
一、安装gitlab服务器
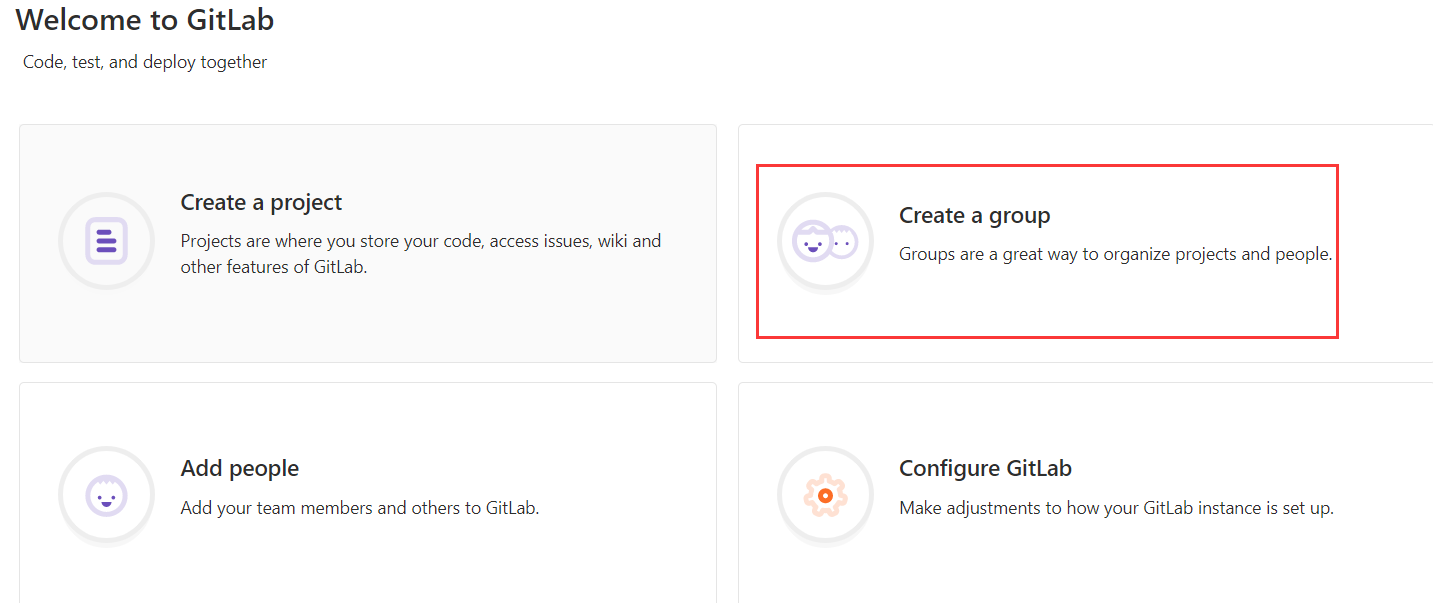
1)创建测试组
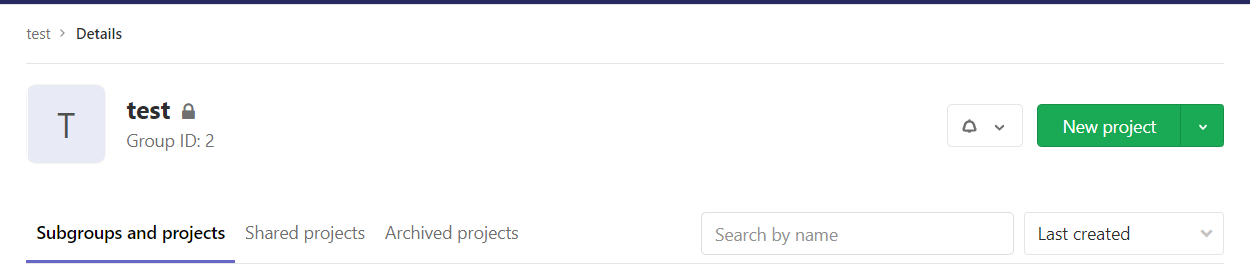
2)基于组创建项目
3)用git 工具测试拉取代码
二、搭建gitlab-ci服务器
1)安装docker
curl -sSL https://get.docker.com/ | sh
2)安装gitlab ci runner
curl -L https://packages.gitlab.com/install/repositories/runner/gitlab-ci-multi-runner/script.rpm.sh | sudo bash
yum install gitlab-ci-multi-runner -y
查看是否正常运行
[root@node01 ~]# gitlab-ci-multi-runner status
gitlab-runner: Service is running!
3)为了让gitlab-runner能运行docker命令,需要把gitlab-runner用户添加到docker group里,然后重启docker和gitlab runner
usermod -aG docker gitlab-runner
service docker restart
gitlab-ci-multi-runner restart
4)查看gitlab-ci-multi-runner 相关命令
gitlab-ci-multi-runner -h
其中关键的命令为 gitlab-ci-multi-runner register 注册
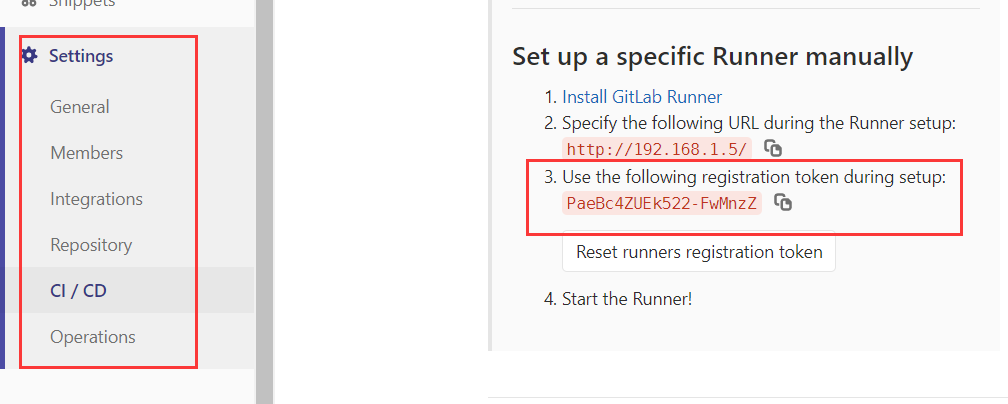
5)将gitlab服务器注册到gitlab-ci-multi-runner 中
root@node01 ~]# gitlab-ci-multi-runner register
Running in system-mode.

Please enter the gitlab-ci coordinator URL (e.g. https://gitlab.com/):
http://192.168.1.5/                        # gitlab服务器地址
Please enter the gitlab-ci token for this runner:
PaeBc4ZUEk522-FwMnzZ                    # 相关项目下的token
Please enter the gitlab-ci description for this runner:
[node01]:
Please enter the gitlab-ci tags for this runner (comma separated):
test,demo                                # 做个tag
Whether to run untagged builds [true/false]:
[false]:
Whether to lock Runner to current project [true/false]:
[false]:
Registering runner... succeeded                     runner=PaeBc4ZU
Please enter the executor: docker-ssh, ssh, virtualbox, docker+machine, docker, parallels, shell, docker-ssh+machine, kubernetes:
shell                                    # 用shell
Runner registered successfully. Feel free to start it, but if it's running already the config should be automatically reloaded!
[root@node01 ~]# gitlab-ci-multi-runner list    # 查看注册地址
Listing configured runners                          ConfigFile=/etc/gitlab-runner/config.toml
node01                                              Executor=shell Token=-zjEKdpLKy9L3aiFFDCF URL=http://192.168.1.5/
5.1)获取gitlab的token
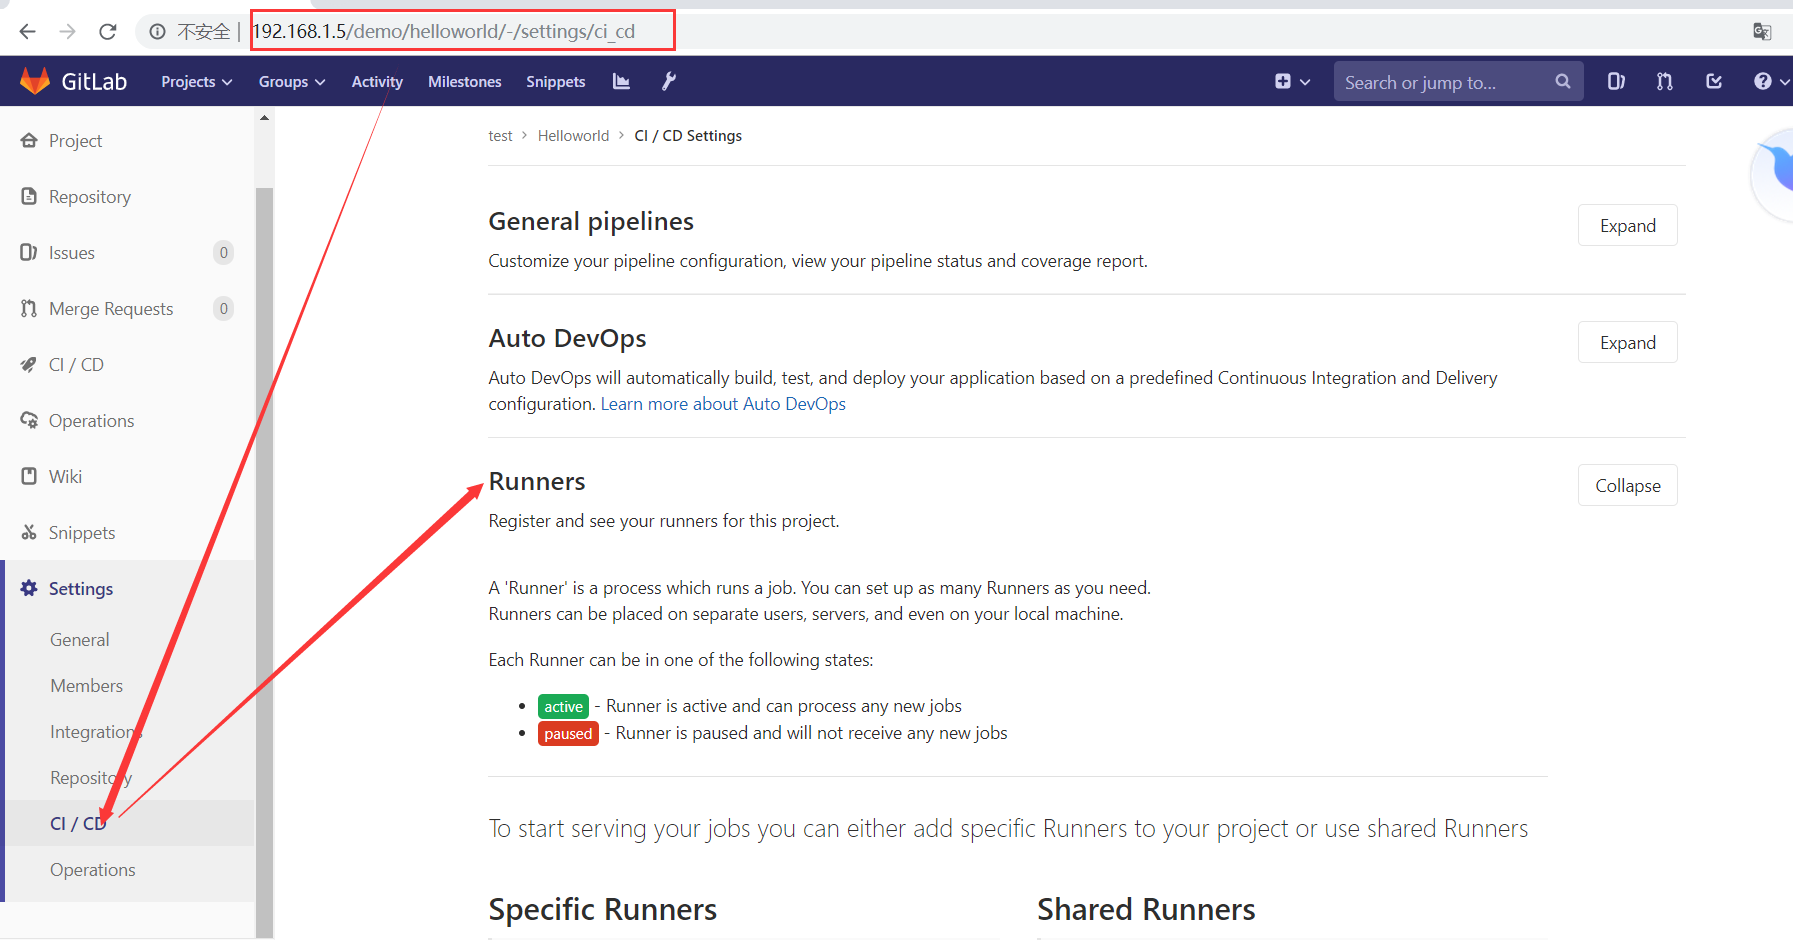
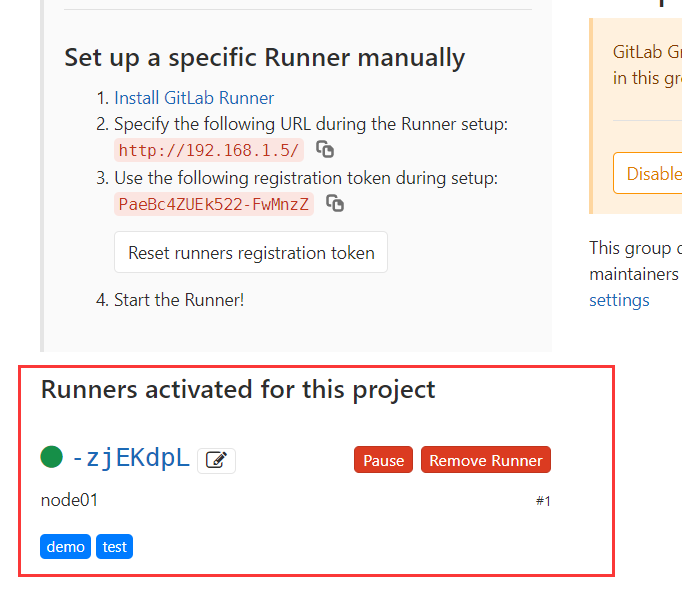
5.2)注册成功后,在gitlab服务器上刷新一下。可看见注册过来的服务器
三、测试流水线
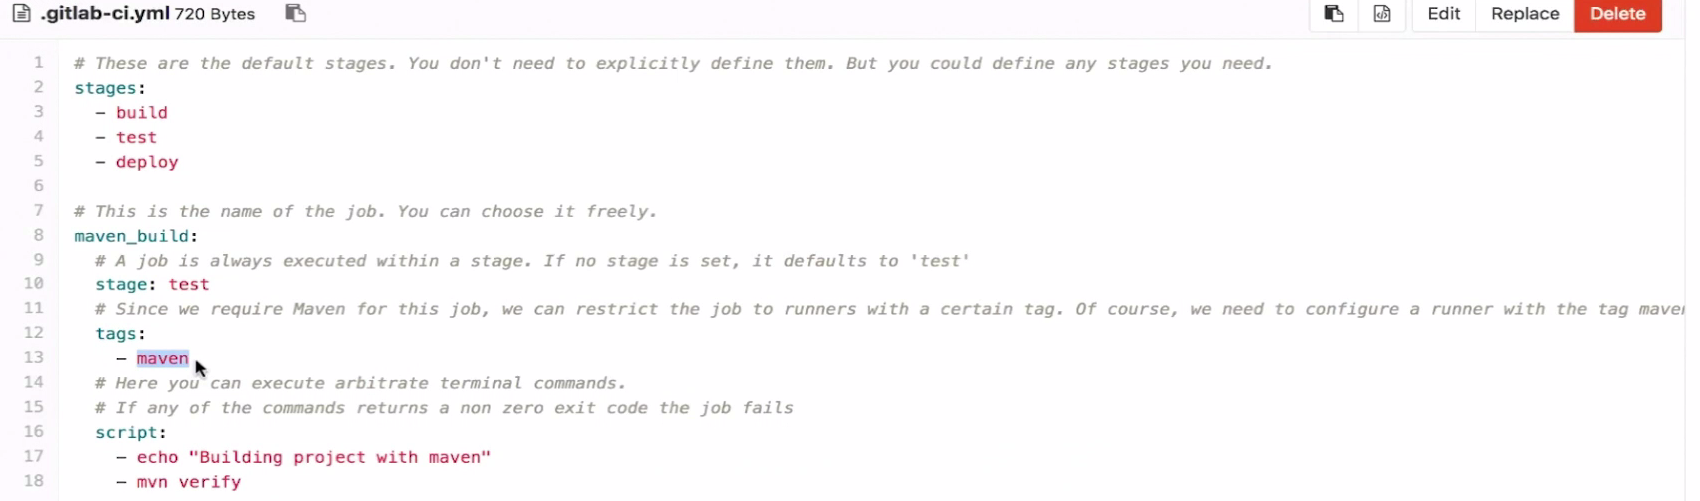
1.1)在代码项目中的跟目录一定要有一个文件.gitlab-ci.yml。此文件定义了流水线的任务
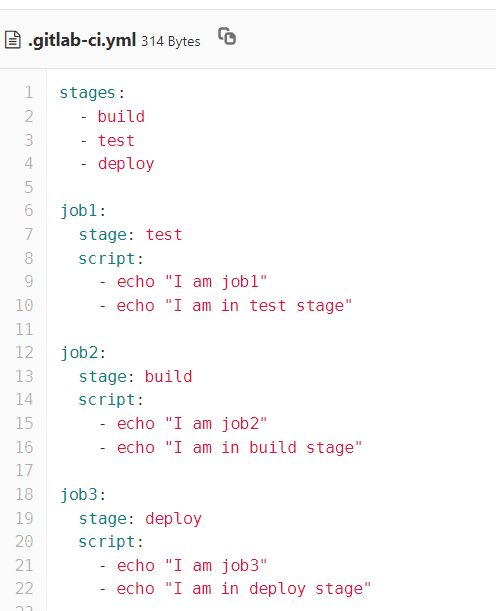


stages:
  - build
  - test
  - deploy

job1:
  stage: test
  script:
    - echo "I am job1"
    - echo "I am in test stage"

job2:
  stage: build
  script:
    - echo "I am job2"
    - echo "I am in build stage"

job3:
  stage: deploy
  script:
    - echo "I am job3"
    - echo "I am in deploy stage"
注意,不能使用tab键,必须按控股
1.2)提交该 gitlab-ci.yaml文件,点击ci -cd

自动执行了流水线任务。点击pending。可查看问题
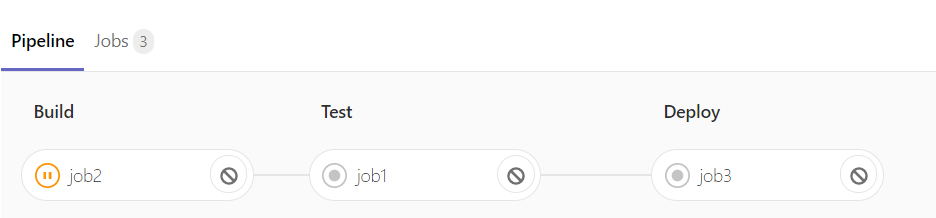
点击问题是因为发现没有runner可以使用
2)选择可用runner执行流水线任务
添加 tags
stages:
  - build
  - test
  - deploy

job1:
  stage: test
  tags:
    - demo
  script:
    - echo "I am job1"
    - echo "I am in test stage"

job2:
  stage: build
  tags:
    - demo
  script:
    - echo "I am job2"
    - echo "I am in build stage"

job3:
  stage: deploy
  tags:
    - demo
  script:
    - echo "I am job3"
    - echo "I am in deploy stage"
四、测试python流水线
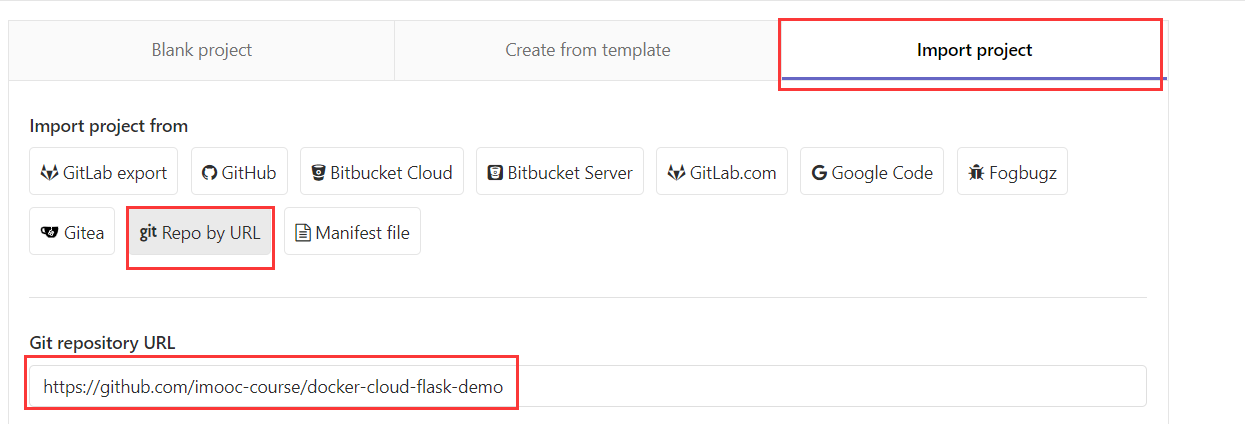
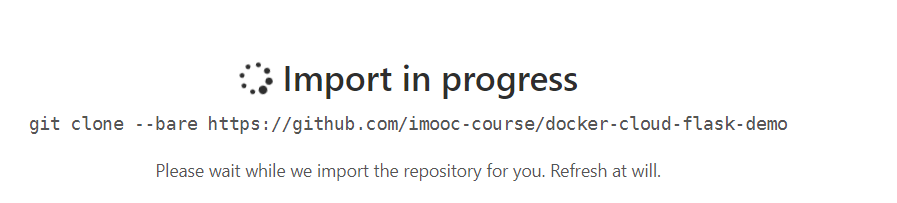
1)新建项目,使用import导入,相当于从github中克隆代码到本地的gitlab中

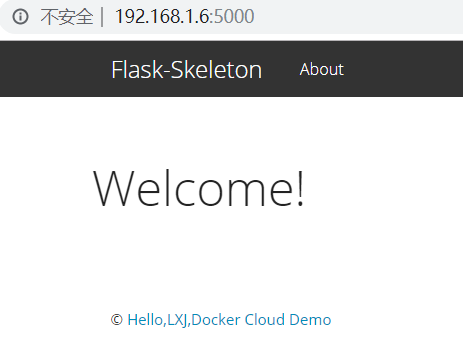
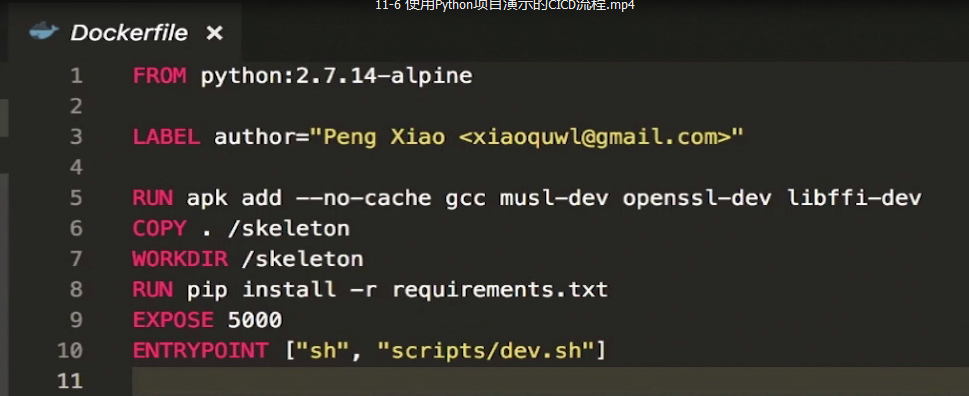
2)将代码克隆到本地,构键容器
[root@node01 wwwroot]# git clone git@gitlab.example.com:root/flask-demo.git
[root@node01 wwwroot]# cd flask-demo/
[root@node01 flask-demo]# docker build -t flask-demo .
[root@node01 ~]# docker run -d -p 5000:5000 flask-demo
反应较慢
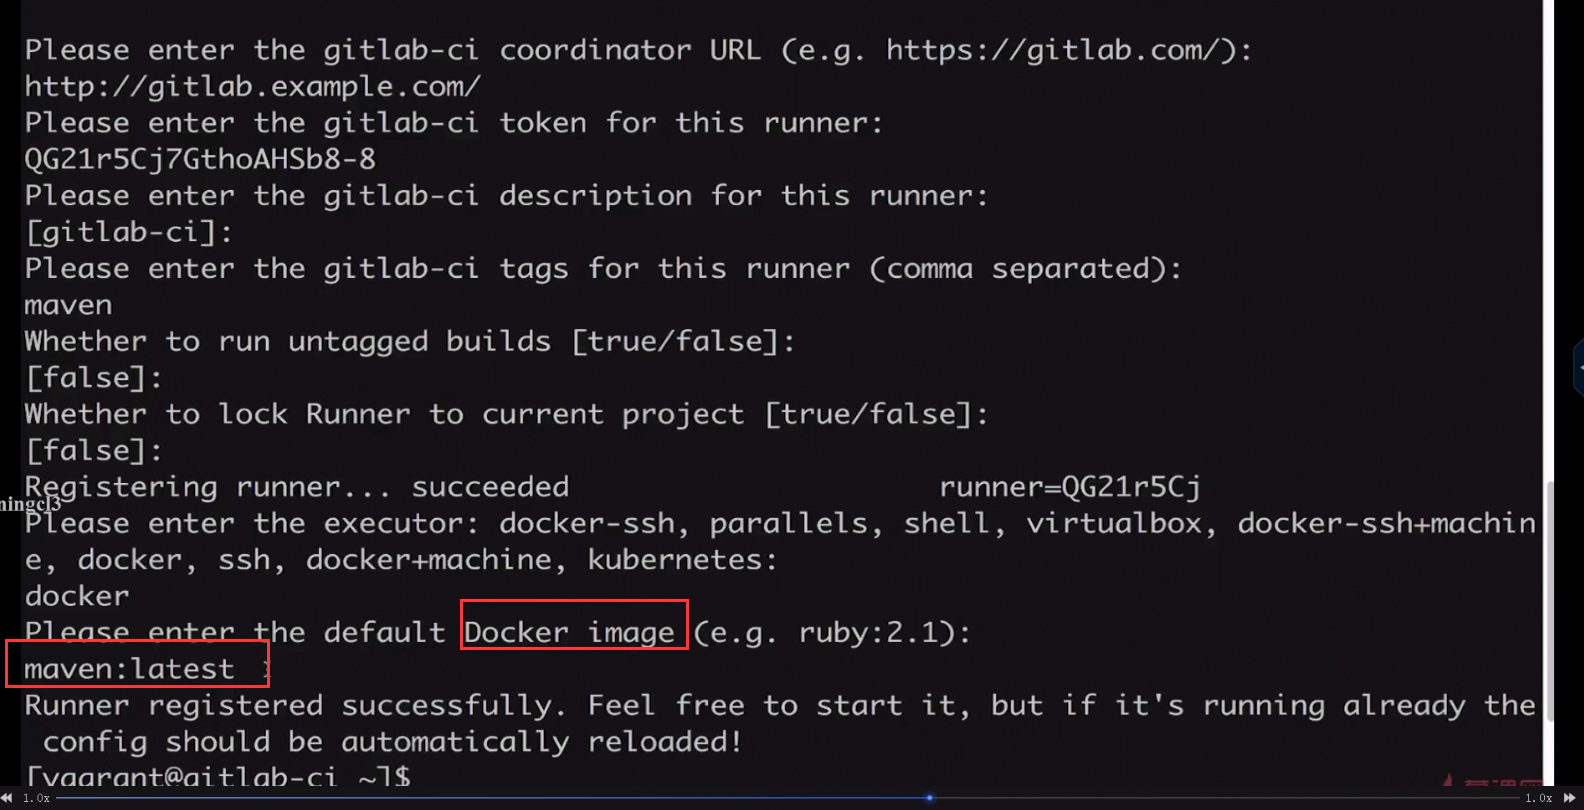
3)再注册2个流水线
===========
[root@node01 ~]# gitlab-ci-multi-runner register
Running in system-mode.

Please enter the gitlab-ci coordinator URL (e.g. https://gitlab.com/):
http://192.168.1.5/
Please enter the gitlab-ci token for this runner:
5X5THtmbd17mQNS_BAAA
Please enter the gitlab-ci description for this runner:
[node01]:
Please enter the gitlab-ci tags for this runner (comma separated):
python2.7
Whether to run untagged builds [true/false]:
[false]:
Whether to lock Runner to current project [true/false]:
[false]:
Registering runner... succeeded                     runner=5X5THtmb
Please enter the executor: docker-ssh, ssh, virtualbox, docker+machine, kubernetes, docker, parallels, shell, docker-ssh+machine:
docker
Please enter the default Docker image (e.g. ruby:2.1):
 ^Hpython2.7
Runner registered successfully. Feel free to start it, but if it's running already the config should be automatically reloaded!
=========
[root@node01 ~]# gitlab-ci-multi-runner register
Running in system-mode.

Please enter the gitlab-ci coordinator URL (e.g. https://gitlab.com/):
http://192.168.1.5/
Please enter the gitlab-ci token for this runner:
5X5THtmbd17mQNS_BAAA
Please enter the gitlab-ci description for this runner:
[node01]:
Please enter the gitlab-ci tags for this runner (comma separated):
python3.4
Whether to run untagged builds [true/false]:
[false]:
Whether to lock Runner to current project [true/false]:
[false]:
Registering runner... succeeded                     runner=5X5THtmb
Please enter the executor: docker, shell, virtualbox, docker+machine, docker-ssh, parallels, ssh, docker-ssh+machine, kubernetes:
docker
Please enter the default Docker image (e.g. ruby:2.1):
python3.4
Runner registered successfully. Feel free to start it, but if it's running already the config should be automatically reloaded!
3.1)查看可用的流水线
[root@node01 ~]# gitlab-ci-multi-runner verify
Running in system-mode.

Verifying runner... is alive                        runner=-zjEKdpL
Verifying runner... is alive                        runner=FzxPyysh
Verifying runner... is alive                        runner=D7RHQWxH
同时也要在gitlab中查看可用的runner
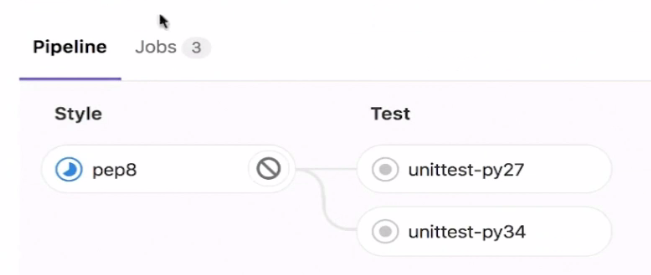
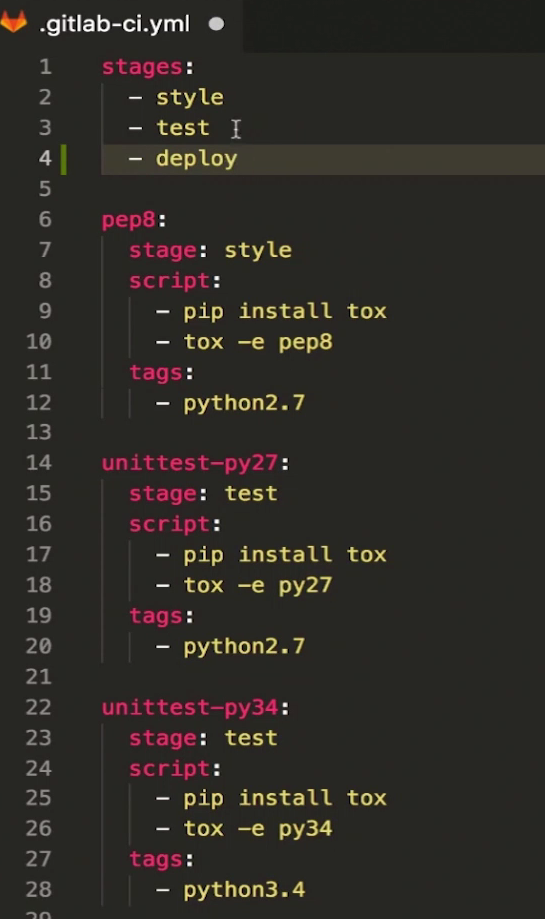
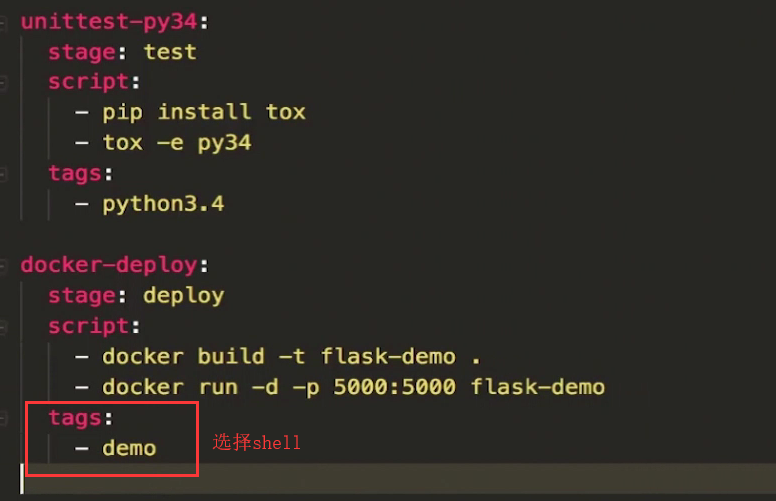
4)在flask-demo项目中
stages:
  - style
  - test

pep8:
  stage: style
  script:
    - pip install tox
    - tox -e pep8
  tags:
    - python2.7

unittest-py2.7:
  stage: test
  script:
   - pip install tox
   - toe -e py27
  tags:
    - python2.7

unittest-py34:
  stage: test
  script:
    - pip install tox
    - tox -e py34
  tags:
    - python3.4
5)扩展
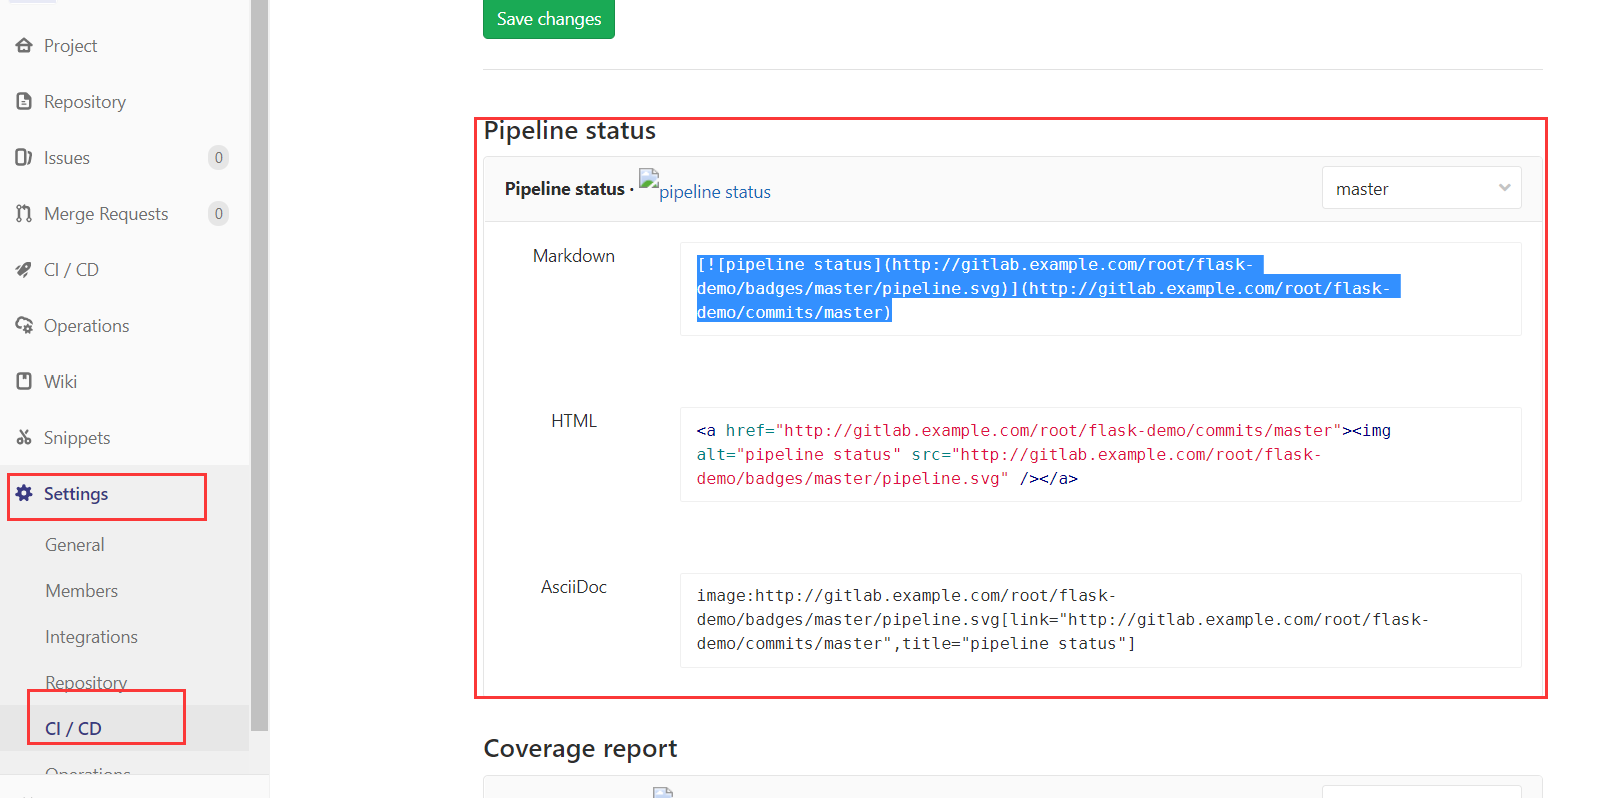
将内容拷贝到这里
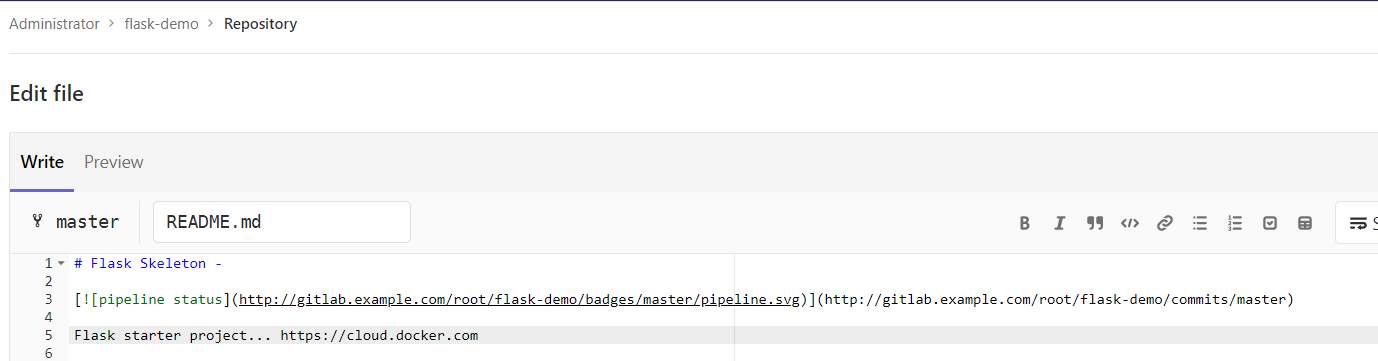
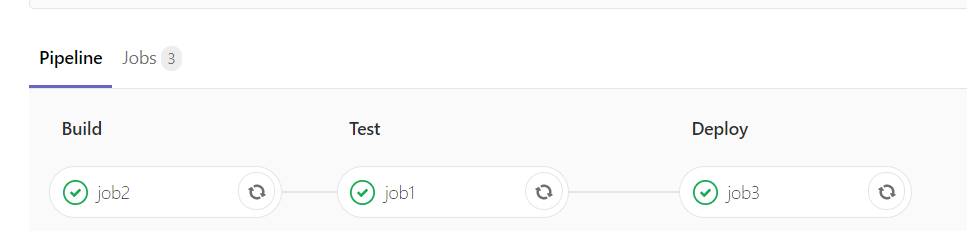
然后点击Preview可看到效果
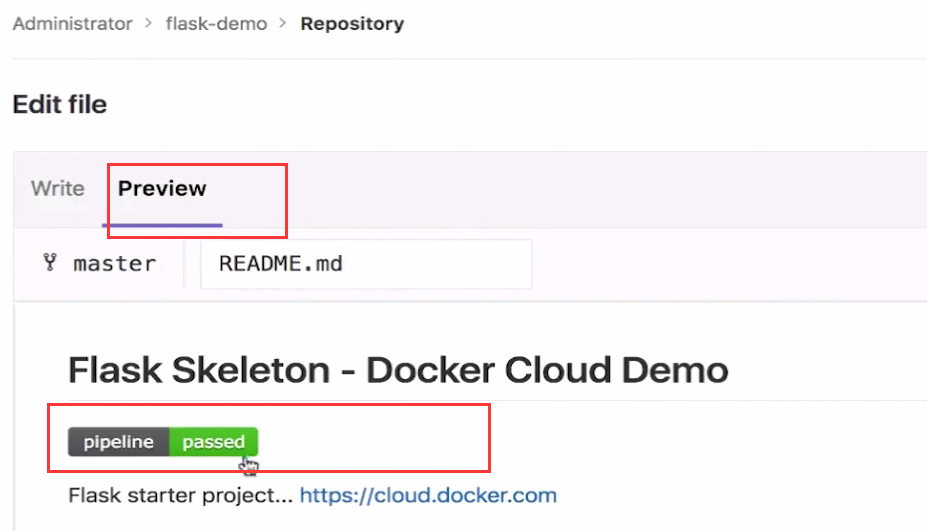
再保存一下,后面每一次提交。都可看到 pipeline的状态
五、基于java演示
六、python演示CI CD
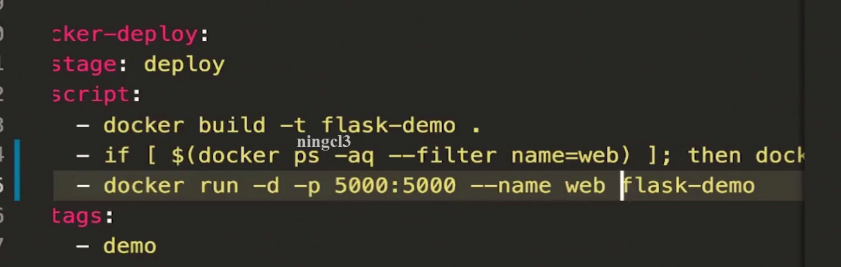
1) 简单的演示
对部署的优化。如果已经有容器了。需要先删除,再run

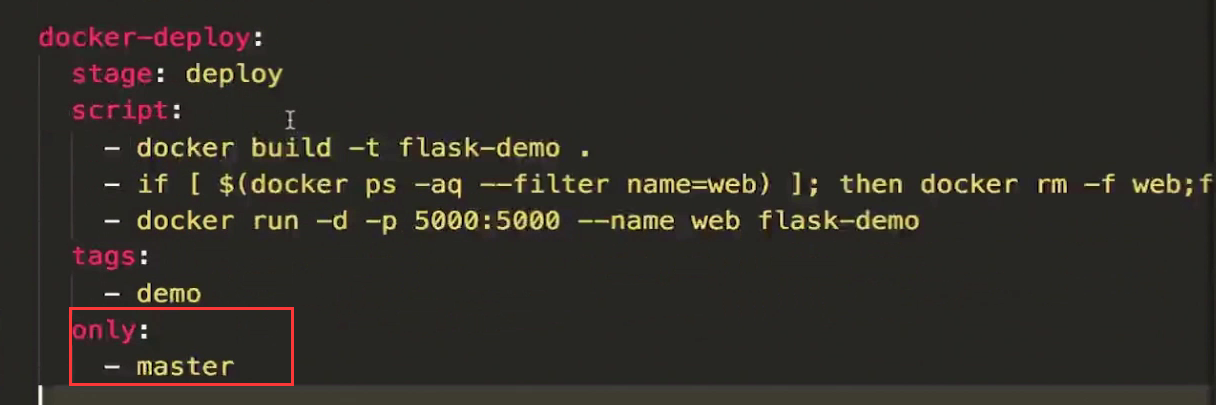
针对只有master分支发生了变化才deploy
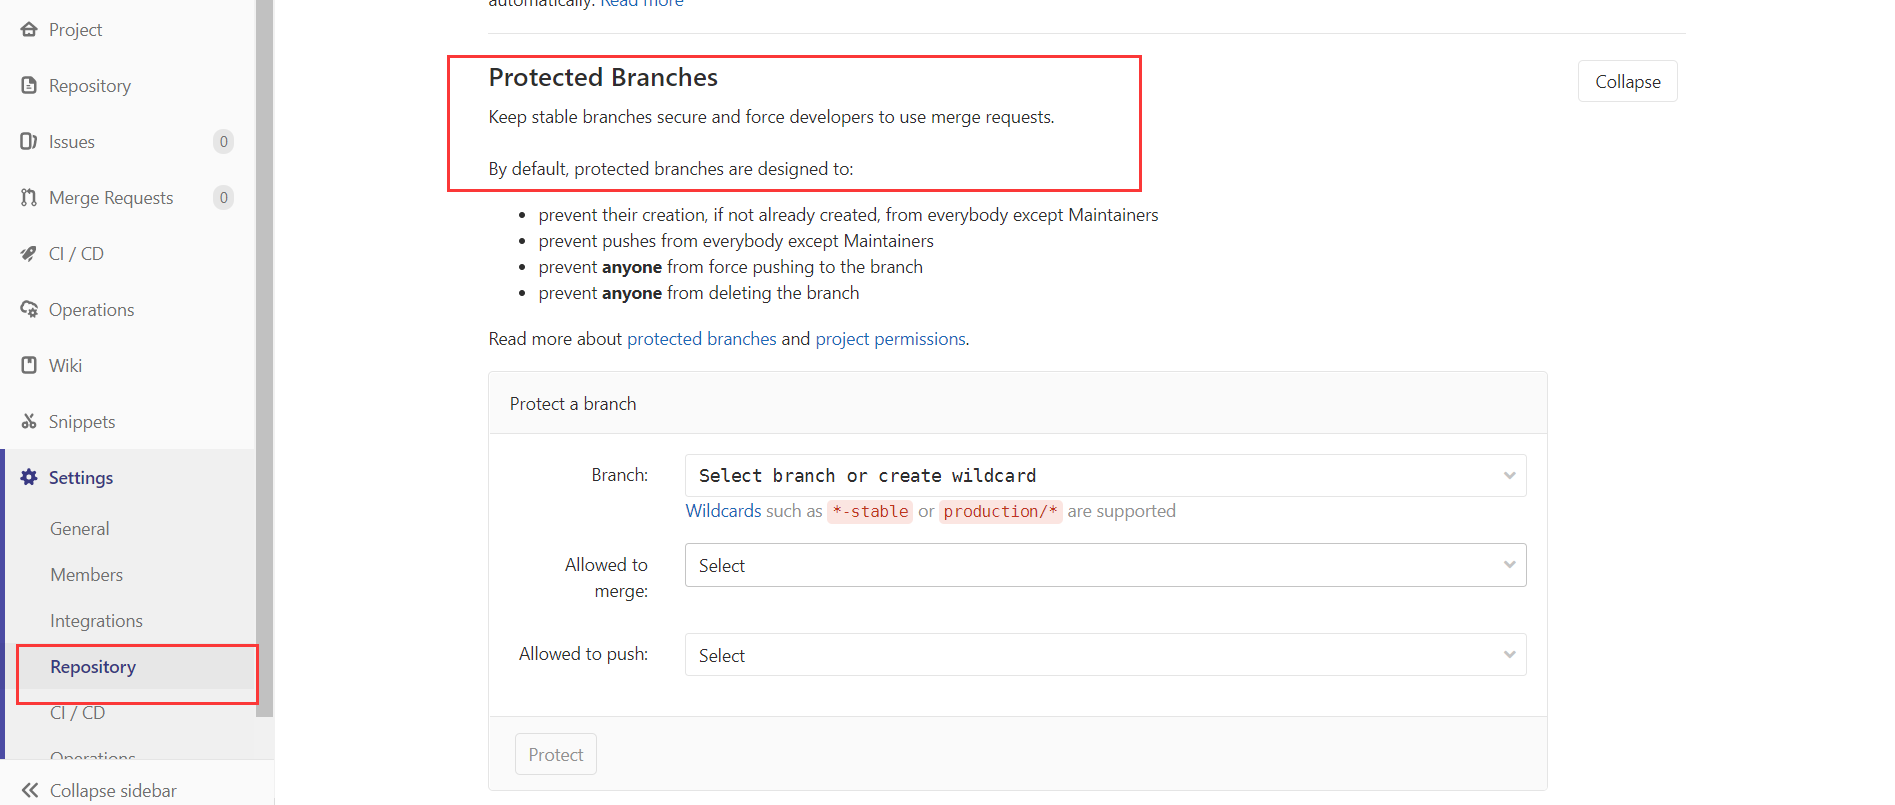
2)保护master分支不会被任何人改动
2.1) 改动1.限制master改动
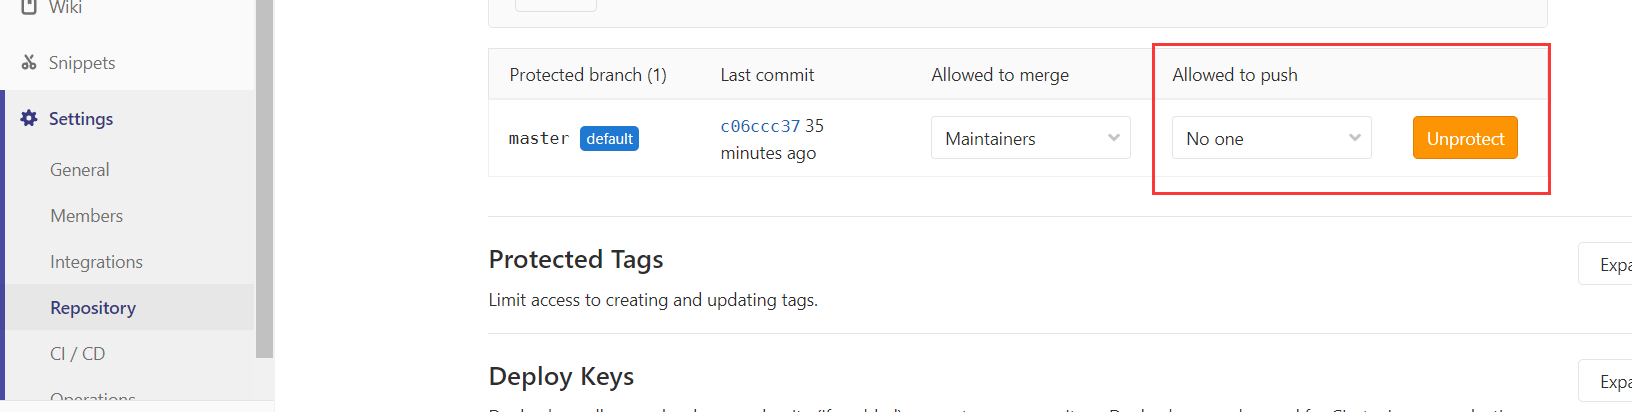
2.2)对master合并代码(权限)

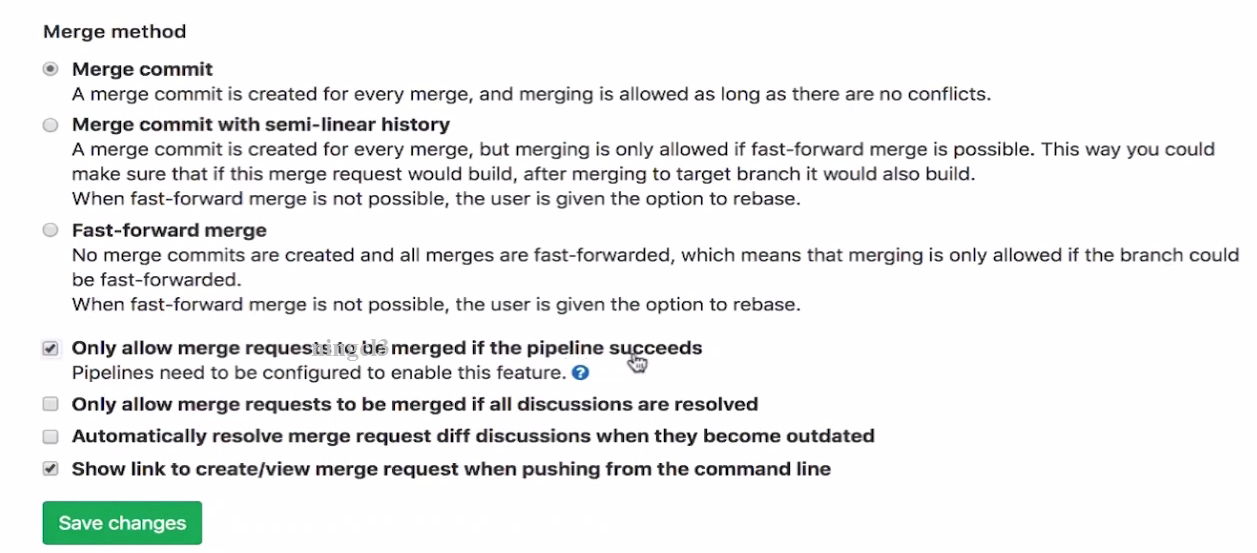
要让分支通过pipline
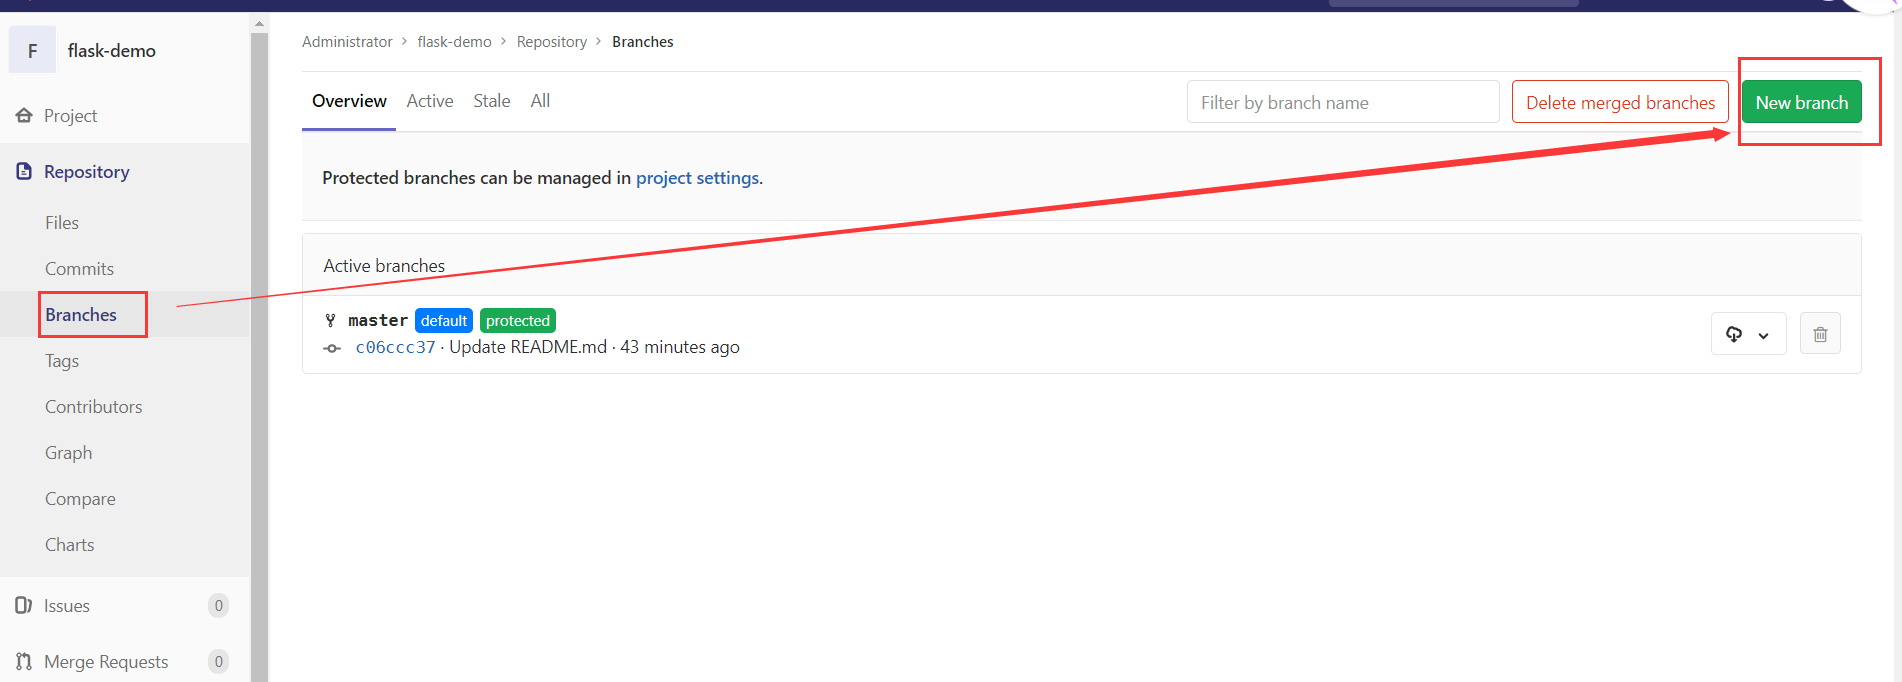
3)创建新的分支


七、在生产环境下的流水线
需要添加docker仓库

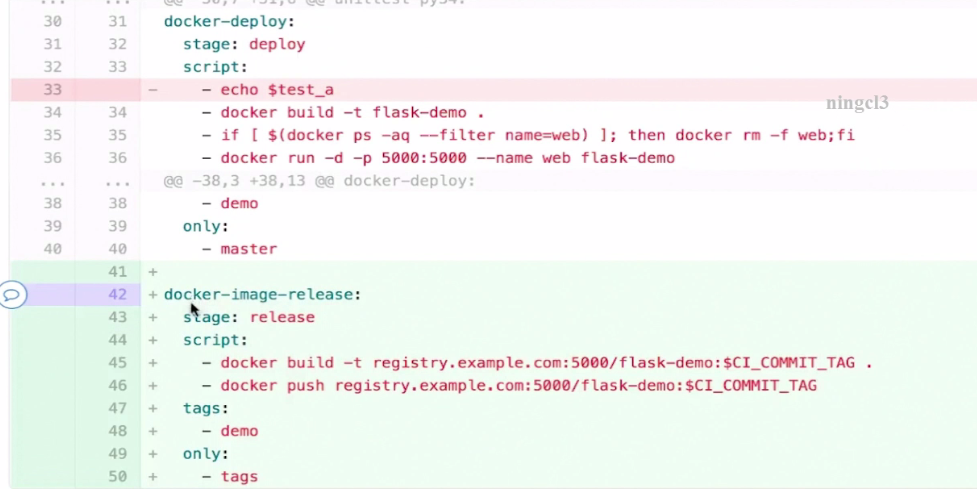
八、流水线测试
1)构建 镜像
import os,time

app = "myapp"
date = str(time.strftime('%Y%m%d_%H%M'))
tag = "tag_" + app + "_" +date + "_" + str(time.time()).split('.')[0][-3:]

class MyError(BaseException):
    def __init__(self,msg):
        super().__init__()
        self.msg=msg
    def __str__(self):
        return '<%s>' %self.msg


def shell(comand):
    a = os.system(comand)
    if a != 0:
        raise MyError('Command execution failed')

comand = "cd /opt/mydockerfile-master/nginxfile && docker build -t %s ./" %(tag)

shell(comand)
2)待完善
import os,time

app = "myapp"
date = str(time.strftime('%Y%m%d_%H%M'))
tag = "tag_" + app + "_" +date + "_" + str(time.time()).split('.')[0][-3:]

class MyError(BaseException):
    def __init__(self,msg):
        super().__init__()
        self.msg=msg
    def __str__(self):
        return '<%s>' %self.msg

class devops:
    def shell(self,comands):
        msg = os.system(comands)
        if msg != 0:
            raise MyError('Command execution failed')

    def build(self):
        comand = "cd /opt/mydockerfile-master/nginxfile && docker build -t %s ./" % (tag)
        self.shell(comand)

    def pull(self):
        pass

    def update(self):
        # push
        pass

    def test(self):
        pass

    def roll_back(self):
        pass
3)传统方式部署,类似于 php
import os,time

app = "myapp"
date = str(time.strftime('%Y%m%d_%H%M'))
getapp = "/opt/gitlab/"
webapp = "/var/www/"
gitlabaddress = "https://192.168.1.11"


class MyError(BaseException):
    def __init__(self,msg):
        super().__init__()
        self.msg=msg
    def __str__(self):
        return '<%s>' %self.msg

class Devops:
    def shell(self,comands):
        msg = os.system(comands)
        if msg != 0:
            raise MyError('Command execution failed')

    def git(self):
        comand = "cd %s && git clone %s/%s" % (getapp,gitlabaddress,app)
        print(comand)
        #self.shell(comand)

    def tag(self):
        tag_gz = "%s.%s.tar.gz" %(app,date)
        comand = "cd %s && tar -czvf %s %s/" %(getapp,tag_gz,app)
        print(comand)
        #self.shell(comand)
        return tag_gz

    def scp_host(self,tar_gz):
        comand1 = "ansible app -m copy -a 'src=%s%s dest=%s'"%(getapp,tar_gz,getapp)
        print(comand1)
        comand2 = "ansible app -m shell -a 'cd %s && tar xf %s'" %(getapp,tar_gz)
        print(comand2)
        filesapp = tar_gz.split('.tar')[0]
        comand3 = "ansible app -m shell -a 'cd %s && mv %s %s'" %(getapp,app,filesapp)
        print(comand3)
        comand4 = "ansible app -m shell -a 'cd %s && ln -s %s %s%s'" %(getapp,filesapp,webapp,app)
        print(comand4)


    def test(self):
        pass

    def roll_back(self):
        pass

    def main(self):
        self.git()
        tag = self.tag()
        self.scp_host(tag)

if __name__ == '__main__':
    devops = Devops()
    devops.main()

 浙公网安备 33010602011771号