一、MyCat中使用分布式事务
1、数据准备
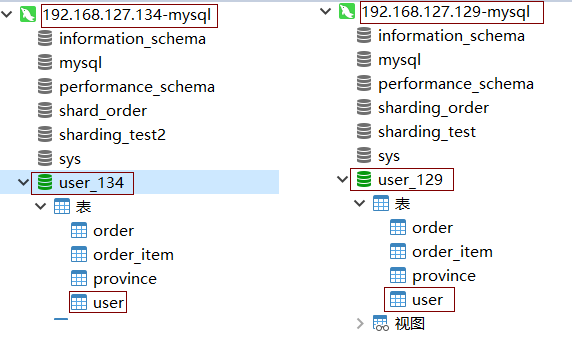
以前面介绍的用户表数据为例 两台Mysql 192.168.127.134 (dn0) ,192.168.127.129 (dn1) , Mycat 安装在192.168.127.129
如下图所示

Mycat的配置,
1)、schema.xml配置
分片规则为sharding-by-intfile
cd /usr/local/mycat/conf/
cat schema.xml

2)、 cat rule.xml

使用的是provice_id 作为分片的字段
hash-int使用的是partition-hash-int.txt文件
        <function name="hash-int"
                class="io.mycat.route.function.PartitionByFileMap">
                <property name="mapFile">partition-hash-int.txt</property>
                <property name="defaultNode">0</property>
        </function>
3)、cat partition-hash-int.txt

10000 落在dn0, 10010落在dn1, 默认是dn0
2、Mycat分布式事务配置
cat server.xml
<!--分布式事务开关,0为不过滤分布式事务,1为过滤分布式事务(如果分布式事务内只涉及全局表,则不过滤),2为不过滤分布式事务,但是记录分布式事务日志-->
                <property name="handleDistributedTransactions">0</property>
0: 支持分布式事务, 1: 不支持分布式事务
默认是支持分布式事务。
3、插入数据
先清空134和129中user表的数据
然后在MyCat中插入数据
INSERT into `user`(`id`,`username`,`province_id`) VALUES (1,"Larry1",10000),(2,"Larry2",10010);
可以看到134和129各插入1条数据

4、模拟异常情况
先清空134和129中user表的数据,然后将129的username长度改为1

可以发现报如下错误

查看134和129中user表的数据,都没有插入成。
set autocommit=0
set xa=on
INSERT into `user`(`id`,`username`,`province_id`) VALUES (1,"Larry1",10000),(2,"Larry2",10010);
commit
二、项目中连接MyCat,并使用分布式事务
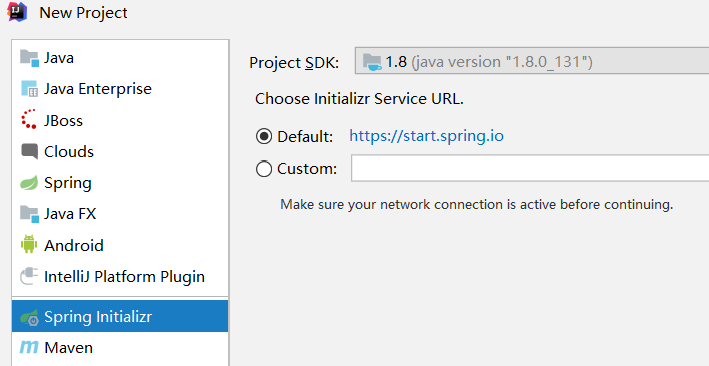
1、新建SpringBoot工程

命名为mycat-demo

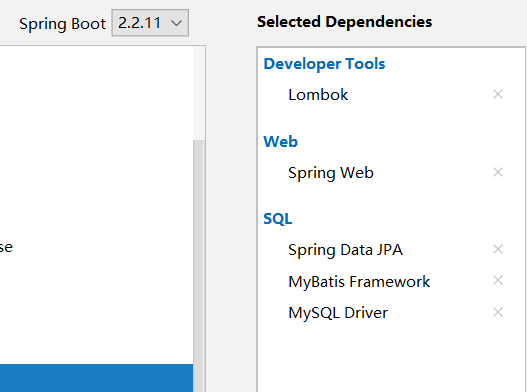
选择需要的依赖

因为MySQL数据库的版本 是5.7。所有这里使用的mysql-connector-java版本为5.1.48
<dependency>
            <groupId>mysql</groupId>
            <artifactId>mysql-connector-java</artifactId>
            <version>5.1.48</version>
        </dependency>
2、使用mybatis-generator插件
pom.xml中增加插件
            <plugin>
                <groupId>org.mybatis.generator</groupId>
                <artifactId>mybatis-generator-maven-plugin</artifactId>
                <version>1.3.2</version>
                <configuration>
                    <verbose>true</verbose>
                    <overwrite>true</overwrite>
                </configuration>
            </plugin>
generatorConfig.xml,连接mycat
<?xml version="1.0" encoding="UTF-8"?>
<!DOCTYPE generatorConfiguration
        PUBLIC "-//mybatis.org//DTD MyBatis Generator Configuration 1.0//EN"
        "http://mybatis.org/dtd/mybatis-generator-config_1_0.dtd">

<generatorConfiguration>

    <!--指定特定数据库的jdbc驱动jar包的位置-->
    <classPathEntry location="C:\Users\Think\Desktop\MyBatis\mybatis-generator-core-1.3.2\mybatis-generator-core-1.3.2\lib\mysql-connector-java-5.1.29.jar"/>

    <context id="default" targetRuntime="MyBatis3">

        <!-- optional,旨在创建class时,对注释进行控制 -->
        <commentGenerator>
            <property name="suppressDate" value="true"/>
            <property name="suppressAllComments" value="true"/>
        </commentGenerator>

        <!--jdbc的数据库连接 -->
        <jdbcConnection driverClass="com.mysql.jdbc.Driver"
                        connectionURL="jdbc:mysql://192.168.127.129:8066/user?characterEncoding=utf8" userId="root"
                        password="123456" />


        <!-- 非必需,类型处理器,在数据库类型和java类型之间的转换控制-->
        <javaTypeResolver>
            <property name="forceBigDecimals" value="false"/>
        </javaTypeResolver>


        <!-- Model模型生成器,用来生成含有主键key的类,记录类 以及查询Example类
            targetPackage     指定生成的model生成所在的包名
            targetProject     指定在该项目下所在的路径
        -->
        <javaModelGenerator targetPackage="com.example.mycatdemo.model" targetProject="./src/main/java">
            <!-- 是否允许子包,即targetPackage.schemaName.tableName -->
            <property name="enableSubPackages" value="false"/>
            <!-- 是否对model添加 构造函数 -->
            <property name="constructorBased" value="true"/>
            <!-- 是否对类CHAR类型的列的数据进行trim操作 -->
            <property name="trimStrings" value="true"/>
            <!-- 建立的Model对象是否 不可改变  即生成的Model对象不会有 setter方法,只有构造方法 -->
            <property name="immutable" value="false"/>
        </javaModelGenerator>

        <!--mapper映射文件生成所在的目录 为每一个数据库的表生成对应的SqlMap文件 -->
        <sqlMapGenerator targetPackage="mappers" targetProject="./src/main/resources">
            <property name="enableSubPackages" value="false"/>
        </sqlMapGenerator>

        <javaClientGenerator type="XMLMAPPER" targetPackage="com.example.mycatdemo.dao" targetProject="./src/main/java">
            <!-- enableSubPackages:是否让schema作为包的后缀 -->
            <property name="enableSubPackages" value="false" />
        </javaClientGenerator>

        <table schema="user" tableName="user" domainObjectName="User" enableCountByExample="false" enableUpdateByExample="false" enableDeleteByExample="false" enableSelectByExample="false" selectByExampleQueryId="false"></table>

    </context>
</generatorConfiguration>
生成后的工程结构如下图所示

3、增加数据库配置 application.prooperties
spring.datasource.driver-class-name=com.mysql.jdbc.Driver
spring.datasource.username=root
spring.datasource.password=123456
spring.datasource.url=jdbc:mysql://192.168.127.129:8066/user?characterEncoding=utf8&useSSL=false

mybatis.mapper-locations=mappers/*.xml
4、增加服务层代码
@Service
public class UserService {

    @Resource
    private UserMapper userMapper;

    @Transactional(rollbackFor = Exception.class)
    public void testUser(){
        User user1 = new User();
        user1.setId(1);
        user1.setUsername("Nick1");
        user1.setProvinceId(10000);
        userMapper.insert(user1);


        User user2 = new User();
        user2.setId(2);
        user2.setUsername("Nick2");
        user2.setProvinceId(10010);
        userMapper.insert(user2);

    }
}
5、测试
@SpringBootTest
class MycatDemoApplicationTests {

    @Autowired
    UserService userService;


    @Test
    public void testUser(){
        userService.testUser();
    }

}
运行testUser方法,出现如下错误: username太长了

注:Sharding-JDBC默认也是开启了分布式事务
作者:Work Hard Work Smart
出处:http://www.cnblogs.com/linlf03/
欢迎任何形式的转载,未经作者同意,请保留此段声明!


