
1、接口规范
@FunctionalInterface
public interface SpringBootExceptionReporter {

	/**
	 * Report a startup failure to the user.
	 * @param failure the source failure
	 * @return {@code true} if the failure was reported or {@code false} if default
	 * reporting should occur.
	 */
	boolean reportException(Throwable failure);

}
2、进入run方法
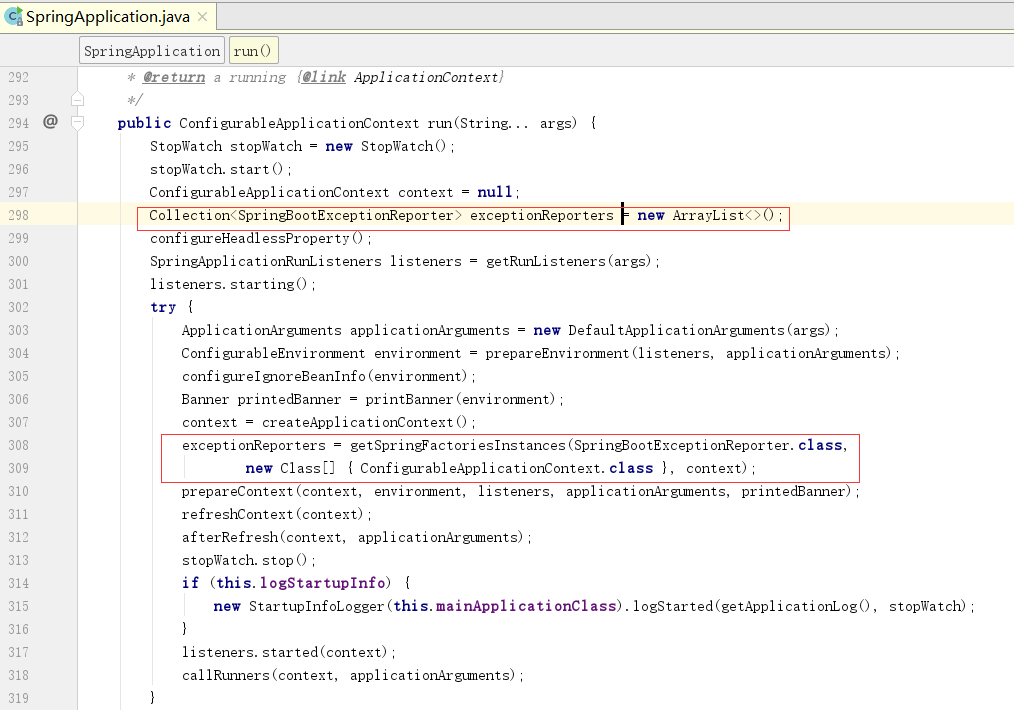
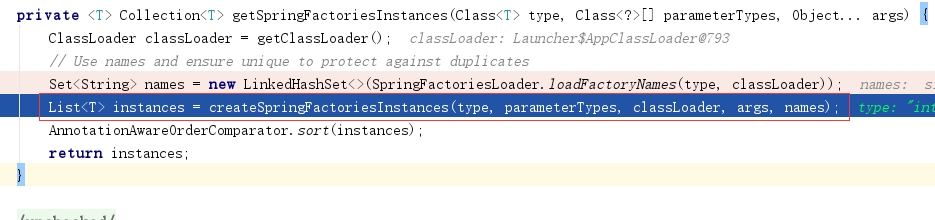
3、进入getSpringFactoriesInstances方法。用来获取spring.factoryies中类型为SpringBootExceptionReporter的配置。

Spring.facories中对SpringBootExceptionReporter的配置如下

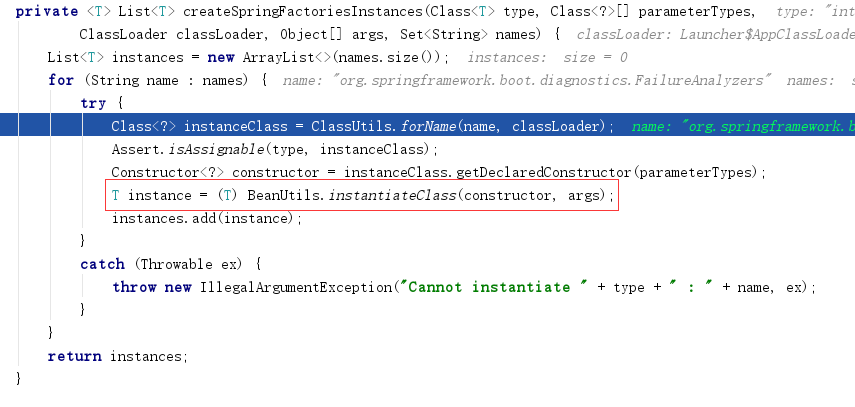
4、然后使用createSpringFactoriesInstances创建实例
创建实例的方法如下BeanUtils.instantiateClass
5、进入FailureAnalyzers类的构造函数
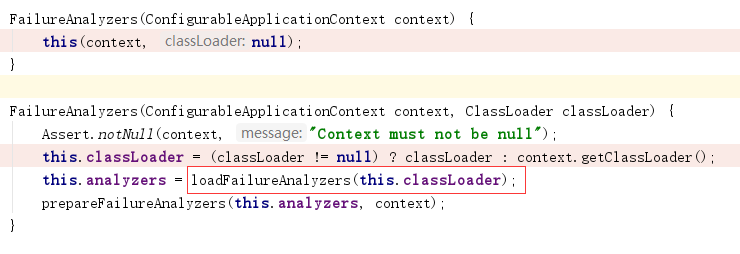
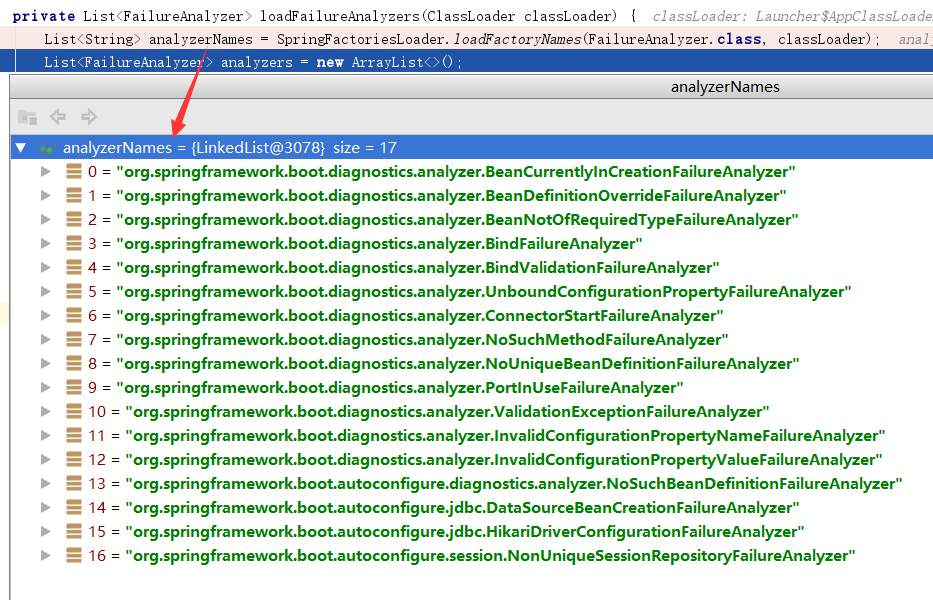
6、然后进入loadFailureAnalyzers方法。获取analyzerName,遍历analyzerNames,增加到analyzers变量中

有以下几个analyzerNames
6、下面模拟异常实战
1) 我们将端口改为808080808,然后启动项目

2) 运行到checkPort抛出异常

3) 抛出异常后,run方法里处理异常
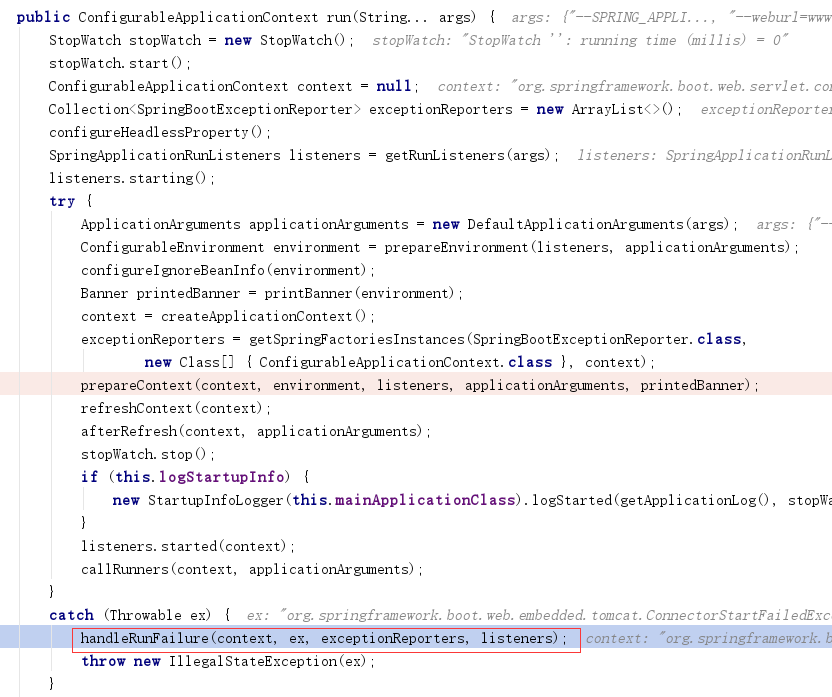
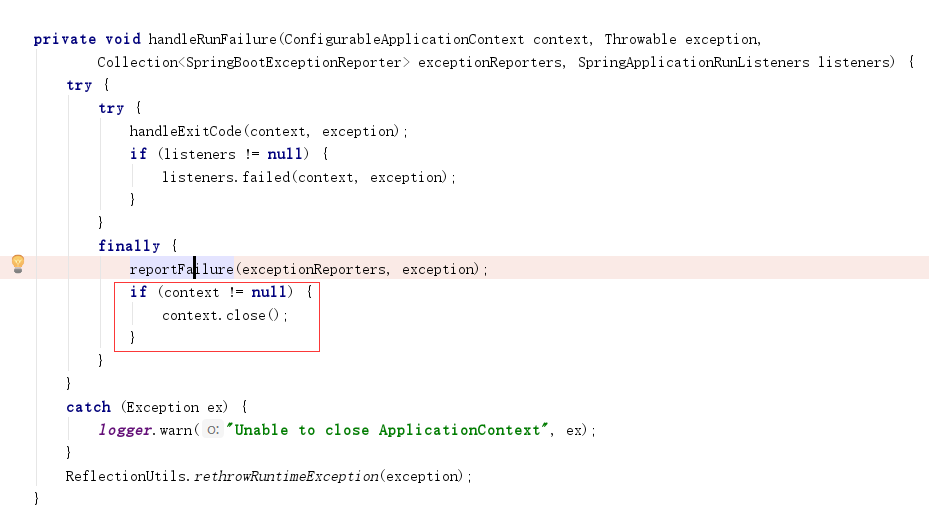
4) 进入handleRunFailure方法

首先进入handleExitCode方法
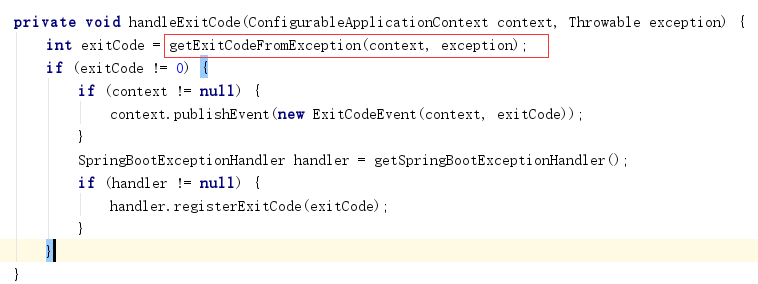
这里exitCode返回0
然后listeners不为空,发送failed广播
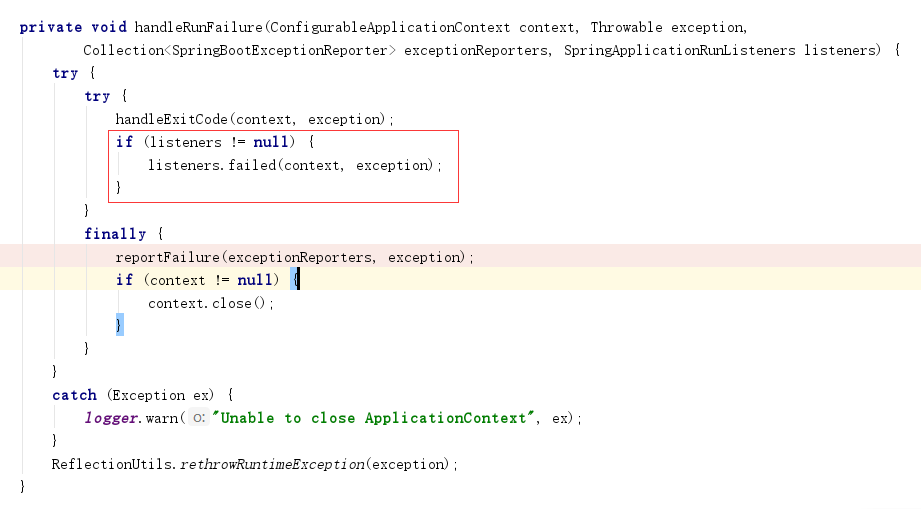
5) 进入reportFailure方法

6)然后调用context.close方法
close方法先调用doClose方法,然后移除钩子方法。

doClose方法。发布shoutdown广播,关闭一些bean和工厂bean,方便垃圾回收。
protected void doClose() {
		// Check whether an actual close attempt is necessary...
		if (this.active.get() && this.closed.compareAndSet(false, true)) {
			if (logger.isDebugEnabled()) {
				logger.debug("Closing " + this);
			}

			LiveBeansView.unregisterApplicationContext(this);

			try {
				// Publish shutdown event.
				publishEvent(new ContextClosedEvent(this));
			}
			catch (Throwable ex) {
				logger.warn("Exception thrown from ApplicationListener handling ContextClosedEvent", ex);
			}

			// Stop all Lifecycle beans, to avoid delays during individual destruction.
			if (this.lifecycleProcessor != null) {
				try {
					this.lifecycleProcessor.onClose();
				}
				catch (Throwable ex) {
					logger.warn("Exception thrown from LifecycleProcessor on context close", ex);
				}
			}

			// Destroy all cached singletons in the context's BeanFactory.
			destroyBeans();

			// Close the state of this context itself.
			closeBeanFactory();

			// Let subclasses do some final clean-up if they wish...
			onClose();

			// Reset local application listeners to pre-refresh state.
			if (this.earlyApplicationListeners != null) {
				this.applicationListeners.clear();
				this.applicationListeners.addAll(this.earlyApplicationListeners);
			}

			// Switch to inactive.
			this.active.set(false);
		}
	}
钩子方法。
在JVM退出时,调用这个方法
 public static void main(String[] args) {
        System.out.println("hello");
        Thread close_jvm = new Thread(()-> System.out.println("close jvm"));
        Runtime.getRuntime().addShutdownHook(close_jvm);
        System.out.println("world");
    }
运行结果如下:
hello
world
close jvm
6) 最终进入FailureAnalyzers类的reportException异常
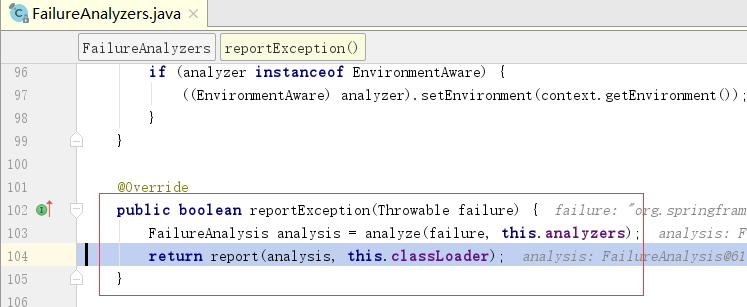
7) 进入report方法

8) 最终进入LoggingFailureAnalysisReporter方法,打印异常

9) 异常信息如下:

7、自定义异常报告
1)、创建自定义报告异常类
public class MyExceptionReporter  implements SpringBootExceptionReporter{


    private ConfigurableApplicationContext context;

    public MyExceptionReporter(ConfigurableApplicationContext context) {
        this.context = context;
    }

    @Override
    public boolean reportException(Throwable failure) {
        if(failure instanceof UnsatisfiedDependencyException){
            UnsatisfiedDependencyException exception = (UnsatisfiedDependencyException)failure;
            System.out.println("no such bean " + exception.getInjectionPoint().getField().getName());
        }
        return false;
    }
}
2) 模拟异常 创建Solid类
public class Solid {
}
然后引入Solid

这样引用肯定会抛出异常
3) 运行程序。错误输出如下

作者:Work Hard Work Smart
出处:http://www.cnblogs.com/linlf03/
欢迎任何形式的转载,未经作者同意,请保留此段声明!

 浙公网安备 33010602011771号