
linux-源码软件管理-yum配置
总结如下:
1.源码配置软件管理
2.配置yum本地源和网络源及yum 工作原理讲解
3.计算机硬盘介绍
1.1 源码管理软件
压缩包管理命令:
# 主流的压缩格式包括tar、rar、zip、war、gzip、bz2、iso等。从性能上比较,TAR、WAR、RAR格式较ZIP格式压缩
率较高,但压缩时间远远高于ZIP
1. tar : 进行tar.gz,tar.bz2 压缩包的解压或者是打压缩。
-c, --create 建立新的存档
-t, --list 列出存档中文件的目录
-x, --extract, --get 解压文件
-j, --bzip2, --bunzip2 有bz2属性的软件包;
-z, --gzip, --ungzip 有gz属性的软件包;
-C, --directory DIR 指定新的目录;
-f, --file [HOSTNAME:]F 指定存档或设备,后接文件名称;
-v, --verbose 详细显示处理的文件;
--exclude FILE不把指定文件包含在内;
# tar [选项] 压缩包名字 需要压缩的目录
# 下载软件包
wget -c nginx.org/download/nginx-1.14.0.tar.gz
# 进行压缩包解压缩。
[root@localhost ~]# tar xzf nginx-1.14.0.tar.gz
[root@localhost ~]# ls
nginx-1.14.0 nginx-1.14.0.tar.gz
# nginx-1.14.0 这个目录就是源码软件包的目录
-------------
# 进行打压缩包测试
[root@localhost ~]# tar cjf nginx.tar.bz2 nginx-1.14.0
[root@localhost ~]# ll
total 1688
drwxr-xr-x 8 1001 1001 158 Apr 17 2018 nginx-1.14.0
-rw-r--r-- 1 root root 1016272 Apr 17 2018 nginx-1.14.0.tar.gz
-rw-r--r-- 1 root root 707953 Aug 16 20:45 nginx.tar.bz2
# 可以不解压缩包查看压缩包的内容
tar tf nginx.tar.bz2
# 常用方法:
tar -xzf
tar -zjf
tar czf
tar cjf
tar tf
tar xzf nginx-1.14.0.tar.gz -C /opt/
2. zip 和 unzip 是对应ZIP软件包的解压和压缩,通常使用后缀名“.zip”。
zip 命令参数如下:
-d 从压缩文件删除文件;
-r 递归到目录;
-1 压缩更快1-9压缩更好;
-v verbose操作/打印版本信
# 压缩命令
zip -r nginx.zip nginx-1.14.0
unzip 命令 参数:
-d 指定解压缩目录
unzip nginx-1.14.0.zip -d /home
1.1.2 源码软件包的优点
1. 默认系统的软件管理不存在的软件,可以通过源码进行安装。
2. 一个软件也会有很多功能,系统的软件默认会安装所有的基本功能,可能会占用更多的资源。可以使用源码
进行自定义功能,减少资源的消耗。
3. 源码安装软件还可以对于特定硬件进行优化,性能更好。
4. 源码软件支持多种跨平台操作,良好平台扩展性。
1.1.3 源码编译的步骤
源码包安装有三个步骤,如下:
./configure 预编译,主要用于检测系统基准环境库是否满足,生成MakeFile文件;比如它会检测你是不
是有CC或GCC,并不是需要CC或GCC,它是个Shell脚本。
# ./configure 参数的查找
[root@localhost nginx-1.14.0]# ./configure --help |grep ssl
--with-http_ssl_module enable ngx_http_ssl_module
--with-mail_ssl_module enable ngx_mail_ssl_module
--with-stream_ssl_module enable ngx_stream_ssl_module
--with-stream_ssl_preread_module enable ngx_stream_ssl_preread_module
--with-openssl=DIR set path to OpenSSL library sources
--with-openssl-opt=OPTIONS set additional build options for OpenSSL
[root@localhost nginx-1.14.0]# ./configure --help |grep prefix
--prefix=PATH set installation prefix
[root@localhost nginx-1.14.0]#
# make 编译,基于第一步生成的makefile文件(其实是对于软件的功能和插件进行记录,还有就是
源代码的位置和编译参数匹配),进行源代码的编译; 当前编译的过程主要就是使用cc 命令对源码进行解析和编译,将
源码编译成可读的文件。使用make编译时,Linux操作系统必须有GCC编译器,用于编译源码。
对应命令:
make
# make install 安装,编译完毕之后,将相关的可运行文件复制系统中;
执行命令:
make install
# 编译好nginx 之后,就可以进行软件的执行和使用。
--------------------------------------
nginx 安装报错提示1 :
[root@localhost nginx-1.14.0]# ./configure --prefix=/opt/nginx --user=www --group=www --
with-http_ssl_module
checking for OS
+ Linux 3.10.0-693.el7.x86_64 x86_64
checking for C compiler ... not found
./configure: error: C compiler cc is not found
# C 编译器cc 命令没有找到, yum install gcc -y
nginx 安装报错提示2 :
./configure: error: the HTTP rewrite module requires the PCRE library.
You can either disable the module by using --without-http_rewrite_module
option, or install the PCRE library into the system, or build the PCRE library
statically from the source with nginx by using --with-pcre=<path> option.
# pcre依赖包没有,yum install pcre-devel -y
nginx 安装报错提示3 :
./configure: error: SSL modules require the OpenSSL library.
You can either do not enable the modules, or install the OpenSSL library
into the system, or build the OpenSSL library statically from the source
with nginx by using --with-openssl=<path> option.
# openssl依赖包没有,yum install openssl-devel -y
# 安装第一步预编译错误原因:对应功能依赖包没有,版本不对,版本依赖不对,依赖包,变量没有,指定基准库没有
1.2 yum 软件包管理工具
YUM主要用于管理RPM包,于RPM工具使用范围类似,YUM工具能够从指定的服务器自动下载RPM包并且安装,
还可以自动处理依赖性关系。
1.2.1 Yum本地源配置
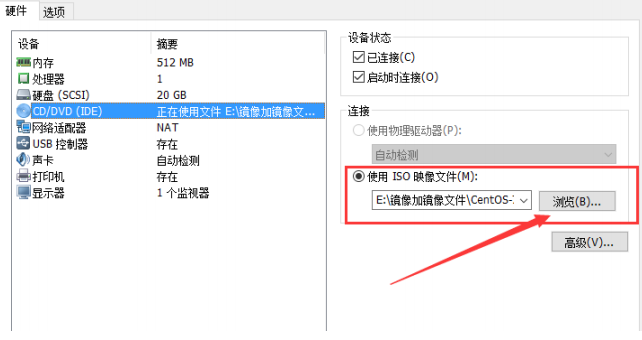
1. 本地挂载镜像
选择光盘按钮,双击打开光盘设置。
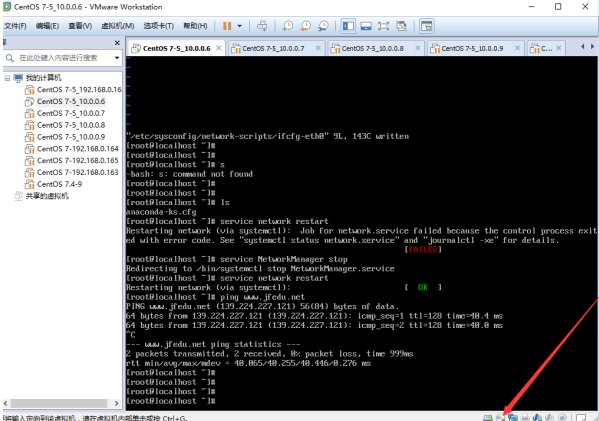
2. Linux服务器上面mount 挂载本地镜像到Linux 系统上。
[root@localhost ~]# mount /dev/cdrom /mnt
mount: /dev/sr0 is write-protected, mounting read-only
# 光盘挂载好之后是只读文件。
[root@localhost mnt]# ls
CentOS_BuildTag GPL LiveOS RPM-GPG-KEY-CentOS-7
EFI images Packages RPM-GPG-KEY-CentOS-Testing-7
EULA isolinux repodata TRANS.TBL
3. 配置yum 的本地服务源端repo文件
[root@localhost yum.repos.d]# pwd
/etc/yum.repos.d
# 本地源文件的配置。
[root@localhost yum.repos.d]# vim centos.repo
[centos] # yum源的标签
name=centos # yum 的 名字
baseurl=file:///mnt # yum源仓库路径(file:// 代表格式 /mnt 代表路径)
gpgcheck=0 # 检测光盘是否有问题,或者是有病毒,0为不检测,1 检测
enabled=1 # 开机是否自动启动yum ,1 开机启动,0 开机不启动。
4. 直接安装软件
yum install httpd -y
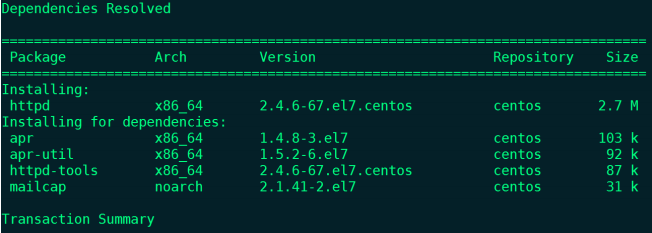
Package : 软件名字
arch : 软件支持的平台
version : 版本
repository : 仓库的标签
size : 软件包的大小。
1.2.2 Yum外网源配置
# 外网源一般国内使用阿里云,腾讯云,163,搜狐都可以。默认安装好Linux操作系统之后,Centos使用的是官方源。
阿里云站点:https://opsx.alibaba.com/mirror
腾讯站点:https://mirrors.cloud.tencent.com/
163 站点:http://mirrors.163.com/
搜狐站点:http://mirrors.sohu.com/
CentOS 外网源的配置过程。
1、备份
mv /etc/yum.repos.d/CentOS-Base.repo /etc/yum.repos.d/CentOS-Base.repo.backup
2、下载新的CentOS-Base.repo 到/etc/yum.repos.d/
CentOS 6
wget -O /etc/yum.repos.d/CentOS-Base.repo http://mirrors.aliyun.com/repo/Centos-6.repo
或者
curl -o /etc/yum.repos.d/CentOS-Base.repo http://mirrors.aliyun.com/repo/Centos-6.repo
CentOS 7
wget -O /etc/yum.repos.d/CentOS-Base.repo http://mirrors.aliyun.com/repo/Centos-7.repo
或者
curl -o /etc/yum.repos.d/CentOS-Base.repo http://mirrors.aliyun.com/repo/Centos-7.repo
3、之后运行yum makecache生成缓存
4. 配置对应的软件既可以。

 浙公网安备 33010602011771号