需求:vue3+swiper+ts实现轮播图(中间主体轮播,左右各显示部分)
一、下载安装swiper
安装:pnpm install swiper
使用你熟悉的方式来安装(yarn npm cnpm)
二、在项目中引入swiper
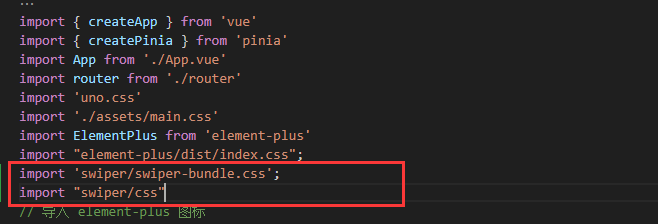
1.main.js文件
点击查看代码
import 'swiper/swiper-bundle.css';
import "swiper/css"

2.页面代码实现
点击查看代码
<script setup>
import { ref, reactive } from 'vue'
import { Swiper, SwiperSlide } from "swiper/vue"
import { Navigation, Pagination, Scrollbar, A11y, Autoplay } from 'swiper/modules';
import "swiper/css"
import image1 from "../assets/image/banner1.jpg"
import image2 from "../assets/image/banner2.jpg"
import image3 from "../assets/image/banner3.jpg"
import image4 from "../assets/image/banner4.jpg"
import LeftArrow from "../assets/image/left.png"
import RightArrow from "../assets/image/right.png"
const state = reactive({
    LeftArrow: LeftArrow,
    RightArrow: RightArrow,
    banner: [
        {
            url: '',
            image: image1,
        },
        {
            url: '',
            image: image2,
        },
        {
            url: '',
            image: image3,
        },
        {
            url: '',
            image: image4,
        },

    ],
})
const navigation = ref({
    prevEl: ".leftArrow",
    nextEl: ".rightArrow",
});
const pagination = ref({
    el: ".swiper-pagination",
    clickable: true, //允许分页点击跳转
})
const modules = [Autoplay, Pagination, Navigation, Scrollbar]


</script>
<template>
    <div class="containers">
	// :slidesPerView="'auto'" 解决页面循环轮播出现空白的问题
        <swiper :modules="modules"
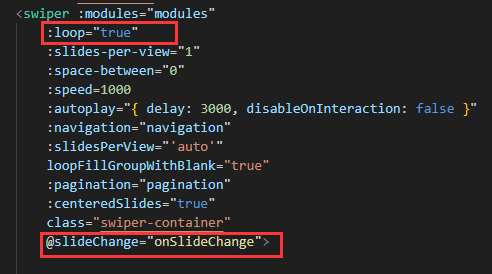
            :loop="true"
            :slides-per-view="1"
            :space-between="0"
            :speed=1000
            :autoplay="{ delay: 3000, disableOnInteraction: false }"
            :navigation="navigation"
            :slidesPerView="'auto'"
            loopFillGroupWithBlank="true"
            :pagination="pagination"
            :centeredSlides="true"
            class="swiper-container"
            @slideChange="onSlideChange">
            <swiper-slide v-for="(item, i) in  state.banner " :key="i">
                <a href="">
                    <div class="banner_img" :style="{ backgroundImage: `url(${item.image})` }"> </div>
                </a>
            </swiper-slide>
            <img ref="prevRef" class="leftArrow w-28px h-52px" :src="state.LeftArrow" />
            <img ref="nextRef" class="rightArrow w-28px h-52px" :src="state.RightArrow" />

        </swiper>
    </div>
</template>

<style  scoped>
.containers {
    width: 100%;
	//就这行比较有用
    overflow: hidden !important;
    display: flex;
    justify-content: center;
    position: relative;
}

.swiper-container {
    //这行也是
    overflow: visible !important;
    width: 1200px;
    height: 550px;
    position: relative;
}

.banner_img {
    width: 1200px;
    background-size: 100%, 100%;
    height: 5500px;
}

.leftArrow {
    position: absolute;
    top: 45%;
    left: -34px;
    z-index: 1000;
    cursor: pointer;
}

.rightArrow {
    position: absolute;
    top: 45%;
    right: -34px;
    z-index: 1000;
    cursor: pointer;
}
//页码样式穿透 也可自定义页码
:deep(.swiper-pagination) {
    bottom: 20px;
}
:deep(.swiper-pagination-bullet) {
    border: solid 1px #999;
    margin: 0 6px;
}
:deep(.swiper-pagination-bullet-active) {
    background: #4d4d4d;
}
:deep(.swiper-pagination-bullet:hover) {
    background: #4d4d4d;
    opacity: 0.6;
}
</style>
补充(20231031)
处理activeIndex不正确的问题
原因:在swiper上使用了loop模式,而loop是复制了dom,但不会复制dom之外的任何东西,所以点击事件什么的都会失效。所以如果需要拿到activeIndex的话就会出现错乱的情况

方案:可以使用realIndex(activeIndex因为loop的原先始终无法按照索引,如果非要用activeIndex可以使用js去实现)
可点击此茶查看问题讨论

分类:
需求集锦


【推荐】国内首个AI IDE,深度理解中文开发场景,立即下载体验Trae
【推荐】编程新体验,更懂你的AI,立即体验豆包MarsCode编程助手
【推荐】抖音旗下AI助手豆包,你的智能百科全书,全免费不限次数
【推荐】轻量又高性能的 SSH 工具 IShell:AI 加持,快人一步
· 无需6万激活码!GitHub神秘组织3小时极速复刻Manus,手把手教你使用OpenManus搭建本
· Manus爆火,是硬核还是营销?
· 终于写完轮子一部分:tcp代理 了,记录一下
· 别再用vector<bool>了!Google高级工程师:这可能是STL最大的设计失误
· 单元测试从入门到精通