


[Azure DevOps Dynamics] Automate CRM Solution Deployment - Dynamics 365
Login to dev.azure.com-> Create new project
Once project created successfully, Navigate to Pipeline and create new pipeline. Select Use classic editor option.
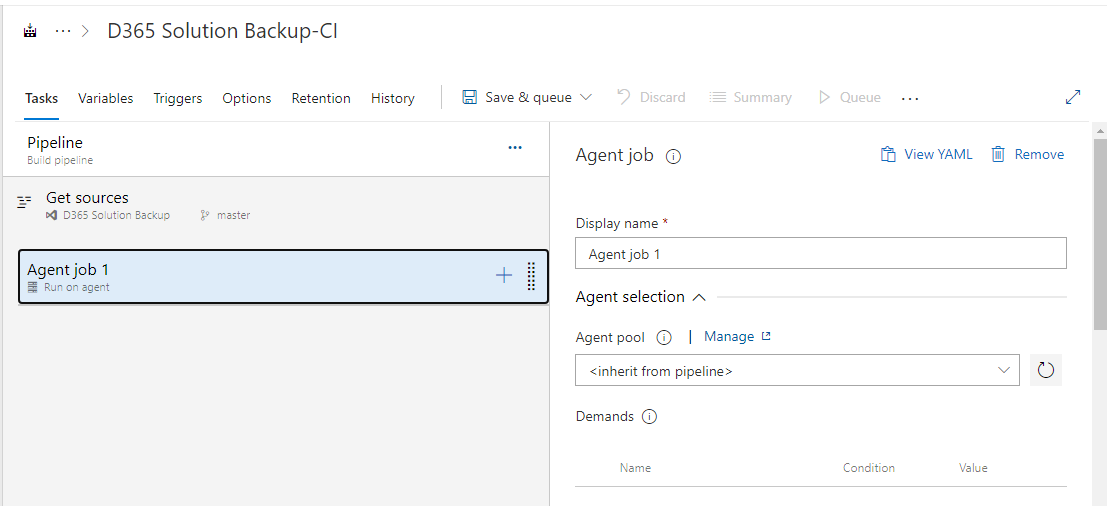
Once you click on Use Class Editor link, it will open new dialog and select Agent. Azure devops will automatically populate for you. You can use custom built Agent as well.
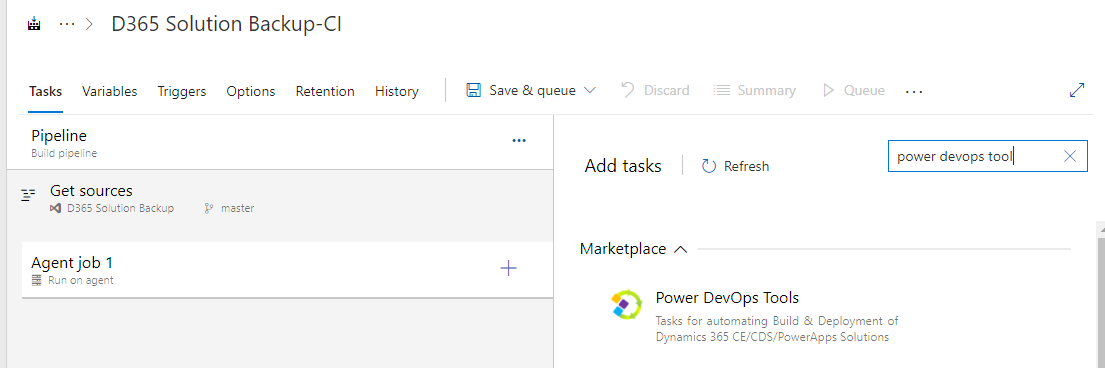
Now we need to install Power Devops Tool by Wael Hamze. Once installed add this in your pipeline.
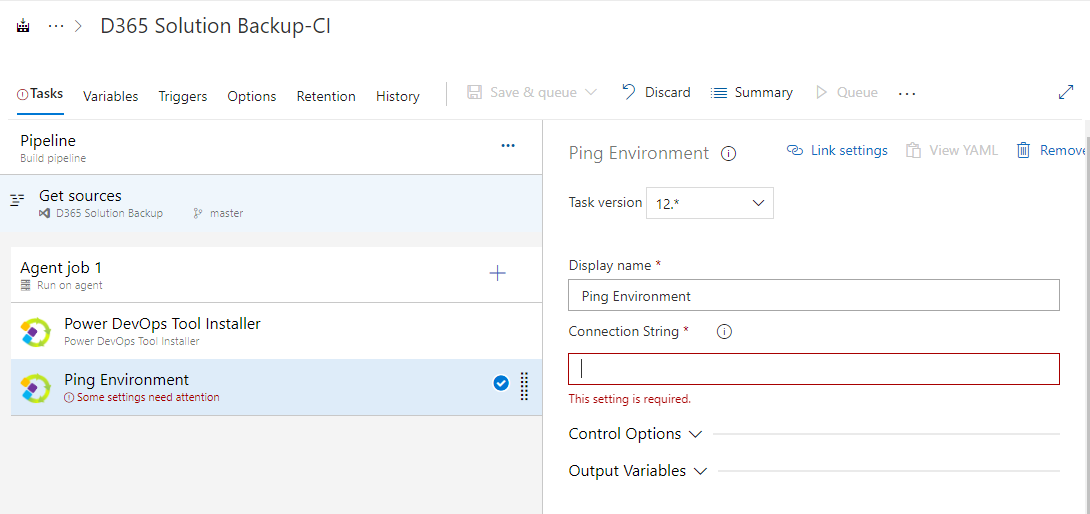
Next we have add Ping Environment task from Power Devops Tools to check if Dynamics CRM instance is up and running. We need to provide CRM Connectiong String in below format
AuthType=Office365;Username=username@name.onmicrosoft.com; Password=CRM Online Password;Url=https://CRMORG.crm8.dynamics.com
Then we have to add SetVersion task to set the CRM solution version number based on build number. Click on Options tab and set Build Number with as bewlo format. And use this in Set Version task in Version Number as $(Build.BuildNumber).
1.0.0.$(Rev:r) - Last digit of version number will be dynamically changed for each run.
Check this pagefor Azure Devops predefined variables

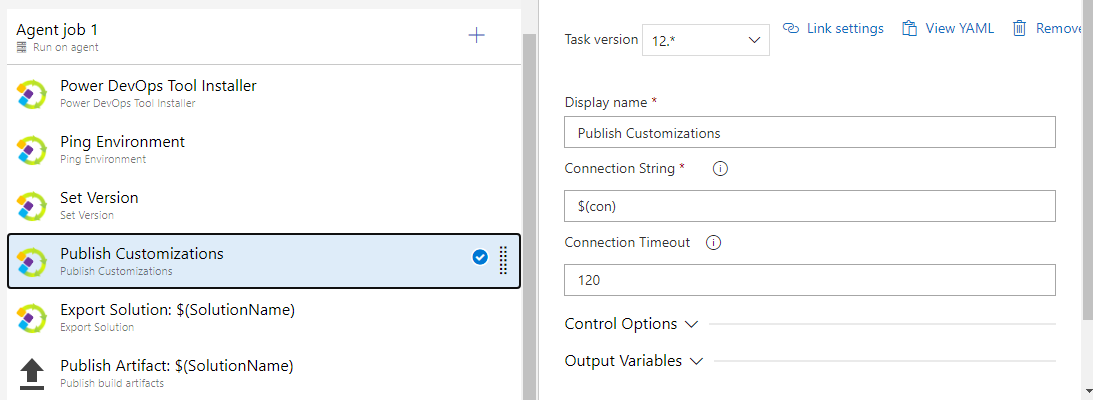
Now add Publish Customizations task to publish any changes before exporting the solution. It takes only connection string parameter.
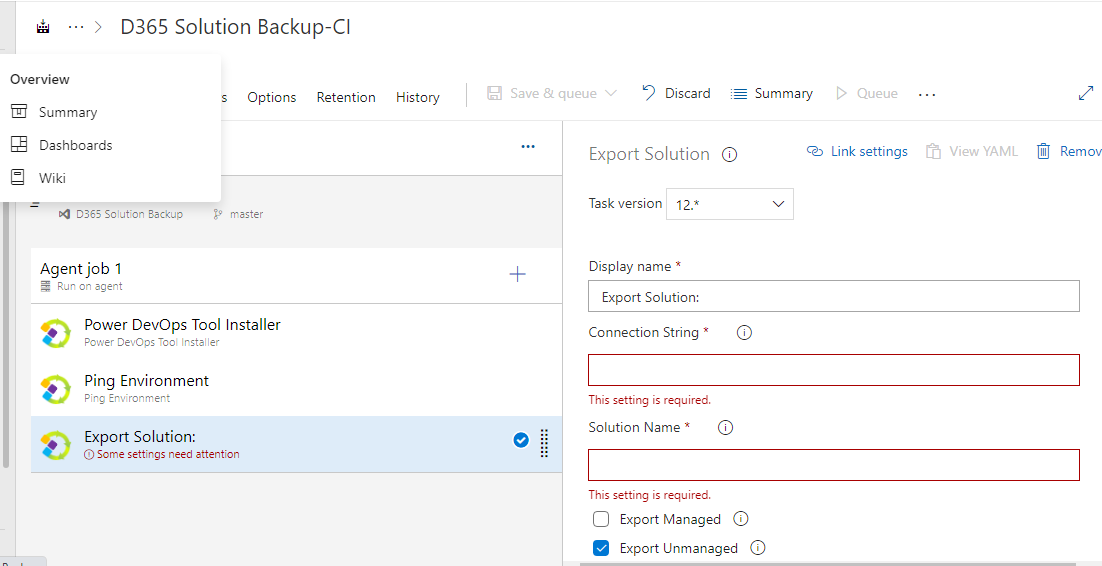
Next add Export Solution Task from power devops tool and provide Connection string as mentioned in above steps and Solution Name which you want to take deploy.
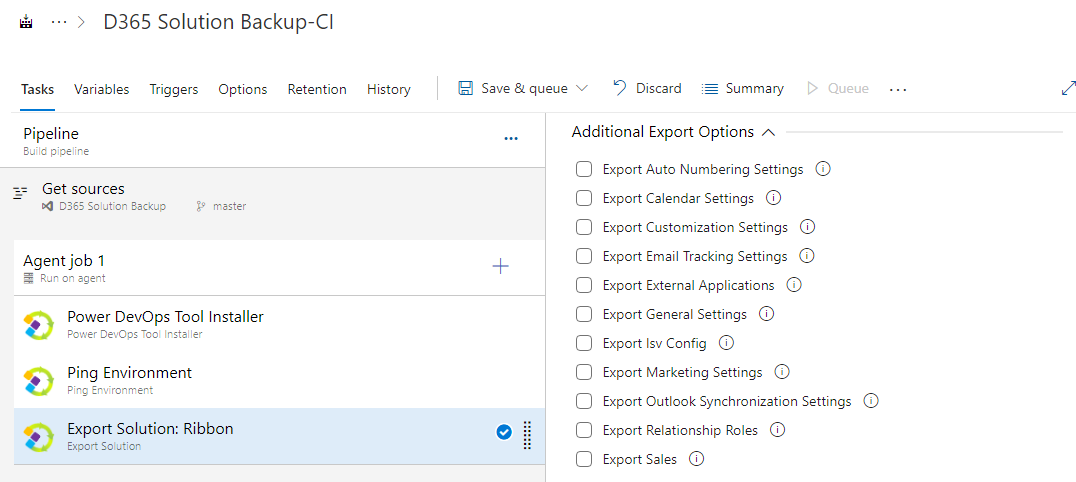
Select whether you want to export managed or unmanaged solution. Also select additional General settings to be exported as part of the solution.
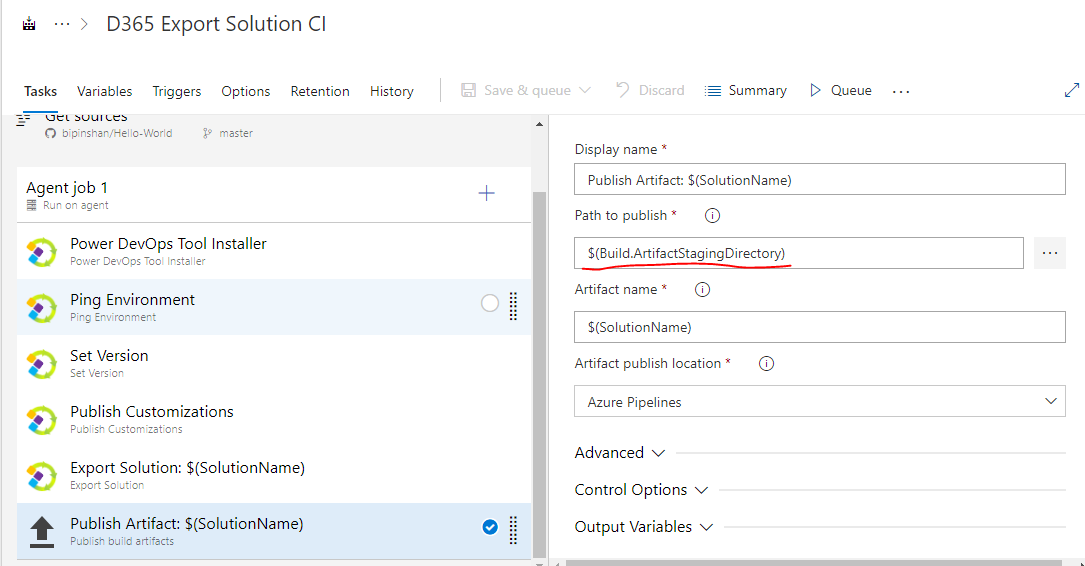
Next add Publish Build Artifact task to publish the solution zip file to Azure pipeling Artifact which will be used by Release to deploy to SIT, UAT & Prod. Select Path to publish as $(Build.ArtifactStagingDirectory) which we have used in export solution task. Publish Build Artifact will copy file from this location to Azure pipeline Artifact.
Pipeline is completed for exporting the solution and publishing the solution file to Artifact. Run this pipeline manually and verify Solution Zip file is published to Artifact.

Create Release to Deploy Solution to Target Environment
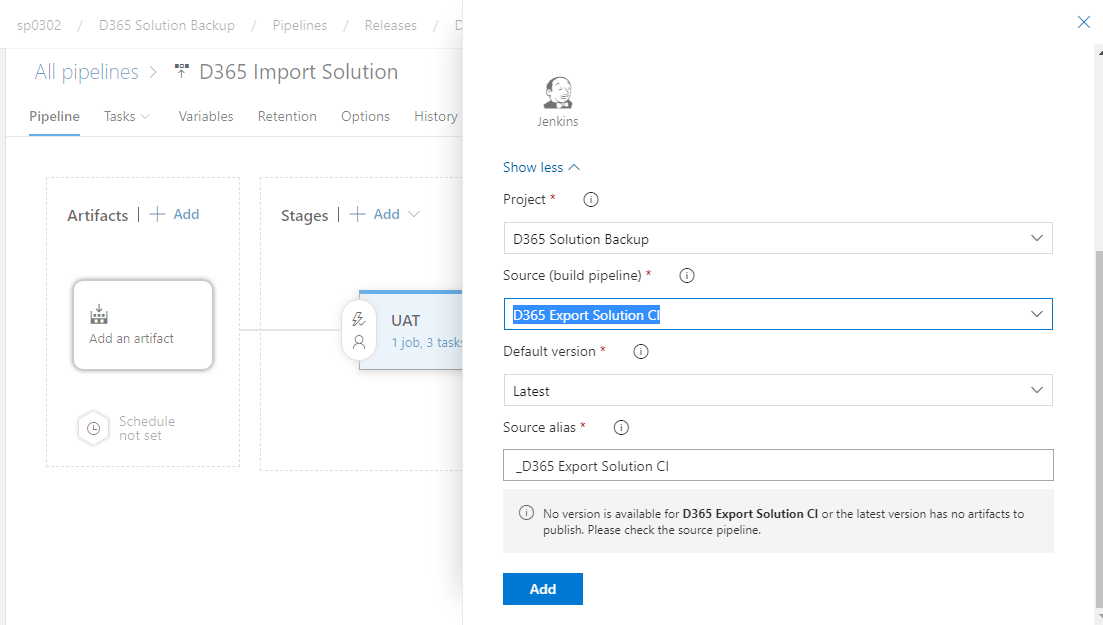
Click on Releases from left menu and create new release for UAT. And select Artifact where solution zip file is published.
Next go to Tasks and add below tasks in Releases.
- Add Power Devops Tools installer
- Add Ping Environemnt - Provide Connection string of Target Environment
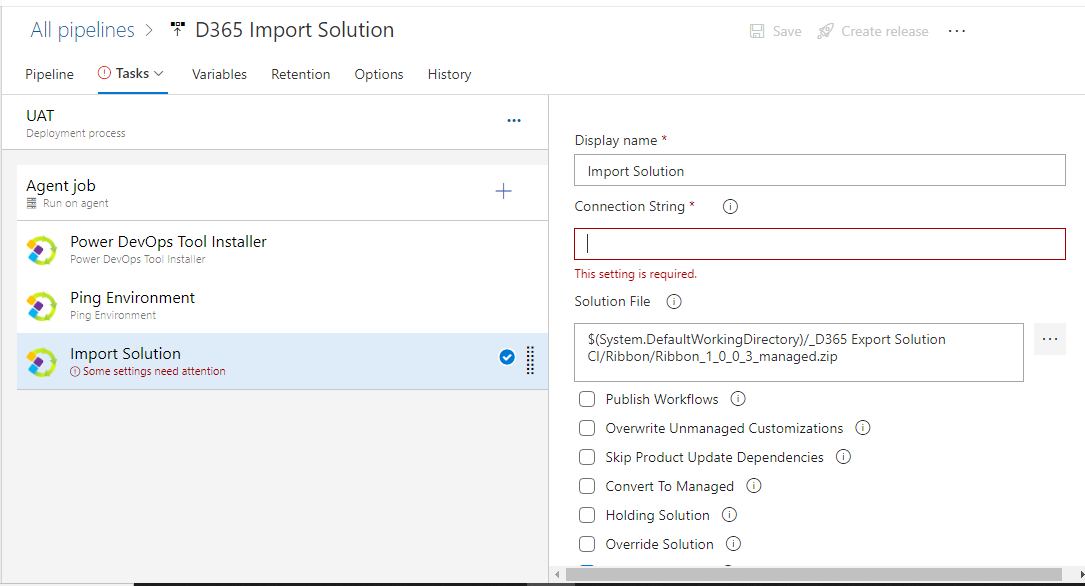
- Add Import Solution - Provide Connection string of Target Environment and select Solution file as shown below
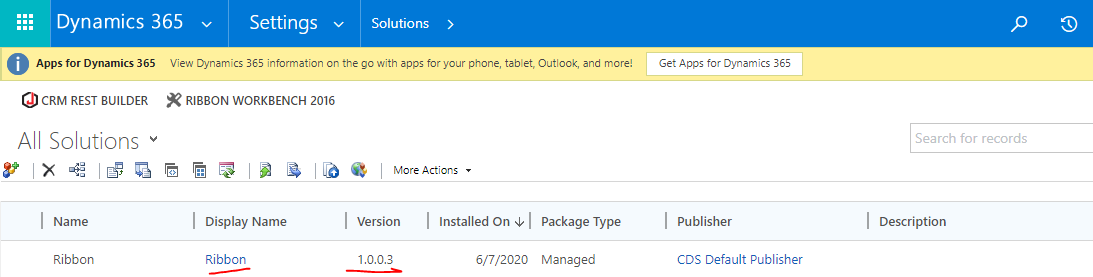
Once done, Click on Create Release to verify solution Deployment to Target Environment.
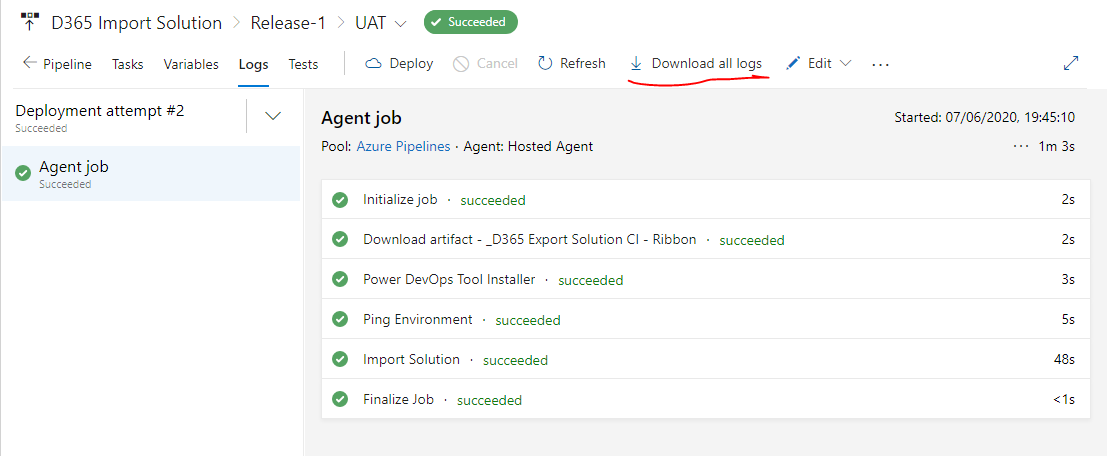
To downloag Solution Import Log file, Go to Release window and click on Download All Logs.
Hope this helps!

posted on 2021-08-27 10:18 lingdanglfw 阅读(63) 评论(0) 编辑 收藏 举报

【推荐】国内首个AI IDE,深度理解中文开发场景,立即下载体验Trae
【推荐】编程新体验,更懂你的AI,立即体验豆包MarsCode编程助手
【推荐】抖音旗下AI助手豆包,你的智能百科全书,全免费不限次数
【推荐】轻量又高性能的 SSH 工具 IShell:AI 加持,快人一步
· Linux系列:如何用 C#调用 C方法造成内存泄露
· AI与.NET技术实操系列(二):开始使用ML.NET
· 记一次.NET内存居高不下排查解决与启示
· 探究高空视频全景AR技术的实现原理
· 理解Rust引用及其生命周期标识(上)
· DeepSeek 开源周回顾「GitHub 热点速览」
· 物流快递公司核心技术能力-地址解析分单基础技术分享
· .NET 10首个预览版发布:重大改进与新特性概览!
· AI与.NET技术实操系列(二):开始使用ML.NET
· 单线程的Redis速度为什么快?