Power BI with Power Apps
Create a Power BI report using the Common Data Service connector
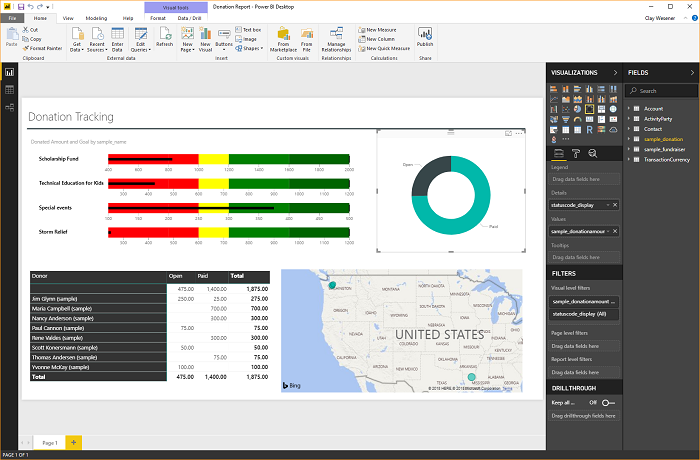
Common Data Service allows you to connect directly to your data using Power BI Desktop to create reports and publish them to Power BI. From Power BI, reports can be used in dashboards, shared to other users, and accessed cross platform on Power BI mobile apps.
Prerequisites
To use Power BI with Common Data Service, you need the following items:
- Download and install Power BI Desktop, which is a free application that runs on your local computer. You can download Power BI desktop here.
- Common Data Service environment with maker permissions to access the portal and read permissions to access data within entities.
Finding your Common Data Service Environment URL
-
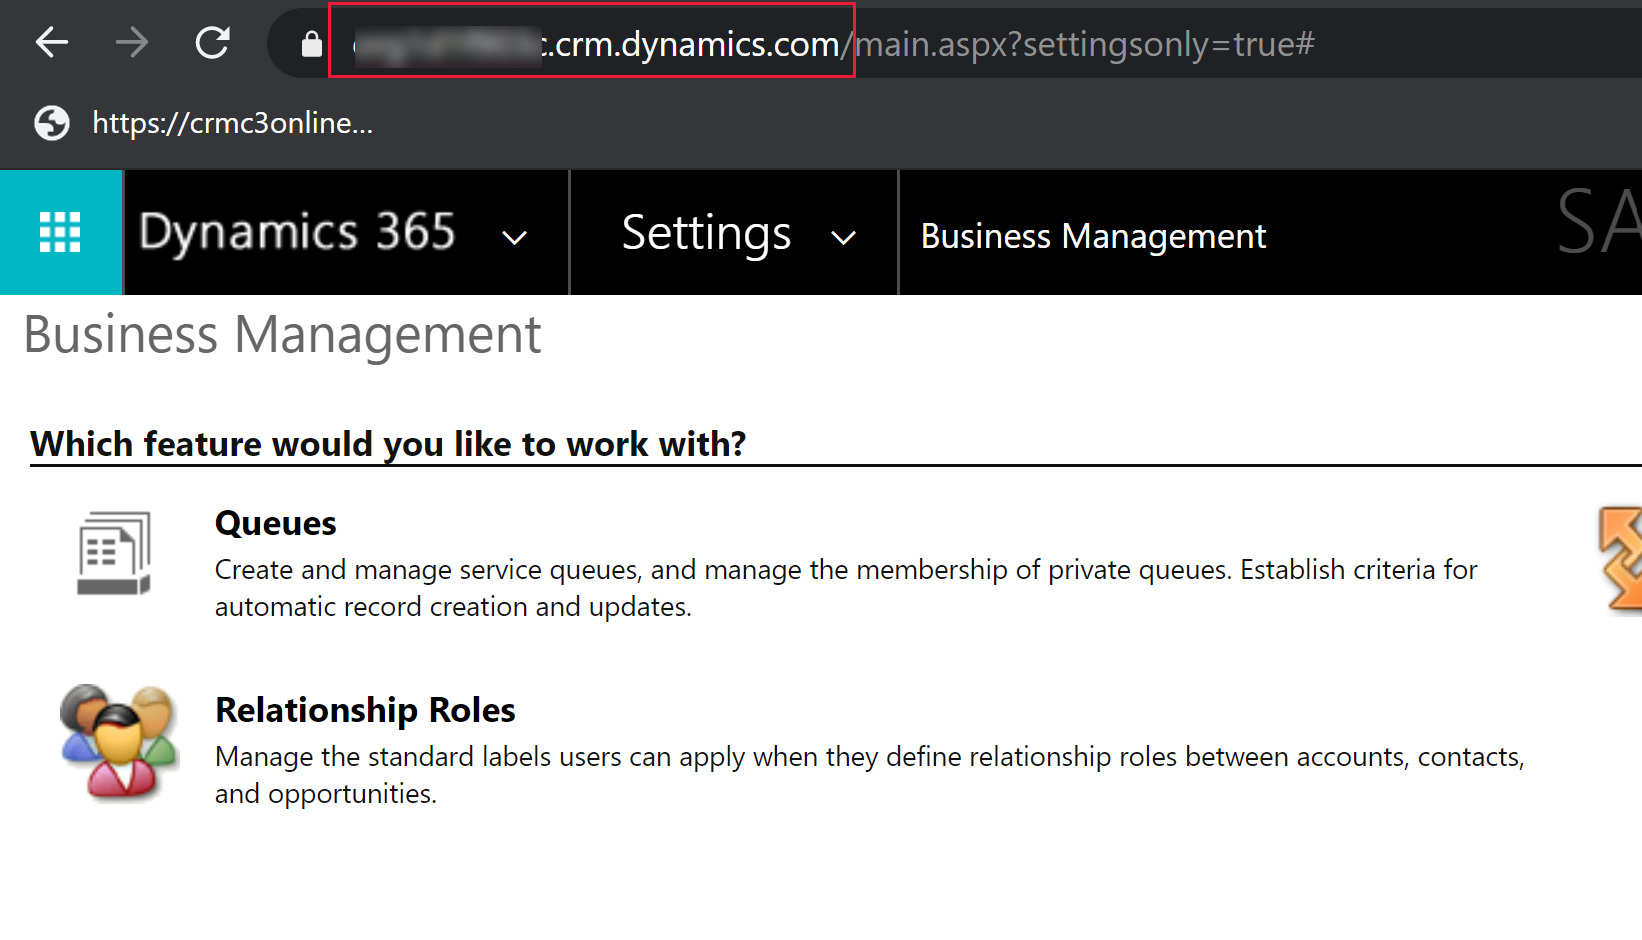
Open Power Apps, select the environment you're going to connect to, select Settings in the top-right corner, and then select Advanced settings.
-
In the new browser tab that opens, copy the root of the URL. This is the unique URL for your environment. The URL will be in the format of https://yourenvironmentid.crm.dynamics.com/. Make sure not to copy the rest of the URL. Keep this somewhere handy so you can use it when creating your Power BI reports.
Connecting to Common Data Service from Power BI Desktop
-
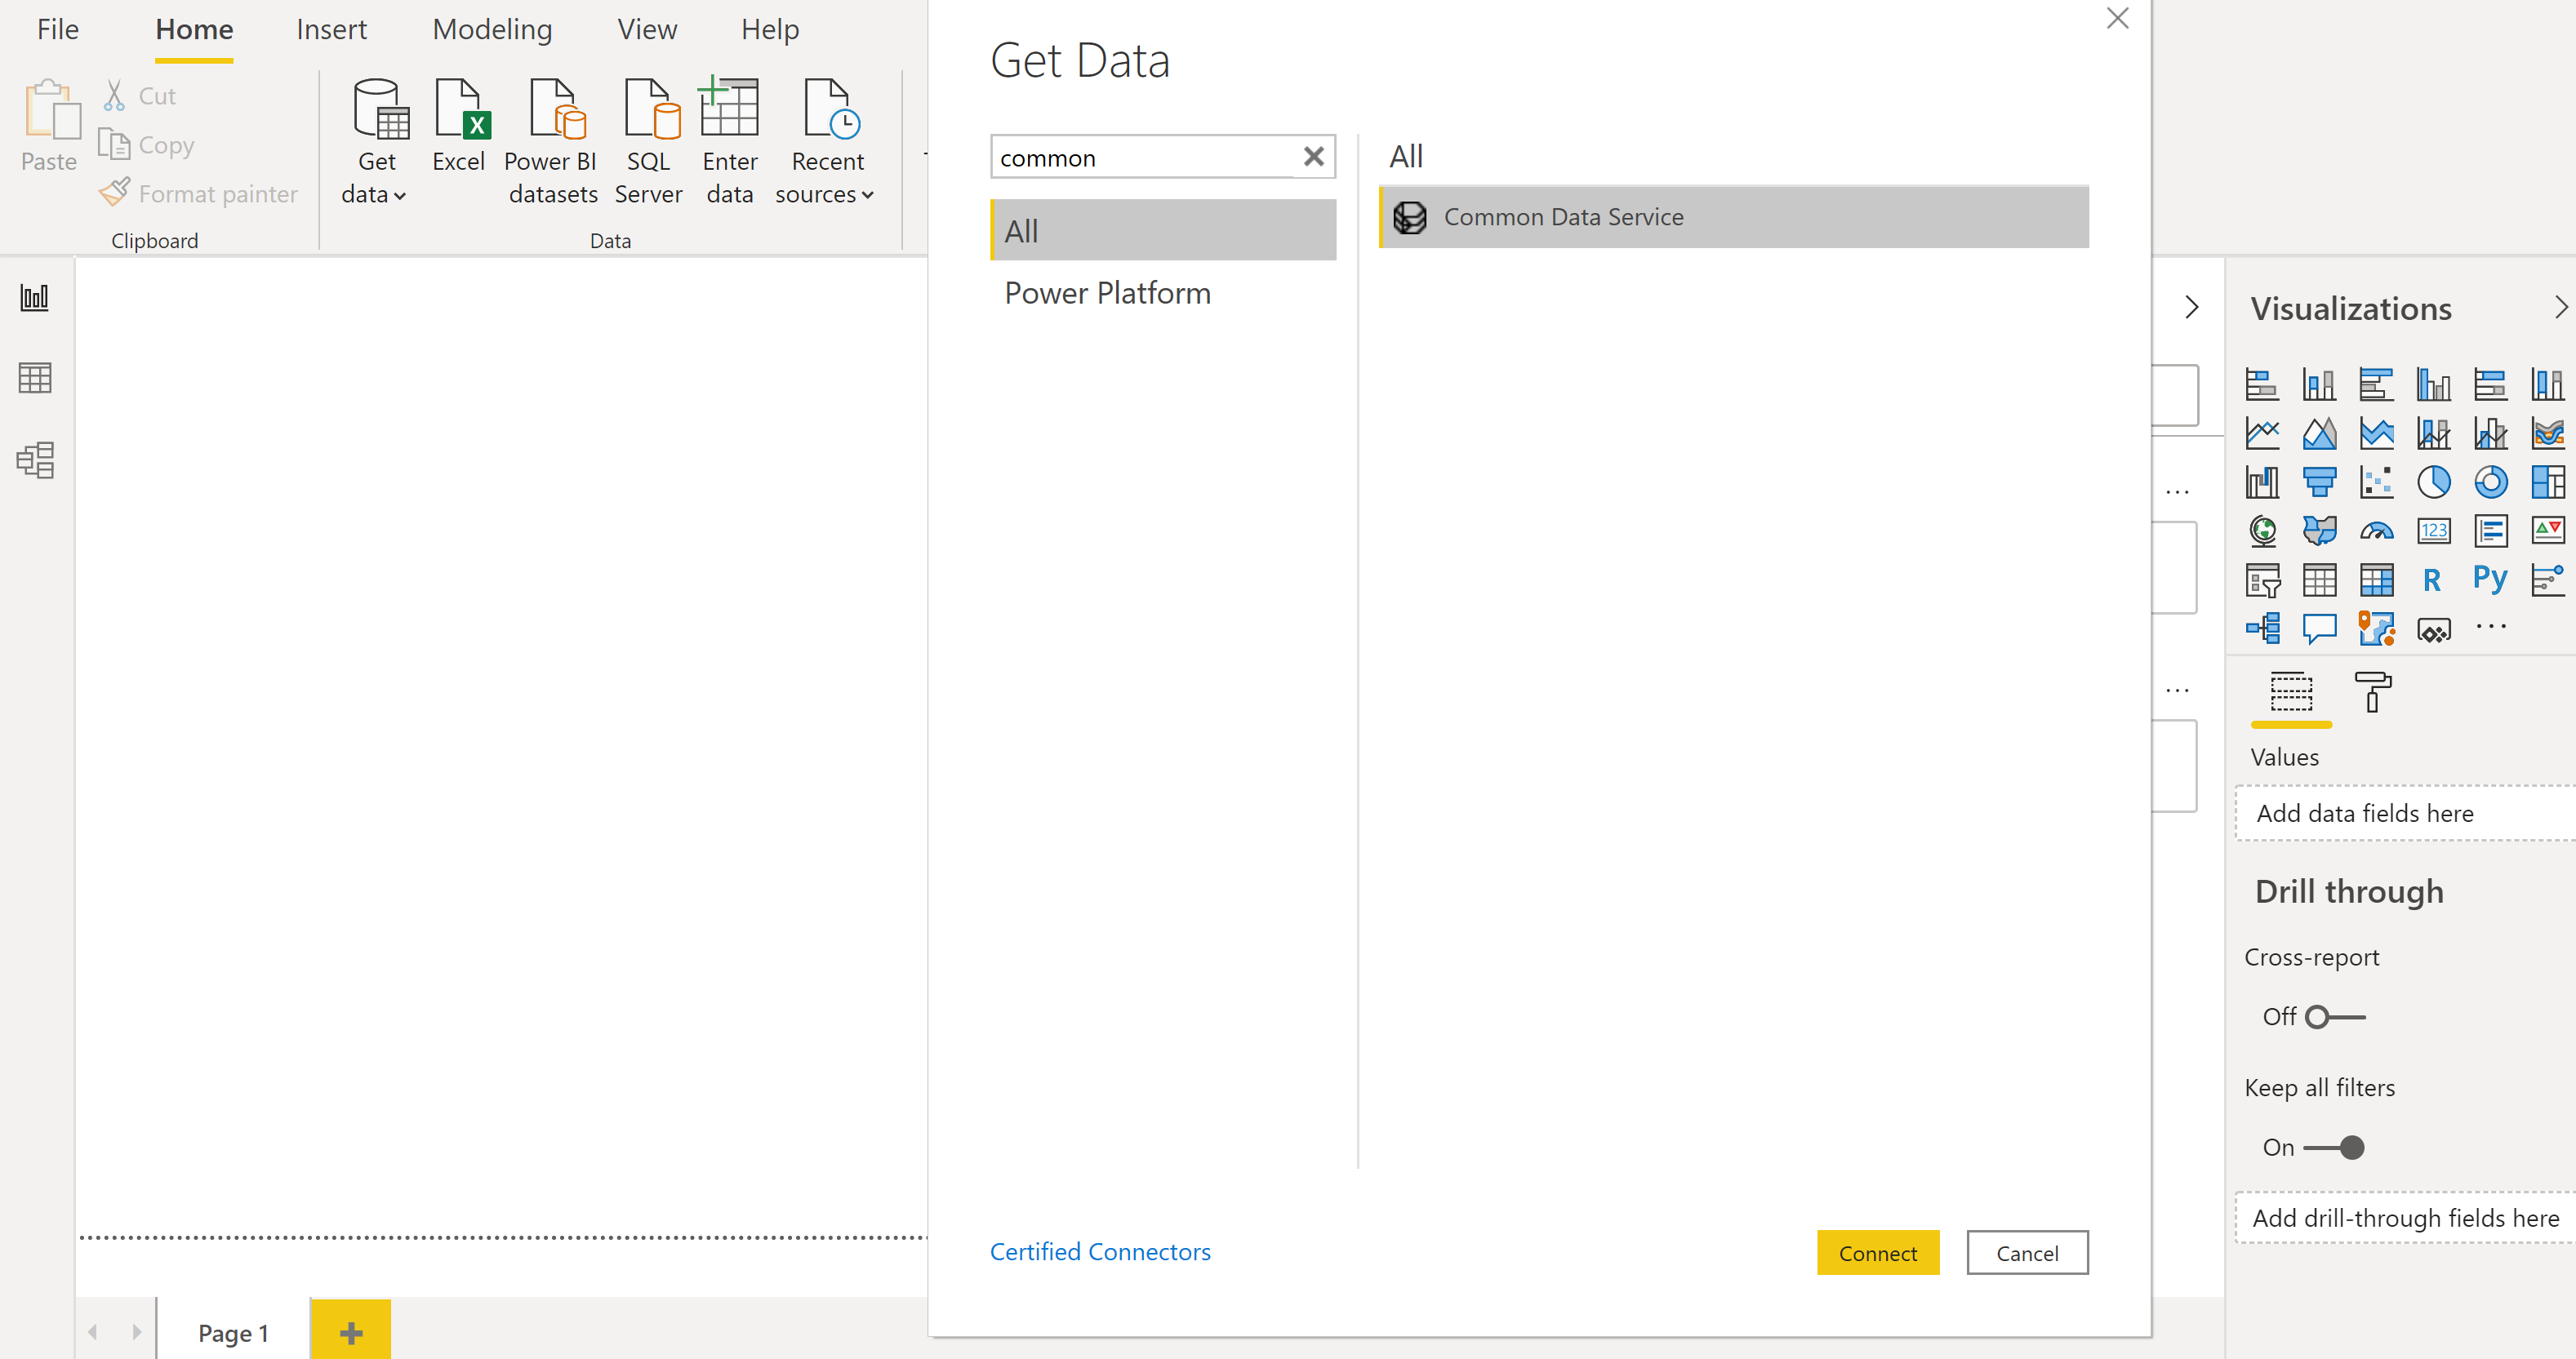
Open Power BI Desktop. Select File > Get Data and then select Get data to get started to open the full list of data sources available for Power BI Desktop.
-
Type common in the Search box, select Common Data Service, and then select Connect.
-
In the Common Data Service dialog box that appears, paste in your Common Data Service environment URL into the Server Url box and select OK. You might be prompted to sign in using the same credentials you use to connect to Power Apps and Common Data Service. Select Connect.
-
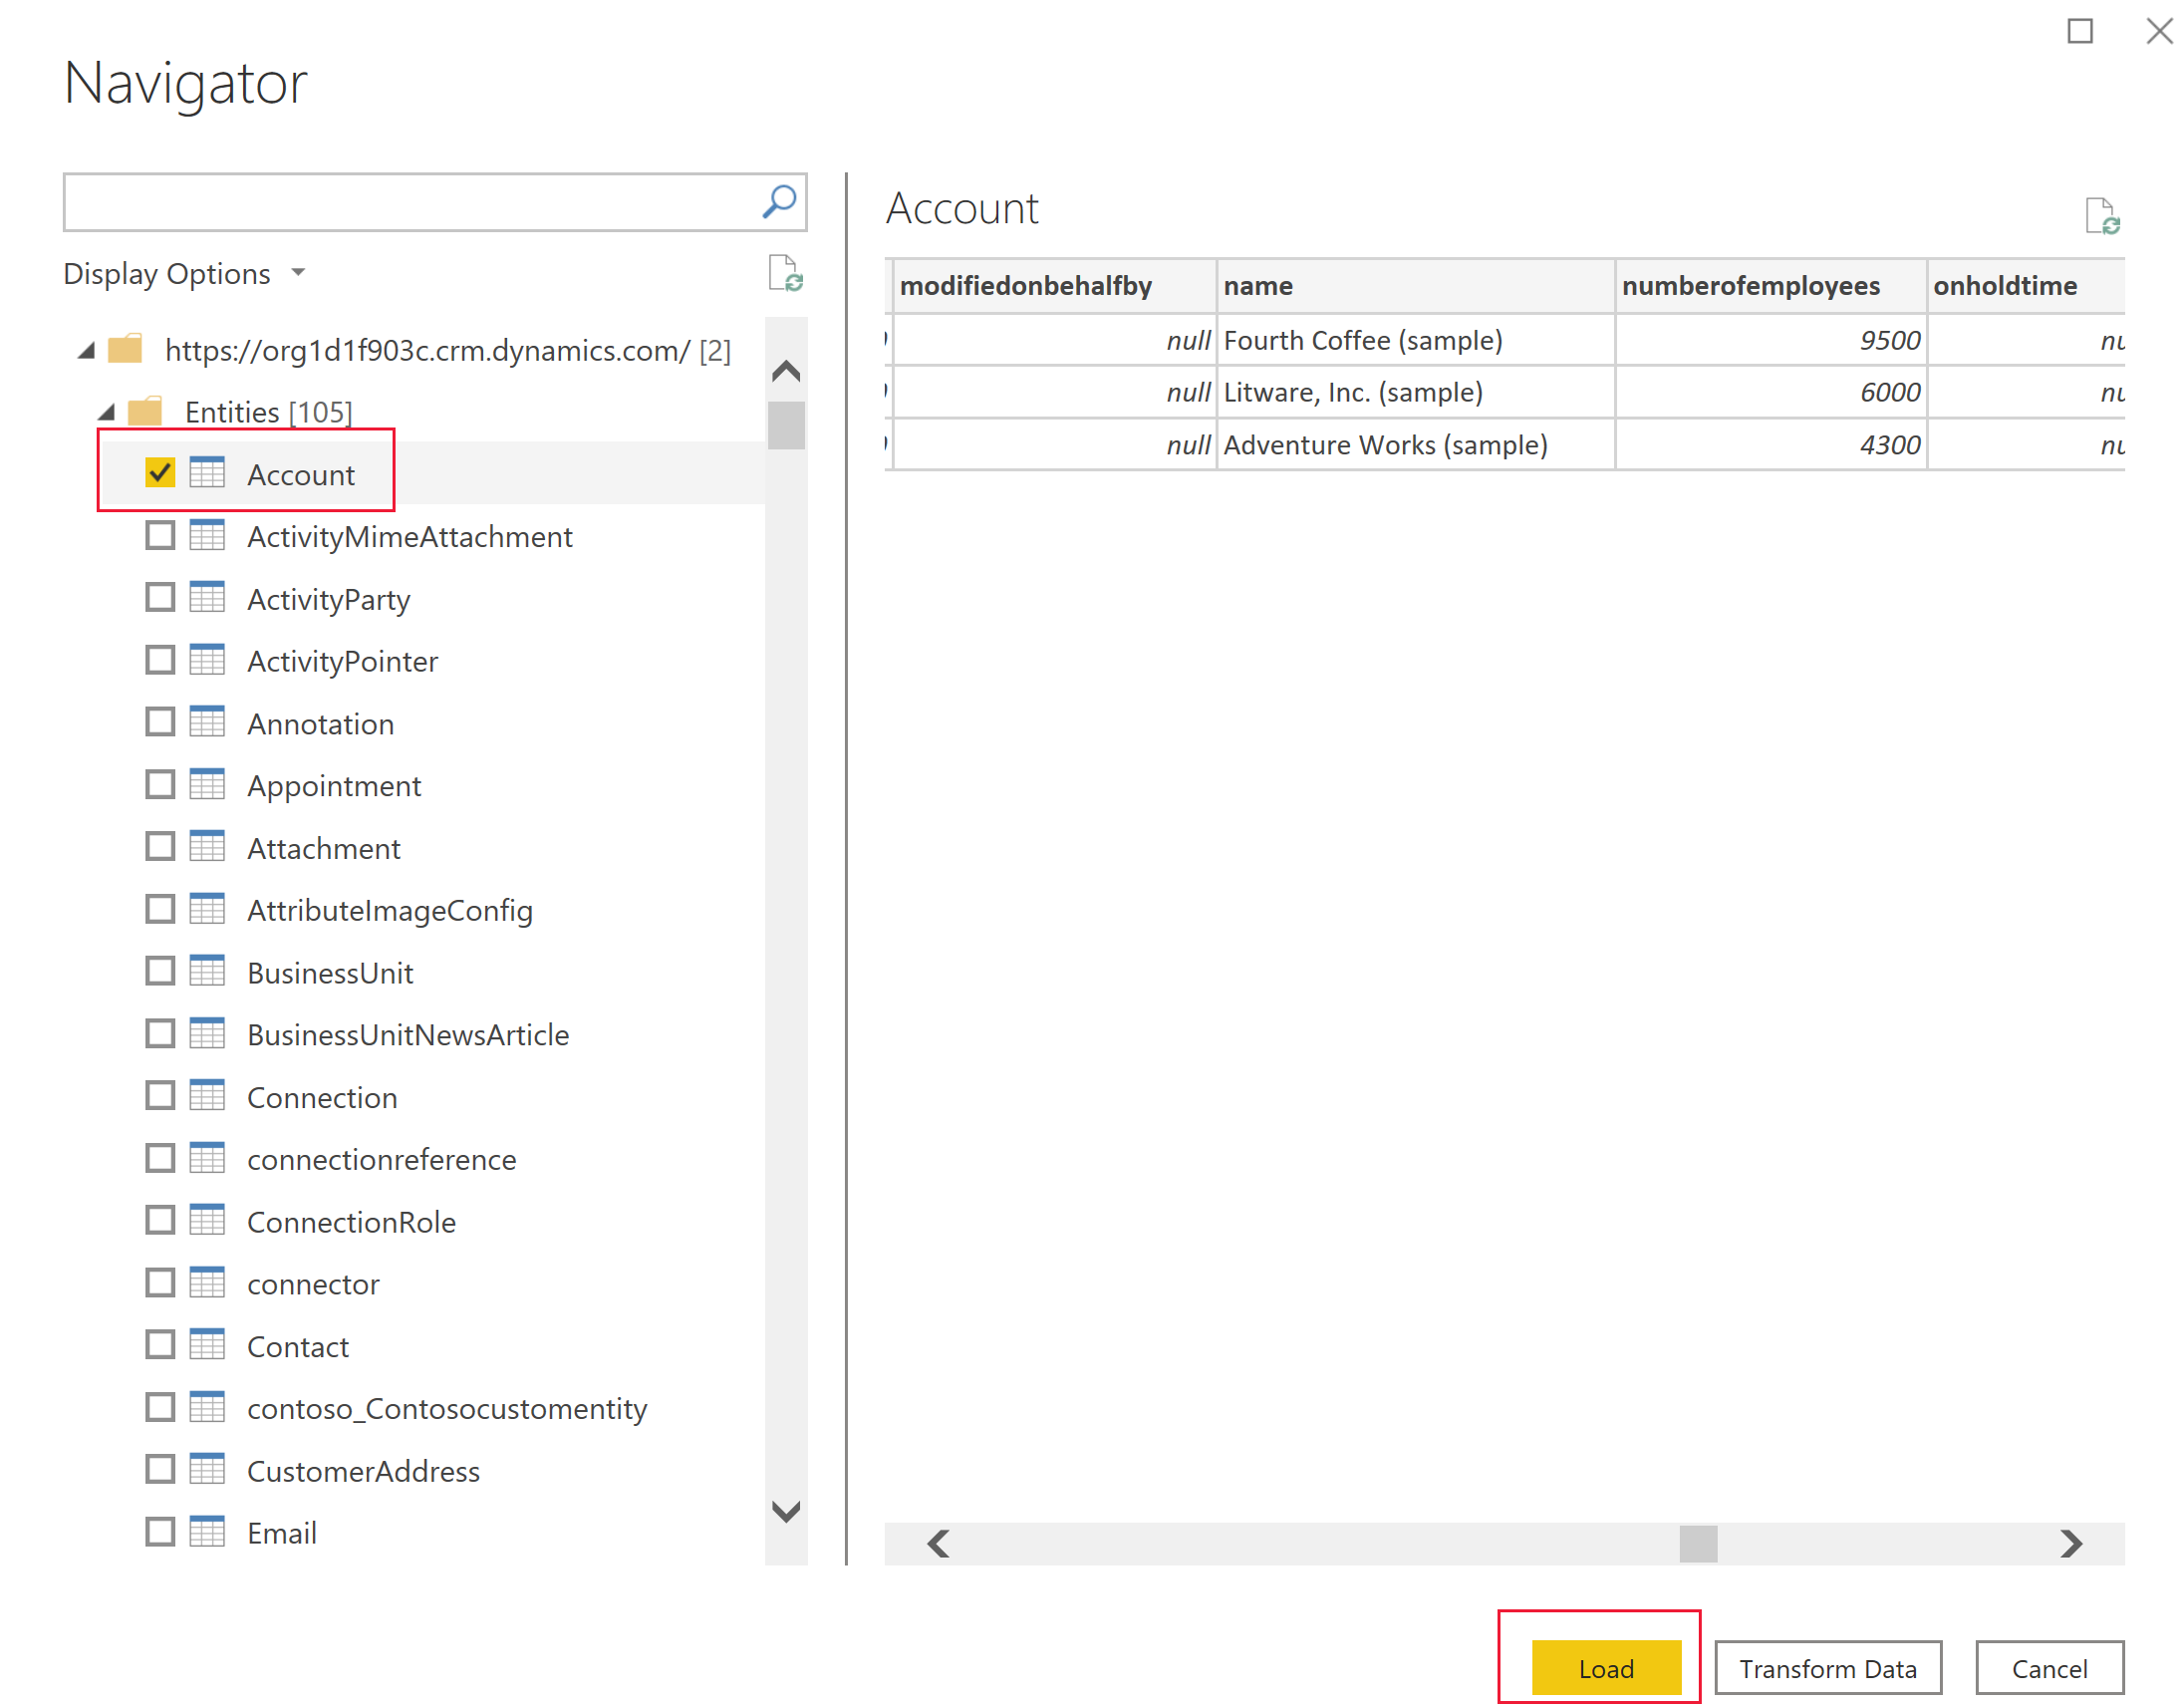
The Navigator displays all entities available for your environment grouped into two folders.
- Entities - are standard entities and custom entities that you have created or imported in your environment.
- System - contains all entities in your environment, including system entities.
-
Select the Account entity to see a preview of your data in the right pane. Select Load.
-
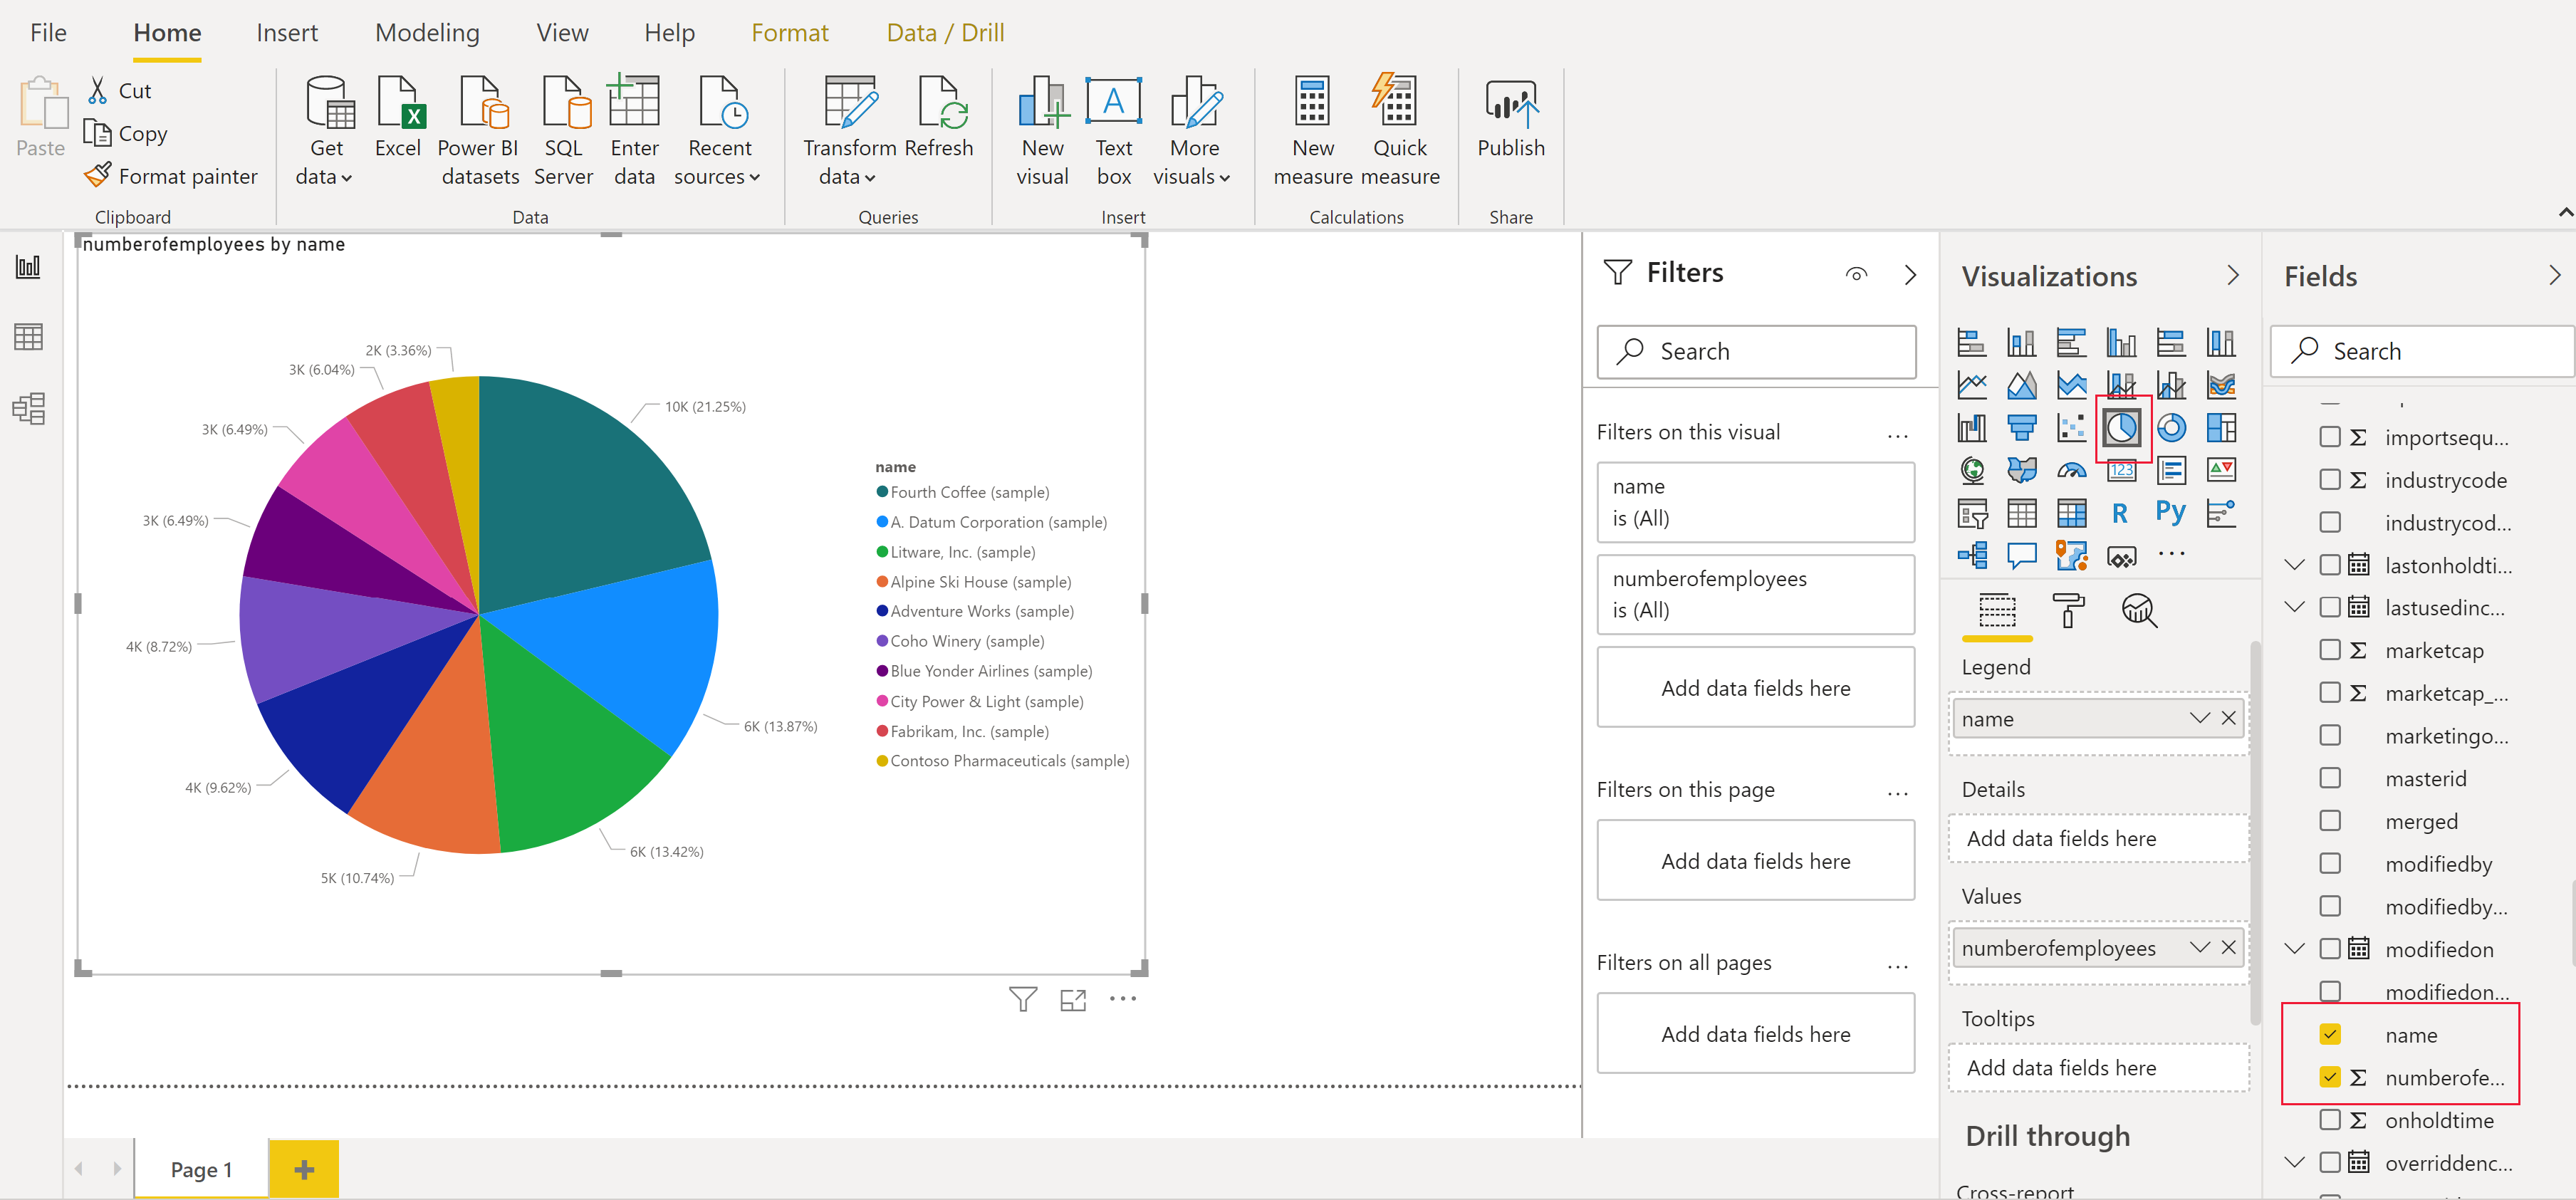
Your entity is now loaded into your report, and you can begin building reports, or repeat the previous steps to add additional entities. For example, in the Fields pane, select the name field and then select the numberofemployees field. In the Visualizations pane, select Pie chart. This adds a new visualization to your report canvas.
Using option sets
Options sets are used in entities to provide a drop-down list of values to a user in apps and flows. When using the Power BI connector option set fields will be presented as two columns to show both the unique value, and the display value.
As an example, if you had an option set on your entity called ApprovalStatus, you would see two fields in Power BI:
-
ApprovalStatus - This will show a unique integer value for each item in your option set, this is help when applying filters so they will not be impacted if you make future changes to the display name.
-
ApprovalStatus_display - This will show the friendly display name of the item and is most commonly used when presenting the option in a table or chart.
ApprovalStatus ApprovalStatus_Display 1 Submitted 2 In Review 3 Approved 4 Rejected
Navigating Relationships
Relationships in Common Data Service require you to create a relationship within Power BI desktop between the two entities using a GUID field, this is a system-generated unique identifier that ensures relationships are created for the create records where ambiguity or duplication may exist with other fields. You can read more about managing relationships in Power BI desktop here.
While some relationships may be automatically created, you can still review and ensure the correct relationships are established when creating your report:
- The lookup field on the entity will contain the GUID of the record in the related entity.
- The related entity will have a field in the format "[EntityName]ID" that contains the GUID, for example Accountid or MyCustomEntityid
- Using the Power BI desktop Manage Relationships feature, you would create a new relationship between your lookup field, and the id field on the related entity.
posted on 2020-11-06 09:12 lingdanglfw 阅读(207) 评论(0) 编辑 收藏 举报


【推荐】国内首个AI IDE,深度理解中文开发场景,立即下载体验Trae
【推荐】编程新体验,更懂你的AI,立即体验豆包MarsCode编程助手
【推荐】抖音旗下AI助手豆包,你的智能百科全书,全免费不限次数
【推荐】轻量又高性能的 SSH 工具 IShell:AI 加持,快人一步
· Linux系列:如何用 C#调用 C方法造成内存泄露
· AI与.NET技术实操系列(二):开始使用ML.NET
· 记一次.NET内存居高不下排查解决与启示
· 探究高空视频全景AR技术的实现原理
· 理解Rust引用及其生命周期标识(上)
· DeepSeek 开源周回顾「GitHub 热点速览」
· 物流快递公司核心技术能力-地址解析分单基础技术分享
· .NET 10首个预览版发布:重大改进与新特性概览!
· AI与.NET技术实操系列(二):开始使用ML.NET
· 单线程的Redis速度为什么快?