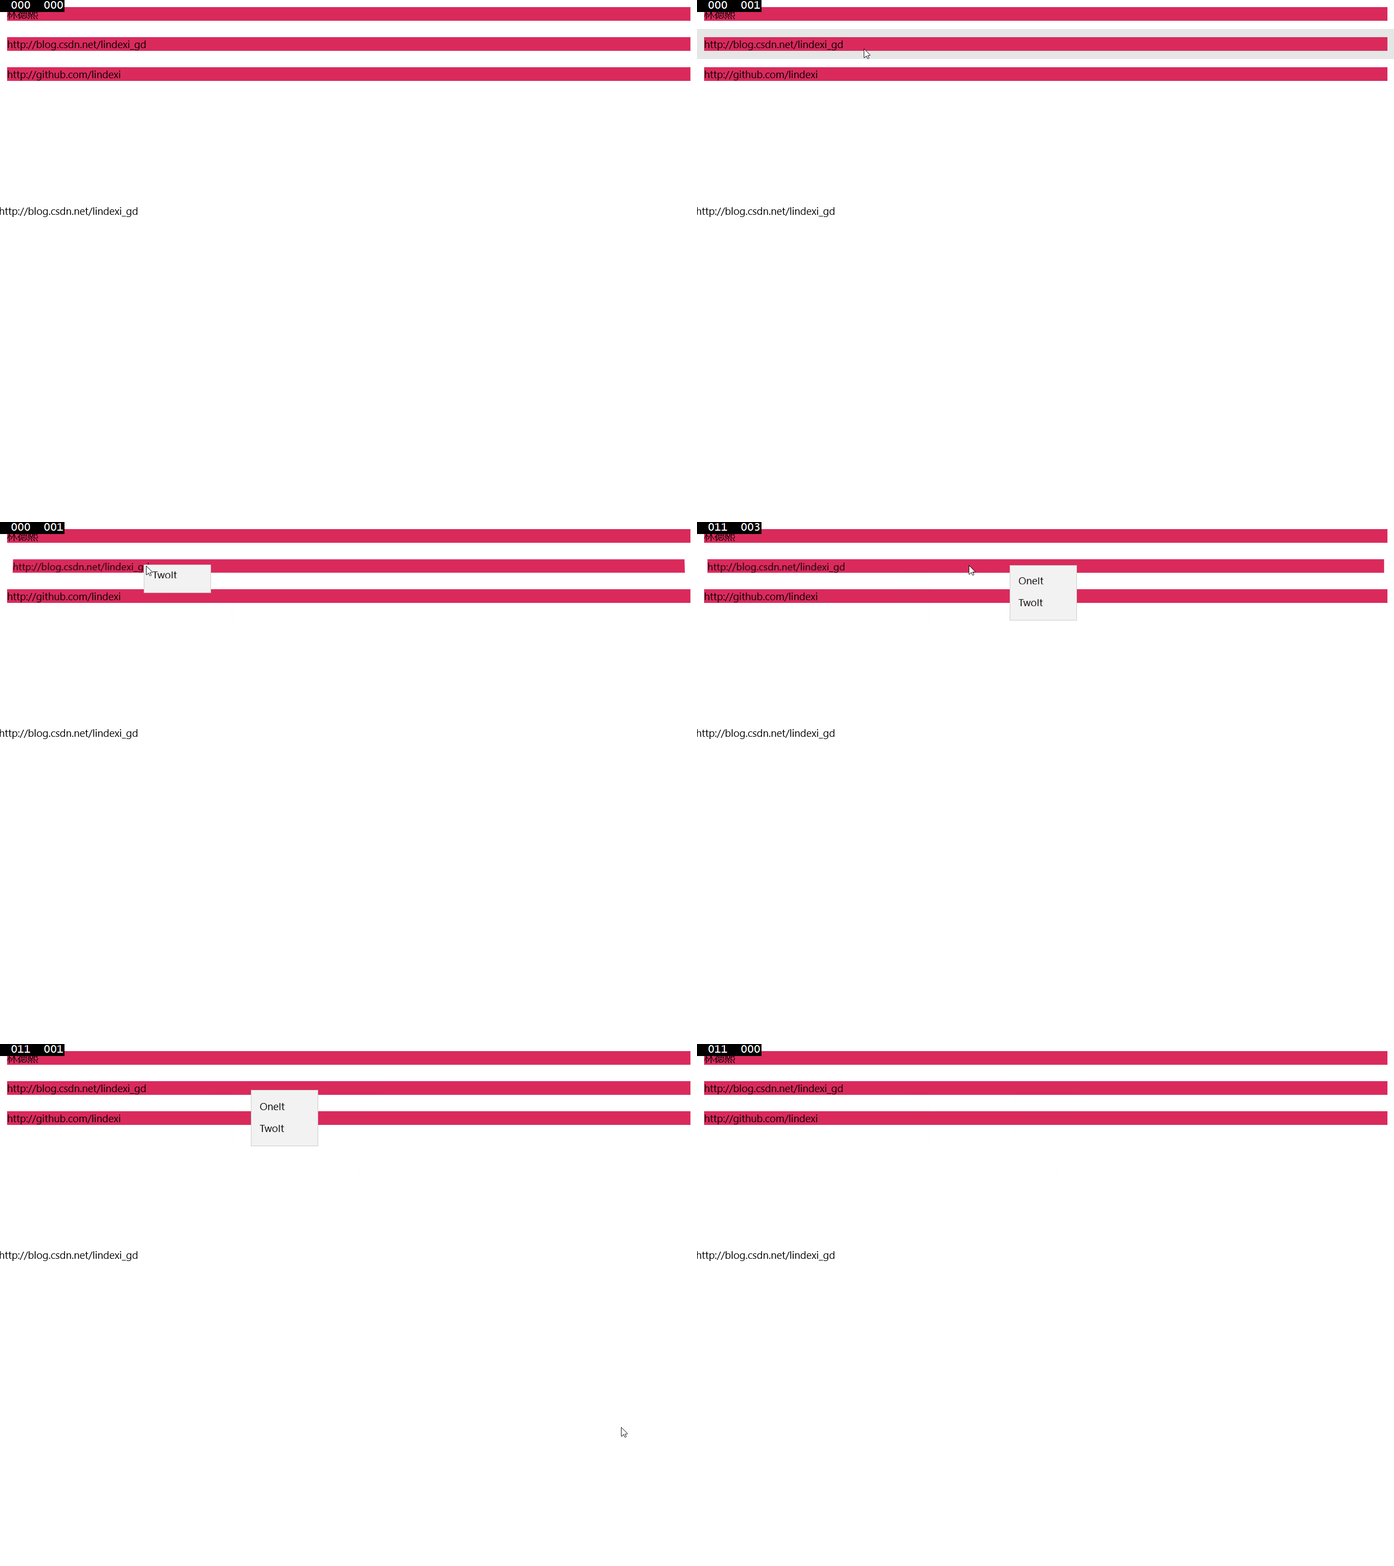
win10 uwp 右击浮出窗在点击位置
本文主要让MenuFlyout出现在我们右击位置。
我们一般使用的MenuFlyout写在前台,写在Button里面,但是可能我们的MenuFlyout显示的位置和我们想要的不一样。
通过使用后台写ShowAt的方法,我们可以通过e.GetPosition获得鼠标点击位置,需要对函数传入相对的元素,这个元素一般可以用我们点击使用的元素,也可以使用我们的最外层Grid,这样我们就可以获得了鼠标位置,也就可以显示我们的MenuFlyout在点击位置。
我们建一个ListView,然后绑定后台,在我们ListView要右击显示我们的浮出,要求我们的浮出在我们点击位置。
MenuFlyout可以在后台写,当然写在前台也可以。
我们这写在后台,我们可以选择Placement 显示在我们元素的位置,但这不是我们鼠标点击的位置,要显示我们鼠标点击的位置,其实也很简单。我们可以从e.GetPosition(sender as UIElement)获得鼠标位置,把这个给MenuFlyout我们的浮出显示在我们鼠标点击位置
<ListView ItemsSource="{x:Bind View.Str}">

        <ListView.ItemContainerStyle>

            <Style TargetType="ListViewItem">

                <Setter Property="HorizontalContentAlignment"

                                    Value="Stretch" />

                <Setter Property="VerticalContentAlignment" Value="Center"></Setter>

            </Style>

        </ListView.ItemContainerStyle>


        <ListView.ItemTemplate>

            <DataTemplate>

                <Grid Background="#FFda2a5c" RightTapped="GridColection_OnRightTapped">

                    <TextBlock Text="{Binding}"></TextBlock>

                </Grid>

            </DataTemplate>

        </ListView.ItemTemplate>

    </ListView>
后台写
   private void GridColection_OnRightTapped(object sender, RightTappedRoutedEventArgs e)

    {

        MenuFlyout myFlyout = new MenuFlyout();

        MenuFlyoutItem firstItem = new MenuFlyoutItem { Text = "OneIt" };

        MenuFlyoutItem secondItem = new MenuFlyoutItem { Text = "TwoIt" };

        myFlyout.Items.Add(firstItem);

        myFlyout.Items.Add(secondItem);

        //if you only want to show in left or buttom

        //myFlyout.Placement = FlyoutPlacementMode.Left;


        FrameworkElement senderElement = sender as FrameworkElement;

        //the code can show the flyout in your mouse click

        myFlyout.ShowAt(sender as UIElement, e.GetPosition(sender as UIElement));

    }


本作品采用知识共享署名-非商业性使用-相同方式共享 4.0 国际许可协议进行许可。欢迎转载、使用、重新发布,但务必保留文章署名林德熙(包含链接:http://blog.csdn.net/lindexi_gd ),不得用于商业目的,基于本文修改后的作品务必以相同的许可发布。如有任何疑问,请与我联系。
博客园博客只做备份,博客发布就不再更新,如果想看最新博客,请访问 https://blog.lindexi.com/
如图片看不见,请在浏览器开启不安全http内容兼容

本作品采用知识共享署名-非商业性使用-相同方式共享 4.0 国际许可协议进行许可。欢迎转载、使用、重新发布,但务必保留文章署名[林德熙](https://www.cnblogs.com/lindexi)(包含链接:https://www.cnblogs.com/lindexi ),不得用于商业目的,基于本文修改后的作品务必以相同的许可发布。如有任何疑问,请与我[联系](mailto:lindexi_gd@163.com)。


