使用 Swagger 自动生成 ASP.NET Core Web API 的文档、在线帮助测试文档(ASP.NET Core Web API 自动生成文档)
对于开发人员来说,构建一个消费应用程序时去了解各种各样的 API 是一个巨大的挑战。
在你的 Web API 项目中使用 Swagger 的 .NET Core 封装 Swashbuckle 可以帮助你创建良好的文档和帮助页面。 Swashbuckle 可以通过修改 Startup.cs 作为一组 NuGet 包方便的加入项目。
Swashbuckle 是一个开源项目,为使用 ASP.NET Core MVC 构建的 Web APIs 生成 Swagger 文档。
Swagger 是一个机器可读的 RESTful API 表现层,它可以支持交互式文档、客户端 SDK 的生成和可被发现。
Swashbuckle 有两个核心的组件
Swashbuckle.SwaggerGen : 提供生成描述对象、方法、返回类型等的 JSON Swagger 文档的功能。
Swashbuckle.SwaggerUI : 是一个嵌入式版本的 Swagger UI 工具,使用 Swagger UI 强大的富文本表现形式来可定制化的来描述 Web API 的功能,并且包含内置的公共方法测试工具。
新建一个ASP.NET Core WebApi 项目,项目结构如下图所示:

使用NUget进行添加Swashbuckle
1、工具->NUget包管理器->程序包管理器控制台
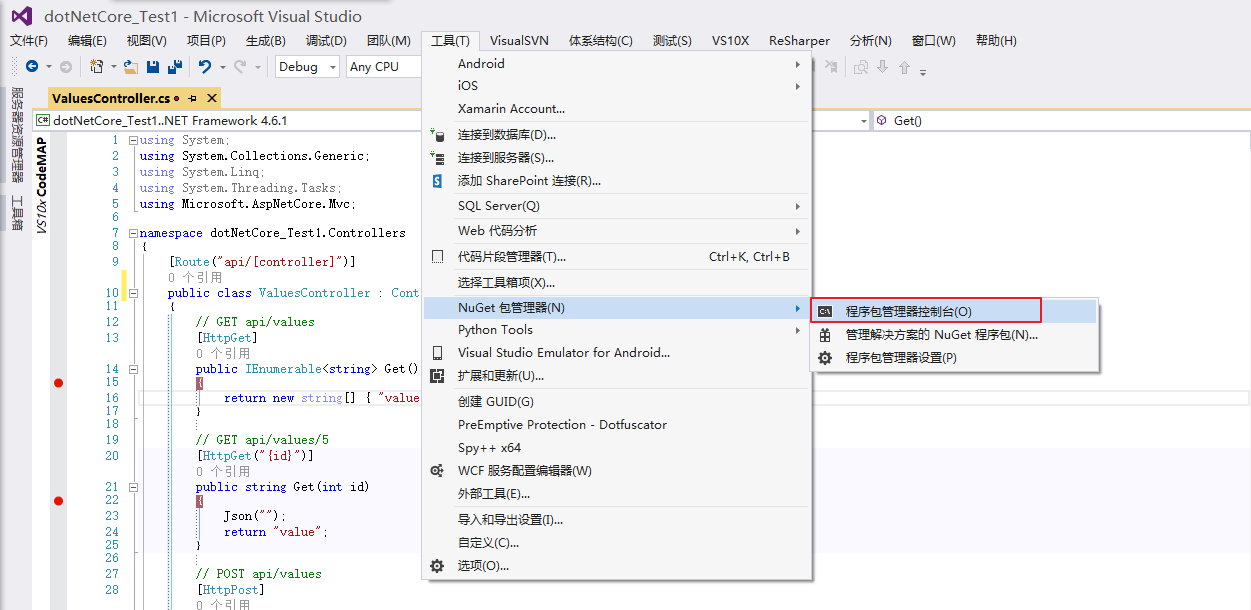
2、在控制台输入: Install-Package Swashbuckle -Pre 按下回车键

3、安装Swashbuckle完成:
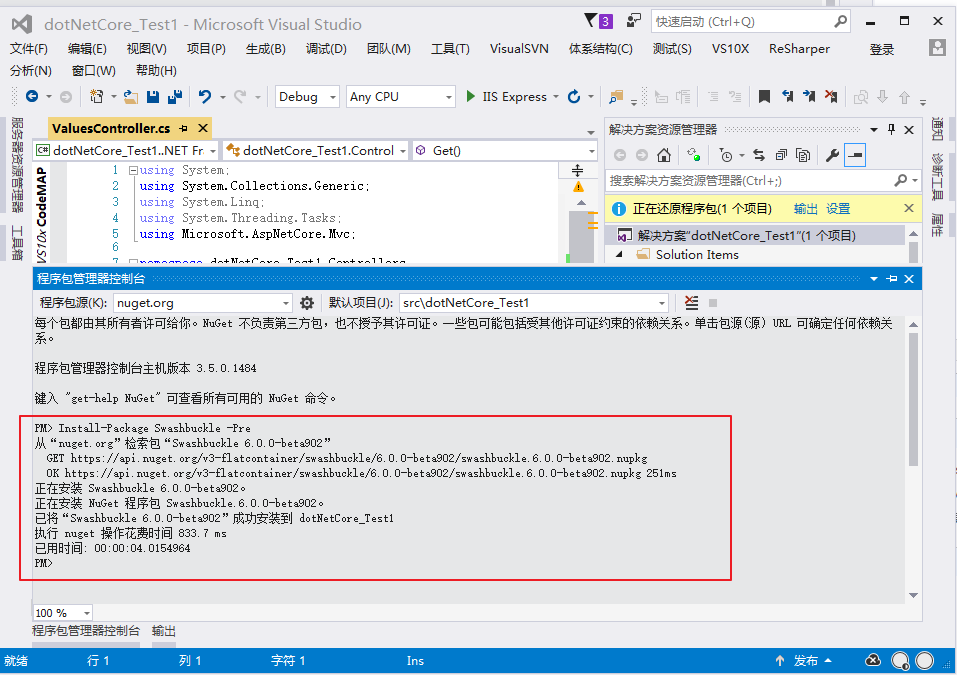
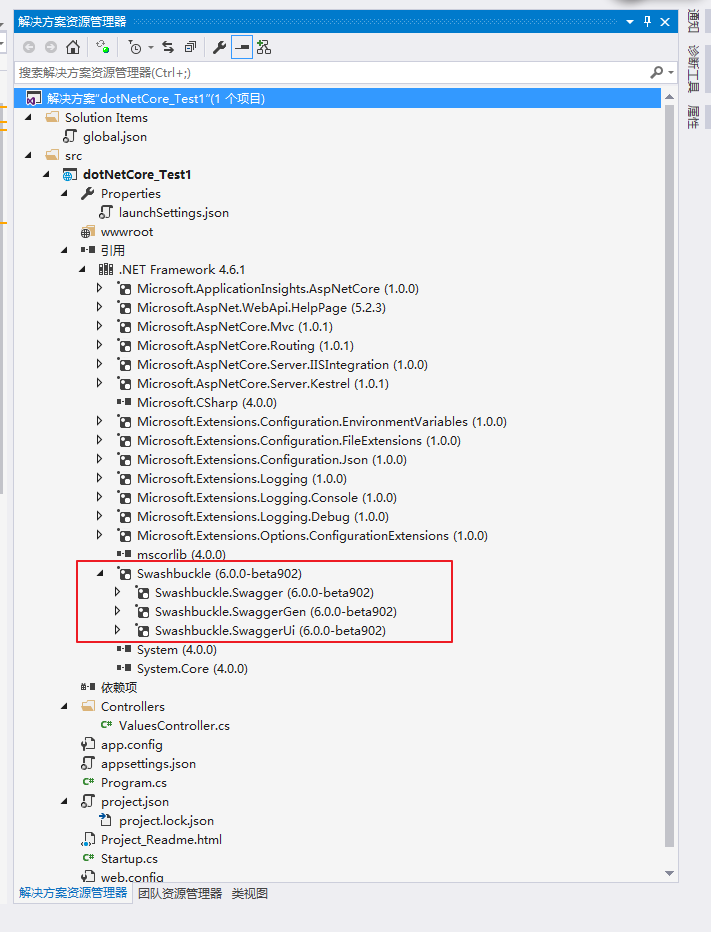
4、安装Swashbuckle完成后台项目的引用发生了变化:
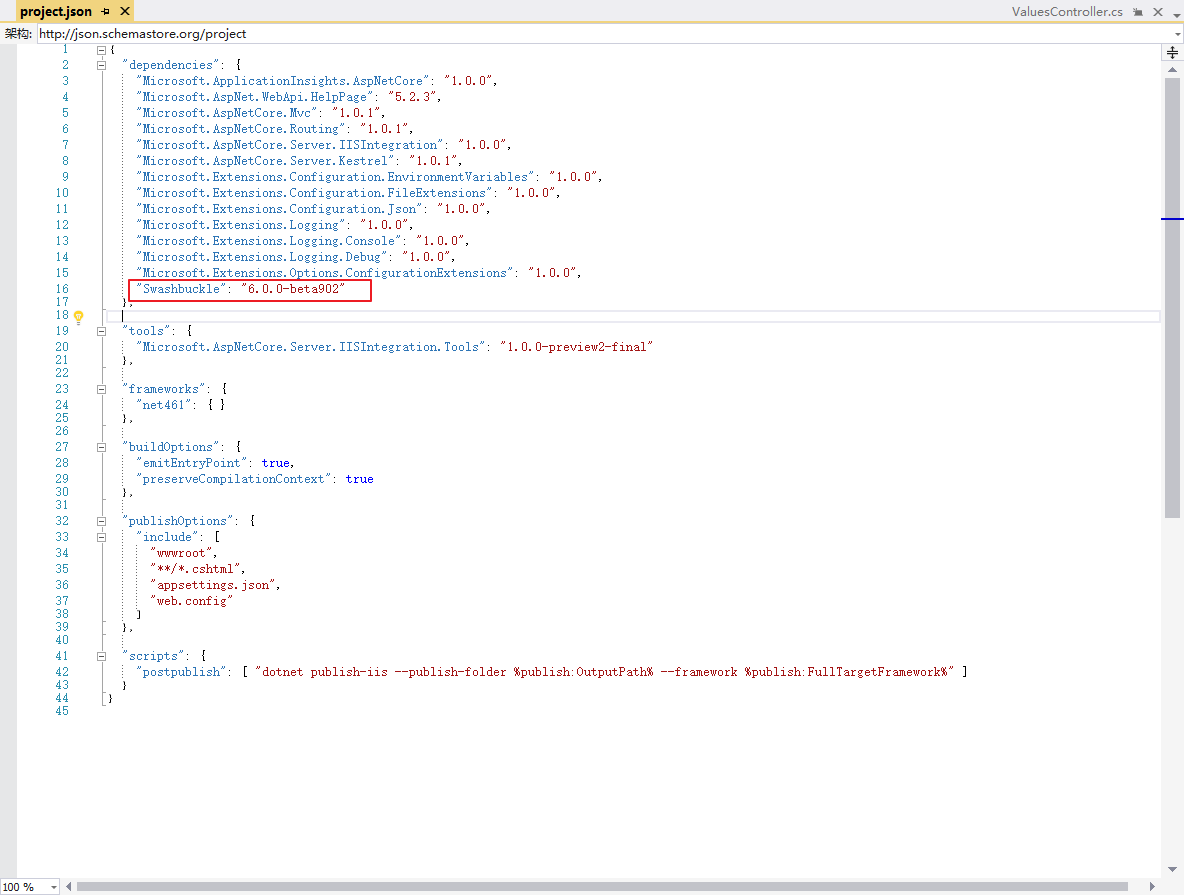
5、在 project.json 中添加多了一项配置 "Swashbuckle": "6.0.0-beta902" :
7、启用 XML 注释, 在 Visual Studio 中右击项目并且选择 Properties 在 Output Settings 区域下面点击 XML Documentation file 。

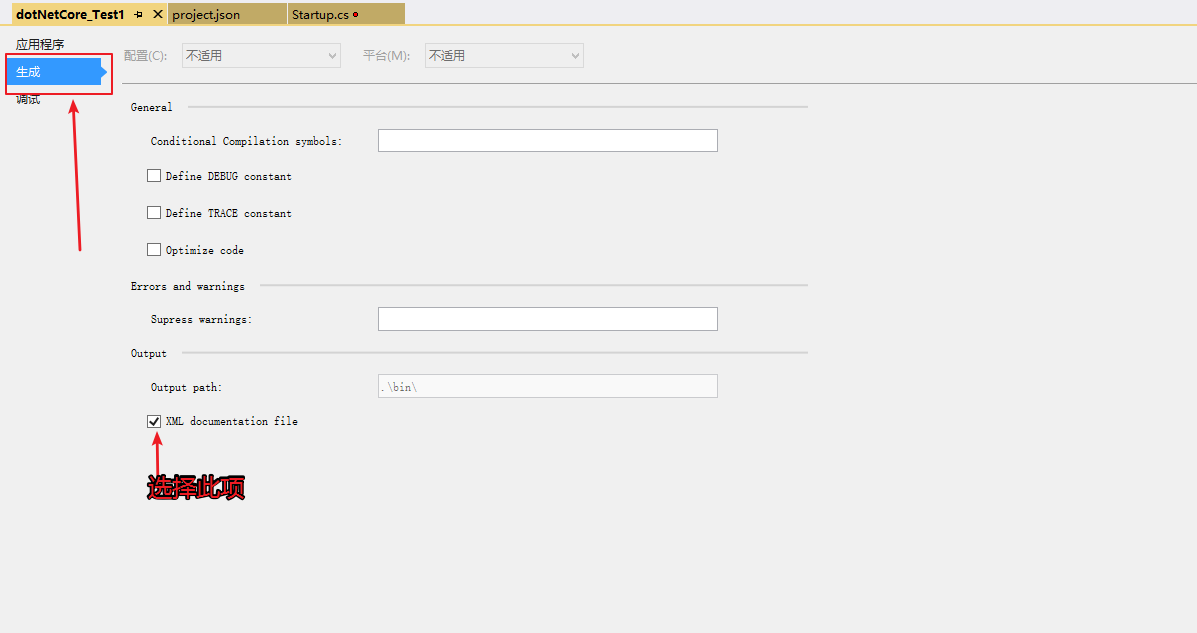
9、在 project.json 中设置 “xmlDoc”: true 来启用 XML 注释。

10、在Startup.cs类的 ConfigureServices 方法中,允许中间件提供和服务生成 JSON 文档以及 SwaggerUI。Configure 方法中把 SwaggerGen 添加到 services 集合。配置 Swagger 使用生成的 XML 文件
 1 using System;
 2 using System.Collections.Generic;
 3 using System.Linq;
 4 using System.Threading.Tasks;
 5 using Microsoft.AspNetCore.Builder;
 6 using Microsoft.AspNetCore.Hosting;
 7 using Microsoft.Extensions.Configuration;
 8 using Microsoft.Extensions.DependencyInjection;
 9 using Microsoft.Extensions.Logging;
10 using Microsoft.Extensions.PlatformAbstractions;
11 using Swashbuckle.Swagger.Model;
12
13 namespace dotNetCore_Test1
14 {
15
16     public class Startup
17     {
18         public Startup(IHostingEnvironment env)
19         {
20             var builder = new ConfigurationBuilder()
21                 .SetBasePath(env.ContentRootPath)
22                 .AddJsonFile("appsettings.json", optional: true, reloadOnChange: true)
23                 .AddJsonFile($"appsettings.{env.EnvironmentName}.json", optional: true);
24
25             if (env.IsEnvironment("Development"))
26             {
27                 // This will push telemetry data through Application Insights pipeline faster, allowing you to view results immediately.
28                 builder.AddApplicationInsightsSettings(developerMode: true);
29             }
30             builder.AddEnvironmentVariables();
31             Configuration = builder.Build();
32         }
33
34         public IConfigurationRoot Configuration { get; }
35
36         // This method gets called by the runtime. Use this method to add services to the container
37         public void ConfigureServices(IServiceCollection services)
38         {
39             // Add framework services.
40             services.AddApplicationInsightsTelemetry(Configuration);
41
42             services.AddMvc();
43
44             //services.AddLogging();
45
46             // 注入的实现ISwaggerProvider使用默认设置
47             services.AddSwaggerGen();
48
49             services.ConfigureSwaggerGen(options =>
50             {
51                 options.SingleApiVersion(new Info
52                 {
53                     Version = "v1",
54                     Title = "测试ASP.NET Core WebAPI生成文档(文档说明)",
55                     Description = "A simple example ASP.NET Core Web API",
56                     TermsOfService = "None",
57                     Contact = new Contact { Name = "linyongjie", Email = "", Url = "https://docs.microsoft.com/zh-cn/aspnet/core/" },
58                     License = new License { Name = "Swagger官网", Url = "http://swagger.io/" }
59                 });
60
61                 var basePath = Microsoft.Extensions.PlatformAbstractions.PlatformServices.Default.Application.ApplicationBasePath; // 获取到应用程序的根路径
62                 options.IncludeXmlComments(basePath + "\\dotNetCore_Test1.xml");  //是需要设置 XML 注释文件的完整路径
63             });
64
65
66         }
67
68         // This method gets called by the runtime. Use this method to configure the HTTP request pipeline
69         public void Configure(IApplicationBuilder app, IHostingEnvironment env, ILoggerFactory loggerFactory)
70         {
71             loggerFactory.AddConsole(Configuration.GetSection("Logging"));
72             loggerFactory.AddDebug();
73
74             app.UseApplicationInsightsRequestTelemetry();
75
76             app.UseApplicationInsightsExceptionTelemetry();
77
78             app.UseMvc();
79
80
81             app.UseSwagger(); //使中间件服务生成Swagger作为JSON端点
82
83             app.UseSwaggerUi();  //使中间件服务swagger-ui assets (HTML、javascript、CSS等等)
84
85         }
86     }
87 }
11、新建一个User(用户)Model用于测试:
 1 using System;
 2 using System.Collections.Generic;
 3 using System.ComponentModel.DataAnnotations;
 4 using System.Linq;
 5 using System.Threading.Tasks;
 6
 7 namespace dotNetCore_Test1.Models
 8 {
 9
10     /// <summary>
11     /// 用户模型
12     /// </summary>
13     public class User
14     {
15
16
17         /// <summary>
18         /// 年龄
19         /// </summary>
20         public int Age { set; get; }
21
22         /// <summary>
23         /// 名称
24         /// </summary>
25         [Required]  //此配置可以约束(Swagger )传进来的参数值 不能为空
26         public string Name { get; set; }
27
28
29         /// <summary>
30         /// 性别
31         /// </summary>
32         public string Sex { get; set; }
33     }
34 }
12、添加了XML注释控制器例子:
 1 using System;
 2 using System.Collections.Generic;
 3 using System.Linq;
 4 using System.Threading.Tasks;
 5 using Microsoft.AspNetCore.Mvc;
 6
 7 namespace dotNetCore_Test1.Controllers
 8 {
 9     /// <summary>
10     /// 测试 Swagger的 XML 注释
11     /// </summary>
12     [Route("api/[controller]")]
13     public class ValuesController : Controller
14     {
15         /// <summary>
16         /// 获得一个数组信息
17         /// </summary>
18         /// <returns></returns>
19         [HttpGet]
20         public IEnumerable<string> Get()
21         {
22             return new string[] { "value1", "value2" };
23         }
24
25         /// <summary>
26         /// 根据id获取信息
27         /// </summary>
28         /// <param name="id">主键唯一标识</param>
29         /// <returns>返回一个值</returns>
30         [HttpGet("{id}")]
31         public string Get(int id)
32         {
33             return "value";
34         }
35
36         /// <summary>
37         /// 添加一个用户
38         /// </summary>
39         /// <remarks>
40         ///
41         ///     POST /User
42         ///     {
43         ///        "Age": "年龄",
44         ///        "Name": "名称",
45         ///        "Sex": "性别
46         ///     }
47         ///
48         /// </remarks>
49         /// <param name="item">用户的json对象</param>
50         /// <returns>返回一个对象</returns>
51         /// <response code="201">返回新创建的项目</response>
52         /// <response code="400">如果item是null</response>
53         [HttpPost]
54         [ProducesResponseType(typeof(dotNetCore_Test1.Models.User), 201)]
55         [ProducesResponseType(typeof(dotNetCore_Test1.Models.User), 400)]
56         [HttpPost]
57         public IActionResult Post([FromBody]dotNetCore_Test1.Models.User item)
58         {
59             if (item == null)
60             {
61                 return BadRequest();
62             }
63             return Ok(item);
64         }
65
66
67
68
69         /// <summary>
70         /// 删除一个对象
71         /// </summary>
72         /// <remarks>
73         /// 这里可以写详细的备注
74         /// </remarks>
75         /// <param name="id">主键id标识</param>
76         [HttpDelete("{id}")]
77         public void Delete(int id)
78         {
79         }
80     }
81 }
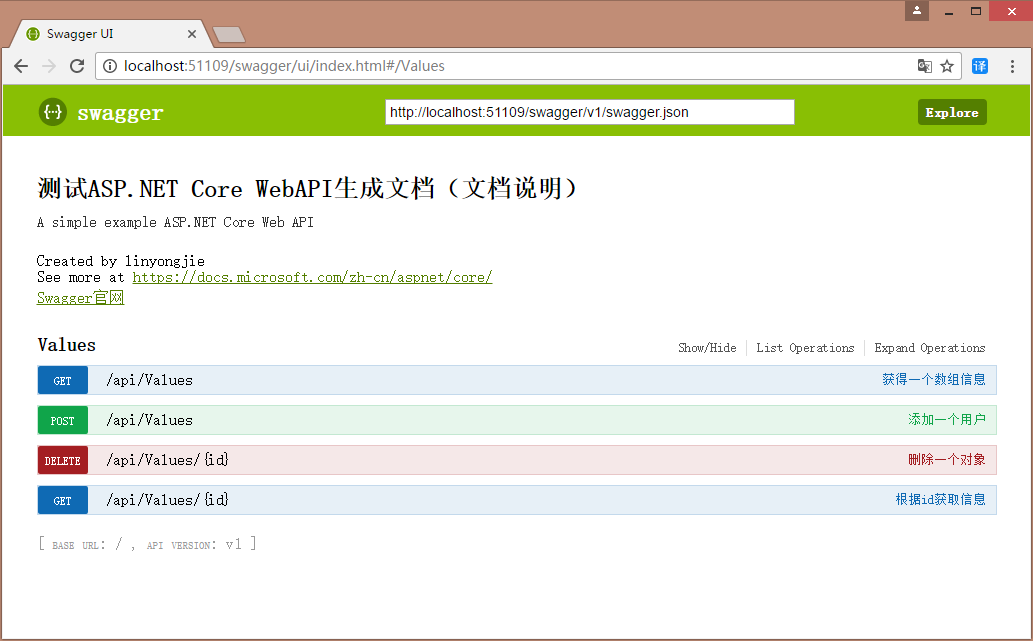
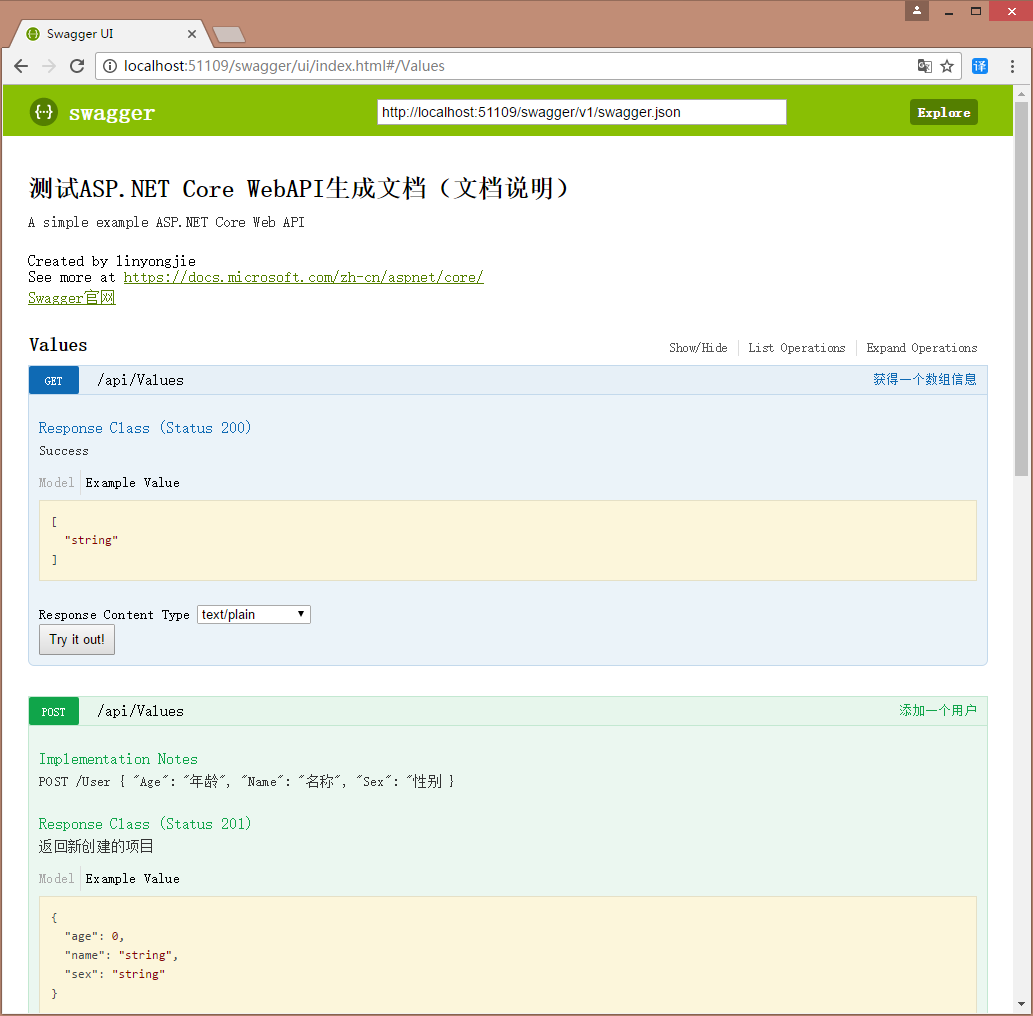
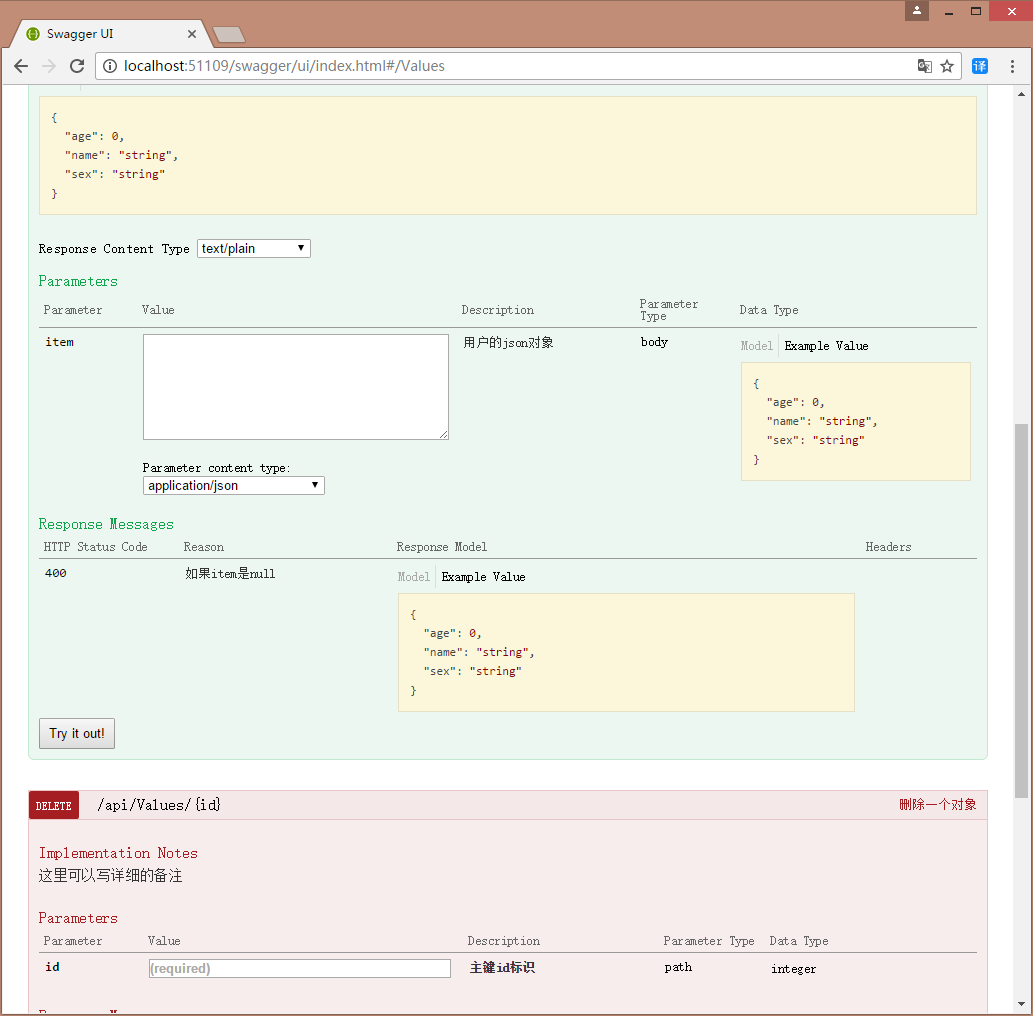
13、通过访问 http://localhost:<random_port>/swagger/ui 查看Swagger 自动生成文档 (<random_port> 表示IIS Express随机分配的端口号,我测试的demo分配的端口号是:51109,所以我这里查看Swagger生成的文档地址是http://localhost:51109/swagger/ui/index.html#/Values)生成的文档如下图:
13.1、
13.2
13.3
13.4

配置 Swagger 使用生成的 XML 文件


