springcloud(7)hystrix服务熔断和dashboard
服务在经过一定负荷之后,如果达到一定上限之后会中断进行报错,而服务调用的方法也会报错等等,一旦整体服务停下,别的客户端再来访问就会无法调用。对此需要进行另外一种服务熔断模式。
不同于现实中的熔断保险丝,服务熔断是在系统服务达到一定错误之后,自动熔断降级,采取备用方法,但是在一定时间后客户端再次调用成功后,一定时间内成功率上去,系统的熔断机制会慢慢的关闭,恢复到正常请求的状态。
本篇接上一章直接改动。
1.主启动类加上新的注解。
@EnableCircuitBreaker
2.service写入新的熔断控制方法
@Service
public class PaymentHystrixService {
  @HystrixCommand(fallbackMethod = "paymentCircuitBreaker_fallback",commandProperties = {
            @HystrixProperty(name = "circuitBreaker.enabled", value = "true"),              //是否开启断路器
            @HystrixProperty(name = "circuitBreaker.requestVolumeThreshold", value = "10"),    //请求数达到后才计算
            @HystrixProperty(name = "circuitBreaker.sleepWindowInMilliseconds", value = "10000"), //休眠时间窗
            @HystrixProperty(name = "circuitBreaker.errorThresholdPercentage", value = "60"),  //错误率达到多少跳闸
    })
    public String paymentCirtuitBreaker(@PathVariable("id")Integer id){
      if(id<0){
          throw new RuntimeException("****id不能为负数");
      }
      String randomNum= IdUtil.simpleUUID();

      return Thread.currentThread().getName()+"\t"+"调用成功,编号"+randomNum;

    }
    public String paymentCircuitBreaker_fallback(@PathVariable("id")Integer id){
        return "id不能为负数,请稍后重试,o(╥﹏╥)o+"+id;
    }
此处hystrixCommand注解即是对熔断的一些限制,一般是在10秒内进行10次有60%的访问错误率就会进行熔断,自动启动备用的方法,默认5秒后有 正确的执行结果就会慢慢恢复正常状态,关闭断路器。
3.dashboard
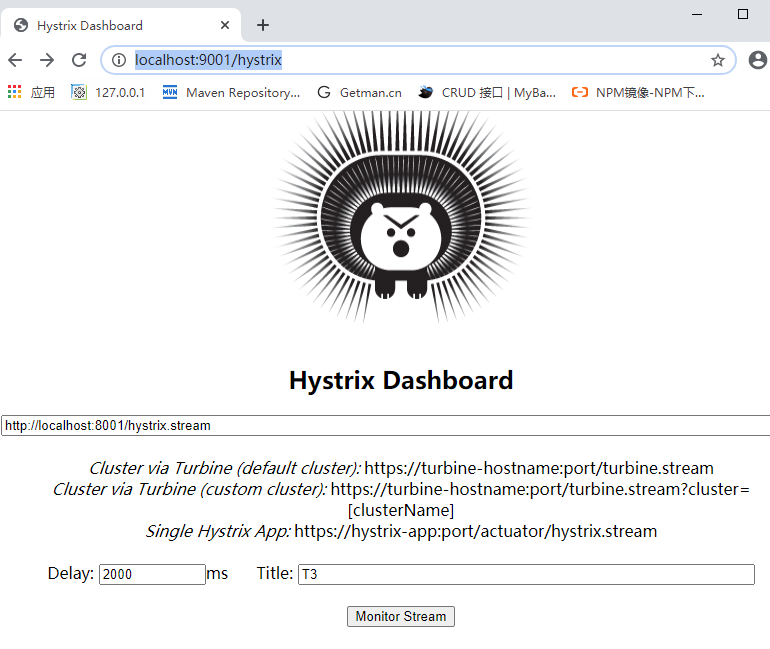
为了能够更加直观的看见服务访问的一些情况,配置下可视化的网页观察熔断。
新建dashboard工程。
pom文件依赖

<dependencies>
        <dependency>
            <groupId>com.bai</groupId>
            <artifactId>cloud-api-common</artifactId>
            <version>${project.version}</version>
        </dependency>
        <dependency>
            <groupId>org.springframework.boot</groupId>
            <artifactId>spring-boot-starter-web</artifactId>
        </dependency>
        <dependency>
            <groupId>org.springframework.cloud</groupId>
            <artifactId>spring-cloud-starter-netflix-hystrix-dashboard</artifactId>
        </dependency>
        <!--监控-->
        <dependency>
            <groupId>org.springframework.boot</groupId>
            <artifactId>spring-boot-starter-actuator</artifactId>
        </dependency>
        <dependency>
            <groupId>org.springframework.cloud</groupId>
            <artifactId>spring-cloud-starter-netflix-hystrix</artifactId>
        </dependency>
        <!--eureka client-->
        <dependency>
            <groupId>org.springframework.cloud</groupId>
            <artifactId>spring-cloud-starter-netflix-eureka-client</artifactId>
        </dependency>
        <!--热部署-->
        <dependency>
            <groupId>org.springframework.boot</groupId>
            <artifactId>spring-boot-devtools</artifactId>
            <scope>runtime</scope>
            <optional>true</optional>
        </dependency>
        <dependency>
            <groupId>org.projectlombok</groupId>
            <artifactId>lombok</artifactId>
            <optional>true</optional>
        </dependency>
        <dependency>
            <groupId>org.springframework.boot</groupId>
            <artifactId>spring-boot-starter-test</artifactId>
            <scope>test</scope>
        </dependency>
    </dependencies>
主启动类
@SpringBootApplication
@EnableHystrixDashboard
public class HystrixDashboard9001 {
    public static void main(String[] args) {
        SpringApplication.run(HystrixDashboard9001.class,args);
    }
}
yml配置下端口即可。
访问地址
http://localhost:9001/hystrix/

对于被监控的服务需要额外的配置。新版本会有报错需要在启动类加上如下配置。
/**
         * 此配置是为了服务监控而配置,与服务容错本身无关,springcloud升级后的坑
         * ServletRegistrationBean因为SpringBoot的默认路径不是 “/hystrix.stream"
         * 只要在自己的项目里配置上下的servlet就可以了
         */
        @Bean
        public ServletRegistrationBean getServlet() {
            HystrixMetricsStreamServlet streamServlet = new HystrixMetricsStreamServlet() ;
            ServletRegistrationBean registrationBean = new ServletRegistrationBean(streamServlet);
            registrationBean.setLoadOnStartup(1);
            registrationBean.addUrlMappings("/hystrix.stream");
            registrationBean.setName("HystrixMetricsStreamServlet");
            return  registrationBean;
        }
本篇所有代码均在GitHub:


