Lilypond+TexLive(LuaLatex+lyluatex)+VS Code实现谱文混排
没想到发文章反而更难被预览了,那就复制一份到随笔里好了。
多次尝试之下,终于实现了现阶段谱文混排的最理想方式:
1. 综合Latex的排版(还有广泛适用人群)的优势以及Lilypond的美观优势;
2. 在同一个编辑器里完成输入、与编译与浏览成品;
3. 谱面代码可以像数学公式那样有行间与多行显示;
4. 不需要设置环境变量,不需要在命令行里操作。
接下来就演示Lilypond、TexLive和VS Code三剑客合璧的全过程吧!
-----------------------------------
1. Lilypond安装
lilypond提供乐谱方面的排版
2 TexLive
TexLive提供文章排版
2.1 TexLive 安装
TexLive清华大学镜像下载见 Index of /CTAN/systems/texlive/Images/ | 清华大学开源软件镜像站 | Tsinghua Open Source Mirror
iso文件下载后直接双击打开,按下图红色框位置双击即可安装

2.2 lyluatex安装
lyluatex是在Latex里编译lilypond代码的关键,所以必须安装。另外,它只能在LuaLatex下编译,这一点后面会显示出来。
打开 Tex Live Manager ,如下图先选择全部package,然后再搜索lyluatex,如果显示已经安装,则不需要再专门安装lyluatex

3 VS code
VS Code 整合 Latex 和 Lilypond 的编辑环境
3.1 VS code 安装
先下载:下载 Visual Studio Tools - 免费安装 Windows、Mac、Linux (microsoft.com)
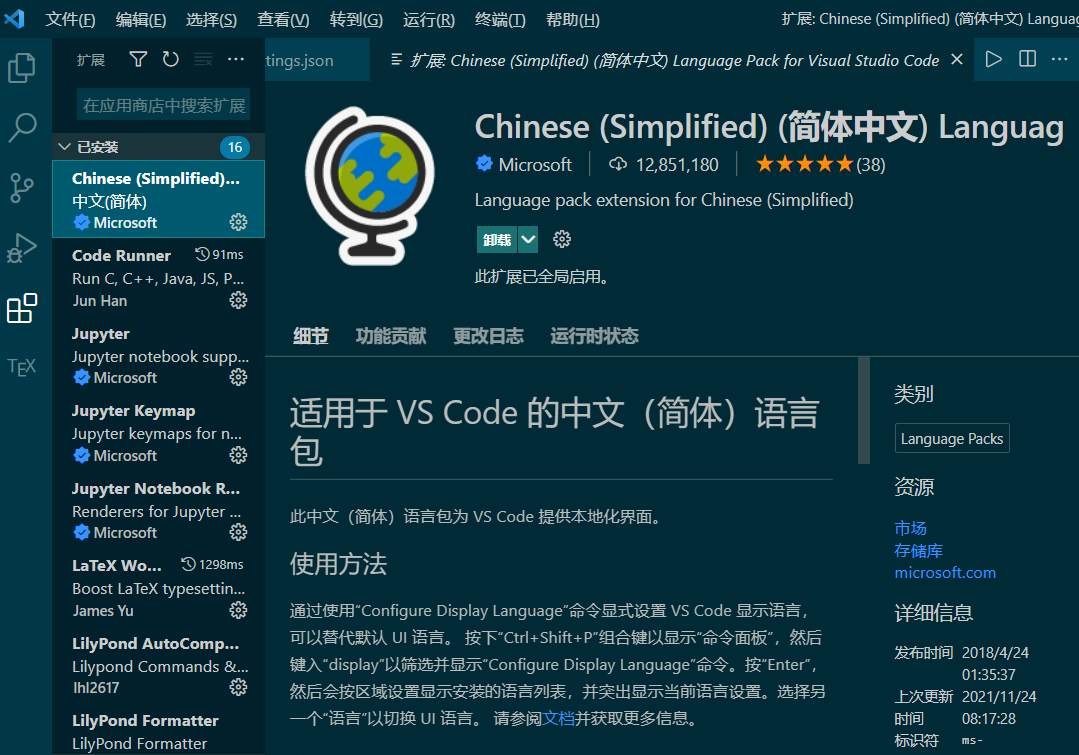
然后下载中文语言支持包,点击方块处,搜Chinese然后下载,如下图
3.2 插件Latex Workshop
Latex Workshop用于支持Latex的编译和运行在vs code上运行
3.2.1 安装
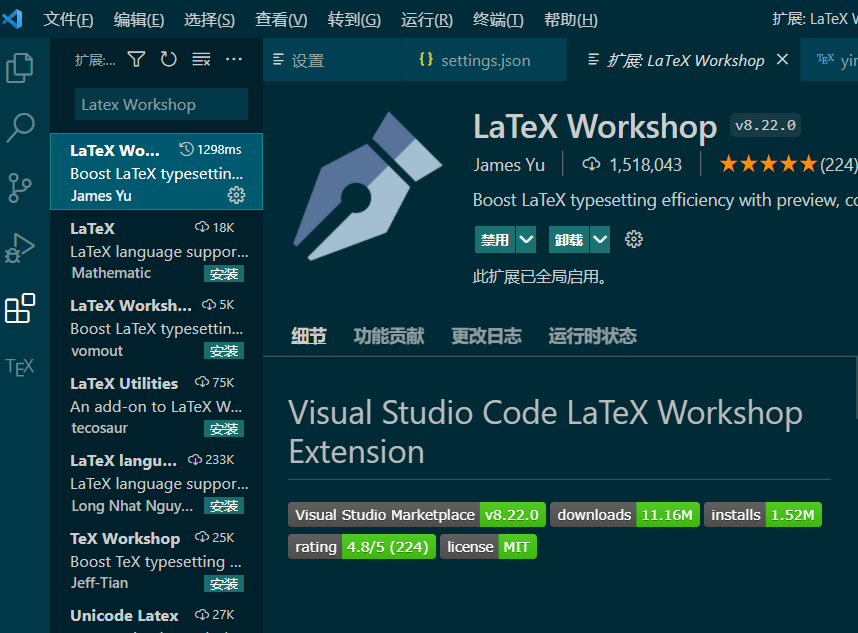
搜Latex,然后找到 Latex Workshop 下载
3.2.2 配置
按 Ctrl + Shift + P,调出命令界面,进入首选项

在大括号中复制下面代码(大括号本身不要复制进去),之后保存设置
{
   // Latex Workshop设置,从这里开始复制

    "latex-workshop.latex.autoBuild.run": "never",
    "latex-workshop.showContextMenu": true,
    "latex-workshop.intellisense.package.enabled": true,
    "latex-workshop.message.error.show": false,
    "latex-workshop.message.warning.show": false,
    "latex-workshop.latex.tools": [
        {
            "name": "lualatex",
            "command": "lualatex",
            "args": [
                "-synctex=1",
                "-interaction=nonstopmode",
                "-file-line-error",
                "-shell-escape",    //这个命令行在网上的Latex Workshop设置里一般没有,所以直接recipe会报错
                "%DOCFILE%"
            ]
        }
    ],
       "latex-workshop.latex.recipes": [
        {
            "name": "LuaLaTeX",
            "tools": [
                "lualatex"
            ]
        },
    ],
  "latex-workshop.latex.clean.fileTypes": [
        "*.aux",
        "*.bbl",
        "*.blg",
        "*.idx",
        "*.ind",
        "*.lof",
        "*.lot",
        "*.out",
        "*.toc",
        "*.acn",
        "*.acr",
        "*.alg",
        "*.glg",
        "*.glo",
        "*.gls",
        "*.ist",
        "*.fls",
        "*.log",
        "*.fdb_latexmk"
    ],
        "latex-workshop.latex.autoClean.run": "onFailed",
        "latex-workshop.latex.recipe.default": "lastUsed",
        "latex-workshop.view.pdf.internal.synctex.keybinding": "double-click",
        "latex-workshop.view.pdf.external.viewer.command": "C:\\Program Files (x86)\\Adobe\\Acrobat DC\\Acrobat\\Acrobat.exe",
        //双引号里是pdf浏览器的执行文件,可以根据实际情况更换
        "latex-workshop.view.pdf.viewer": "tab"

  //复制到这里结束
}
4 编译文件
先在vs code里新建*.tex文件,编写代码:
\documentclass{article}

%% 开头的设置可以确保中文随便打,并且能支持用LuaLatex编译。lyluatex只能通过LuaLatex来编译
\usepackage[UTF8]{ctex}

%% 使用lyluatex宏包,用以编译lilypond语句
\usepackage{lyluatex}

% geometry宏包可以用于灵活调整纸张大小
\usepackage{geometry}
\geometry{a4paper, scale=0.65}

%% 因为怕太密集,调整一下行距
\linespread{2.0}


%% 正文
\begin{document}
\title{使用lyluatex实现谱文混排}
\author{lilypond 手残粉}

\maketitle


搭建好lilypond和latex的设置之后,就可以实现各种方式的打谱。例如:

只需要输入 \textbackslash lilypond\{c' d' e'\},就能实现行中打谱 \lilypond{c' d' e'} 正如你所看到的那样。

大括号里的语法和lilypond里的语法一致。例如,输入\textbackslash lilypond\{  \textbackslash clef bass  \textbackslash omit Staff.TimeSignature
c' d' e'  \} 就可以看到变成\underline{低音谱号}以及\underline{去掉拍号}后\lilypond{\clef bass \omit Staff.TimeSignature c' d' e'}的打谱效果。

也可以使用\textbackslash begin\{lilypond\} 和 \textbackslash end\{lilypond\} 直接进入lilypond环境,像编辑数学公式一样编辑乐谱。

%% 空了一行
\vspace*{0.5\baselineskip}


%% lilypond 环境

\begin{lilypond}
    music = \relative {
        c d e
    }
    \score {
        \new ChoirStaff \with {
            instrumentName = "2 Fl."
        } <<
        \new Staff \transpose c c' \music
        \new Staff {
                \clef bass
                \music
            }
        >>
    }
\end{lilypond}

这样,既可以利用Latex的编排优势,又可以利用lilypond的打谱优势,lilypond笨拙的文字排版终于可以说拜拜了。

\end{document}
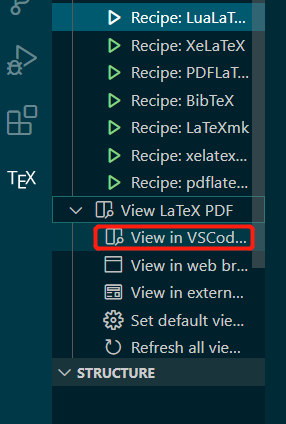
因为是tex文件,建立后vs code的左侧会出现tex字样,点击它,然后在COMMANDS一栏里点击Recipe: LuaLaTex
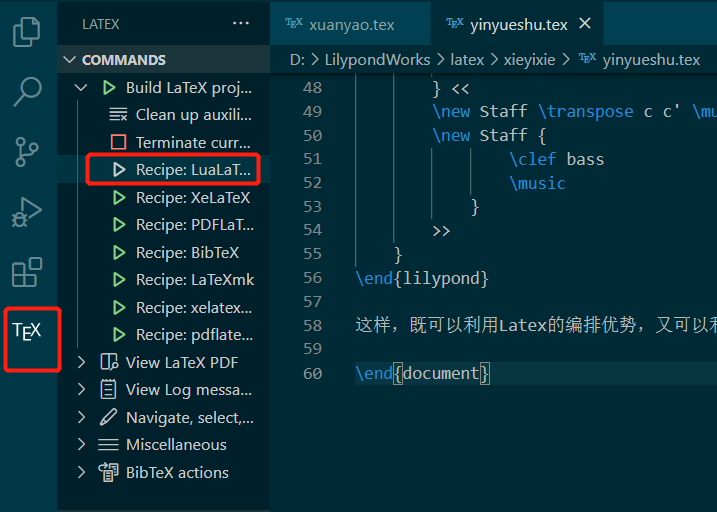
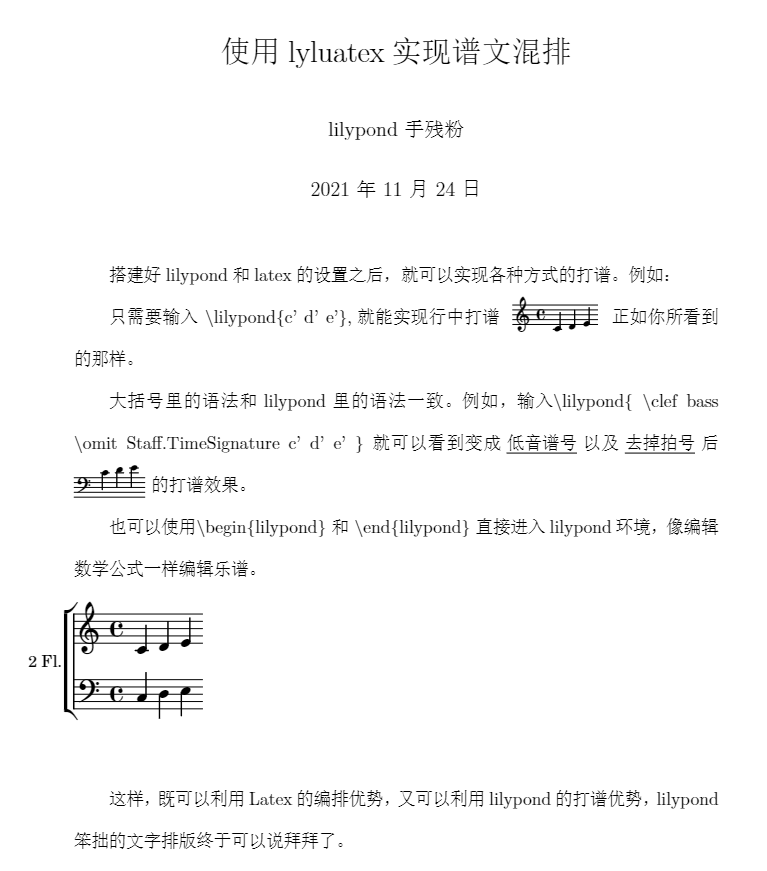
最后选择View in VSCode Tab,就可以看到成果了
