Spring实战 六 渲染Web视图
概述
之前也使用InternalResourceViewResolver进行渲染Web视图,但是一直没有仔细研究。
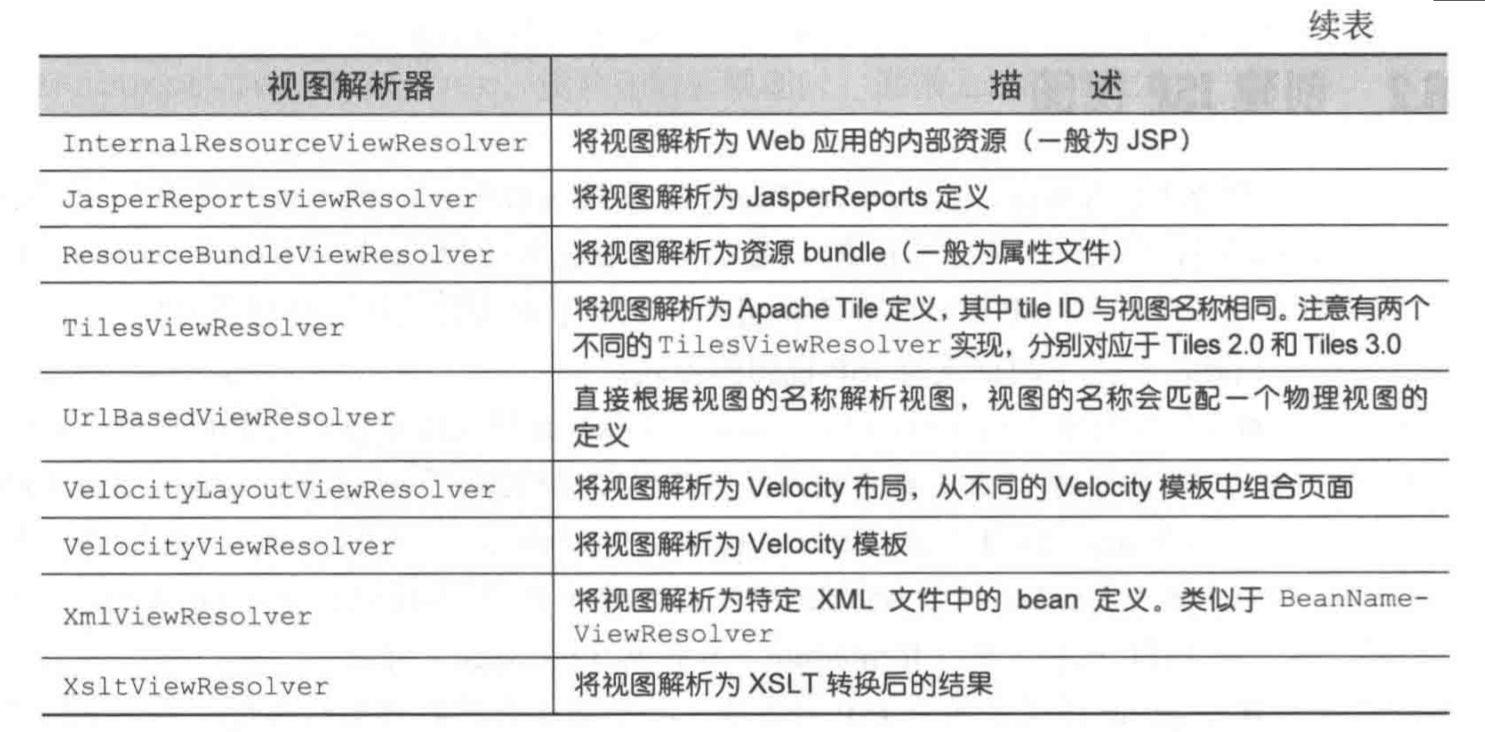
Spring提供多种视图解析器,用于解析不同类型的视图。
Spring的JSP库
标签库是JSP技术中比较强大的技术。例如c:out
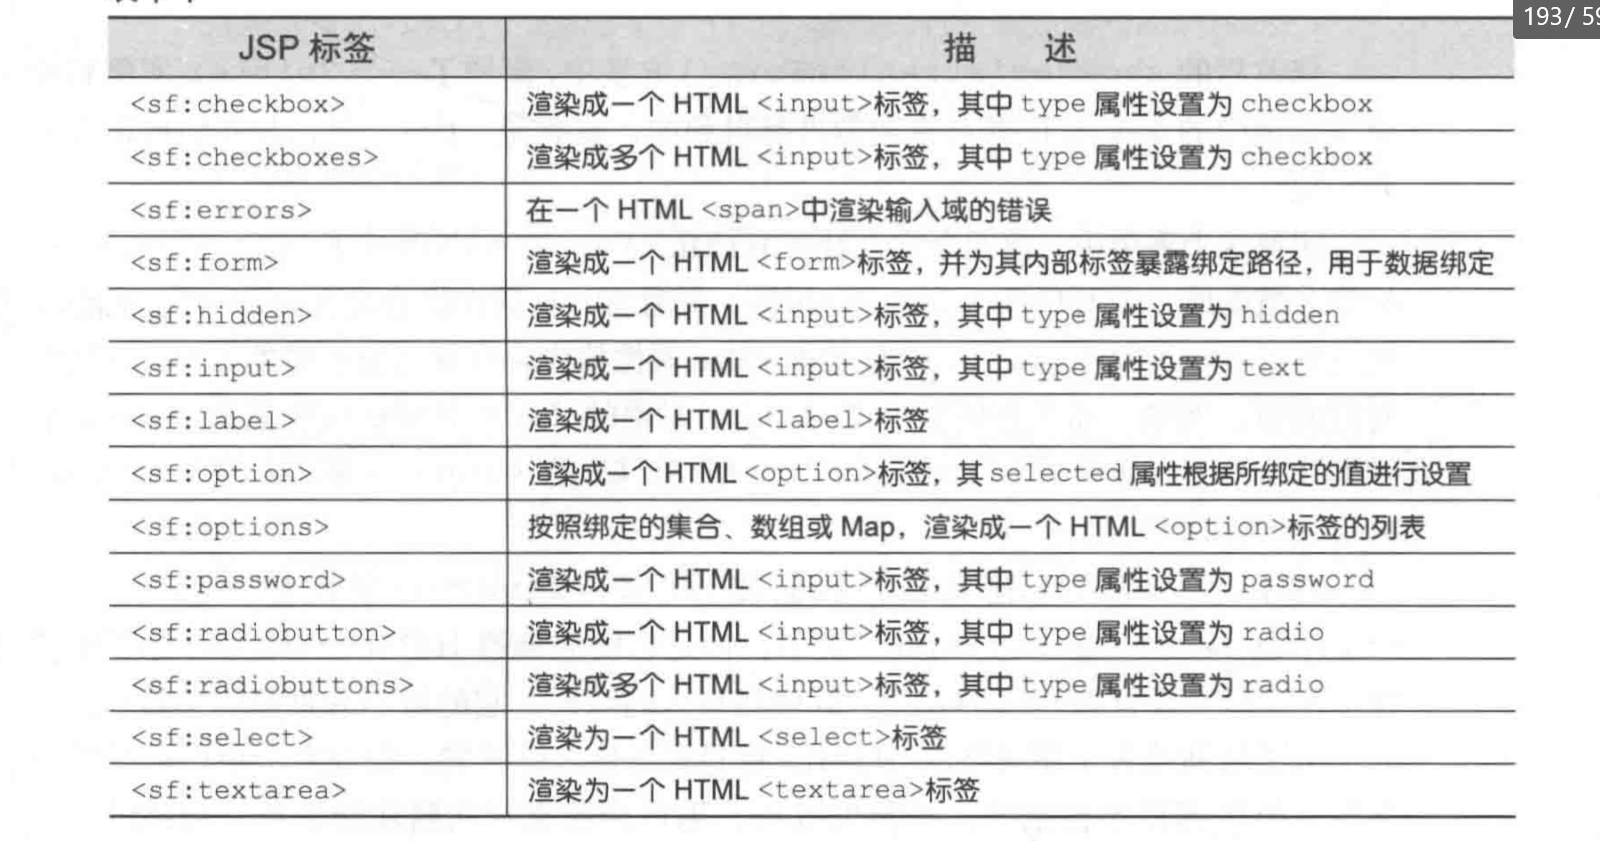
Spring提供了一套JSP标签库用于表单处理,使用如下命令进行声明
<%@ taglib uri="http://www.springframework.org/tags/form" prefix="sf"%>
sf是我们指定的前缀,很多人也用form。
现在我们把之前的注册jsp页面使用Spring标签库重写。
我们只需要把原来的表单替换成使用sf标签库中的对应标签即可。这里的modelAttribute属性代表模型中的一个属性值,这个值我们稍后会提供。而下面的各个标签中的path属性则是modelAttribute中指定的对象中的属性。一会儿,我们会看到从注册参数不合法的页面跳转过来之后,用户上次输入的信息还能够得以保存。
注意,这个modelAttribute属性在之前的Spring中可以使用commandName属性,它俩没什么区别,但是后面commandName属性被弃用了。
<sf:form method="POST" modelAttribute="spitter">
    First Name: <sf:input path="firstName"/>
        <sf:errors path="firstName"/><br>
    Last Name: <sf:input path="lastName"/>
        <sf:errors path="lastName"/> <br>
    Username: <sf:input path="userName"/>
        <sf:errors path="userName"/> <br>
    Password: <sf:password path="password"/>
        <sf:errors path="password"/> <br>
    <button type="submit">注册成为Spitter</button>
</sf:form>
sf:errors是错误控件,当后端JSR验证失败,对应失败字段的sf:errors会以span的形式显示到页面中来,并且定义好的错误消息会在span中显示。

下面我们到Controller中给这个页面绑定一个modelAttribute,通过向model中设置一个id为spitter的空对象,这个id要和modelAttribute中的一致。
@GetMapping("/register")
public String register(Model model) {
    model.addAttribute("spitter", new Spitter());
    return "register";
}
对于此示例,缺省状态下的默认id完全可以满足需求,但是我真的觉得那种完全依赖规约的、看起来很简洁的代码有点不明不白的,不想那样写。
这样,当用户因校验错误被重定向回这个页面时,原先输入的内容还会存在于模型中。而当用户正常请求这个页面时,则会返回一个空的Spitter对象。
上面我们使用sf:errors标签来将对应的错误信息输出,还有一种惯常的处理方式是将所有错误放到一起,Spring当然也提供了这样的支持。
只需要在sf:form中的任意位置添加这行代码,并且指定path为*就行了。这也说明了为什么这里用的是path而不是property,明明对于属性匹配来说property更合适,但是这里匹配的不仅是单一的属性。
<sf:errors path="*" element="div"/>
Thymeleaf视图解析器
Jsp是一项老技术了,有点跟不上这个时代对于可读性的需求。现在写代码已经不是写出来,能干活就行那个年代了。
Thymeleaf说实话也有点老了,现在都前后端分离,但是作为一个模板引擎的角度来说,它还是不错的。
Jsp有如下缺点
- Jsp定义了自己的文件类型,并且标签库的出现更让这个东西变成了四不像,说它是java代码,它又不是,说它是Html又不是,处在前端和后端之间一个尴尬的境地。而且编辑器支持普遍不是太好。
- Jsp与Servlet规范紧紧绑定,无法应用到其他规范的后端开发步骤中。
- 使用第三方标签,如果标签出错,很容易被渲染到界面上,Thymeleaf使用纯HTML,使用HTML元素属性将数据渲染到文档中,这样的好处是浏览器对不认识的属性不会解析,用户看不到出错的内容,不会对用户造成困扰。
配置Thymeleaf视图解析器
引入依赖
<dependency>
    <groupId>org.thymeleaf</groupId>
    <artifactId>thymeleaf-spring5</artifactId>
    <version>3.0.9.RELEASE</version>
</dependency>
引入依赖后还要配置Bean,需要配置三个,一个是模板解析器,一个是模板引擎,一个是新的Thymeleaf视图解析器。
@Bean
public SpringResourceTemplateResolver templateResolver() {
    SpringResourceTemplateResolver resolver = new SpringResourceTemplateResolver();
    resolver.setPrefix("/WEB-INF/templates/");
    resolver.setSuffix(".html");
    resolver.setCacheable(false);
    resolver.setCharacterEncoding("UTF-8");
    resolver.setTemplateMode("HTML5");
    resolver.setOrder(1);
    return resolver;
}
@Bean
public SpringTemplateEngine templateEngine(SpringResourceTemplateResolver resolver) {
    SpringTemplateEngine templateEngine = new SpringTemplateEngine();
    templateEngine.setTemplateResolver(resolver);
    return templateEngine;
}
@Bean
public ViewResolver thymeleafViewResolver(SpringTemplateEngine engine) {
    ThymeleafViewResolver viewResolver = new ThymeleafViewResolver();
    viewResolver.setTemplateEngine(engine);
    viewResolver.setCharacterEncoding("UTF-8");
    return viewResolver;
}
用XML方式就不写了。注意在Java配置类中去掉原先的视图解析器。
下面我们将用Thymeleaf的方式重写整个项目的页面。先是首页
<!doctype html>
<html lang="en">
<head>
    <meta charset="UTF-8">
    <meta name="viewport"
          content="width=device-width, user-scalable=no, initial-scale=1.0, maximum-scale=1.0, minimum-scale=1.0">
    <meta http-equiv="X-UA-Compatible" content="ie=edge">
    <title>Document</title>
</head>
<body>
    <h1>Welcome to Spittr</h1>

    <a th:href="@{/spittles}">Spittles</a> |
    <a th:href="@{/spitter/register}">Register</a>
</body>
</html>
除了使用了th:href替换了href,其余的和html没啥差别,还有@{/spittles}会被自动加上上下文路径解析成/项目上下文/spittles。
这个th:href会被渲染成href属性。

表单绑定
我们最复杂的页面莫过于注册页面,因为其中有一些表单。
参考下面的代码
<label th:class="${#fields.hasErrors('firstName')} ? 'error'">First Name</label>
和HTML差不多,它的作用就是检测firstName属性有没有错误,如果有就添加一个error类,这在Jsp中需要用自定义标签的自定义属性cssClass来指定,我没有记录,因为我觉得太丑了。
而input也差不多
<input type="text" th:field="*{firstName}" th:class="${#fields.hasErrors('firstName')} ? 'error'"/>
这里没有使用类似的th:value进行绑定,而是使用了一个根本不是html属性的th:field来绑定,原因是th:field会渲染成value和name两个原生html的属性。
下面是注册界面
<!doctype html>
<html lang="en">
<head>
<meta charset="UTF-8">
<meta name="viewport"
content="width=device-width, user-scalable=no, initial-scale=1.0, maximum-scale=1.0, minimum-scale=1.0">
<meta http-equiv="X-UA-Compatible" content="ie=edge">
<title>Document</title>
<style>
.error {
color: red;
}
</style>
</head>
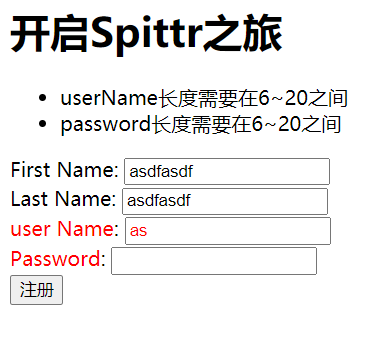
<body>
<h1>开启Spittr之旅</h1>
<form method="POST" th:object="${spitter}">
<div class="errors" th:if="${#fields.hasErrors('*')}">
<ul>
<li th:each="err : ${#fields.errors('*')}"
th:text="${err}">Input is incorrect</li>
</ul>
</div>
<label th:class="${#fields.hasErrors('firstName')} ? 'error'">First Name</label>:
<input type="text" th:field="*{firstName}"
th:class="${#fields.hasErrors('firstName')} ? 'error'"> <br>
<label th:class="${#fields.hasErrors('lastName')} ? 'error'">Last Name</label>:
<input type="text" th:field="*{lastName}"
th:class="${#fields.hasErrors('lastName')} ? 'error'"> <br>
<label th:class="${#fields.hasErrors('userName')} ? 'error'">user Name</label>:
<input type="text" th:field="*{userName}"
th:class="${#fields.hasErrors('userName')} ? 'error'"> <br>
<label th:class="${#fields.hasErrors('password')} ? 'error'">Password</label>:
<input type="password" th:field="*{password}"
th:class="${#fields.hasErrors('password')} ? 'error'"> <br>
<button type="submit">注册</button>
</form>
</body>
</html>