openresty配置https自签名证书
前提:服务器已安装上openresty和openssl
1、在/usr/local/openresty/nginx/conf/目录下创建一个cert文件夹用来存放证书和服务器私钥
cd /usr/local/openresty/nginx/conf
mkdir cert
cd cert/
2、进入cert目录下, 创建服务器私钥,命令会提醒输入一个密码
生成4096字节的服务器私钥:openssl genrsa -des3 -out server.key 4096
openssl genrsa -des3 -out server.key 4096
输入密码:123456
确认密码:123456

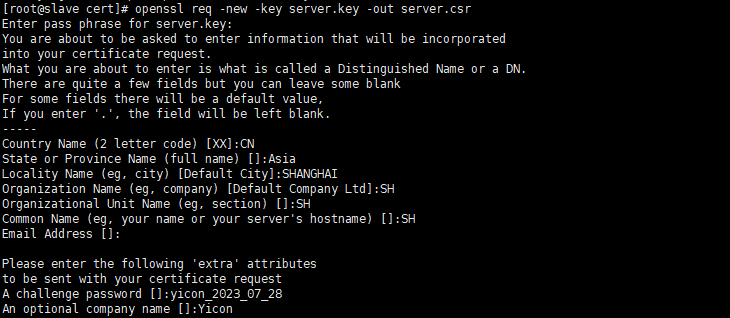
3、创建签名请求的证书(CSR)
openssl req -new -key server.key -out server.csr
输入密码:123456
国家:CN
哪个州:Asia
城市:SHANGHAI
公司:SH
部门:SH
服务器名称:SH
邮箱:可不写
密码:yicon_2023_07_28
公司名称:Yicon

4、在加载SSL支持的Nginx服务器上,使用上述私钥时除去必须的口令(注意,所谓除去,其实就是将必须的私钥密码写入到了私钥文件里面了,更新了原来的私钥文件)
cp server.key server.key.org
openssl rsa -in server.key.org -out server.key
输入密码:123456

5、通过openssl的x509指令生成证书文件
openssl x509 -req -days 3650 -in server.csr -signkey server.key -out server.crt
回车自动生产,如图所示:

6、查看
ll

7、修改nginx配置文件
vim /usr/local/openresty/nginx/conf/nginx.conf
找到最下面的https配置
server {
listen 443 ssl;
server_name localhost;
ssl_certificate /usr/local/openresty/nginx/conf/cert/server.crt;
ssl_certificate_key /usr/local/openresty/nginx/conf/cert/server.key;
ssl_session_cache shared:SSL:5m;
ssl_session_timeout 5m;
ssl_protocols TLSv1 TLSv1.1 TLSv1.2;
ssl_ciphers ECDHE-RSA-AES128-GCM-SHA256:HIGH:!aNULL:!MD5:!RC4:!DHE;
ssl_prefer_server_ciphers on;
}

然后再修改上面的http配置
注意这里没有使用80端口,因为80端口已经被占用了
server {
listen 82;
server_name 192.168.1.56;
rewrite ^/(.*)$ https://192.168.1.56:443/$1 permanent;
这个配置的意思访问http:192.168.1.56:82端口自动跳转到http://192.168.1.56
注意这个}不用写,因为已经有对应的了

如果还有其他的http服务需要访问的,那么也得按上面的https配置
以下是可选操作
这里是因为觉得这个nginx.conf太乱了,所以加了去匹配/usr/local/openresty/nginx/conf/conf.d这个路径下所有的.conf文件

在http下添加以下配置
include /usr/local/openresty/nginx/conf/conf.d/*.conf;
然后在/usr/local/openresty/nginx/conf/路径下创建conf.d文件夹
mkdir conf.d
cd conf.d
去编辑.conf配置文件
vim jira.conf
#jira配置文件
server {
listen 443 ssl;
server_name 192.168.1.56;
ssl_certificate /usr/local/openresty/nginx/conf/cert/server.crt;
ssl_certificate_key /usr/local/openresty/nginx/conf/cert/server.key;
#以下5行可加可不加 为优化选项
ssl_session_cache shared:SSL:5m;
ssl_session_timeout 5m;
ssl_protocols TLSv1 TLSv1.1 TLSv1.2;
ssl_ciphers ECDHE-RSA-AES128-GCM-SHA256:HIGH:!aNULL:!MD5:!RC4:!DHE;
ssl_prefer_server_ciphers on;
location / {
proxy_pass http://192.168.1.56:2800;
proxy_set_header Host $host;
proxy_set_header X-Real-IP $remote_addr;
proxy_set_header X-Forwarded-For $proxy_add_x_forwarded_for;
}
}
(仅供参考)
编辑完成后
重启openresty服务
systemctl restart openresty
访问页面,发现成功


以下为扩展
因有的项目端口为自定义的 例如:88,2881,738
这时候,该怎么配置,也可以达到https://localhost:自定义端口
访问到呢?其实很简单只需要在
sever 下的listen里 端口号后面 添加个ssl 即可
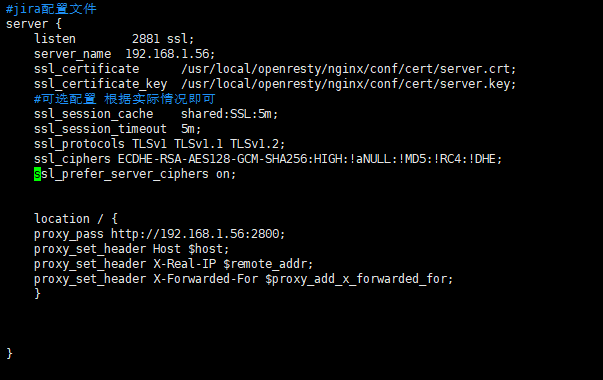
例如:该项目为2881端口并且想要实现https访问
那么配置应该为:
server {
listen 2881 ssl;
server_name 192.168.1.56;
ssl_certificate /usr/local/openresty/nginx/conf/cert/server.crt;
ssl_certificate_key /usr/local/openresty/nginx/conf/cert/server.key;
#可选配置 根据实际情况即可
ssl_session_cache shared:SSL:5m;
ssl_session_timeout 5m;
ssl_protocols TLSv1 TLSv1.1 TLSv1.2;
ssl_ciphers ECDHE-RSA-AES128-GCM-SHA256:HIGH:!aNULL:!MD5:!RC4:!DHE;
ssl_prefer_server_ciphers on;
location / {
proxy_pass http://192.168.1.56:2800;
proxy_set_header Host $host;
proxy_set_header X-Real-IP $remote_addr;
proxy_set_header X-Forwarded-For $proxy_add_x_forwarded_for;
}
}
如图所示

然后重启openresty服务
systemctl restart openresty
访问https://localhost:2881

成功!!!


