vue的学习-项目(七)
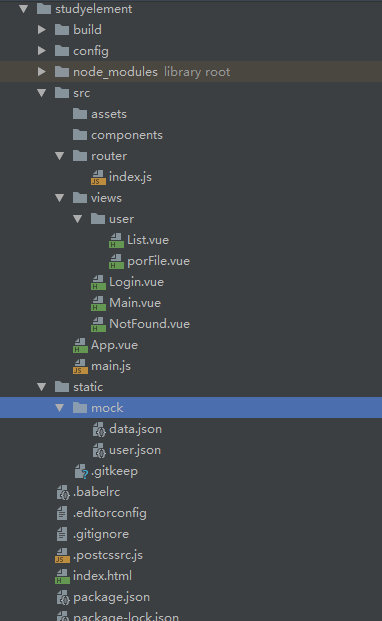
项目结构:
这里使用的是elementUI的组件 https://element.eleme.cn/#/zh-CN/component/installation
如果没有创建项目可学习 vue的学习-创建项目(三)
main.js 文件
import Vue from 'vue'
/*需要加SASS*/
import 'element-ui/lib/theme-chalk/index.css';
import App from './App'
import router from './router'
import ElementUI from 'element-ui';
import axios from 'axios'
import VueAxios from 'vue-axios'

Vue.use(VueAxios, axios);


Vue.use(ElementUI);
Vue.use(router);

new Vue({
  el: '#app',
  router,
  /*给谁渲染*/
  render: h => h(App)
});
创建 index.js 文件 用于 存放 路由的地方
import Vue from 'vue'

import VueRouter from 'vue-router'
import Main from '../views/Main'
import Login from '../views/Login'
import NotFound from '../views/NotFound'
import UserList from '../views/user/List'
import PorFile from '../views/user/porFile'

Vue.use(VueRouter);

export default new VueRouter({
  mode: 'history',
  routes: [
    {
      path: '/login',
      name: 'login',
      component: Login
    },
    {
      path: '/main/:username',
      name: 'main',
      props: true,
      children:[
        {
          path: '/user/list',
          name: 'userList',
          component: UserList
        },
        {
          path: '/user/proFile/:id',
          name: 'userProFile',
          component: PorFile
        }
      ],
      component: Main
    },
    {
      path: '*',
      component: NotFound
    },
    {
      path: '/goName',
      component: Main
    },
    {
      path: '/',
      component: Login
    }
  ]
});
创建 登录组件 Login.vue 用于用户的登录
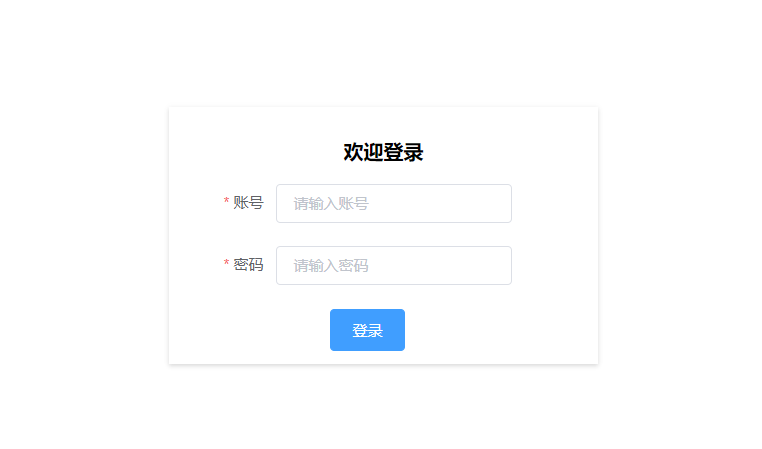
<template>
  <div id="id">
    <div id="id1">
      <el-form ref="elForm" :model="formData" :rules="rules" size="medium" label-width="100px">
        <h3 style="text-align: center">欢迎登录</h3>
        <el-form-item label="账号" prop="username">
          <el-input v-model="formData.username"  placeholder="请输入账号" clearable :style="{width: '220px'}"></el-input>
        </el-form-item>
        <el-form-item label="密码" prop="password">
          <el-input v-model="formData.password" placeholder="请输入密码" clearable show-password
                    :style="{width: '220px'}"></el-input>
        </el-form-item>
        <el-form-item size="large">
          <span id="sub"><el-button type="primary" @click="submitForm">登录</el-button></span>
        </el-form-item>
      </el-form>
    </div>
  </div>
</template>
<script>
  export default {
    name:"Login",
    components: {},
    props: [],
    data() {
      return {
        formData: {
          username: '',
          password: '',
        },
        rules: {
          username: [{
            required: true,
            message: '请输入账号',
            trigger: 'blur'
          }],
          password: [{
            required: true,
            message: '请输入密码',
            trigger: 'blur'
          }],
        },
      }
    },
    methods: {
      submitForm() {
        this.$refs['elForm'].validate(valid => {
          let me = this;
          if(valid){
            //?username="+this.formData.username+"&password="+this.formData.password
            let username = this.formData.username;
            let password = this.formData.password;
            let info = this.formData.info;
            this.axios({
              method: "get",
              url: 'http://127.0.0.1:8080/static/mock/user.json'
            }).then(function (response) {
              if(username===response.data.username && password===response.data.password){
               me.$router.push("/main/"+ username);
              }else{
                alert("账号密码错误!!!")
              }
            });
          }
        })
      },
    },
  }
</script>
<style scoped>
  #id{
     box-shadow: 0 2px 4px rgba(0, 0, 0, .12), 0 0 6px rgba(0, 0, 0, .04);
     height: 240px;
     width: 400px;
     border-radius: 0;
     font-family: "Helvetica Neue",Helvetica,"PingFang SC","Hiragino Sans GB","Microsoft YaHei","微软雅黑",Arial,sans-serif;
     margin:0 auto;
     border:1px;
     position: absolute;
     top: 200px;
     left: 0;
     bottom: 0;
     right: 0;
   }
  #id1{
    position: absolute;
    top: 10px;
    left: 0;
    bottom: 0;
    right: 0;
  }
  #sub{
    position: absolute;
    top: 0;
    left: 50px;
    bottom: 0;
    right: 0;
  }
</style>
创建 Main.vue 组件 ,该组件是登录成功之后跳转的页面

<template>
  <el-container style="height: 500px; border: 1px solid #eee">
    <el-aside width="200px" style="background-color: rgb(238, 241, 246)">
      <el-menu :default-openeds="['1', '3']">
        <el-submenu index="1">
          <template slot="title">
            <i class="el-icon-message"></i>用户管理
          </template>
          <el-menu-item-group>
            <el-menu-item index="1-1">
              <!-- 跳转带参数 name的路由组件中的name  params 带的参数 -->
              <router-link :to="{name: 'userProFile', params: {id: 1}}">个人信息</router-link>
            </el-menu-item>
            <el-menu-item index="1-2">
              <!-- 不带参数可以直接 跳转-->
              <router-link to="/user/list">用户列表</router-link>
            </el-menu-item>
          </el-menu-item-group>
        </el-submenu>
        <el-submenu index="2">
          <template slot="title">
            <i class="el-icon-menu"></i>内容管理
          </template>
          <el-menu-item-group>
            <el-menu-item index="2-1">分类管理</el-menu-item>
            <el-menu-item index="2-2">内容列表</el-menu-item>
          </el-menu-item-group>
        </el-submenu>

      </el-menu>
    </el-aside>

    <el-container>
      <el-header style="text-align: right; font-size: 12px">
       <router-link style="font-size: 20px;" to="/goName">首页</router-link>
        <el-dropdown>
          <i class="el-icon-setting" style="margin-right: 15px"></i>
          <el-dropdown-menu slot="dropdown">
            <el-dropdown-item>个人信息</el-dropdown-item>
            <el-dropdown-item>退出登录</el-dropdown-item>
          </el-dropdown-menu>
          {{username}}
        </el-dropdown>
      </el-header>

      <el-main>
        <router-view></router-view>
      </el-main>
    </el-container>
  </el-container>
</template>

<style>
  .el-header {
    background-color: #b3c0d1;
    color: #333;
    line-height: 60px;
  }

  .el-aside {
    color: #333;
  }
</style>

<script>
  export default {
    props: ['username'],
    data() {
    }
  };
</script>
因为我们的登录是模仿后台传过来的数据
user.json 文件 所以登录必须是admin 和admin
{
  "username": "admin",
  "password": "admin"
}
创建 NotFound.vue 的组件 ,用于 访问路径输入错误跳转的页面
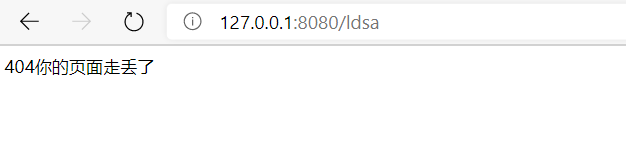
<template>
    <div style="align-content: center">404你的页面走丢了</div>
</template>

<script>
    export default {
        name: "NotFound"
    }
</script>

<style scoped>

</style>
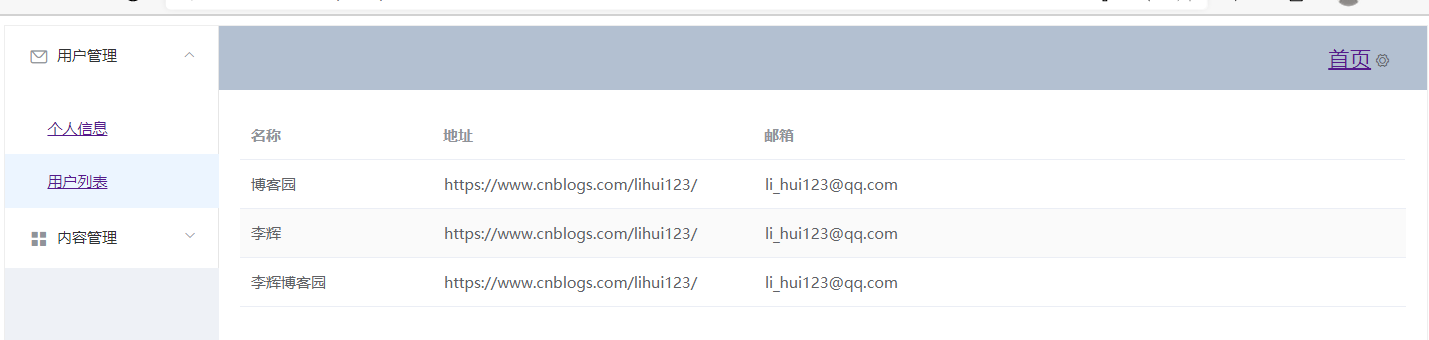
创建 List.vue 组件 用于 用户列表的展示
<template>
  <el-table
    :data="tableData"
    stripe
    style="width: 100%">
    <el-table-column
      prop="name"
      label="名称"
      width="180">
    </el-table-column>
    <el-table-column
      prop="url"
      label="地址"
      width="300">
    </el-table-column>
    <el-table-column
      prop="Email"
      label="邮箱">
    </el-table-column>
  </el-table>
</template>

<script>
  export default {
    name: "List",
    data() {
      return{
        tableData: null,
      }

    },
    beforeRouteEnter:(to, from, next)=>{
      console.log("进入路由前");
      next(vm=>{
        vm.getData();
      });
    },
    beforeRouteLeave:(to, from, next)=>{
      console.log("进入路由后");
      next();
    },
    /*
      . to:路由将要跳转的路径信息
      . from:路径跳转前的路径信息
      . next:路由的控制参数
          . next()跳入下一个页面
          . next('/path')改变路由的跳转方向,使其跳到另一个路由
          . next(false)返回原来的页面
          . next((vm)=>)仅在 beforeRouteEnter中可用,vm是组件实例
     */
    methods: {
      getData: function () {
        let me = this;
        this.axios({
          method: 'get',
          url: 'http://127.0.0.1:8080/static/mock/data.json'
        }).then(response=>(me.tableData=response.data))
      }
    }
  }
</script>

<style scoped>

</style>
这里的数据也是模拟后台传来的数据
data.json 文件
[
  {
    "name": "博客园",
    "Email": "li_hui123@qq.com",
    "url": "https://www.cnblogs.com/lihui123/"
  },
  {
    "name": "李辉",
    "Email": "li_hui123@qq.com",
    "url": "https://www.cnblogs.com/lihui123/"
  },
  {
    "name": "李辉博客园",
    "Email": "li_hui123@qq.com",
    "url": "https://www.cnblogs.com/lihui123/"
  }
]
创建 porFile.vue 组件 用于 测试 带参数的跳转并把参数展示出来
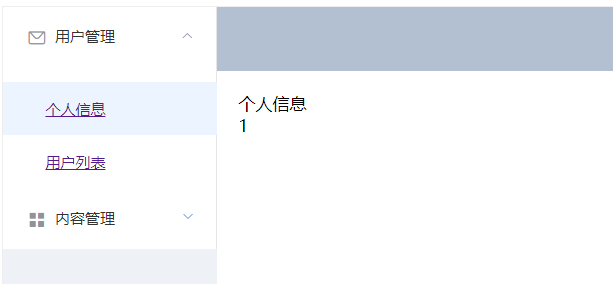
<template>
    <div>个人信息<br>
      {{$route.params.id}}
    </div>
</template>

<script>
    export default {
        name: "porFile"
    }
</script>

<style scoped>

</style>
