【从0开始.NET CORE认证】-1 认识认证和授权
引子
最近在学习IdentityServer4,看了园子里大神们的文章,但是看完之后,能明白这样做可以达到业务需求。但是为什么这样做可以达到业务需求,我用其他方式不行吗?为什么这样做可以呢。也就是老话所说的:
知其然不知其所以然
所以自己看完之后,也看了其他许多教程。总结了.NET Core Identity认证和IdentityServer4的认证框架的知识理论体系,从最开始的基础开始写,会一直写到ASP.NET CORE Identity和IdentityServer结合起来使用。可以帮助园子里新入门的小伙伴们更好的理解ASP.NET CORE Identity和IdentityServer。顺便也是对自己学习完的知识做一个总结。
前提
首先,我们要明白自己做什么,我要要做的是一个登录授权的应用程序。这个程序有什么特点的:就是他可以注册用户,登录用户,判断用户是否有权限访问某某功能,获取这个用户的基本信息等等功能。
首先,在ASP.NET Identity中,认证模块和授权模块是分开的,在.NET Core中,他们也被称为认证中间件和授权中间件。也就是说:当你只做一个模块的时候,可能会出现一个用户她有权限访问某某功能,但是你不知道他是谁(这种情况在代码中是不会出现的,因为会出现异常)。或者说你知道是谁(例如你们公司老板)想访问一下考勤记录功能(需要人力资源权限),但是没做授权,哪怕你知道他是老板,他其实也是无法访问的。
为了更好的让朋友们理解认证和授权,我做了一个Demo,来演示认证(Authentication)和授权(Authorization) 这两个单词长得比较像,注意区分。
本文含有大量GIF图,请耐心等待加载
创建项目
现在我们创建一个空的解决方案,命名解决方案的名称是AspNetCoreIdentity,然后创建一个BasiclyIdentity的项目,最基础的ASP.NET CORE WEB 应用程序。请看GIF图
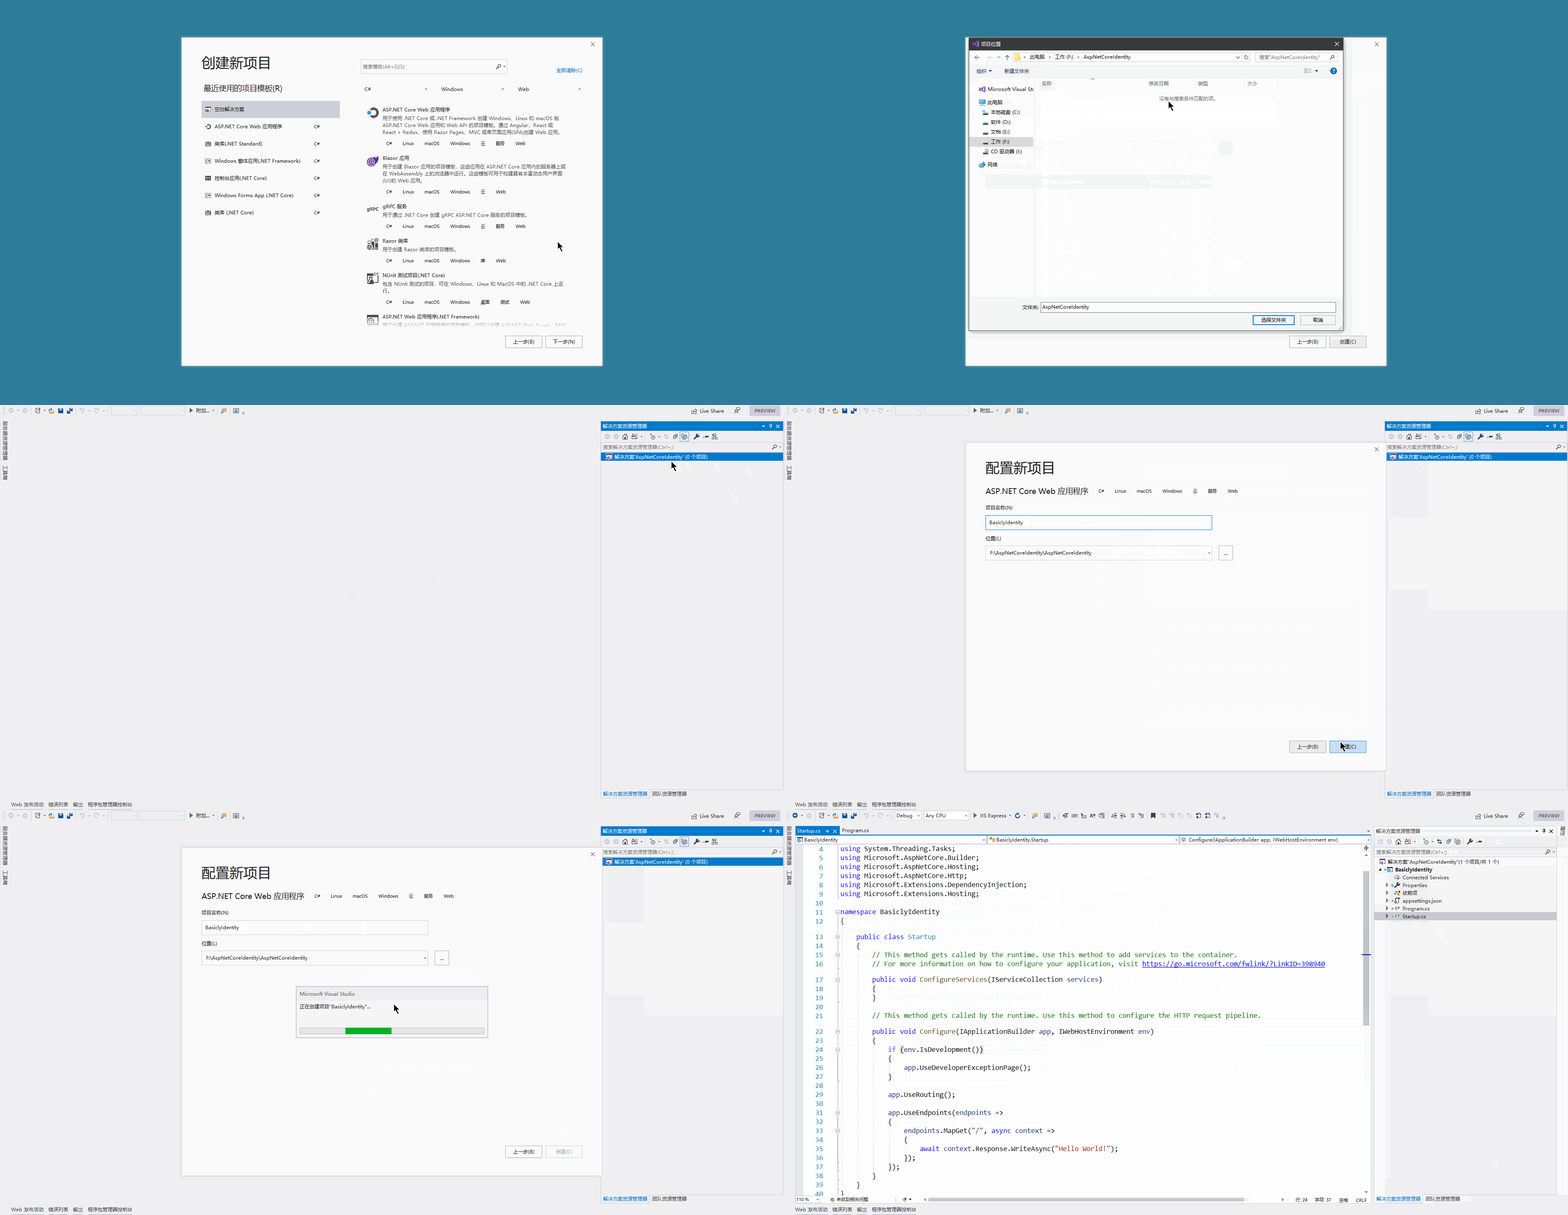
新建页面
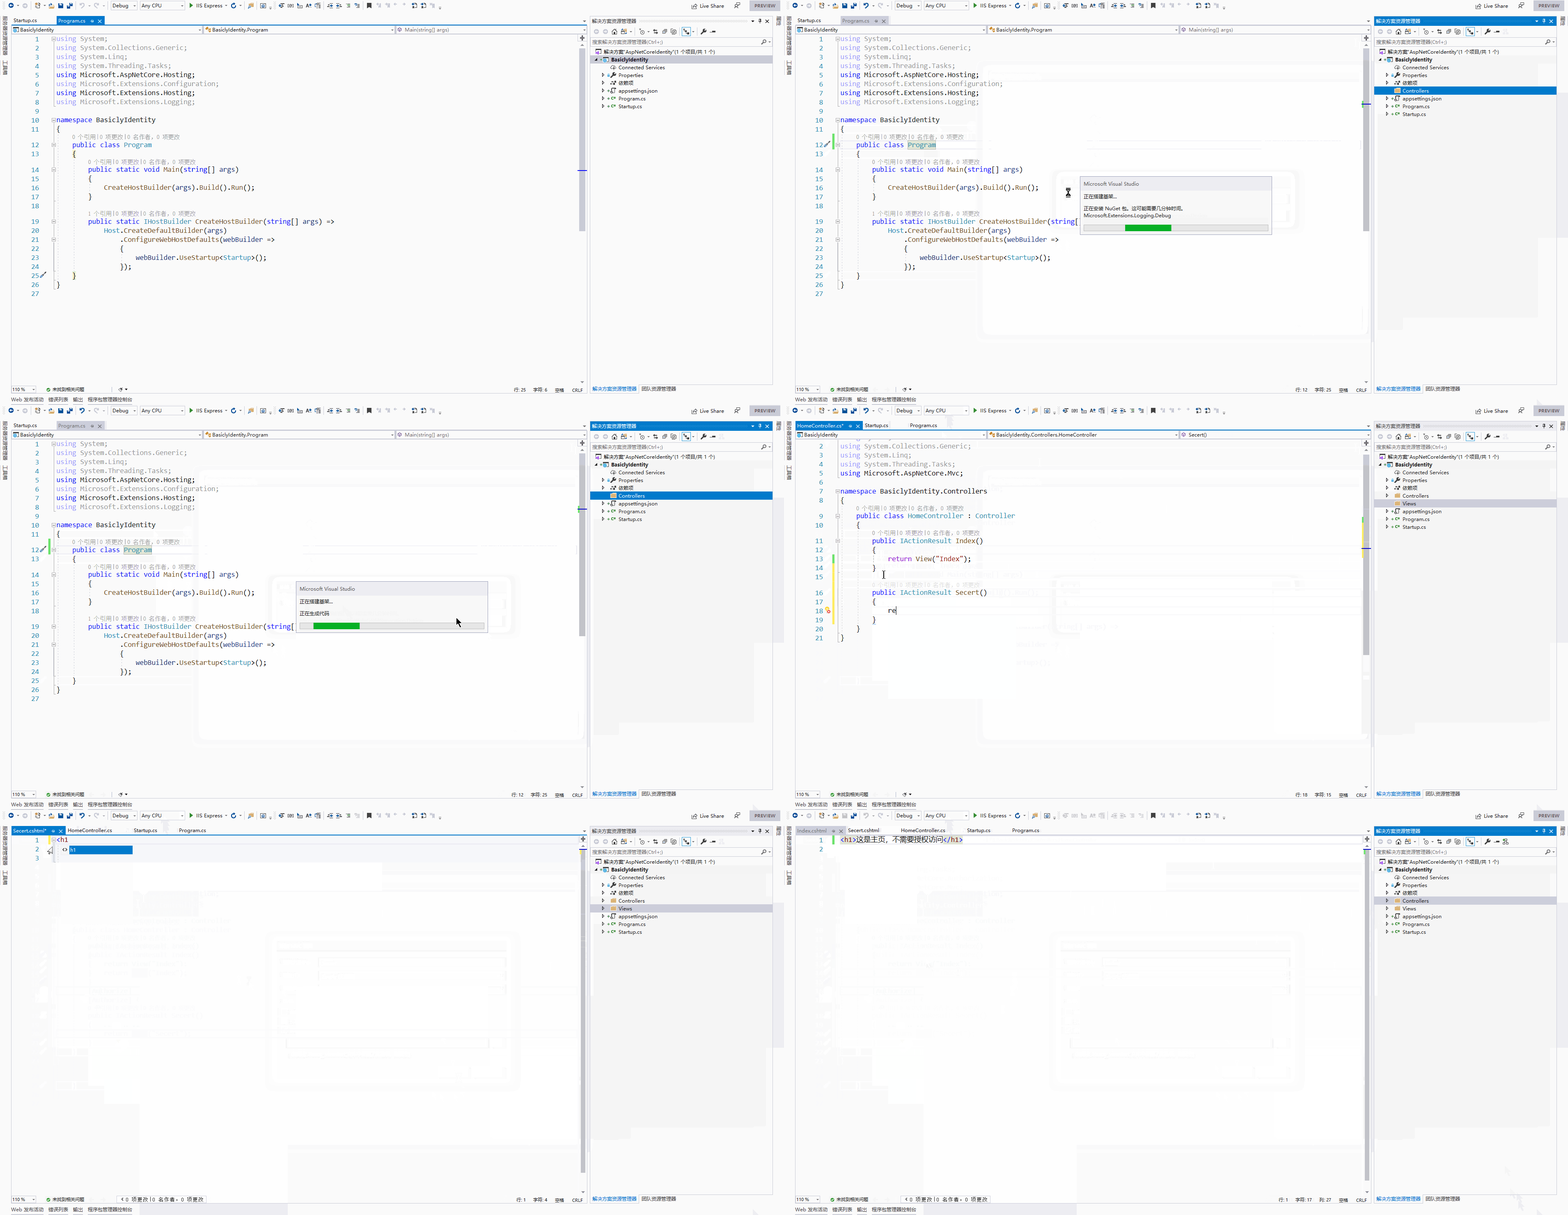
我们创建两个MVC页面,一个是Index主页(不需要授权访问),另外一个是Secert页面(代表着需要授权访问),
右键项目——新建文件夹——创建MVC控制器——HomeController,然后再HomeController里面创建两个接口,分别返回两个页面一个是Index,一个是Secert,代码如下

 1 using Microsoft.AspNetCore.Authorization;
 2 using Microsoft.AspNetCore.Mvc;
 3
 4 namespace BasiclyIdentity.Controllers
 5 {
 6     public class HomeController : Controller
 7     {
 8         public IActionResult Index()
 9         {
10             return View("Index");
11         }
12
13         [Authorize]
14         public IActionResult Secert()
15         {
16             return View("Secert");
17         }
18     }
19 }

1 <h1>这是主页,不需要授权访问</h1>

1 <h1>这需要授权访问的页面</h1>
流程看GIF图
接着,我们试着运行,好像只能返回Hello,world,所以我们需要在StartUp.cs修改一下,因为我们这个空的web应用程序在StartUp.cs默认返回hello,world字符串,代码改成以下内容

 1 using System;
 2 using System.Collections.Generic;
 3 using System.Linq;
 4 using System.Threading.Tasks;
 5 using Microsoft.AspNetCore.Builder;
 6 using Microsoft.AspNetCore.Hosting;
 7 using Microsoft.AspNetCore.Http;
 8 using Microsoft.Extensions.DependencyInjection;
 9 using Microsoft.Extensions.Hosting;
10
11 namespace BasiclyIdentity
12 {
13     public class Startup
14     {
15         // This method gets called by the runtime. Use this method to add services to the container.
16         // For more information on how to configure your application, visit https://go.microsoft.com/fwlink/?LinkID=398940
17         public void ConfigureServices(IServiceCollection services)
18         {
19             services.AddControllersWithViews();
20         }
21
22         // This method gets called by the runtime. Use this method to configure the HTTP request pipeline.
23         public void Configure(IApplicationBuilder app, IWebHostEnvironment env)
24         {
25             if (env.IsDevelopment())
26             {
27                 app.UseDeveloperExceptionPage();
28             }
29
30             app.UseRouting();
31
32             app.UseEndpoints(endpoints =>
33             {
34                 endpoints.MapDefaultControllerRoute();
35             });
36         }
37     }
38 }
演示请看GIF
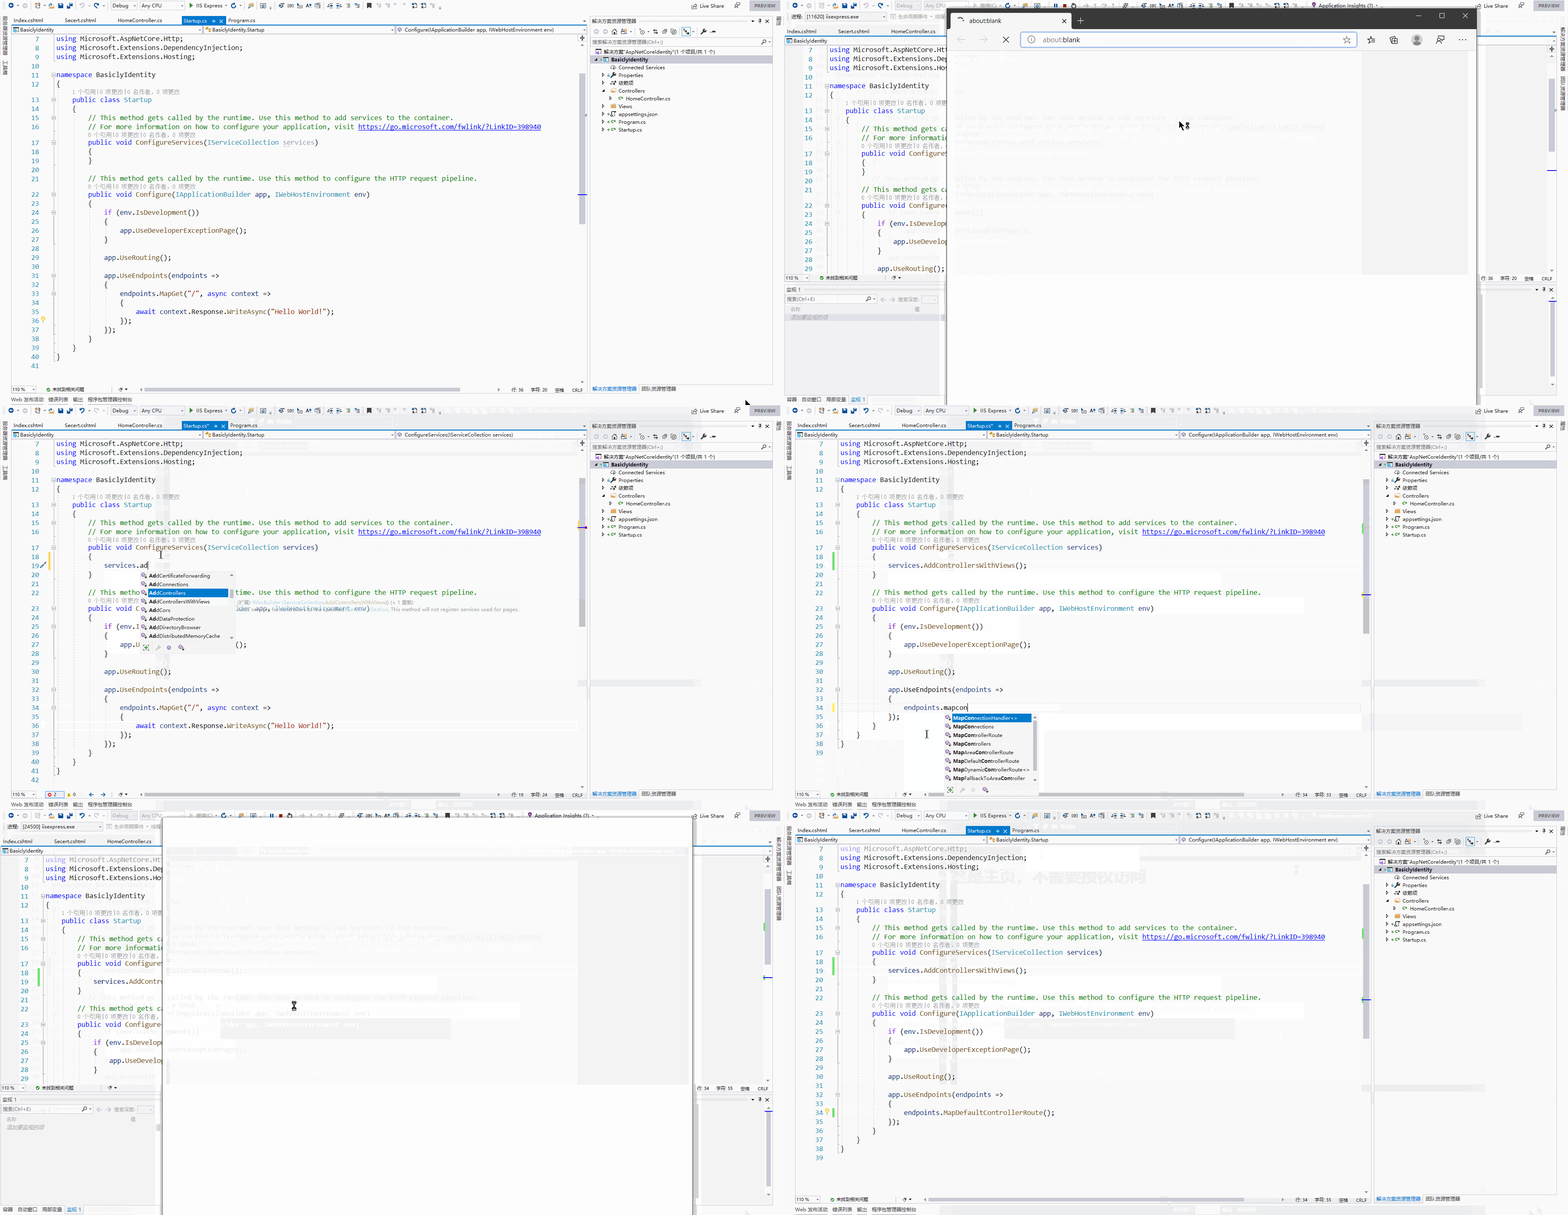
配置MVC页面
增加授权UseAuthorization
修改完成之后,可以看到可以正确访问页面,至于为什么要改成这样,可以参考构建.NET CORE MVC应用程序教程
接着,我们访问一下授权页面,看下会出现什么情况。
出现了一个错误,错误内容如下:
InvalidOperationException: Endpoint BasiclyIdentity.Controllers.HomeController.Secert (BasiclyIdentity) contains authorization metadata, but a middleware was not found that supports authorization. Configure your application startup by adding app.UseAuthorization() inside the call to Configure(..) in the application startup code. The call to app.UseAuthorization() must appear between app.UseRouting() and app.UseEndpoints(...).
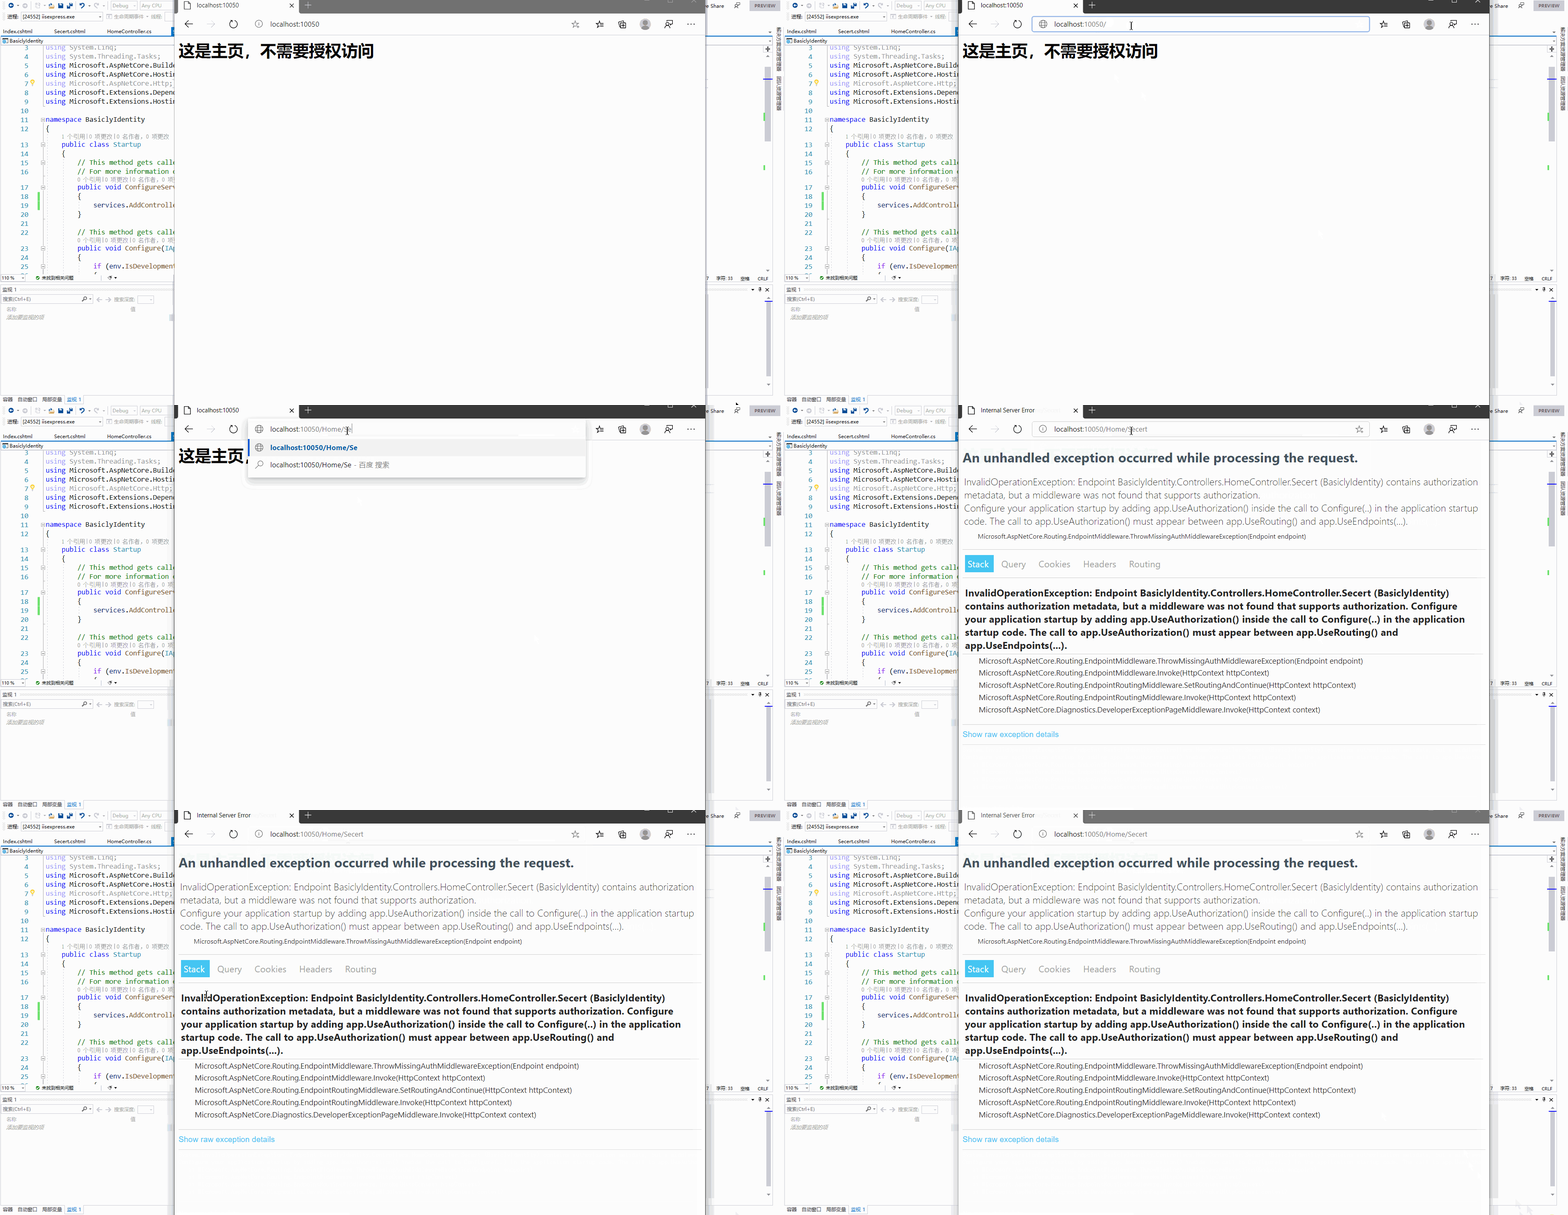
从错误异常中微软很贴心的告诉我们要怎么修复这个错误,微软告诉我们需要调用app.UseAuthorization() ,并且这个调用方法要出现在app.UseRouting() and app.UseEndpoints(...).中间
The call to app.UseAuthorization() must appear between app.UseRouting() and app.UseEndpoints(...).
增加认证方案(AuthenticationScheme)
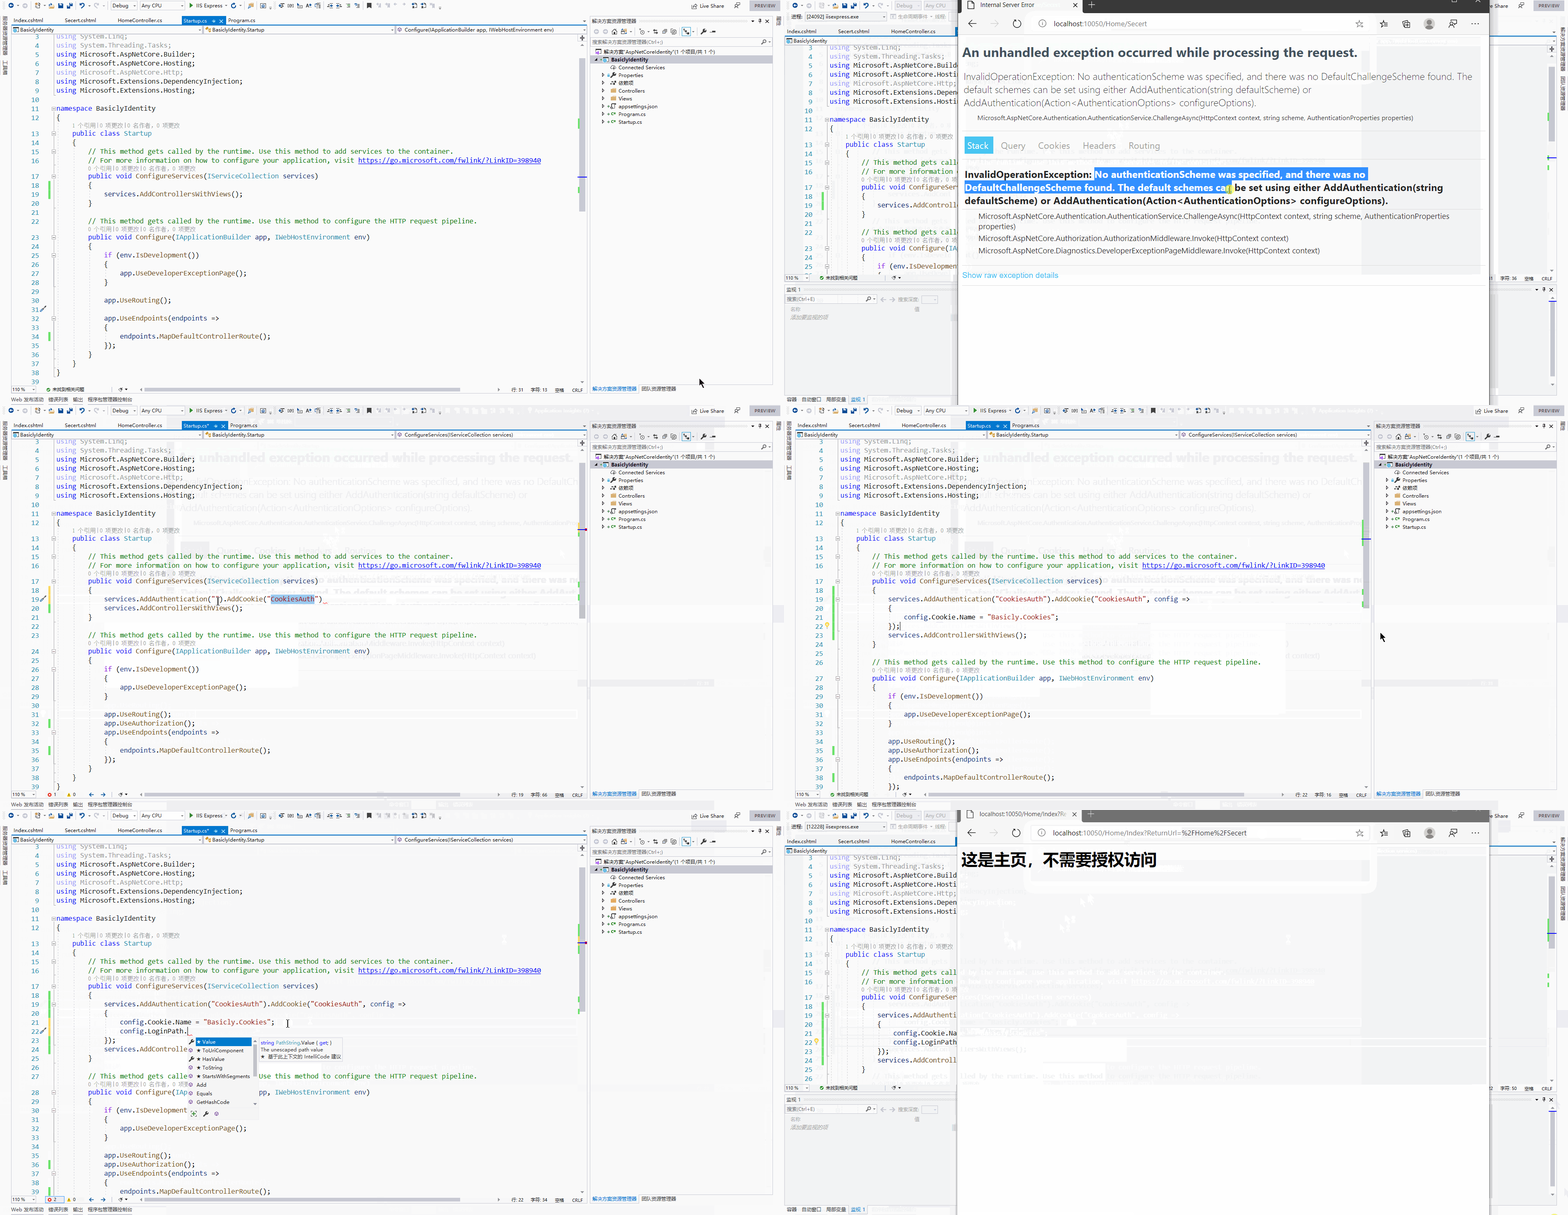
修改一下代码,然后访问页面/Home/Secert,同样的,我们会收到以下错误信息
InvalidOperationException: No authenticationScheme was specified, and there was no DefaultChallengeScheme found. The default schemes can be set using either AddAuthentication(string defaultScheme) or AddAuthentication(Action<AuthenticationOptions> configureOptions).
大致意思就是没有找到认证方案,也没有找到默认的认证方案。所以我们需要为我们的应用程序配置一个认证方案(authenticationScheme ),所以我们需要添加一个认证方案。
我们添加的认证方案是Cookies认证,即当我们认证的时候,会使用Cookie作为认证手段。在浏览器中插入一条Cookie记录
当需要授权的时候,会去检查浏览器的Cookies,检查一下有没有一个Basicly.Cookies的Cookies
1.如果有就表示通过了授权。即显示Secert页面的内容
2.如果没有,就会跳转到一个默认的登录页,当然,你可以配置登录页。我配置成如果没有登录就跳转到首页。
 StartUp.cs
创建登录接口
因为我们上文中没有Cookie所以他跳转到了我们配置的页面,想要访问需要授权的页面,需要有Cookie,那Cookies怎么来呢,所以我们需要新增一个接口,来创建Cookie。
在HomeController下,新增以下代码
 1 public IActionResult Login()
 2         {
 3             //Claim类似于身份证的某条内容,一条内容对应一条Claim.例如:民族:汉、籍贯:浙江杭州 此处用的是学校的学生证
 4             var schoolClaims = new List<Claim>()
 5             {
 6                 new Claim(ClaimTypes.Name,"李雷"),//姓名
 7                 new Claim(ClaimTypes.SerialNumber,"0001"),//学号
 8                 new Claim("Gender","男"),//性别
 9             };
10
11             //Claim类似于身份证的某条内容,一条内容对应一条Claim.例如:民族:汉、籍贯:浙江杭州 此处用的是社会上的驾照
12             var drivePass =new List<Claim>()
13             {
14                 new Claim(ClaimTypes.Name,"李雷"),//姓名
15                 new Claim(ClaimTypes.SerialNumber,"浙A00000"),//车牌号
16                 new Claim("Driver","GoodJob"),//开车技术怎么样...随便写的
17             };
18
19             //ClaimsIdentity 类似于身份证、学生证。它是有一条或者多条Claim组合而成。这样就是组成了一个学生证和驾照
20             var schoolIdentity = new ClaimsIdentity(schoolClaims, "school");
21             var govIdentity = new ClaimsIdentity(drivePass, "gov");
22
23             //claimsPrincipal相当于一个人,你可以指定这个人持有哪些ClaimsIdentity(证件),我指定他持有schoolIdentity、govIdentity那么他就是
24             //在学校里是学生,在社会上是一名好司机
25             ClaimsPrincipal claimsPrincipal = new ClaimsPrincipal(new[] { schoolIdentity, govIdentity });
26
27             //HttpContext上下文登录。会根据你在StartUp.cs文件中配置的services.AddAuthentication("CookiesAuth").AddCookie("CookiesAuth")进行操作
28             //此处就是增加了Cookies
29             HttpContext.SignInAsync(claimsPrincipal);
30             //HttpContext上下文登出,会清除Cookies
31             //HttpContext.SignOutAsync()
32             return View("Index");
33         }
然后我们再访问这个接口,可以看到,在我们的浏览器中增加了一个Cookie的一行。按理说,再去访问/home/secert页面总该可以了吧。别急看GIF图
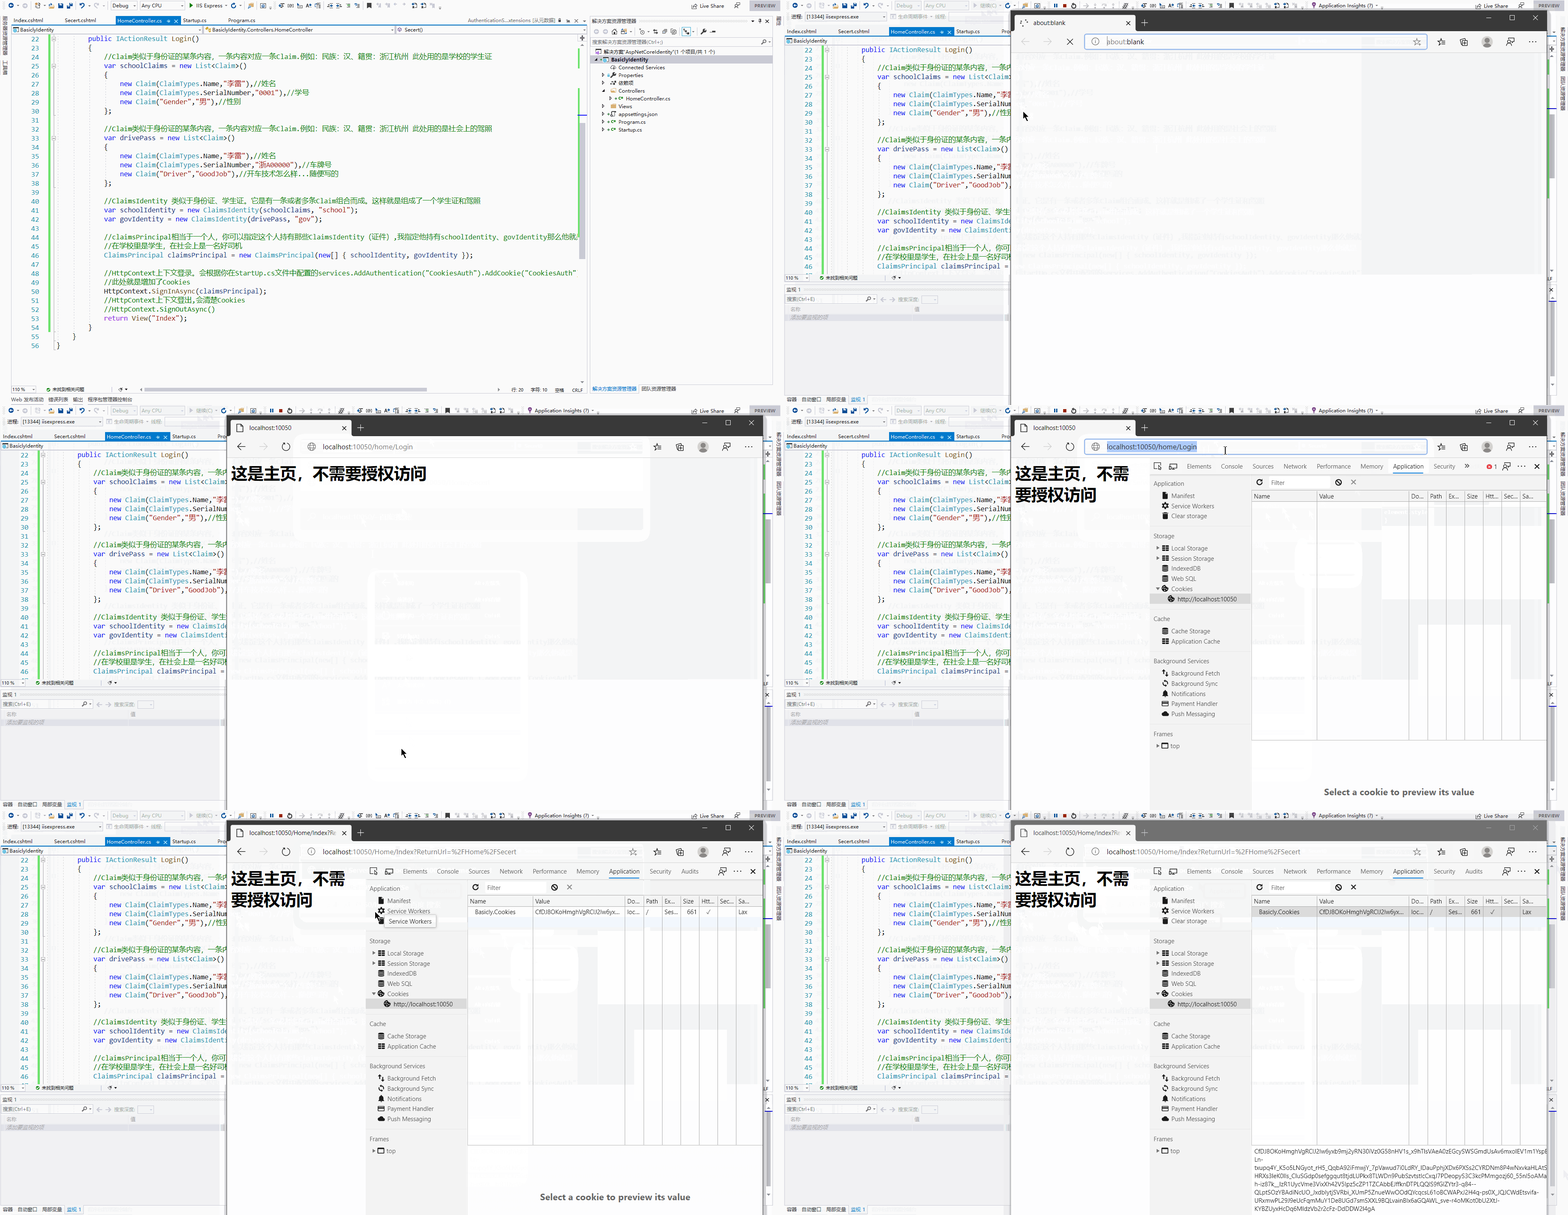
可以看到,增加了Cookies我们还是无法访问Secert页面,为什么呢?回到上文,.net Core Identity分成了授权模块和认证模块,也成为中间件,需要在StartUp.cs里面配置,但是我好像只是用了

所以我们需要额外增加一个

至此,我们可以看看效果怎么样。
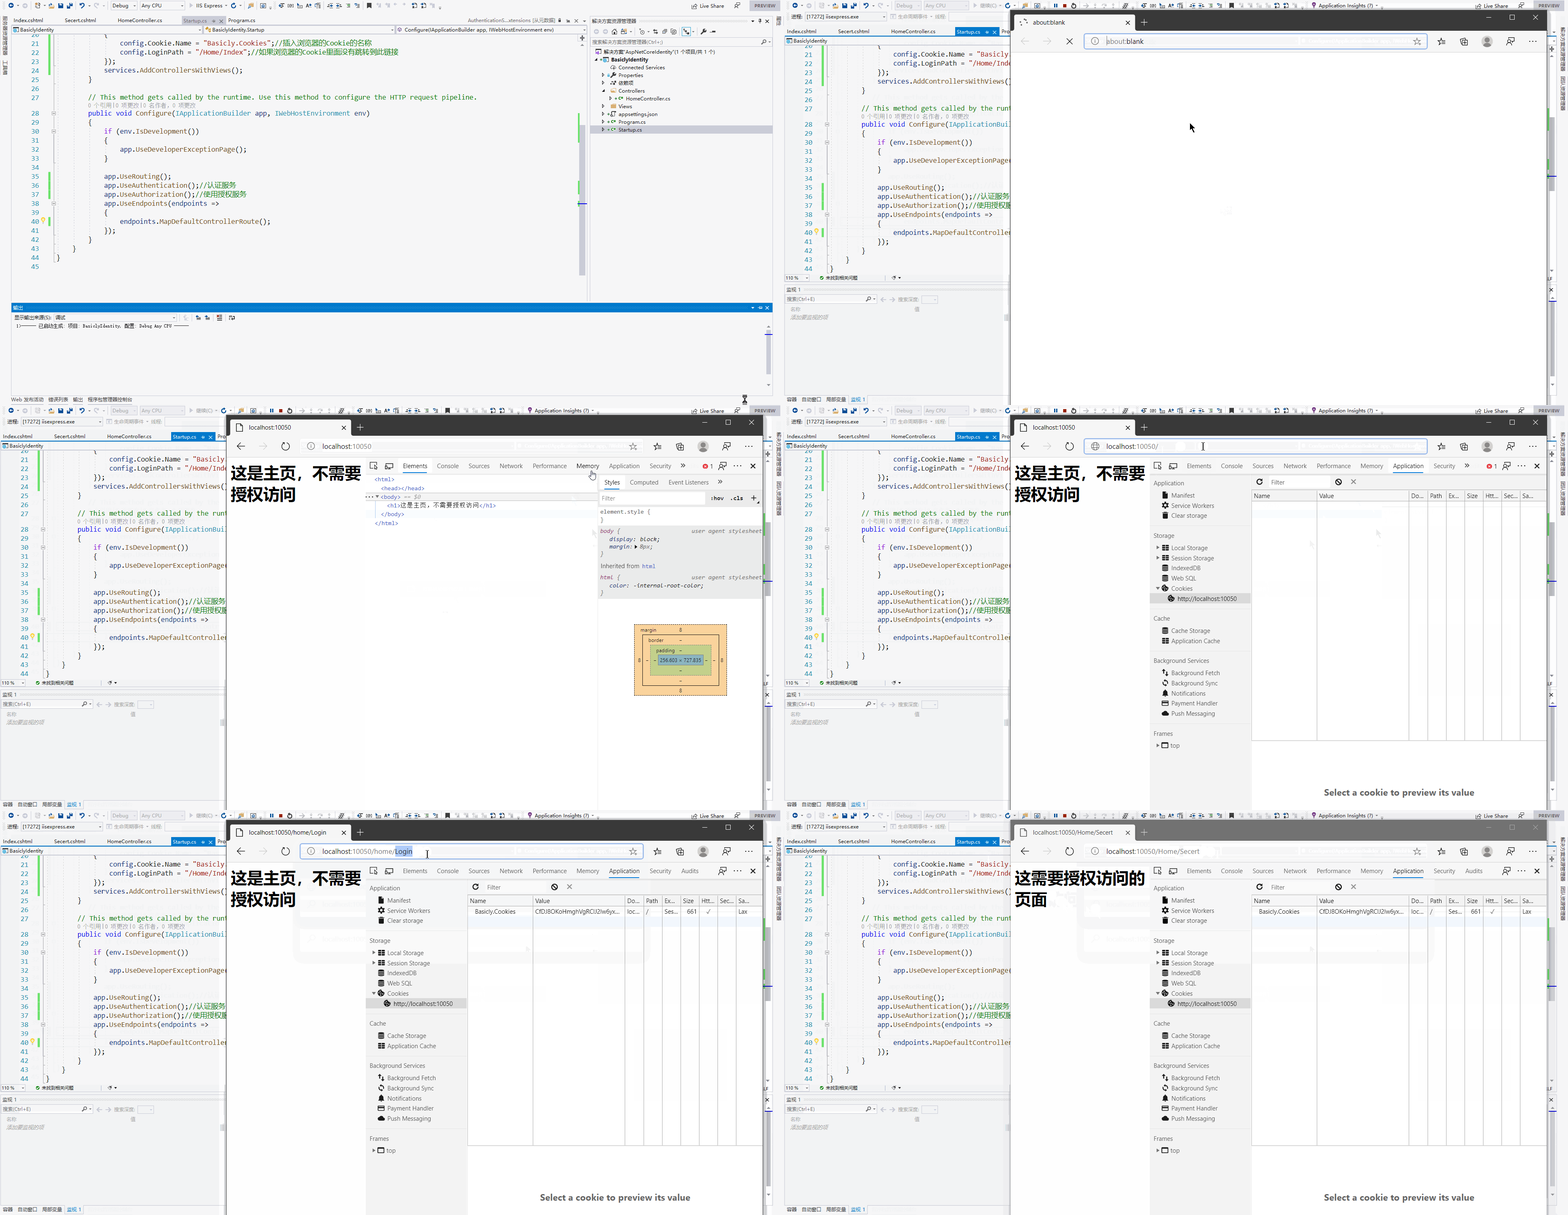
非常棒!我们现在已经可以访问授权的页面了。
总结
本章主要介绍了搭建一个MVC页面,怎么使用认证
1.认证(Authentication)和授权(Authorization)——认证(Authentication)是说明你是谁 授权(Authorization)是说明你能干什么
2.声明(Claim)和声明类型(ClaimType)——声明(Claim)是一条记录,声明类型(ClaimType)有默认内置的例如姓名,邮箱,或者自定义性别等字段
3.证件(ClaimsIdentity)和证件持有人(ClaimsPrincipal)——证件(ClaimsIdentity)是由各个机关签发给你的,例如学校签发给你学生证,公安局签发给你身份证,证件持有人(ClaimsPrincipal)则表示你自己,你能持有什么证件
这些都是以后文章的基本知识,希望大家能够多多理解。
问题
1.如果把授权放在前面,认证放在后面会怎么样?
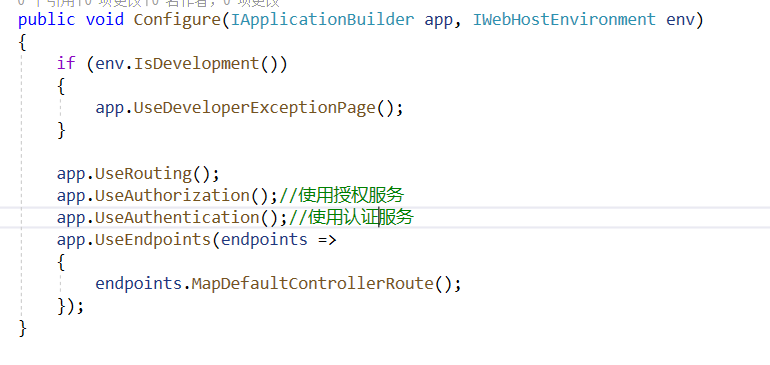
没想到写文章这么累。。。。不懂的地方大家可以在评论区留言



 浙公网安备 33010602011771号