
上一篇说了用户认证的基本流程,但是上一篇当访问一个受保护的服务后,如果未认证会调到默认的登录页面,这样是不行的,而且认证成功后,就直接访问了那个服务,如果想要做认证成功后做一些操作,还需要自定义。
个性化用户认证流程:
1)自定义登录页面
2)自定义登录成功处理(如给用户发积分或者签到)
3)自定义登录失败处理(如记录密码失败次数,超过3次不让登录等)
1,自定义登录页面
在BrowserSecurityConfig类里配置:
@Configuration //这是一个配置
public class BrowserSecurityConfig extends WebSecurityConfigurerAdapter{

    //注意是org.springframework.security.crypto.password.PasswordEncoder
    @Bean
    public PasswordEncoder passwordencoder(){
        //BCryptPasswordEncoder implements PasswordEncoder
        return new BCryptPasswordEncoder();
    }

    @Override
    protected void configure(HttpSecurity http) throws Exception {
        //实现需要认证的接口跳转表单登录,安全=认证+授权
        //http.httpBasic() //这个就是默认的弹框认证
        http.formLogin() //表单认证
            .loginPage("/login.html") //登录页面
            //登录过滤器UsernamePasswordAuthenticationFilter默认登录的url是"/login",在这能改
            .loginProcessingUrl("/authentication/form")
            .and()
            .authorizeRequests() //下边的都是授权的配置
            .antMatchers("/login.html").permitAll() //放过登录页不过滤,否则报错
            .anyRequest()        //任何请求
            .authenticated();    //都需要身份认证
    }
}
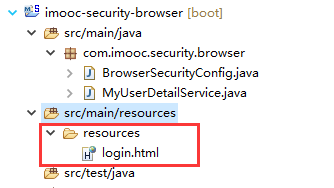
在src/main/resource下新建resources目录,新建login页面
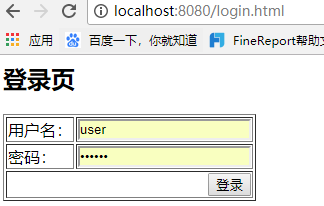
<body>
    <h2>登录页</h2>
    <form action="/authentication/form" method="post">
        <table border="1">
            <tr>
                <td>用户名:</td>
                <td><input type="text" name="username"/></td>
            </tr>
            <tr>
                <td>密码:</td>
                <td><input type="password" name="password"/></td>
            </tr>
            <tr>
                <td colspan="2" align="right"><button type="submit">登录</button></td>
            </tr>
        </table>
    </form>
  </body>
访问 http://localhost:8080/user跳转到自定义的登录页:

此时点击登录:
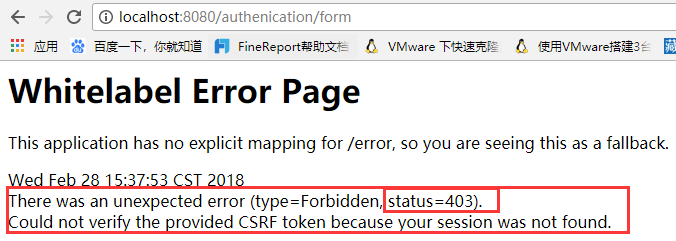
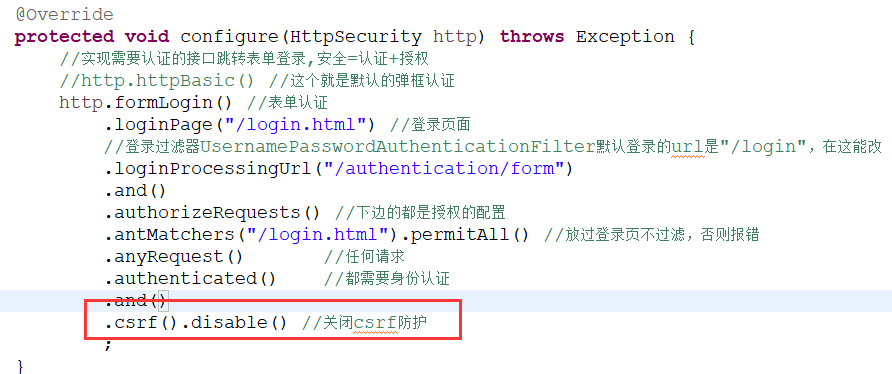
SpringSecurity默认提供了CSRF(跨站请求伪造)防护,是用CSRF token来完成防护的。暂时关闭CSRF防护,在BrowserSecurityConfig里设置:
然后再访问localhost:8080/user,登录成功后,返回查询信息

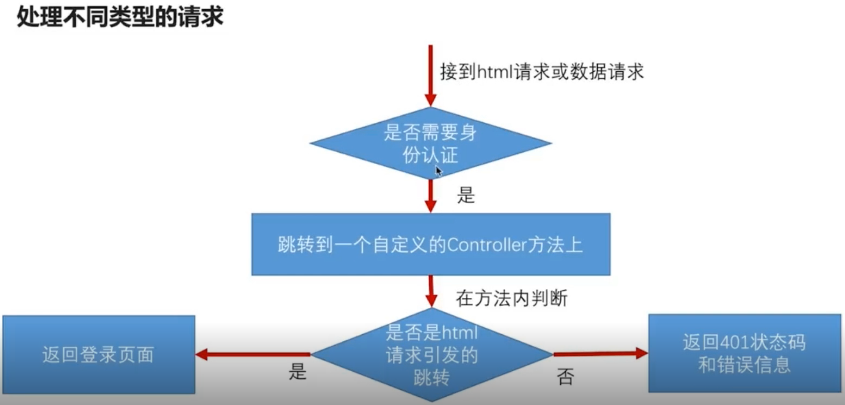
到此为止,自定义登录页已经做好了,但是我们发出的是Rest服务,应该返回状态码+json信息,而这里返回时html页,是不合理的,可以做成像SpringBoot对错误处理的机制一样,如果是浏览器发过来的请求,就跳转到登录页,如果是app发过来的请求,就返回Json。
而且随后要做成可重用的安全模块,现在限制死了登录页,是不合理的。
解决:
1,处理不同类型的请求
最终的项目结构:
浏览器项目:

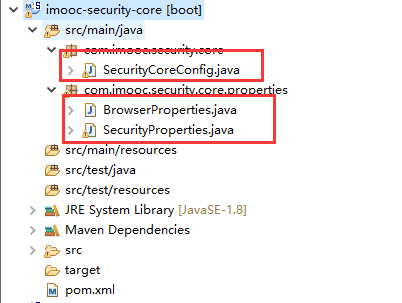
核心项目:
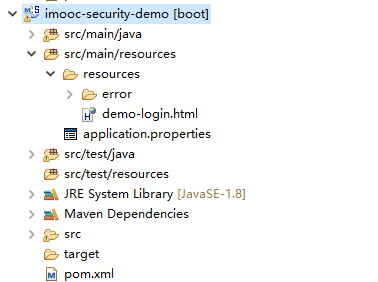
引用安全模块的demo项目:
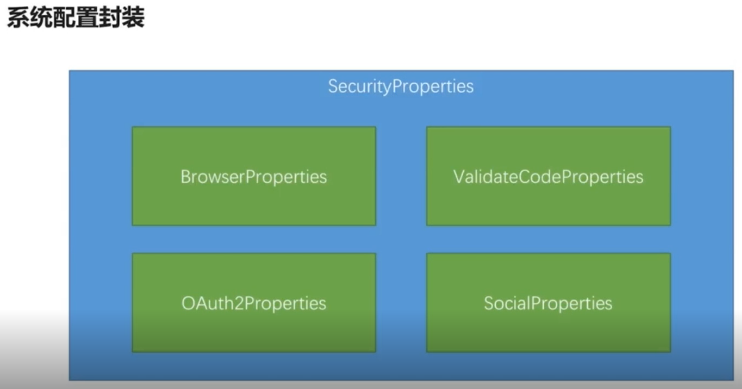
思路:在浏览器项目里新建一个控制器BrowserSecurityController,处理用户认证,浏览器和app的请求做不同的处理。在core核心项目里,封装读取application.properties里自定义配置的类,这样在demo项目引用开发的安全模块时,可以根据application.properties里的配置,跳转到自定义的登录页。
第一步,BrowserSecurityConfig配置的configure方法中,http.formLogin() .loginPage("/authentication/require") 标红处就不应该是一个login.html的登录页了,让他跳转到自定义的BrowserSecurityController,浏览器和app的请求做不同的处理,SpringSecurity里有一些工具类RequestCache可以帮我们拿到请求的url:
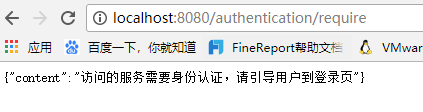
/**
 * 处理用户认证Controller,浏览器和app的请求做不同的处理
 * ClassName: BrowserSecurityController
 * @Description: 处理用户认证Controller,浏览器和app的请求做不同的处理
 * @author lihaoyang
 * @date 2018年2月28日
 */
@RestController
public class BrowserSecurityController {

    private Logger logger = LoggerFactory.getLogger(getClass());

    //缓存的请求,SpringSecurity通过HttpSessionRequestCache把请求信息缓存到session里
    private RequestCache requestCache = new HttpSessionRequestCache();
    //跳转的工具
    private RedirectStrategy redirectStrategy = new DefaultRedirectStrategy();

    @Autowired
    private SecurityProperties securityProperties;

    /**
     * 当需要身份认证时,跳转到这里处理
     * @Description: TODO
     * @param @param request
     * @param @param response
     * @param @return
     * @return String
     * @throws Exception
     * @throws
     * @author lihaoyang
     * @date 2018年2月28日
     */
    @RequestMapping("/authentication/require")
    @ResponseStatus(code=HttpStatus.UNAUTHORIZED)//返回状态码401 未授权
    public SimpleResponse requireAuthentication(HttpServletRequest request,HttpServletResponse response) throws Exception{
        //拿出缓存的请求 引发跳转的请求
        SavedRequest savedRequest = requestCache.getRequest(request, response);
        if(savedRequest != null){
            //拿到引发请求的url
            String targetUrl = savedRequest.getRedirectUrl();
            logger.info("引发跳转的url:"+targetUrl);
            if(StringUtils.endsWithIgnoreCase(targetUrl, ".html")){//请求是否以.html结尾
                redirectStrategy.sendRedirect(request, response, securityProperties.getBrowser().getLoginPage());//要跳转的页面,此处应该做成可配置的页面
            }
        }
        return new SimpleResponse("访问的服务需要身份认证,请引导用户到登录页");
    }

}
现在需要处理的就是上边标红的代码,他的作用是能够动态配置登录页,下一步,在demo项目的application.properties里配置登录页:
#自定义登录页
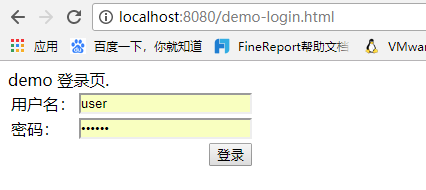
imooc.security.browser.loginPage = /demo-login.html
现在问题就是读取这个配置,在core核心项目里,做配置的封装:
SecurityProperties:
package com.imooc.security.core.properties;

import org.springframework.boot.context.properties.ConfigurationProperties;
import org.springframework.context.annotation.Configuration;

/**
 * 自定义配置项
 * ClassName: SecurityProperties
 * @Description: 自定义配置项
 * 这个类会读取application.properties里所有以imooc.security开头的配置项
 *
 * imooc.security.browser.loginPage = /demo-login.html
 * 其中的browser的配置会读取到BrowserProperties中去
 * 这是以点分割的,一级一级的和类的属性对应
 * @author lihaoyang
 * @date 2018年2月28日
 */

@ConfigurationProperties(prefix="imooc.security")
public class SecurityProperties {

    private BrowserProperties browser = new BrowserProperties();

    public BrowserProperties getBrowser() {
        return browser;
    }

    public void setBrowser(BrowserProperties browser) {
        this.browser = browser;
    }


}
BrowserProperties:
package com.imooc.security.core.properties;

/**
 * 浏览器配置项
 * ClassName: BrowserProperties
 * @Description: 浏览器配置项
 * @author lihaoyang
 * @date 2018年2月28日
 */
public class BrowserProperties {

    private String loginPage = "login.html"; //用户未配置默认登录页

    public String getLoginPage() {
        return loginPage;
    }

    public void setLoginPage(String loginPage) {
        this.loginPage = loginPage;
    }

}
SecurityCoreConfig:
package com.imooc.security.core;

import org.springframework.boot.context.properties.EnableConfigurationProperties;
import org.springframework.context.annotation.Configuration;

import com.imooc.security.core.properties.SecurityProperties;

/**
 * 使配置SecurityProperties生效
 * ClassName: SecurityCoreConfig
 * @Description: 使配置SecurityProperties生效
 * @author lihaoyang
 * @date 2018年2月28日
 */
@Configuration
@EnableConfigurationProperties(SecurityProperties.class)
public class SecurityCoreConfig {

}
这三个类就和application.properties里的配置:imooc.security.browser.loginPage = /demo-login.html 对应上了。
在需要读取配置的地方,直接注入SecurityCoreConfig即可,此时在 BrowserSecurityConfig 里注入SecurityCoreConfig 配置,即可让过滤器读取到配置的登录页。
@Configuration //这是一个配置
public class BrowserSecurityConfig extends WebSecurityConfigurerAdapter{

    //读取用户配置的登录页配置
    @Autowired
    private SecurityProperties securityProperties;

    //注意是org.springframework.security.crypto.password.PasswordEncoder
    @Bean
    public PasswordEncoder passwordencoder(){
        //BCryptPasswordEncoder implements PasswordEncoder
        return new BCryptPasswordEncoder();
    }


    //版本一:配置死的登录页
//    @Override
//    protected void configure(HttpSecurity http) throws Exception {
//        //实现需要认证的接口跳转表单登录,安全=认证+授权
//        //http.httpBasic() //这个就是默认的弹框认证
//        http.formLogin() //表单认证
//            .loginPage("/login.html") //登录页面
//            //登录过滤器UsernamePasswordAuthenticationFilter默认登录的url是"/login",在这能改
//            .loginProcessingUrl("/authentication/form")
//            .and()
//            .authorizeRequests() //下边的都是授权的配置
//            .antMatchers("/login.html").permitAll() //放过登录页不过滤,否则报错
//            .anyRequest()        //任何请求
//            .authenticated()    //都需要身份认证
//            .and()
//            .csrf().disable() //关闭csrf防护
//            ;
//    }

    //版本二:可配置的登录页
    @Override
    protected void configure(HttpSecurity http) throws Exception {
        //实现需要认证的接口跳转表单登录,安全=认证+授权
        //http.httpBasic() //这个就是默认的弹框认证
        http.formLogin() //表单认证
            .loginPage("/authentication/require") //处理用户认证BrowserSecurityController
            //登录过滤器UsernamePasswordAuthenticationFilter默认登录的url是"/login",在这能改
            .loginProcessingUrl("/authentication/form")
            .and()
            .authorizeRequests() //下边的都是授权的配置
            // /authentication/require:处理登录,securityProperties.getBrowser().getLoginPage():用户配置的登录页
            .antMatchers("/authentication/require",securityProperties.getBrowser().getLoginPage()).permitAll() //放过登录页不过滤,否则报错
            .anyRequest()        //任何请求
            .authenticated()    //都需要身份认证
            .and()
            .csrf().disable() //关闭csrf防护
            ;
    }
}
此时再访问localhost:8080/user ,会响应未登录信息和401状态码。此时发ajax请求的前端就可以引导用户到登录页去。

此时访问:http://localhost:8080/index.html,会跳转到demo项目配置的登录页。
注释掉demo项目的登录页配置再访问,#imooc.security.browser.loginPage = /demo-login.html ,就会跳转到browser项目配置的 /login.html 登录页
上述过程只是完成了开篇说的个性化用户认证流程中的第一个步骤,自定义登录页面,下一篇说其他两项。
github代码:https://github.com/lhy1234/spring-security
