
OSX安装Redis
1、查看安装源
#brew search redis
在列出的安装源中,建议选择最新版的,这里选择的是redis@4.0
2、安装redis
#brew install redis@4.0
安装完成后,部分输出的内容如下所示:
==> Pouring redis@4.0-4.0.14.mojave.bottle.tar.gz
==> Caveats
redis@4.0 is keg-only, which means it was not symlinked into /usr/local,
because this is an alternate version of another formula.

If you need to have redis@4.0 first in your PATH run:
  echo 'export PATH="/usr/local/opt/redis@4.0/bin:$PATH"' >> ~/.bash_profile


To have launchd start redis@4.0 now and restart at login:
  brew services start redis@4.0
Or, if you don't want/need a background service you can just run:
  /usr/local/opt/redis@4.0/bin/redis-server /usr/local/etc/redis.conf
==> Summary
🍺  /usr/local/Cellar/redis@4.0/4.0.14: 13 files, 2.8MB
启动/重启Redis:
#brew services start redis@4.0
#brew services restart redis@4.0
设置环境变量:
#echo 'export PATH="/usr/local/opt/redis@4.0/bin:$PATH"' >> ~/.bash_profile
设置redis登录密码:
#vi /usr/local/etc/redis.conf
找到[# requirepass foobared]并修改为[requirepass 123456];
重启Redis让配置生效:
#brew services restart redis@4.0
3、客户端工具Rdm
下载Redis可视化管理工具 redis-desktop-manager-0.9.3.39(这是最后一个免费版的),双击安装。
安装完成后打开Rdm管理工具,添加一个连接,然后输入IP和密码(如果没有配置Redis的密码则不用输入):

点击【Test Connection】按钮测试连接是否正确,当连接成功后点击【OK】按钮,进入Rdm管理界面:
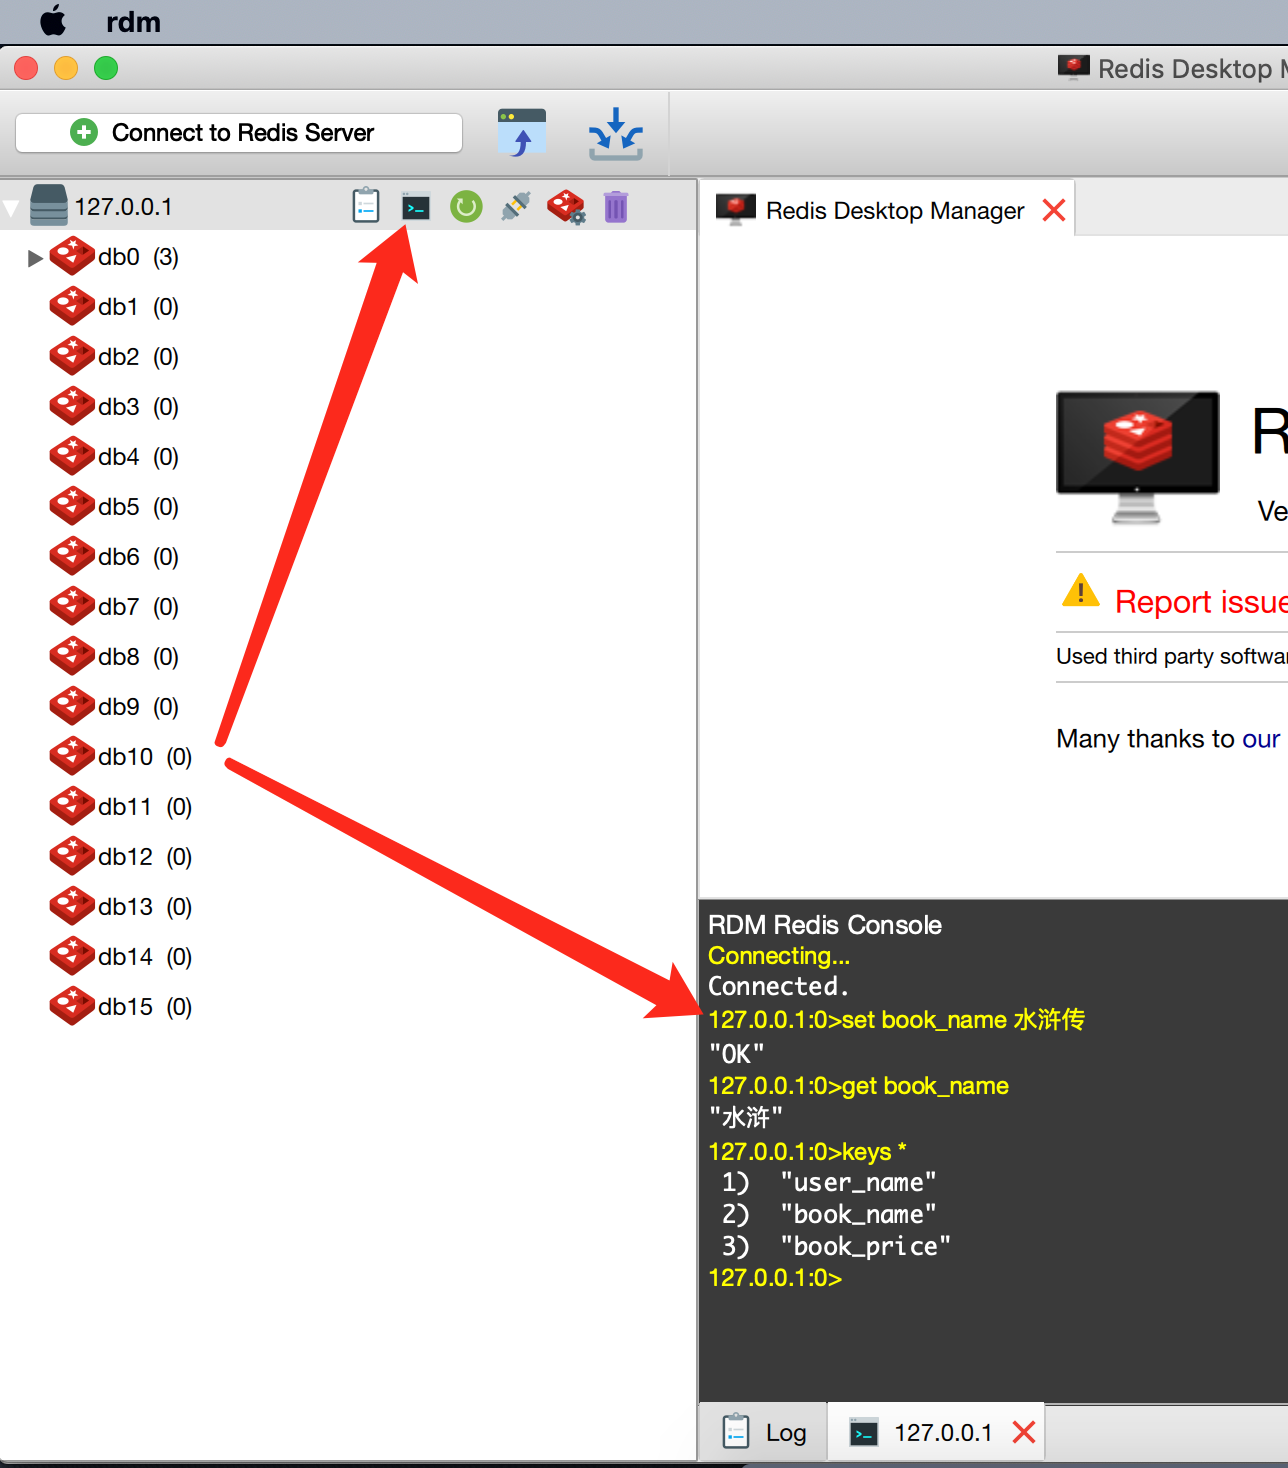
在Rdm工具中,可以打开命令行窗口操作Redis,如下为基本的命令:
#set book_name 三国演义
#get book_name
#keys *
4、安装php的redis扩展
下载、解压redis扩展包
#wget -c https://nodeload.github.com/nicolasff/phpredis/zip/master
#tar -zxvf master
#cd phpredis-master
#sudo phpize
配置、编译及安装
#./configure
#sudo make && make install
安装完成后会有类似如下的提示信息:
----------------------------------------------------------------------
Libraries have been installed in:
   /Users/apple/Downloads/phpredis-master/modules

If you ever happen to want to link against installed libraries
in a given directory, LIBDIR, you must either use libtool, and
specify the full pathname of the library, or use the `-LLIBDIR'
flag during linking and do at least one of the following:
   - add LIBDIR to the `DYLD_LIBRARY_PATH' environment variable
     during execution

See any operating system documentation about shared libraries for
more information, such as the ld(1) and ld.so(8) manual pages.
----------------------------------------------------------------------

Build complete.
Don't forget to run 'make test'.

Installing shared extensions:     /usr/local/Cellar/php@7.2/7.2.20/pecl/20170718/
其中的 【/usr/local/Cellar/php@7.2/7.2.20/pecl/20170718/】即redis.so动态扩展库的安装位置;
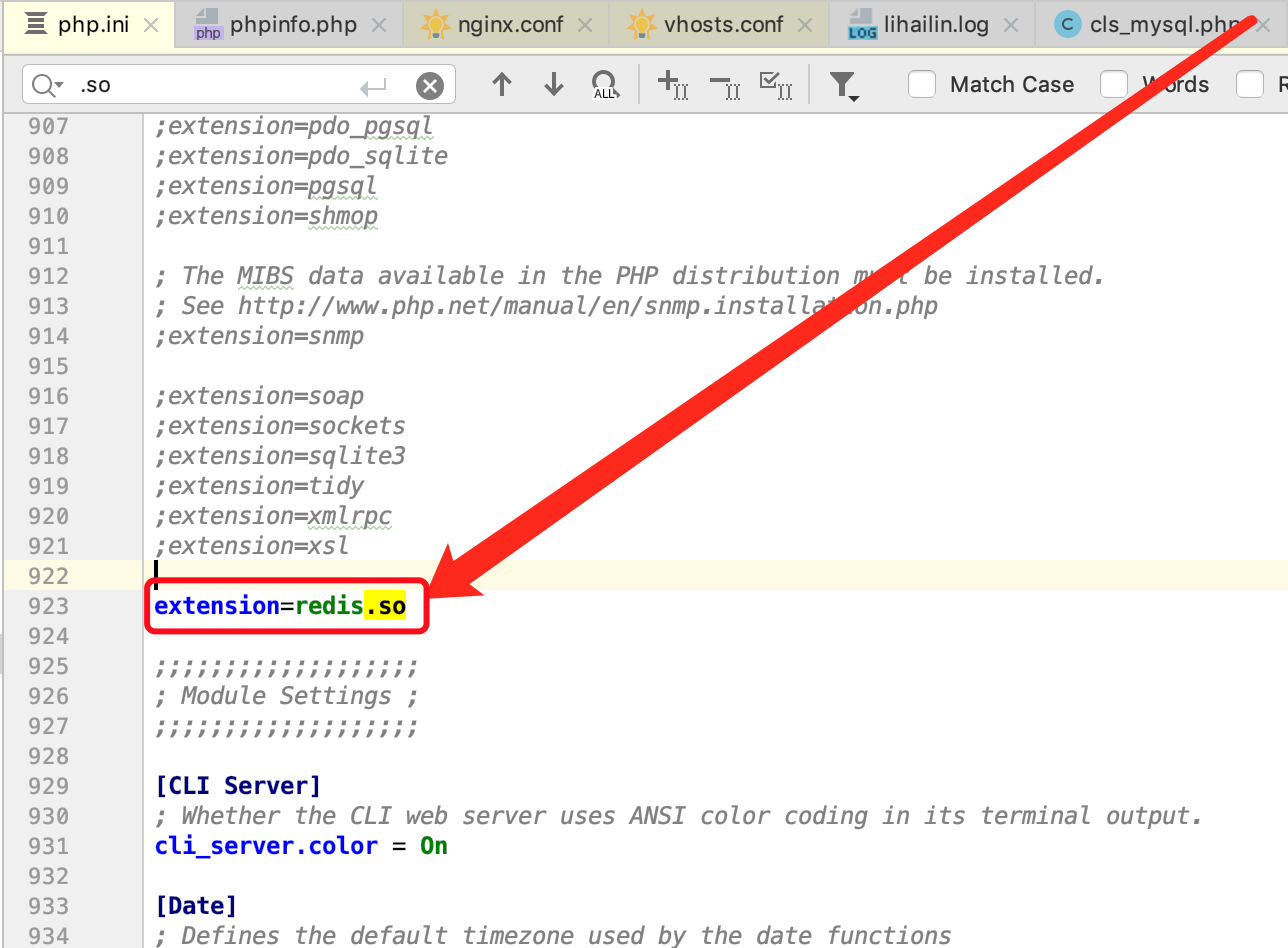
打开php.ini开启redis扩展:
重启php-fpm、nginx,并通过phpinfo()查看扩展是否安装完成:
#brew services restart php@7.2
#brew services restart nginx
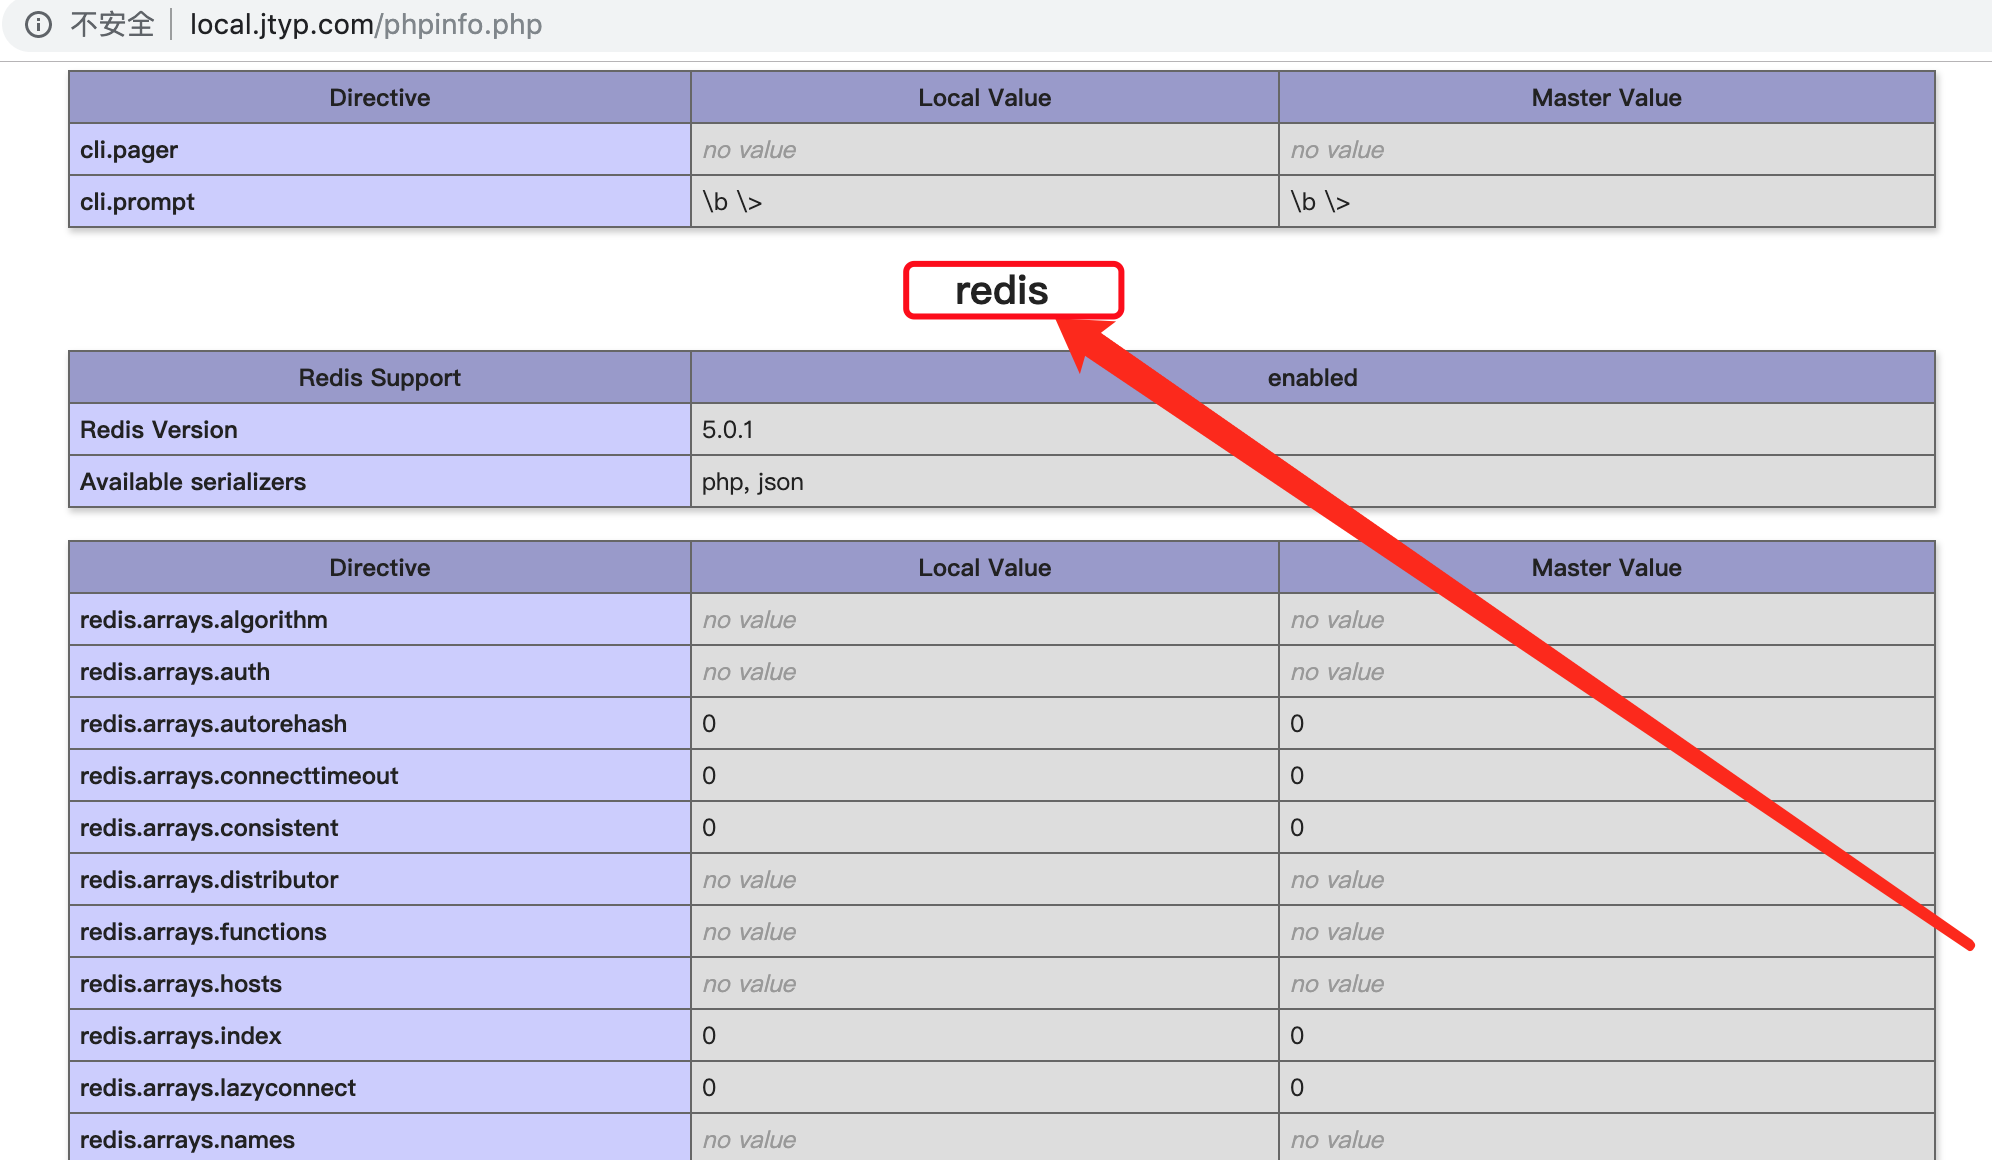
打开浏览器输入:http://localhost/phpinfo.php
安装成功后页面会有类似如下的信息显示:
5、设置Redis以守护进程的方式启动
#vi /usr/local/etc/redis.conf
找到[daemonize no]并修改为[daemonize yes]
重启Redis让配置生效:
#brew services restart redis@4.0
==============================================
关于redis.conf配置文件的说明:
(1)redis默认是前台启动,不是以守护进程的方式进行:daemonize no,把这里修改成yes,就可以让redis以守护进程的方式启动。当redis使用守护进程方式运行,会默认把pid写入/var/run/reids.pid文件中,可以通过pidfile /var/run/redis.pid进行指定。
(2)端口号指定,默认是6379,可以根据需要自己修改
(3)redis是一个NoSQL数据库,可以设置密码,默认无密码;修改【requirepass foobared】为【requirepass 123456】即表示密码为123456
