
visual studio 2015/2019下使用gcc调试linux c++开发环境搭建完整详解
一直以来,相信绝大部分的开发都是windows/mac下做开发,尤其是非嵌入式和qt系的,而开源服务器程序绝大部分都是跑在Linux下,几乎就没有跑在windows下的。一直以来开发人员都是在windows下调试好非平台相关部分,然后到具体环境下去调试平台相关接口。
有着宇宙第一IDE之称的VS自从萨提亚·纳德拉上台之后,vs 2017正式支持跨平台开发,可是vs 2017听说太巨无霸了,安装好要几十个GB。而且之前只装了vs 2015,后来偶然搜到了翻译了msdn官网的帖子,vs 2015有linux c++开发的插件。太爽了。。下面来搭建一把。。
为了使用便捷(visualgdb和visual assist必备,其他都可选):
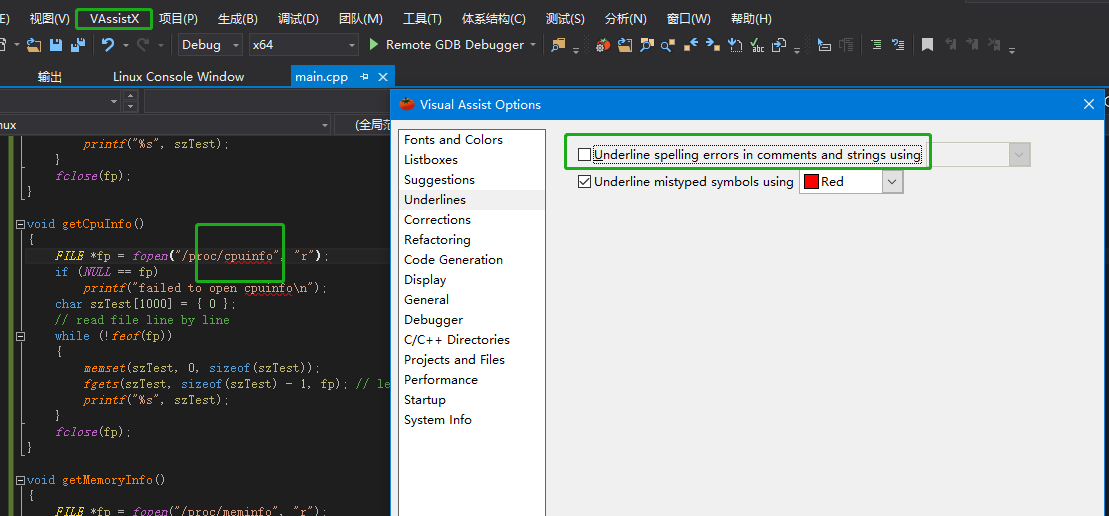
1、首先确保装了小番茄visual assist(必备);
2、禁用字符串和注释中的拼写错误。
3、安装visualgdb插件(远程debug应用,我都是用这个,非常好用,必备(支持gcc toolchains/gdb/make),vs默认不支持makefile工程)。visualgdb默认自动下载目录在LOCALAPPDATA下,参见https://visualgdb.com/documentation/autodownload/,https://sysprogs.com/w/forums/topic/configure-visualgdb-remote-source-cache/,http://pcxitongcheng.com/xtjc/27526.html,https://www.jianshu.com/p/a686a9dde4fe。
4、考虑到跨平台,安装插件forceUTF8,强制所有源文件都是UTF-8编码,这样就不需要编译时设置选项-finput-charset。
5、安装astyle(可选),配置格式化。
1)、工具-》扩展和更新,搜astyle插件,下载安装重启,当前是2.0版本。
2)、工具-》选项-》AStyle Formatter-》Edit,填入下面的,点击save,确定。
--style=allman --indent=spaces=4 --indent-switches --indent-namespaces --break-blocks --pad-oper --unpad-paren --delete-empty-lines --convert-tabs --mode=c
说明:
--indent=spaces=4 行缩进用4个空格
--indent-switches switch 与case不同列,case缩进
--indent-cases 缩进case下面的语句,我不喜欢
--break-blocks 空行分隔无关块
--delete-empty-lines 删除多余空行
--pad-oper 操作符两端出入空格
--unpad-paren 移除括号两端多余空格
--convert-tabs tab转空格
其次,我应该告诉你去看https://blogs.msdn.microsoft.com/vcblog/2017/04/11/linux-development-with-c-in-visual-studio/就好。
注:我猜可能是因为垄断的原因,vs 2017自带的跨平台开发或者vs 2015的visual c++ for linux插件远不如visualgdb好用,它支持make/cmake以及各种profiler,正式开发就应该必备小番茄和visualgdb,效率倍增。本文还是以visual c++ for linux插件为例。
第三,我需要告诉你的是msdn忽略了以及网络上找不到直接答案的关键性信息。安装好插件以及配置好ssh之后,别忙着测试,否则可以让你折腾好一会儿。
- 卸载linux自带的gdb,下载gdb源码并编译安装gdb以及gdbserver(默认rhel Linux下不带gdbserver,一般用于嵌入式开发,否则会提示找到gdbserver);
gdb的安装可以baidu,唯一需要注意的是,刚从gnu下载的gdb源码目录中并没有gdb/gdbserver这个目录,configure/make/make install之后,就生成了gdbserver目录,然后执行make就可以了。
- 点击vs debug->linux console调出 linux控制台(否则,vs会卡死在那);
- 在/etc/ld.so.conf中包含/usr/local/mpc-1.0.1/lib(否则会提示cc1plus: error while loading shared libraries: libmpc.so.3: cannot open shared object file: No such file or directory)
第四,既然是为了在windows下开发,目标环境是linux,就一定得使用linux下专有特性验证下确实在linux下运行。
c++代码,以获取操作系统和配置信息为例:
#include <iostream>

#include <stdio.h>
#include <stdlib.h>
#include <string.h>

using namespace std;

void getOsInfo()
{
    FILE *fp = fopen("/proc/version", "r");
    if (NULL == fp)
        printf("failed to open version\n");
    char szTest[1000] = { 0 };
    while (!feof(fp))
    {
        memset(szTest, 0, sizeof(szTest));
        fgets(szTest, sizeof(szTest) - 1, fp); // leave out \n
        printf("%s", szTest);
    }
    fclose(fp);
}

void getCpuInfo()
{
    FILE *fp = fopen("/proc/cpuinfo", "r");
    if (NULL == fp)
        printf("failed to open cpuinfo\n");
    char szTest[1000] = { 0 };
    // read file line by line
    while (!feof(fp))
    {
        memset(szTest, 0, sizeof(szTest));
        fgets(szTest, sizeof(szTest) - 1, fp); // leave out \n
        printf("%s", szTest);
    }
    fclose(fp);
}

void getMemoryInfo()
{
    FILE *fp = fopen("/proc/meminfo", "r");
    if (NULL == fp)
        printf("failed to open meminfo\n");
    char szTest[1000] = { 0 };
    while (!feof(fp))
    {
        memset(szTest, 0, sizeof(szTest));
        fgets(szTest, sizeof(szTest) - 1, fp);
        printf("%s", szTest);
    }
    fclose(fp);
}


int main()
{
    printf("===os information===\n");
    getOsInfo();

    printf("===cpu infomation===\n");
    getCpuInfo();

    printf("===memory information===\n");
    getMemoryInfo();
    return 0;
}

再看下用户根目录下的project。

直接在linux下运行看看是不是生成linux二进制的格式:

大功告成,可以干活了,必须宇宙第一IDE。。。
相关错误:
"undefined reference to" 多种可能出现的问题解决方法,除了本文中提及的示例外,常规开发中的引用三方库等都测试过了,不如引用gperftools的时候就出现这个异常,这是因为so安装在/usr/local/lib中,但其没有定义在LD_LIBRARY_PATH中的原因。https://blog.csdn.net/shaderdx/article/details/49929147
编译的时候找不到三方库头文件,在
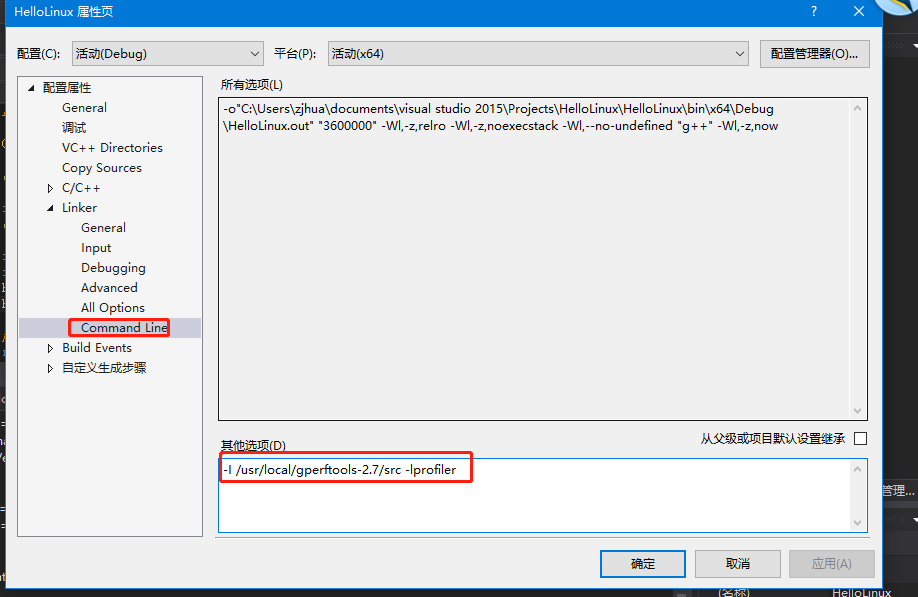
中包含头文件目录即可,VC Directories/C++中的用于本地智能提示,https://developercommunity.visualstudio.com/content/problem/40127/additional-include-folders-problems-for-linux-proj.html
gdb提示Loaded 'shared libraries loaded at this time.'. Cannot find or open the symbol file.,如下:
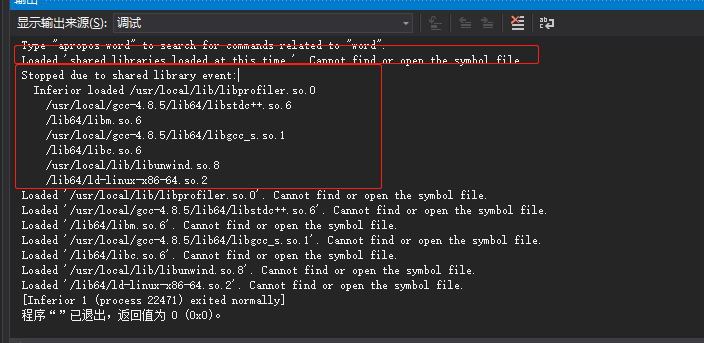
程序运行成功,不影响,这应该是gdb自己的设置问题,和vs无关。https://stackoverflow.com/questions/46127228/visual-studio-2017-for-linux-c-cannot-find-or-open-the-symbol-file
引用非标准库中的so找不到,比如error while loading shared libraries: libmyso.so: cannot open shared object file: No such file or directory。这种情况下,需要确保包含的so在LD_LIBRARY_PATH或者系统库目录/usr/lib:/usr/local/lib下,同时加上-L编译选项,如下:
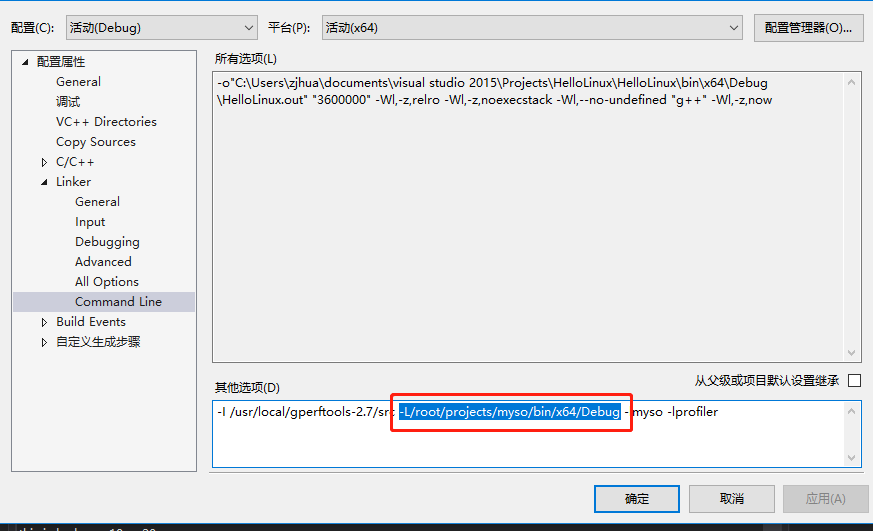
为什么一定要同时包含呢???仔细测试下了,如果去掉IDE中的-L选项,就会提示:
1> /usr/bin/ld: cannot find -lmyso
1> collect2: error: ld returned 1 exit status
可参考这篇的解释,但是感觉是其中一种原因:https://www.cnblogs.com/sylar5/p/6701318.html
===============================makefile工程=========================
在实际中,linux工程几乎95%+都是使用makefile工程,剩下的一部分使用cmake(mysql),所以我们需要能够直接在VS下开发和调试makefile工程。
1、首先创建makefile项目,如下:

2、创建一个Makefile文件,内容如下:

上图中的说明参见:https://stackoverflow.com/questions/48454486/debugging-makefile-project-of-linux-development-with-c
3、设置项目属性:
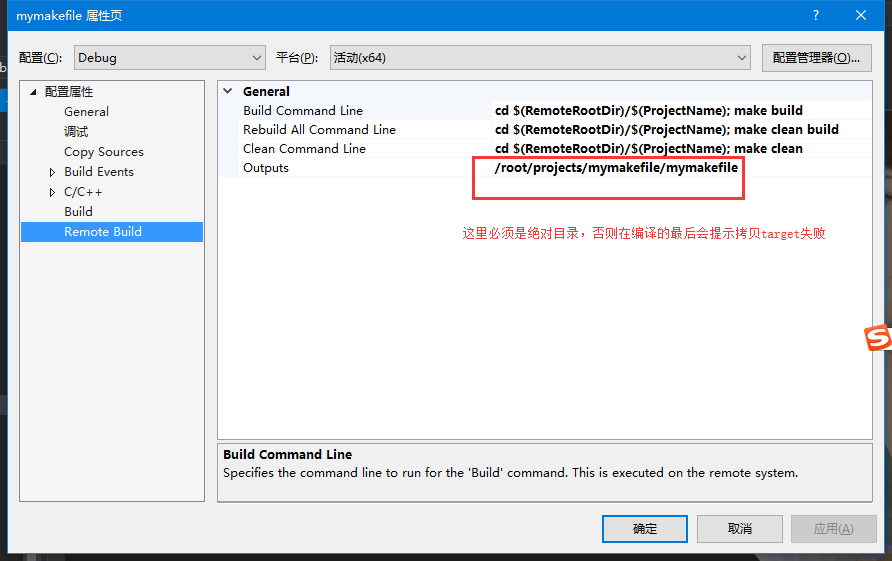
上图的说明原因参见:https://github.com/Microsoft/VSLinux/issues/99
这样就可以调试makefile工程了。
新补充:在有些情况下,我们没有主程序的代码,只有so的代码,此时要进行调试的话,在gdbserver模式,visual studio是step into so的代码的,无论是编译时链接的还是通过dlopen动态加载的so都一样,此时要在visual studio中进行debug,需要改为gdb模式(但是gdb模式不支持控制台交互模式,这要注意)。或者使用visualgdb,visualgdb和vs for linux在使用上还有些差别,后续专门开文讲解。
gdb模式(gdbserver没有这个问题)控制台输出中文乱码,但是程序在linux下执行输出则不是乱码,linux下的编码格式为UTF-8。


暂时不知道如何解决?
windows gdb存在一个问题,长时间debug的时候会退出,如:https://www.pianshen.com/article/92831719921/。
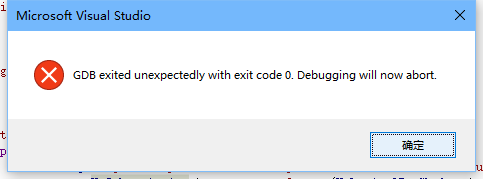
这个问题似乎是windows gdb的问题,要解决,选择使用visualgdb调试引擎即可。
vs for linux box 远程debug mysql,参考:https://mysqlserverteam.com/compiling-mysql-in-visual-studio-on-a-remote-linux-box/
其他
vs本身虽然支持宏调试,但是快速监视不支持宏调用,稍微有点麻烦。另外变量值tooltip中,指针默认显示10进制不够方便。
vs makefile工程远程调试时,宏定义似乎没有生效,默认都是windows下的默认宏定义。
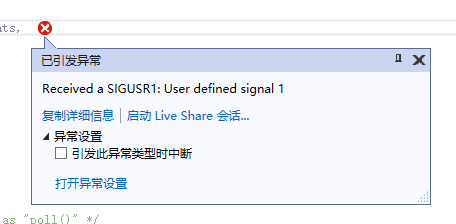
对于注册了信号的进程,可以在对应的信号处理器上打debug。
visualgdb不仅对于attach非常方便,对于launch debug也非常方便,直接quick debug with cmake或gdb即可。
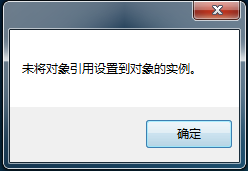
不管因为任何原因出现该异常(vs只要异常终止,必然会出现该问题,删除后,重装插件,大约10分钟),删除 C:\Users\%user%\AppData\Local\Microsoft\VisualStudio 目录下对应的那个版本的文件夹之后,问题得以解决!
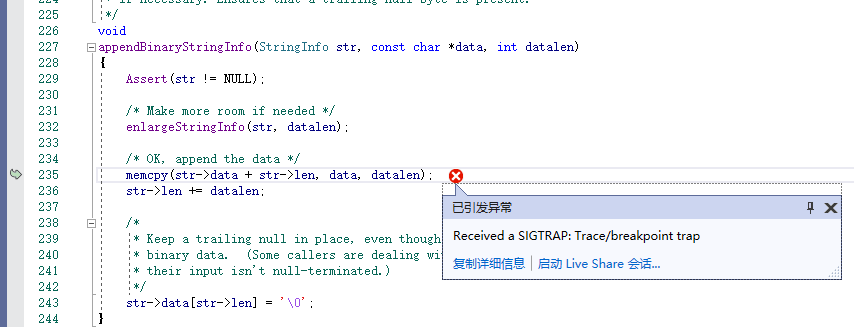
有些代码中不停的弹出“Received a SIGTRAP: Trace/breakpoint trap”,而且同一处位置可能会提示几次到十几次,但是服务端此时没有任何操作和发信号。SO最正确可能也最没用的答案:
Breakpoint trap just means the processor has hit a breakpoint. There are two possibilities for why this is happening. Most likely, your initialization code is being hit because your CPU is resetting and hitting the breakpoint again. The other possibility would be that the code where you set the breakpoint is actually run in places other than initialization. Sometimes with aggressive compiler optimization it can be hard to tell exactly which code your breakpoint maps to and which execution paths can get there.
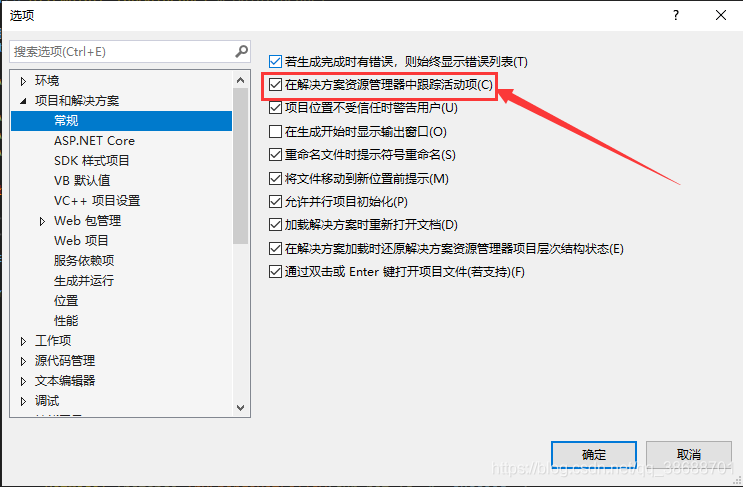
自动定位文件
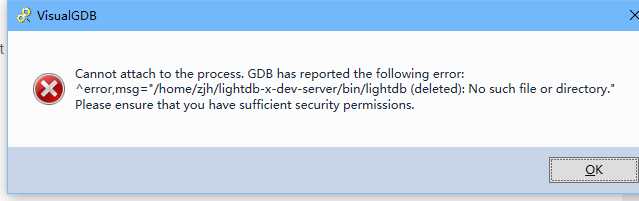
进程存在,为啥提示deleted?权限也正确。ps检查进行,把进程干净的停止了,重启vs看看(可解决)。
1>EXEC : warning : Stderr line received '/usr/bin/xauth:  error in locking authority file /home/zjh/.Xauthority'
1>VisualGDB: E:\c++examples\c++-examples-linux2\c++-examples-linux2 => /tmp/VisualGDB/e/c++examples/c++-examples-linux2/c++-examples-linux2: 1 files copied (7905 bytes), 6 files are up-to-date. (1 warnings)
1>VisualGDB : error : Source file transfer failed. If you want to build your project nonetheless, edit project properties to ignore transfer errors.
1>VisualGDB : error : Build has failed. See the Output window for more details.
1>D:\Program Files (x86)\Microsoft Visual Studio\2019\Enterprise\MSBuild\Microsoft\VC\v160\Microsoft.MakeFile.Targets(47,5): error MSB3073: 命令“"D:\Program Files (x86)\Sysprogs\VisualGDB\\VisualGDB.exe" /build "E:\c++examples\c++-examples-linux2\c++-examples-linux2\c++-examples-linux2.vcxproj" "/solution:E:\c++examples\c++-examples-linux2\c++-examples-linux2.sln"  "/config:Debug" "/platform:Win32"”已退出,代码为 1。
偶尔遇到(尚未解决)。
如果要开发时引用其它三方库头文件,可通过https://blog.csdn.net/qq_39383591/article/details/118878542指定下即可,如果是linux远程开发,则vs通过打开文件夹方式,将三方头文件和项目工程平级,导入他们的共同上一级目录即可。
&“warning: GDB: Failed to set controlling terminal: Operation not permitted\n“ 带参数启动gdb调试无法命中断点
https://blog.csdn.net/qq_42572757/article/details/124053525
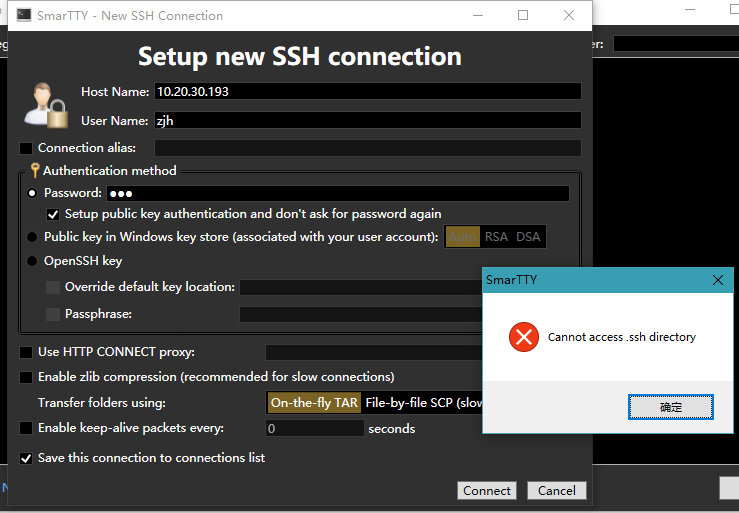
调试的时候报:

删除.Xauthority文件也不能解决。
C++调试时出现“optimized out”的原因、解决办法
使用-g O0编译即可。https://blog.csdn.net/y_m_h/article/details/117463230

同时打开两个工程
有时候为了调试方便,启动两个工程,alt tab切换更快。再执行一次vs启动即可。不是通过菜单栏打开。
参考
https://blogs.msdn.microsoft.com/vcblog/2017/04/11/linux-development-with-c-in-visual-studio/
https://blogs.msdn.microsoft.com/vcblog/2018/04/09/intellisense-for-remote-linux-headers/
https://www.cnblogs.com/coolulu/p/4124803.html
https://docs.microsoft.com/en-us/cpp/linux/configure-a-linux-project
visual studio 2019可参考https://blog.csdn.net/weixin_39979159/article/details/116689854
2019缺少依赖,如下:
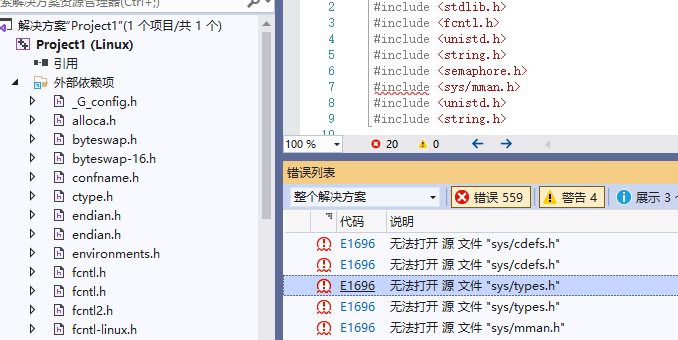
解决方法:
待补充。

 浙公网安备 33010602011771号