SpringBoot发送邮件
SpringBoot集成邮件服务
本文将介绍如何使用Spring Boot集成QQ邮箱的邮件服务,实现Java发送邮件功能。
开启邮件服务
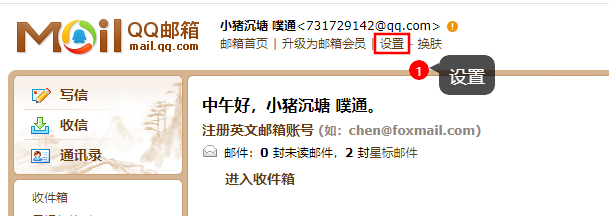
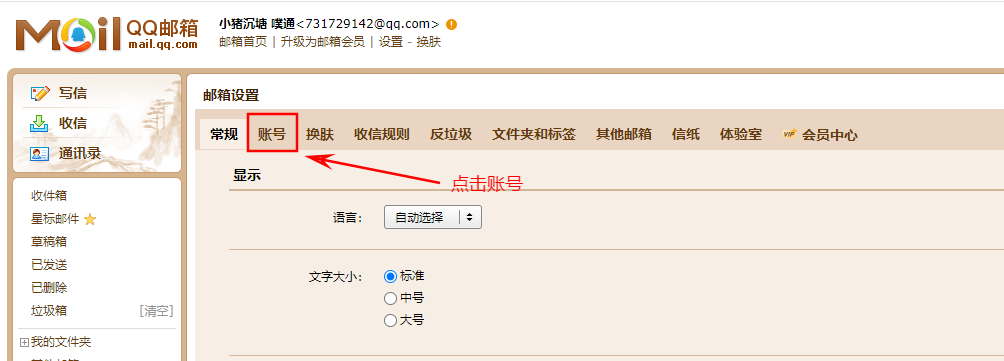
以QQ邮箱为例,首先需要开启SMTP服务。
 |
 |
|---|---|
| 第一步 首页点击设置 | 第二步 点击账号 |
 |
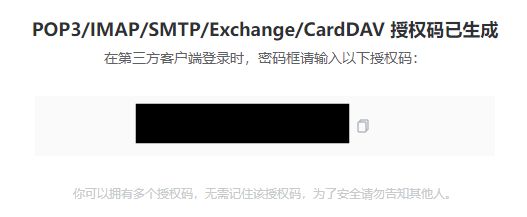 |
| 第三步 下滑找到SMTP相关文件服务,获取验证码 | 第四步 复制获取到的授权码 |
引入依赖
在pom.xml文件中引入发送邮件和Thymeleaf模板引擎相关依赖。
<dependency>
    <groupId>org.springframework.boot</groupId>
    <artifactId>spring-boot-starter-mail</artifactId>
</dependency>
<dependency>
    <groupId>org.springframework.boot</groupId>
    <artifactId>spring-boot-starter-thymeleaf</artifactId>
</dependency>
配置邮件服务
在application.yml文件中添加邮件服务的配置。
spring:
  mail:
    host: smtp.qq.com
    username: XXXXXXXX@qq.com
    password: XXXXXXXXXXXXXXX(授权码)
    port: 587
    default-encoding: UTF-8
实现邮件服务类
创建一个服务类用于发送邮件。
package com.example;

import org.springframework.beans.factory.annotation.Autowired;
import org.springframework.web.bind.annotation.GetMapping;
import org.springframework.web.bind.annotation.RequestParam;
import org.springframework.web.bind.annotation.RestController;
import org.thymeleaf.context.Context;

import javax.mail.MessagingException;

@RestController
public class EmailController {

    // 自动注入EmailService
    @Autowired
    private MailService mailService;

    /**
     * 发送邮件的端点
     * @param to 收件人邮箱地址
     * @param subject 邮件主题
     * @return 发送结果
     */
    @GetMapping("/send-email")
    public String sendEmail(@RequestParam String to, @RequestParam String subject) {
        Context context = new Context();
        context.setVariable("name", "张三");
        context.setVariable("event", "日常聚会");
        context.setVariable("location", "欢乐广场");
        context.setVariable("date", "2024-06-23");
        context.setVariable("time", "19:30");
        context.setVariable("image","background");
        String message = null;
        try {
            mailService.sendSimpleMail(to,subject,"invitationTemplate",context);
            message = "邮件发送成功";
        }catch (MessagingException e) {
            message = "邮件发送失败";
        }
        return message;
    }
}
创建邮件模板
在src/main/resources/templates目录下新建文件invitationTemplate.html。
<!DOCTYPE html>
<html lang="en"
      xmlns:th="http://www.thymeleaf.org">
<head>
    <meta charset="UTF-8">
    <title>邮件模板</title>
</head>
<body>
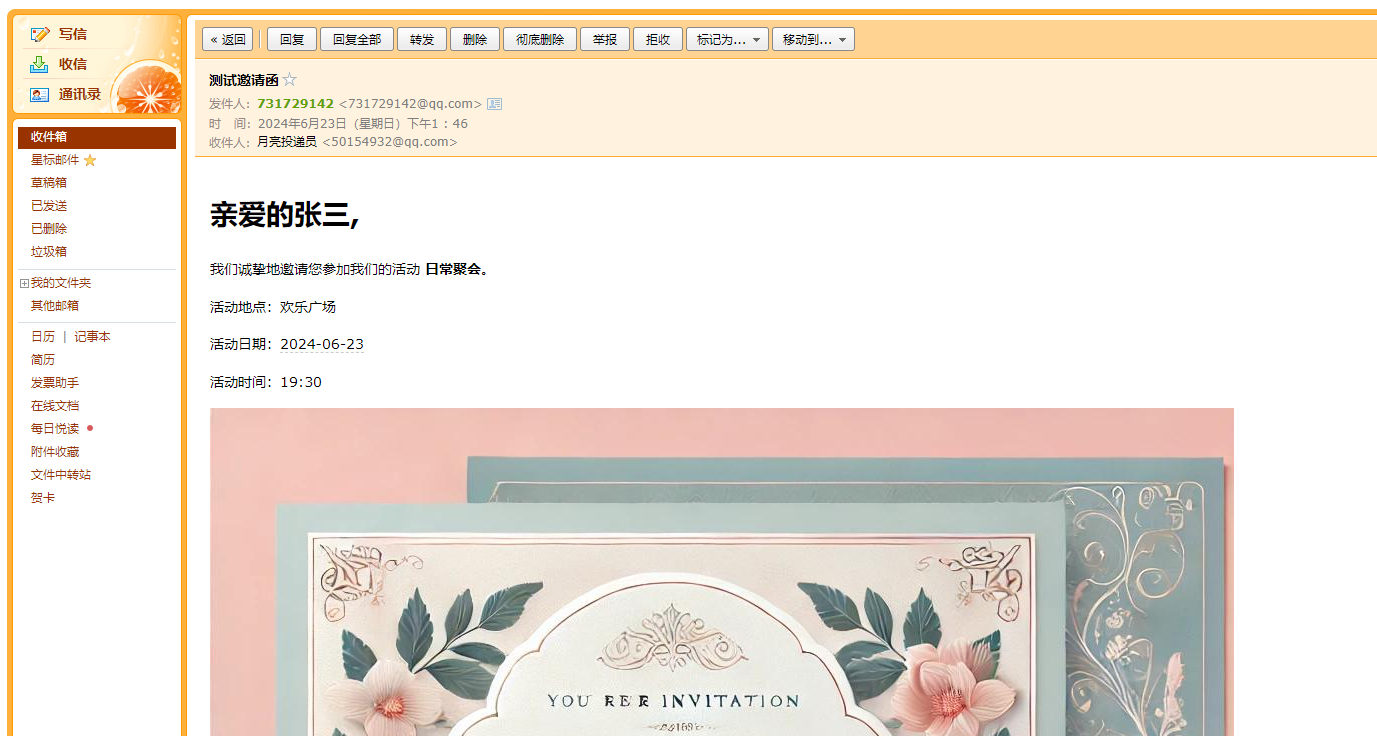
<h1>亲爱的<span th:text="${name}"></span>,</h1>
<p>我们诚挚地邀请您参加我们的活动 <strong><span th:text="${event}"></span></strong>。</p>
<p>活动地点:<span th:text="${location}"></span></p>
<p>活动日期:<span th:text="${date}"></span></p>
<p>活动时间:<span th:text="${time}"></span></p>
<img th:src="'cid:' + ${image}" alt="活动图片"/>
<p>期待您的光临!</p>
</body>
</html>
创建邮件发送控制器
创建一个控制器来处理发送邮件的请求。
package com.example;

import org.springframework.beans.factory.annotation.Autowired;
import org.springframework.web.bind.annotation.GetMapping;
import org.springframework.web.bind.annotation.RequestParam;
import org.springframework.web.bind.annotation.RestController;
import org.thymeleaf.context.Context;

import javax.mail.MessagingException;

@RestController
public class EmailController {

    // 自动注入EmailService
    @Autowired
    private MailService mailService;

    /**
     * 发送邮件的端点
     * @param to 收件人邮箱地址
     * @param subject 邮件主题
     * @return 发送结果
     */
    @GetMapping("/send-email")
    public String sendEmail(@RequestParam String to, @RequestParam String subject) {
        Context context = new Context();
        context.setVariable("name", "张三");
        context.setVariable("event", "日常聚会");
        context.setVariable("location", "欢乐广场");
        context.setVariable("date", "2024-06-23");
        context.setVariable("time", "19:30");
        context.setVariable("image","background");
        String message = null;
        try {
            mailService.sendSimpleMail(to,subject,"invitationTemplate",context);
            message = "邮件发送成功";
        }catch (MessagingException e) {
            message = "邮件发送失败";
        }
        return message;
    }
}
邮件发送测试
通过 postman 进行测试。
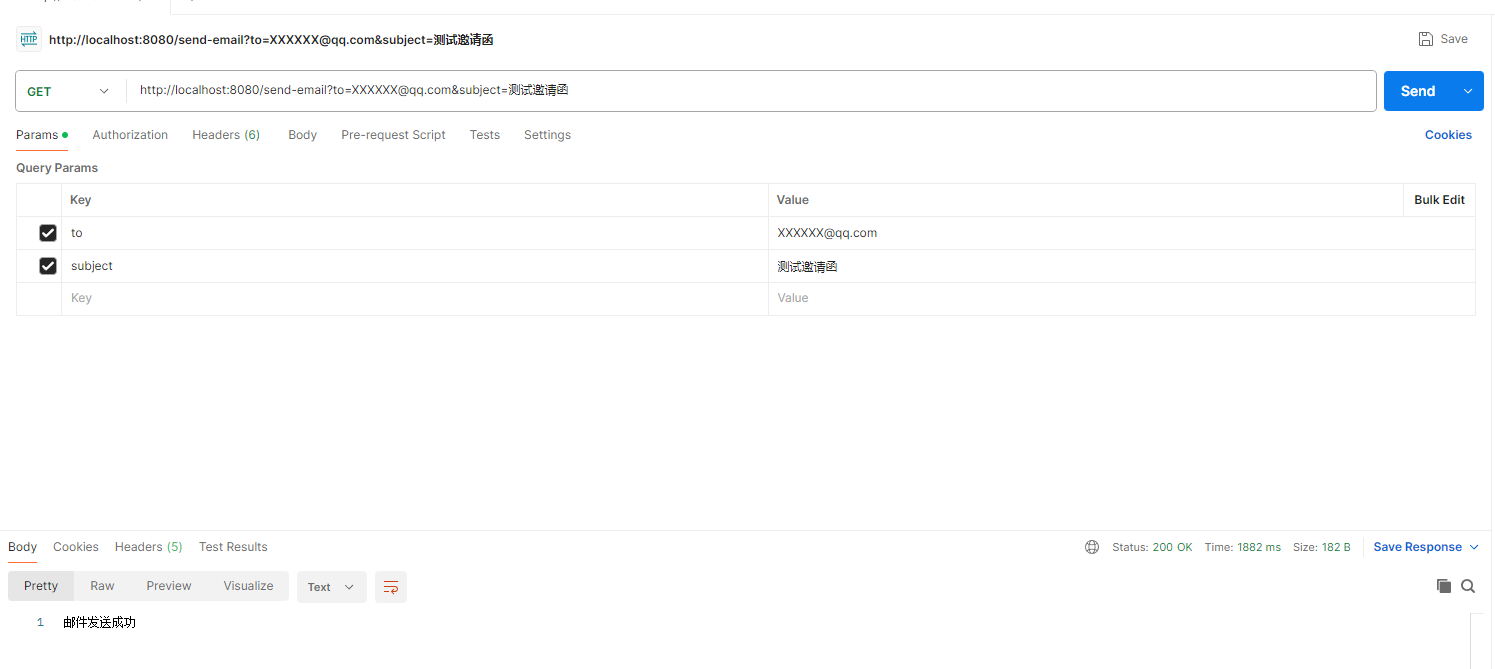
去邮箱查看是否收到邮件。


【推荐】国内首个AI IDE,深度理解中文开发场景,立即下载体验Trae
【推荐】编程新体验,更懂你的AI,立即体验豆包MarsCode编程助手
【推荐】抖音旗下AI助手豆包,你的智能百科全书,全免费不限次数
【推荐】轻量又高性能的 SSH 工具 IShell:AI 加持,快人一步
· DeepSeek 开源周回顾「GitHub 热点速览」
· 物流快递公司核心技术能力-地址解析分单基础技术分享
· .NET 10首个预览版发布:重大改进与新特性概览!
· AI与.NET技术实操系列(二):开始使用ML.NET
· .NET10 - 预览版1新功能体验(一)