haproxy 配置httpd和httpds负载均衡
haproxy配置httpd负载均衡
haproxy配置方法见haproxy配置及使用
环境
| 系统/主机名 | ip |
| redhat 8 /LB | 192.168.100.134 |
| redhat 8 /RS1 | 192.168.100.132 |
| redhat 8 /RS2 | 192.168.100.133 |
配置
//在两台RS上安装httpd
# yum -y install httpd

//关闭防火墙和selinux
# systemctl stop firewalld
# setenforce 0

//修改第二台RS的监听端口
[root@RS2 ~]# vim /etc/httpd/conf/httpd.conf
...
Listen 8080

//RS启动并设置开机自启httpd
# systemctl enable --now httpd

//创建测试页面
[root@RS1 ~]# echo "RS1" > /var/www/html/index.html
[root@RS2 ~]# echo "RS2" > /var/www/html/index.html

//关闭LB的防火墙和selinux
# systemctl stop firewalld
# setenforce 0

//修改LB的 haproxy配置文件  ---添加这两个主机IP和端口号
# vim /etc/haproxy/haproxy.cfg
...
    server web01 192.168.100.132:80 check inter 2000 fall 5
    server web02 192.168.100.133:8080 check inter 2000 fall 5

//重启haproxy
# pkill haproxy
# systemctl start haproxy

//访问测试
[root@LB ~]# curl 192.168.100.134
RS1
[root@LB ~]# curl 192.168.100.134
RS1
[root@LB ~]# curl 192.168.100.134
RS2
[root@LB ~]# curl 192.168.100.134
RS2
[root@LB ~]# curl 192.168.100.134
RS1
[root@LB ~]# curl 192.168.100.134
RS2
[root@LB ~]# curl 192.168.100.134
RS1
[root@LB ~]# curl 192.168.100.134
RS2
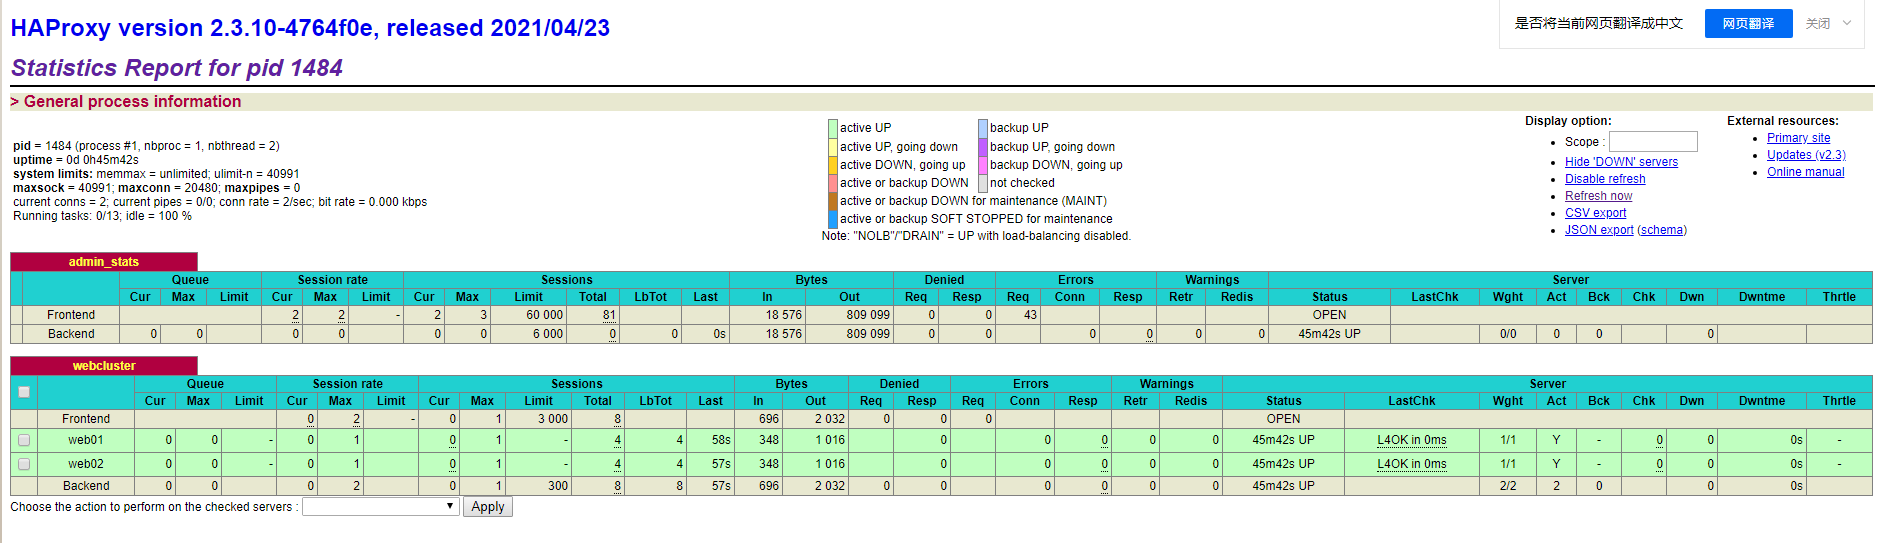
登录网页haproxy查看负载(登陆方式见haproxy配置及使用)
Haproxy搭建HTTPS负载集群
在以上配置基础下搭建https
//RS上安装mod_ssl
[root@RS1 ~]# yum -y install mod_ssl
[root@RS2 ~]# yum -y install mod_ssl

//使用默认的证书,重启服务查看443是否启动
[root@RS1 ~]# systemctl restart httpd
[root@RS2 ~]# systemctl restart httpd

//443端口已经起来
[root@RS1 ~]# ss -antl
State       Recv-Q      Send-Q           Local Address:Port             Peer Address:Port
LISTEN      0           128                    0.0.0.0:22                    0.0.0.0:*
LISTEN      0           128                          *:80                          *:*
LISTEN      0           128                       [::]:22                       [::]:*
LISTEN      0           128                          *:443                         *:*

[root@RS2 ~]# ss -antl
State       Recv-Q      Send-Q           Local Address:Port             Peer Address:Port
LISTEN      0           128                    0.0.0.0:22                    0.0.0.0:*
LISTEN      0           128                          *:80                          *:*
LISTEN      0           128                       [::]:22                       [::]:*
LISTEN      0           128                          *:443                         *:*
修改配置文件
//LB主机
[root@LB ~]# vim /etc/haproxy/haproxy.cfg
global
    log 127.0.0.1 local2  info
    maxconn 20480
    chroot /usr/local/haproxy
    pidfile /var/run/haproxy.pid
    stats socket  /var/lib/haproxy/haproxy.sock mode 600 level admin
    user haproxy
    group haproxy
    daemon
    nbproc 1
    nbthread 4
    spread-checks 5

defaults
    mode http
    log global
    option dontlognull
    option httpclose
    option  http-keep-alive
    option redispatch
    balance roundrobin
    timeout connect 60s
    timeout client 30s
    timeout server 30s
    timeout check 10s
    maxconn 60000
    retries 3

listen https
    bind 0.0.0.0:443
    log global
    mode tcp
    balance  roundrobin
    server web01 192.168.100.132:443 check inter 2s fall 3 rise 5
    server web02 192.168.100.133:443 check inter 2s fall 3 rise 5

//重启haproxy
[root@LB ~]# systemctl restart haproxy

//查看443端口
[root@LB ~]# ss -antl
State     Recv-Q     Send-Q           Local Address:Port           Peer Address:Port
LISTEN    0          128                    0.0.0.0:22                  0.0.0.0:*
LISTEN    0          128                    0.0.0.0:443                 0.0.0.0:*
LISTEN    0          128                       [::]:22                     [::]:*

//访问测试
[root@LB ~]# curl -k https://192.168.100.134
RS1
[root@LB ~]# curl -k https://192.168.100.134
RS2
[root@LB ~]# curl -k https://192.168.100.134
RS1
[root@LB ~]# curl -k https://192.168.100.134
RS2
[root@LB ~]# curl -k https://192.168.100.134
RS1
[root@LB ~]# curl -k https://192.168.100.134
RS2

 浙公网安备 33010602011771号