
[debian]debian个人学习备忘 原创
文章目录
- 个人环境
- Debian社区
- 安全使用frankdebian (sid/testing)
- 初始化
- 软件
- gnome-shell
- 美化
- shell
- Emacs
- 报错
- 常识
- 个人配置
- 个人效果
个人环境
debian sid,gnome3.38.4
Debian社区
社区
bebian.org
文档
https://www.debian.org/doc/manuals
新维护者文档(DM)
https://www.debian.org/doc/manuals/debmake-doc/
安全使用frankdebian (sid/testing)

初始化
testing 下载链接
testing软件源
方法一:添加debian testing版本源
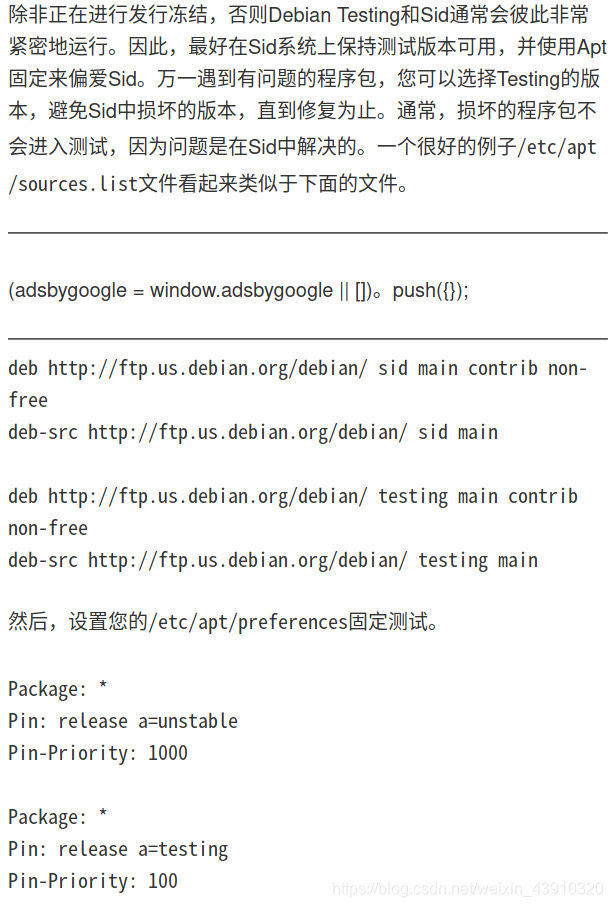
如果安装的是debian stable版,只要喜欢,任何时间都可以将其变成 testing版本,方法很简单,用喜欢的编辑器打开:/etc/apt/source.list 源文件,用#号注释掉之前的源,加入下面的源文件,该源长期有效,因为每个debian版本,都会有testing版本。
# --------testing 源
deb http://security.debian.org/ testing/updates main contrib
deb-src http://security.debian.org/ testing/updates main contrib
deb-src http://ftp.debian.org/debian/ testing-updates main contrib
deb http://ftp.debian.org/debian/ testing-updates main contrib
# 163
deb http://mirrors.163.com/debian/ testing main non-free contrib
deb http://mirrors.163.com/debian/ testing-updates main non-free contrib
deb-src http://mirrors.163.com/debian/ testing main non-free contrib
deb-src http://mirrors.163.com/debian/ testing-updates main non-free contrib
deb http://mirrors.163.com/debian-security/ testing/updates main non-free contrib
deb-src http://mirrors.163.com/debian-security/ testing/updates main non-free contrib
#中国官方源镜像
deb http://mirrors.ustc.edu.cn/debian/ testing main contrib non-free
deb-src http://mirrors.ustc.edu.cn/debian/ testing main contrib non-free
deb http://mirrors.ustc.edu.cn/debian/ testing-updates main contrib non-free
deb-src http://mirrors.ustc.edu.cn/debian/ testing-updates main contrib non-free
deb http://mirrors.ustc.edu.cn/debian-security/ testing/updates main contrib non-free
deb-src http://mirrors.ustc.edu.cn/debian-security/ testing/updates main contrib non-free
保存源文件,终端下执行:
sudo apt-get update
sudo apt-get upgrade
sudo apt-get dist-upgrade
系统就开始更新了,等待的时间可能会有点长,取决于网络速度。升级完成后,发现一切都变了,内核从3.16变成4.8了,当然,不止内核,一切都变了,隔一两个星期再执行以上的命令,就会发现,你的debian系统永远是最新的。
方法二:直接使用testing镜像安装
下载debian testing版本ISO镜像,刻盘或制作U盘启动工具,就可以安装testing了,推荐使用这种方式进行testing,不需要设置。直接安装就是testing了。
DVD镜像下载地址:http://cdimage.debian.org/cdimage/weekly-builds/amd64/iso-dvd/
无限网卡驱动
安装firmware-iwlwifi包:
apt-get install firmware-iwlwifi
iwlwifi模块可以被自动加载,当iwlwifi被自动加载时我们需要重新插入该模块以访问固件。
设置iwlwifi自动重新加载:modprobe -r iwlwifi ; modprobe iwlwifi
扩展知识:

Debian是一个开源操作系统。因此,在安装Debian的时候,默认只安装自由软件,而非自由软件(non-free)则不会被默认安装。在Debian官方的wiki(https://wiki.debian.org/WiFi)中有关于wifi固件以及非开源的wifi驱动程序的说明,在这篇关于wifi的wiki里,有这样的描述:
”Currently there are only a few modern wifi chipsets readily available that work with free software systems. For USB wifi devices this list includes the Realtek RTL8187B chipset (802.11G) and the Atheros AR9170 chipset (802.11N). For Mini PCIe all cards with an Atheros chipset are supported.”.

翻译成中文就是:
“目前只有少数几个现代的WiFi芯片组可以与自由软件系统一起工作。对于USB WiFi设备,该列表包括RealTek RTL8187B芯片组(802.11g)和ActhOS AR9170芯片组(802.11n)。对于小型PCIe,所有具有AcICOS芯片组的卡都得到支持。”

也就是说并不是所有计算机中的wifi固件都支持自由软件,因此Debian9默认并没有启用对wifi的支持。但是 802.11n是支持自由软件的,所以我们需要安装iwlwifi Linux kernel driver(iwlwifi内核驱动程序)来启用对Intel 802.11n devices(Intel 802.11n设备)的支持。
参考资料:

1.Debian Wiki: WiFi:https://wiki.debian.org/WiFi

2.Debian Wiki: iwlwifi:https://wiki.debian.org/iwlwifi

3.iwlwifi - WikiDevi:https://wikidevi.com/wiki/Iwlwifi
N卡驱动
wiki.Debian.org->NvidiaGraphicsDrivers
sudo apt-get install nvidia-detect
然后使用nvidia-detect查看显卡型号,apt特定型号显卡
Debian 11 "Bullseye"

Version 460.73.01

For support of GeForce 600 series and newer GPUs (supported devices). For older devices, see Version 390.143 (legacy GPUs).

    Add "contrib" and "non-free" components to /etc/apt/sources.list, for example:

    # Debian 11 "Bullseye"
    deb http://deb.debian.org/debian/ bullseye main contrib non-free

    Update the list of available packages, then we can install the nvidia-driver package, plus the necessary firmware:

    # apt update
    # apt install nvidia-legacy-390xx-driver firmware-misc-nonfree

    DKMS will build the nvidia module for your system, via the nvidia-kernel-dkms package.
    Restart your system to load the new driver.

Version 390.143

For support of GeForce 400 series and newer GPUs (supported devices).

    Add "contrib" and "non-free" components to /etc/apt/sources.list, for example:

    # Debian 11 "Bullseye"
    deb http://deb.debian.org/debian/ bullseye main contrib non-free

    Update the list of available packages, then we can install the nvidia-legacy-390xx-driver package, plus the necessary firmware:

    # apt update
    # apt install nvidia-legacy-390xx-driver firmware-misc-nonfree

    DKMS will build the nvidia module for your system, via the nvidia-legacy-390xx-kernel-dkms package.
    Restart your system to load the new driver.
grub 分辨率
           $ sudo gedit /etc/default/grub
      然后在打开的grub文件中找到GRUB_GFXMODE,将前面的注释去掉,并将其值设置为
            GRUB_GFXMODE=XXXxYYY
      (注:也可以改为其他显卡支持的分辨率,但不能改为16:9的分辨率,否则没有任何效果,不知为何。)
         然后命令行中输入:
              $ sudo update-grub
        让配置生效。重启电脑。
soduers用户组
切换到root:
su root

修改sudoers

nano /etc/sudoers

在root    ALL=(ALL:ALL) ALL下,加入:
yourName        ALL=(ALL:ALL) ALL
软件
输入法
fcitx输入法
ibus输入法
因为我重新装了之后fcitx发生错误,所以安装了ibus
删除fcitx相关文件(可选项)。
sudo apt-get remove fcitx*
安装ibus框架。
sudo apt-get install ibus ibus-clutter ibus-gtk ibus-gtk3 ibus-qt4
启用ibus框架。
im-config -s ibus
重启系统或者注销当前账户。
安装相应输入法(以安装拼音输入法为例)。
sudo apt-get install ibus-pinyin
附常见几种输入法
IBus拼音:sudo apt-get install ibus-pinyin
IBUS五笔:sudo apt-get install ibus-table-wubi
谷歌拼音输入法:sudo apt-get install ibus-googlepinyin
Sun拼音输入法:sudo apt-get install ibus-sunpinyin
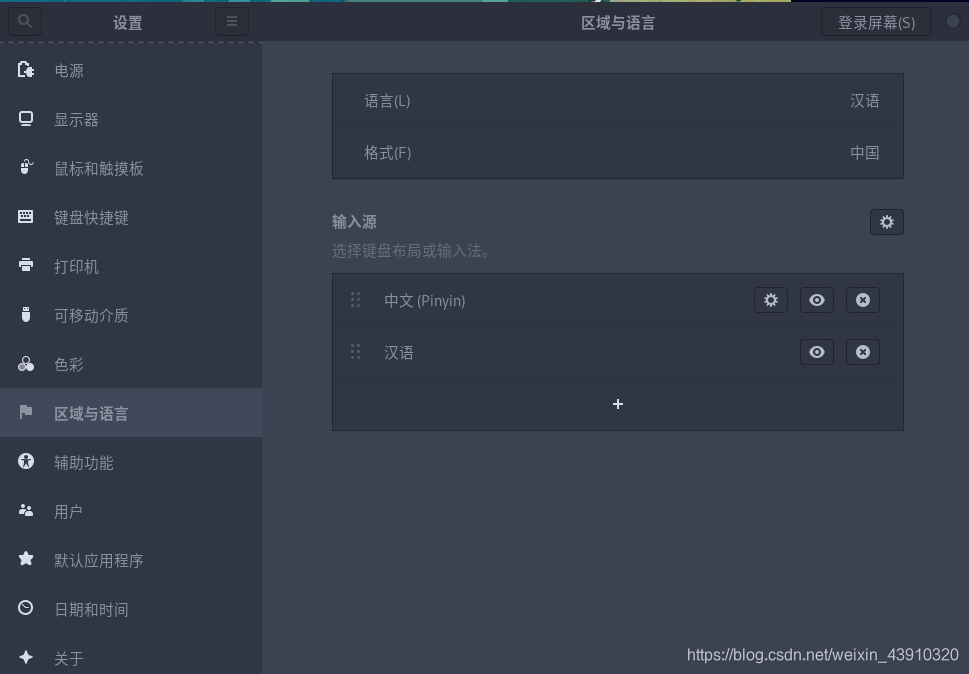
添加中文输入法,修改输入法切换快捷键。
————————————————
版权声明:本文为CSDN博主「羽墨志」的原创文章,遵循CC 4.0 BY-SA版权协议,转载请附上原文出处链接及本声明。
原文链接:https://blog.csdn.net/u011852211/article/details/76100611
使用ibus-setup 开启ibus设置
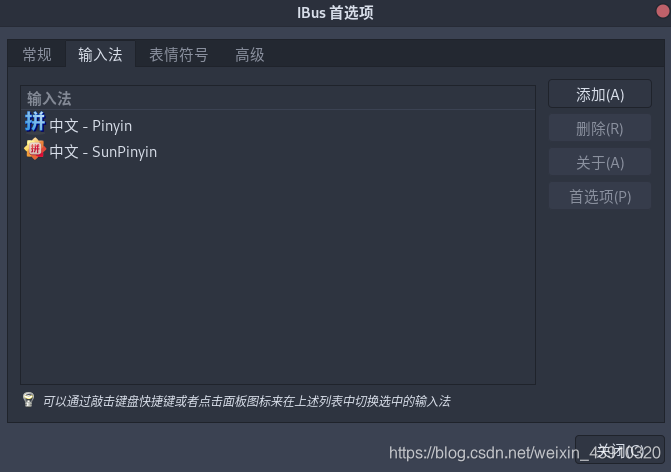 在打开Debian系统设置,更改自己的输入法,同时这样也能在右上角任务栏显示了!

Terminal
Guake
F12一键呼出
虚拟化
Gnome-boxes
虚拟盒子,类似virtualbox
plank
美化的dock
mkfs
apt install xfsprogs xfsdump
vpn
vscode
在Debian上安装VS Code

在你的Debian linux操作系统上通过以下步骤来完成 VS Code 的安装。

01、首先输入以下内容来更新软件包索引并安装依赖项:

sudo apt update
sudo apt install software-properties-common apt-transport-https curl

02、使用以下curl命令导入Microsoft GPG密钥:

curl -sSL https://packages.microsoft.com/keys/microsoft.asc | sudo apt-key add -

将Visual Studio代码存储库添加到你的系统:

sudo add-apt-repository "deb [arch=amd64] https://packages.microsoft.com/repos/vscode stable main"

03、添加存储库后,安装最新版本的Visual Studio代码:

sudo apt update
sudo apt install code

至此, Visual Studio Code已安装在你的 Debian linux操作系统上了,你可以开始使用它。
chrome
 一、下载Google Chrome .deb包

使用wget下载最新Google Chrome软件包到Debian Linux系统:

wget https://dl.google.com/linux/direct/google-chrome-stable_current_amd64.deb

如果你的系统上没有wget,请使用以下命令安装:

sudo apt -y install wget

参考:在Linux系统中安装Wget、Htop、Nano、Lynx、Fzf、Pydf的方法。


二、在Debian 10/9上安装Google Chrome浏览器

下载后,使用apt install命令安装软件包,你需要sudo来完成这个操作:

sudo apt install ./google-chrome-stable_current_amd64.deb

此命令将在Debian上安装Google Chrome,在此过程中,它还会添加Google存储库,以便你的系统自动更新Google Chrome:

$ cat /etc/apt/sources.list.d/google-chrome.list

注1:这个文件是自动配置的。

注2:可以注释掉此条目,但任何其他修改可能会丢失。

deb [arch=amd64] http://dl.google.com/linux/chrome/deb/ stable main
wine
需要安装wine32 ,但64位的debian下无法apt-get install wine32

在执行exploit时会出现 :

it looks like wine32 is missing, you should install it.
multiarch needs to be enabled first. as root, please
execute "dpkg --add-architecture i386 && apt-get update &&
apt-get install wine32"


按照上面的方法dpkg --add-architecture i386 && apt-get update &&
apt-get install wine32即可
crossover
本次是第三次重装系统,我到是发现我用的debian非官方加固件镜像再加testingDVD完全可以把很多驱动和输入法,时区给解决掉。
总之这次的问题是我在安装crossover时出现了非常多的32位包缺乏!
解决方法倒是帖子满天飞
网上大部分都已经失效
经过我三小时谷歌,最后灵光一闪,既然crossoer是wine的定制版,那么我可以可以找找wine?
wine32
//加入32位系统设定
dpkg --add-architecture i386
apt install wine wine32
ia32-libs
然后大部分依赖都完成了,剩下了一个 ia32-libs
我在pksg.org找到了ia32-libs包
wget http://packages.linuxmint.com/pool/main/i/ia32-libs/ia32-libs_2020.05.27_amd64.deb
sudo apt install ./ia32-libs_2020.05.27_amd64.deb
完成

百度云盘
下载地址
https://pan.baidu.com/download
缺少依赖包:libappindicator3-1_0.4.92-3.1
http://mirrors.ustc.edu.cn/debian/pool/main/liba/libappindicator/libappindicator3-1_0.4.92-3.1_amd64.deb]
libappindicator3-1_0.4.92-3.1 依赖libindicator3-7_0.5.0-2
http://ftp.cn.debian.org/debian/pool/main/libi/libindicator/libindicator3-7_0.5.0-2_amd64.deb
这俩安装完之后就可以安装百度云盘了
wps
http://wps-community.org/
libvpx5_1.7.0
https://packages.debian.org/buster/amd64/libvpx5/download
GO
## 安装
apt install golang

## 配置~/.bashrc
### 打开
sudo gedit ~/.bashrc

### 写入


export GOROOT=/usr/lib/go
export GOOS=linux
export GOPATH=/home/xxx/go  #自定义工作目录,下属有三个子目录pkg,src, bin(不用手动创建)
export GOBIN=$GOROOT/bin  #go安装目录下的bin目录
export PATH=.:$PATH:$GOBIN  #将GOBIN设置为PATH
export PATH=.:$PATH:$GOPATH/bin  #将GOPATH/bin设置为PATH,使用一些第三方库


### 启用配置文件
source ~/.bashrc


### 测试
在新建GOPATH下新建三个目录
mkdir src pkg bin
src 存放源码
pkg 存放编译生成的文件
bin 存放生成的可执行文件

创建第一个go应用
cd $GOPATH/src
mkdir test1
cd test1
vi t1.go

    package main

    import "fmt"

    func main() {
        fmt.Println("Hello world, I'm learning Golang")
    }
goland
##  download
https://www.jetbrains.com/go/download/#section=linux

## 解压到/usr/local/目录下
## 进入goland的bin目录下执行./goland.sh开启goland
## 配置为全局启动

将GoLand的启动脚本goland.sh加入用户的/usr/bin/目录下,
可以在任意位置执行goland.sh启动GoLand IDE。


~$ cd /usr/local/GoLand/bin/
~$ sudo ln -s $(pwd)/goland.sh /usr/bin/goland.sh


## 配置启动命令别名并独立运行
按照步骤2中的方式启动GoLand之后,必须保持启动GoLand的terminal保持active,否则GoLand也会随之退出。
因此,通过重命名alias的方式简化启动命令,并独立运行(不随terminal关闭而退出)。

打开.bashrc并定义别名:

~$ vim .bashrc
...
alias goland='nohup goland.sh & >/dev/null'

然后重新打开一个terminal,直接输入goland回车即可启动。
steam
apt install steam
问题1:
需要更新,但显示没有网

下载
https://store.steampowered.com/about/

问题2:
安装steam时提示缺少libGL.so.1
环境:debian10.6+gnome3.30.2

解决方法:sudo apt-get install libgl1-nvidia-glvnd-glx:i386
系统恢复
TimeShift
gnome-shell
gnome-tweak-tool(优化)
gnome-extensions(拓展)
chrome-gnome-shell(web-gnomeExtension的自动下载器,从此之后扩展下载只需要打开按钮)
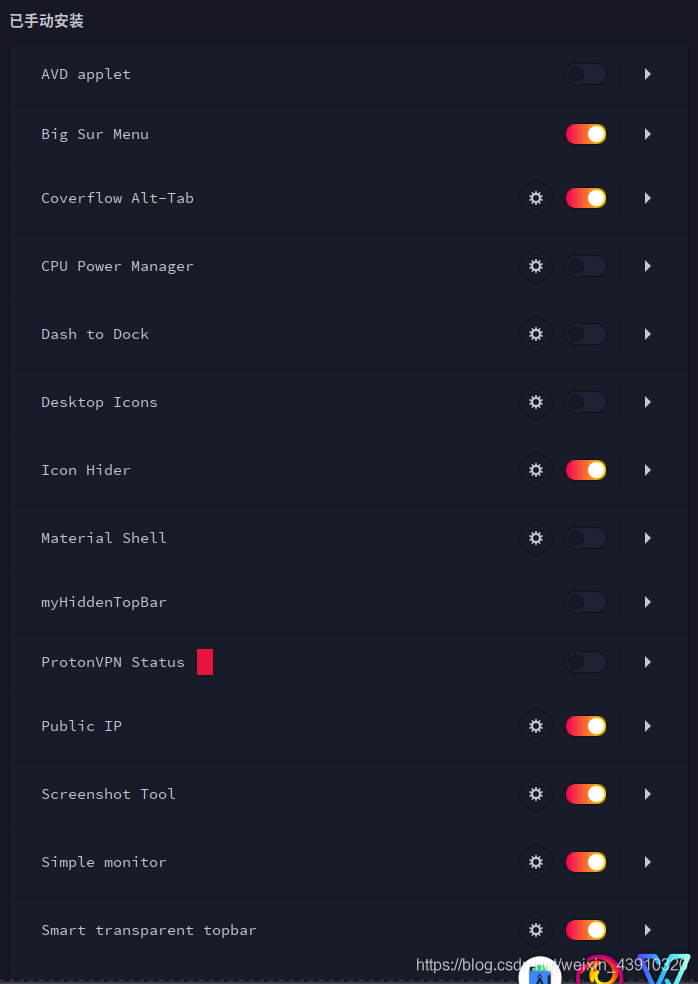
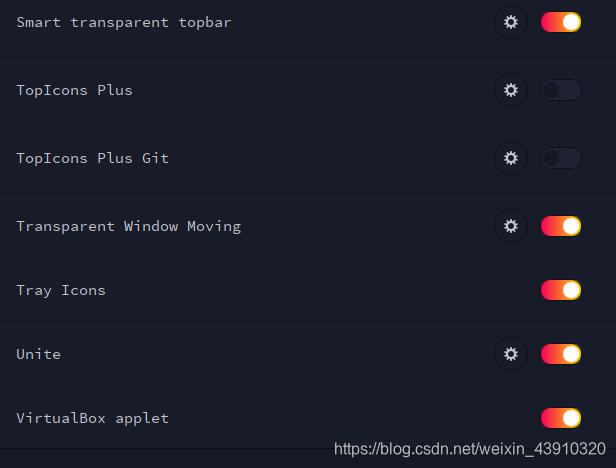
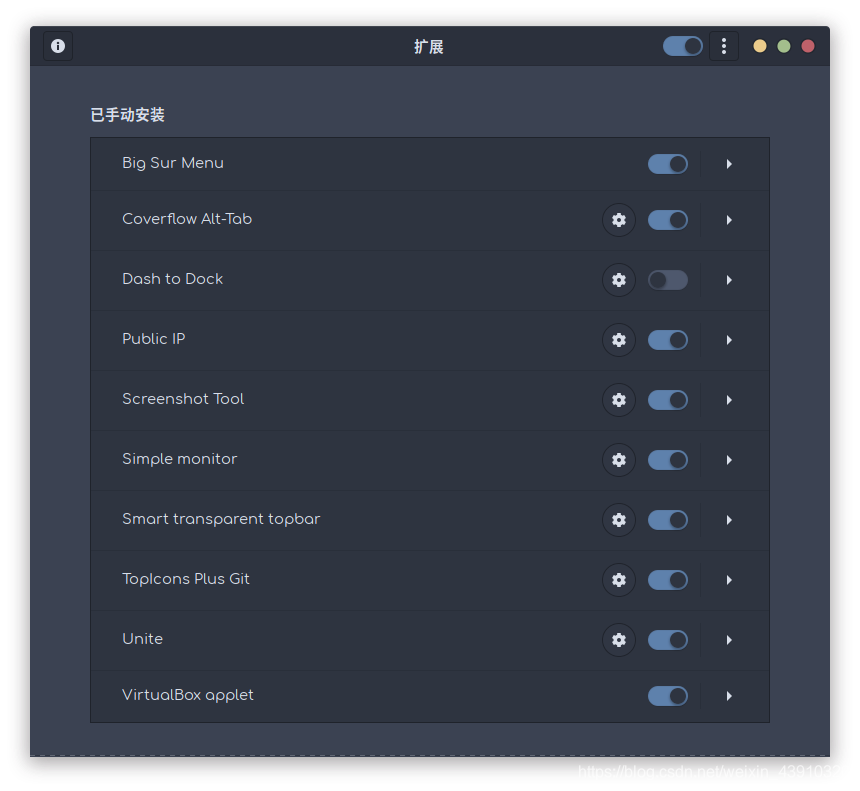
美化
gnome-look.org (gnome-shell视觉布局,都有教程教你怎么下载和使用)
extensions.gnome.org (gnome-shell扩展)
dush-to-dock (dock的变更)
myHiddenTopBar(真正隐藏topBar)
Screenshot Tools(方便的截屏)
Unite(将TopBar和任务顶栏融合,节省空间)
PublicIP(TopBar上显示公共IP)
Cover-Alt-Tab(美丽的任务切换动画)
Applications Menu(应用任务单)
Transaparent Window Moving(移动窗口模糊)
Grub
修改!
gedit /usr/default/grub
更改符合自己计算机硬件的像素
apt update-grub 更新grub
shell
fish shell 真好
oh-my-fish 框架 https://github.com/oh-my-fish/oh-my-fish
Emacs
如何终端一行启动Emacs shell?
在fish shell
gedit ~/.config/fish/functions/config.shell

在bash shell
gedit ~/.bashrc

alias eshell='emacs -nw --eval "(eshell)"'
报错
checkDog not stop
Error mounting:mount:unknown filesystem type ntfs
apt install ntfs-3g
glXChooseVisual failed报警
debian安装这个包即可:
sudo dpkg --add-architecture i386
sudo apt install nvidia-driver-libs:i386
w: possible missing firmware /lib/firmware/rtl_nic/rtl8125a-3.fw for module r8169
mkdir rtl8125b_fw
cd rtl8125b_fw
wget https://git.kernel.org/pub/scm/linux/kernel/git/firmware/linux-firmware.git/plain/rtl_nic/rtl8125b-2.fw
wget https://git.kernel.org/pub/scm/linux/kernel/git/firmware/linux-firmware.git/plain/rtl_nic/rtl8168fp-3.fw
sudo cp *.fw /lib/firmware/rtl_nic/
sudo update-initramfs -u
E: 您必须在 sources.list 中指定代码源(deb-src) URI 解决办法
原因是我们的文件/etc/apt/source.list里的deb-src都被注释掉了,而现在我们需要,找到问题了就好解决了,
Git 报错
GnuTLS recv error (-54)
原因:上传的文件太大,缓存不够,默认只有1M

解决方法:将缓存改为500M
将缓存改为500M

git config http.postBuffer 524288000
GnuTLS recv error (-110)
Recompile and install git solve it finally, the steps are the following:
sudo apt-get install build-essential fakeroot dpkg-dev -y
sudo apt-get build-dep git -y
sudo apt-get install libcurl4-openssl-dev -y
cd ~
mkdir source-git
cd source-git/
apt-get source git
cd git-2.*.*/
sed -i -- 's/libcurl4-gnutls-dev/libcurl4-openssl-dev/' ./debian/control
sed -i -- '/TEST\s*=\s*test/d' ./debian/rules
dpkg-buildpackage -rfakeroot -b -uc -us
sudo dpkg -i ../git_*ubuntu*.deb
https://stackoverflow.com/questions/52529639/gnutls-recv-error-110-the-tls-connection-was-non-properly-terminated
fatal: unable to access ‘https://github.com/ohmyzsh/ohmyzsh.git/‘:
今天发现ohmyzsh更新失败了,我特地找了一下原因,下面是更新失败的日志:
貌似这些关于github的失效了,于是我把hosts里面关于github的部分全部删除了:
sudo vim /etc/hosts
按dd键可以删除
wq保存推出
fatal: 不在 git 仓库中
git init
ACPI error
firmware: failed to load iwl-debug-yoyo.bin (-2) (debian testing)
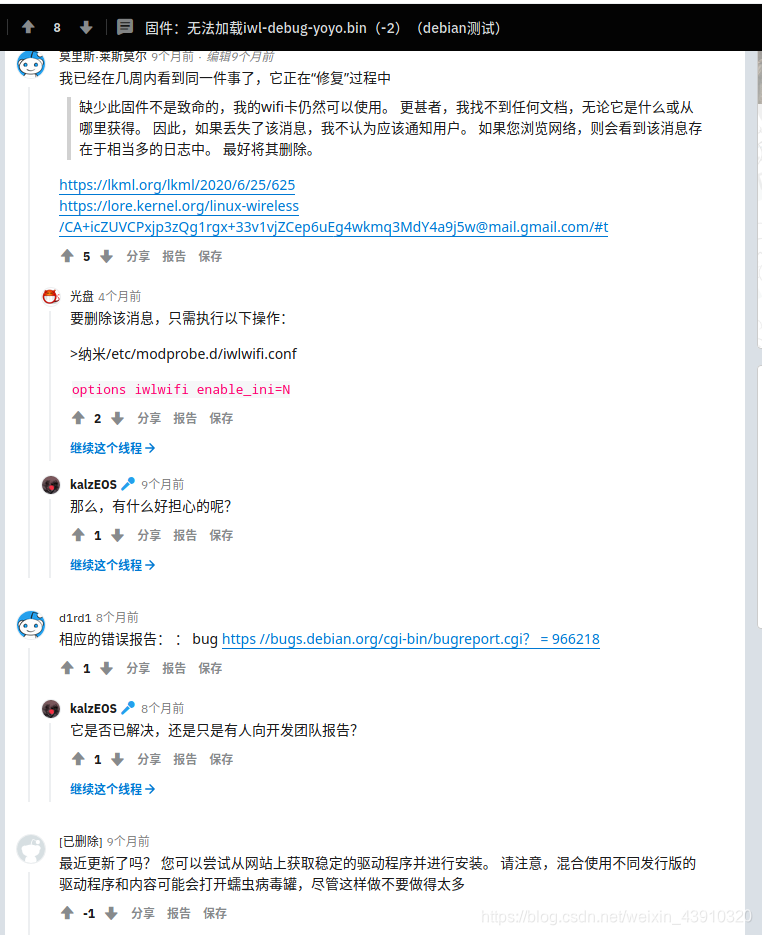
https://www.reddit.com/r/debian/comments/i60j1c/firmware_failed_to_load_iwldebugyoyobin_2_debian/
faild start gnome display
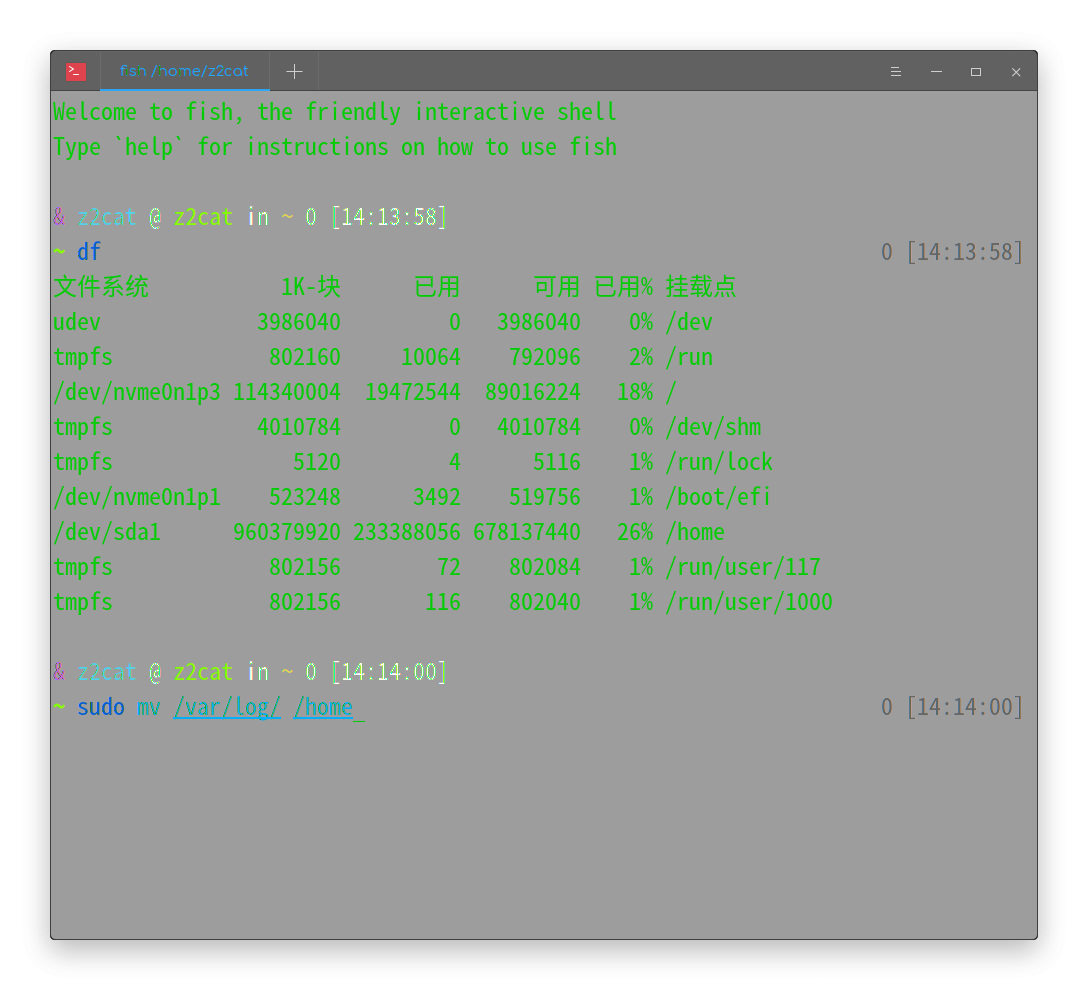
我本来去google搜索,都说是显卡问题,但是我感觉不对劲,我什么也没干,怎么就显卡炸了?
于是我就在csdn搜了一下,然后我就打开了df
我发现我自己的根目录炸了,直接满内存,然后我删掉了一些之后重启就可以进入图形化!
近来之后我用了FileLight这个软件查看了一些根目录分布!发现我的/var/log奇迹一样有60多个G!
于是我就
mv /var/log/ /home
ln -s /home/log/ /var/
这样就做到了在home存储,但是文件结构不变,因为软连接文件指向了/
现在我的根目录就OK了
常识
apt下载的文件放在哪里?
/var/cache/apt/archives
第三方源再哪?
/etc/apt/source.list.d/
如何建立个人deb源
reprepro + apache/
debian管理员手册
debianCN软件原
https://repo.debiancn.org
怎么更改GNOME登录界面?
sudo gedit /etc/gdm3/greeter.dconf-defaults
然后进去把需要的选项去掉注释自己改
fanqiang
protoonvpn
shadows
v2ary
veepn
如何优雅使用虚拟机win
添加debiancn源,然后直接安装virtualbox
但是虚拟机不在ssd实在太慢,所以我把他放在我仅有110G的ssd中分了50G.
在itellyou网站上下载了win.iso,安装好之后又使用虚拟增强功能使得可以全屏且更加流畅。
这个时候我遇到一个问题,我的非ROOT用户怎么无障碍使用这个位于根目录下的文件?
我在gnome extension下载了vmbox assest这个插件方便管理。
先将ssd程序包整个用软连接放到我的账户上来
~ sudo ln -s /usr/local/programes/ /home/z2cat/
然后使用 sudo chmod 777 -R /home/z2cat/ssdProgrames/ 更改了所有的权限,这样我现在就得到了实际位于ssd,但是逻辑上属于账户自身的win10
个人配置
软件源
# 默认注释了源码镜像以提高 apt update 速度,如有需要可自行取消注释
deb https://mirrors.tuna.tsinghua.edu.cn/debian/ sid main contrib non-free
deb-src https://mirrors.tuna.tsinghua.edu.cn/debian/ sid main contrib non-free

deb https://mirrors.tuna.tsinghua.edu.cn/debian/ testing main contrib non-free
deb-src https://mirrors.tuna.tsinghua.edu.cn/debian/ testing main contrib non-free
deb https://mirrors.tuna.tsinghua.edu.cn/debian/ testing-updates main contrib non-free
deb-src https://mirrors.tuna.tsinghua.edu.cn/debian/ testing-updates main contrib non-free

# backup前一代软件源
# deb https://mirrors.tuna.tsinghua.edu.cn/debian/ testing-backports main contrib non-free
# deb-src https://mirrors.tuna.tsinghua.edu.cn/debian/ testing-backports main contrib non-free
deb https://mirrors.tuna.tsinghua.edu.cn/debian-security testing-security main contrib non-free
deb-src https://mirrors.tuna.tsinghua.edu.cn/debian-security testing-security main contrib non-free

#官方源
#deb http://deb.debian.org/debian/ bullseye contrib non-free main
#deb-src http://deb.debian.org/debian/ bullseye contrib non-free main #Added by software-properties
#deb http://security.debian.org/ bullseye-security non-free contrib main
#deb http://deb.debian.org/debian/ bullseye-updates non-free contrib main
第三方扩展
debiancn.org
扩展
part2
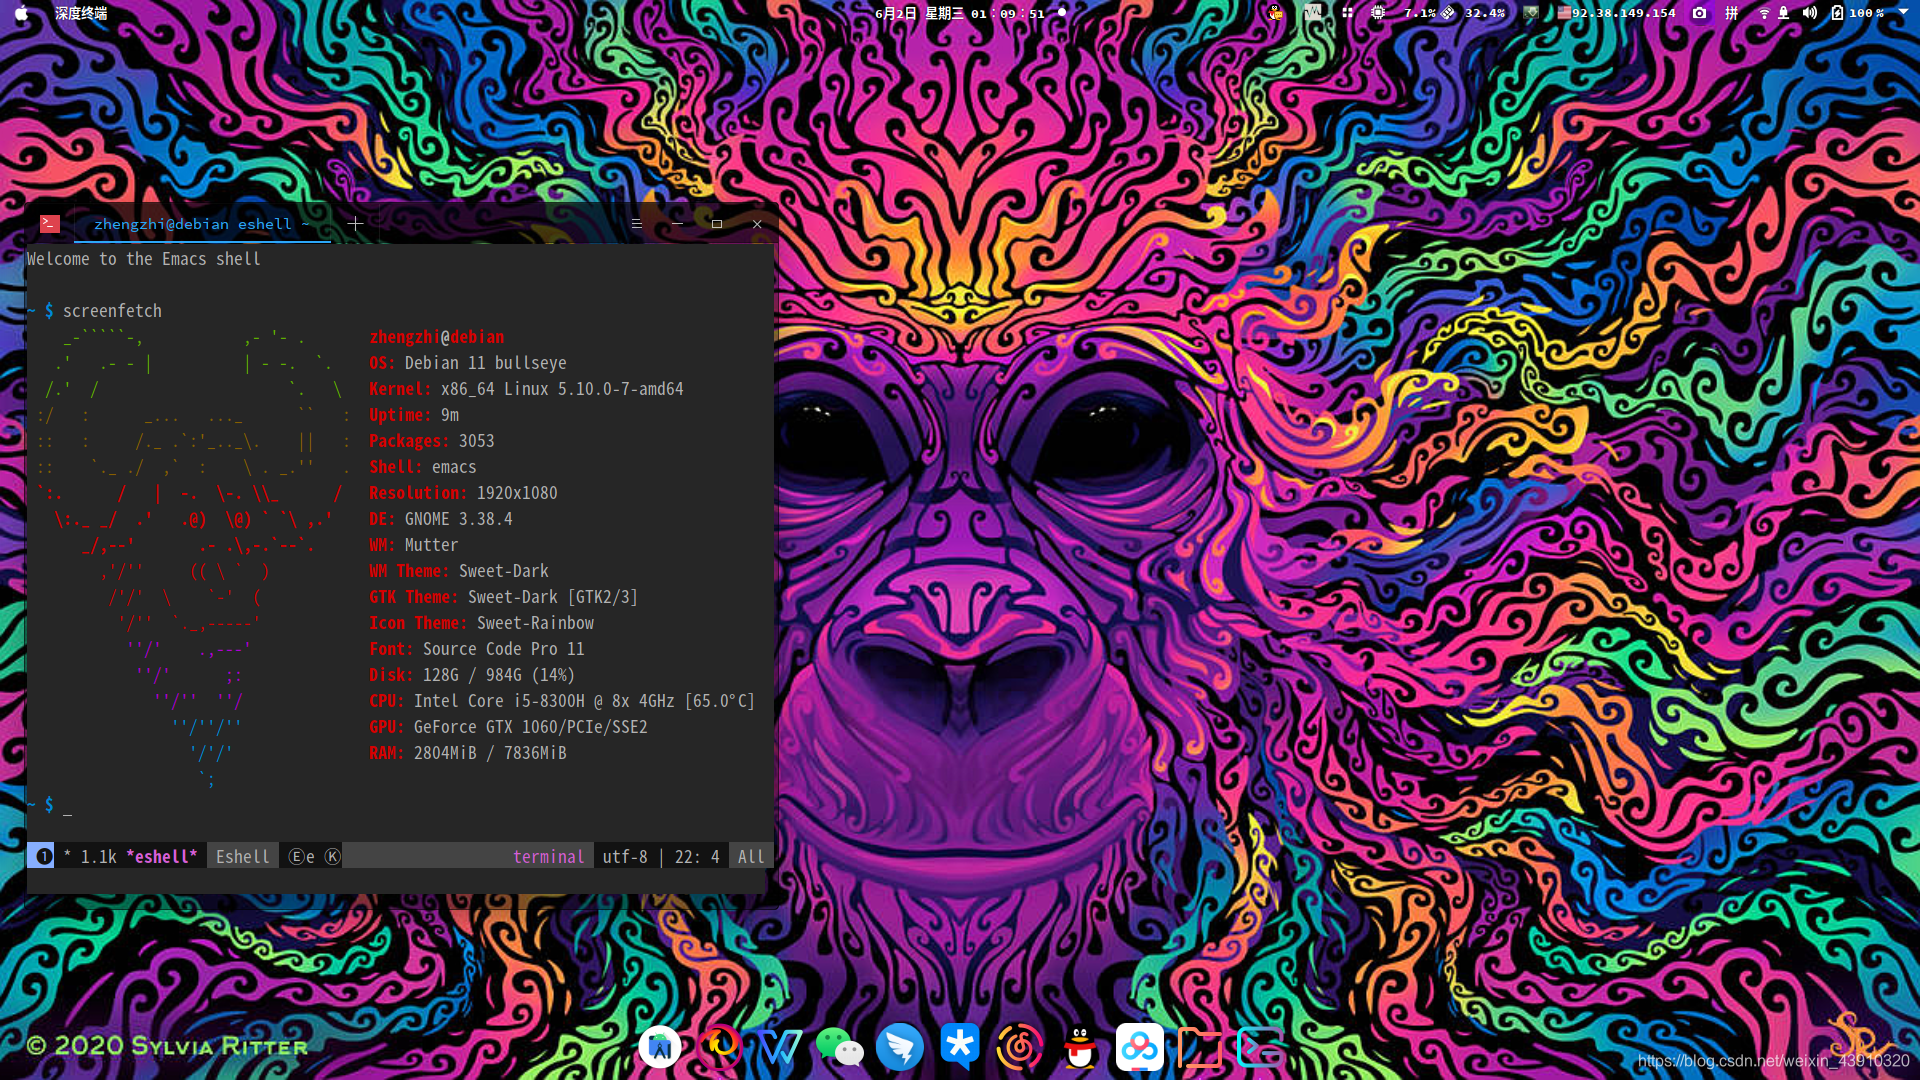
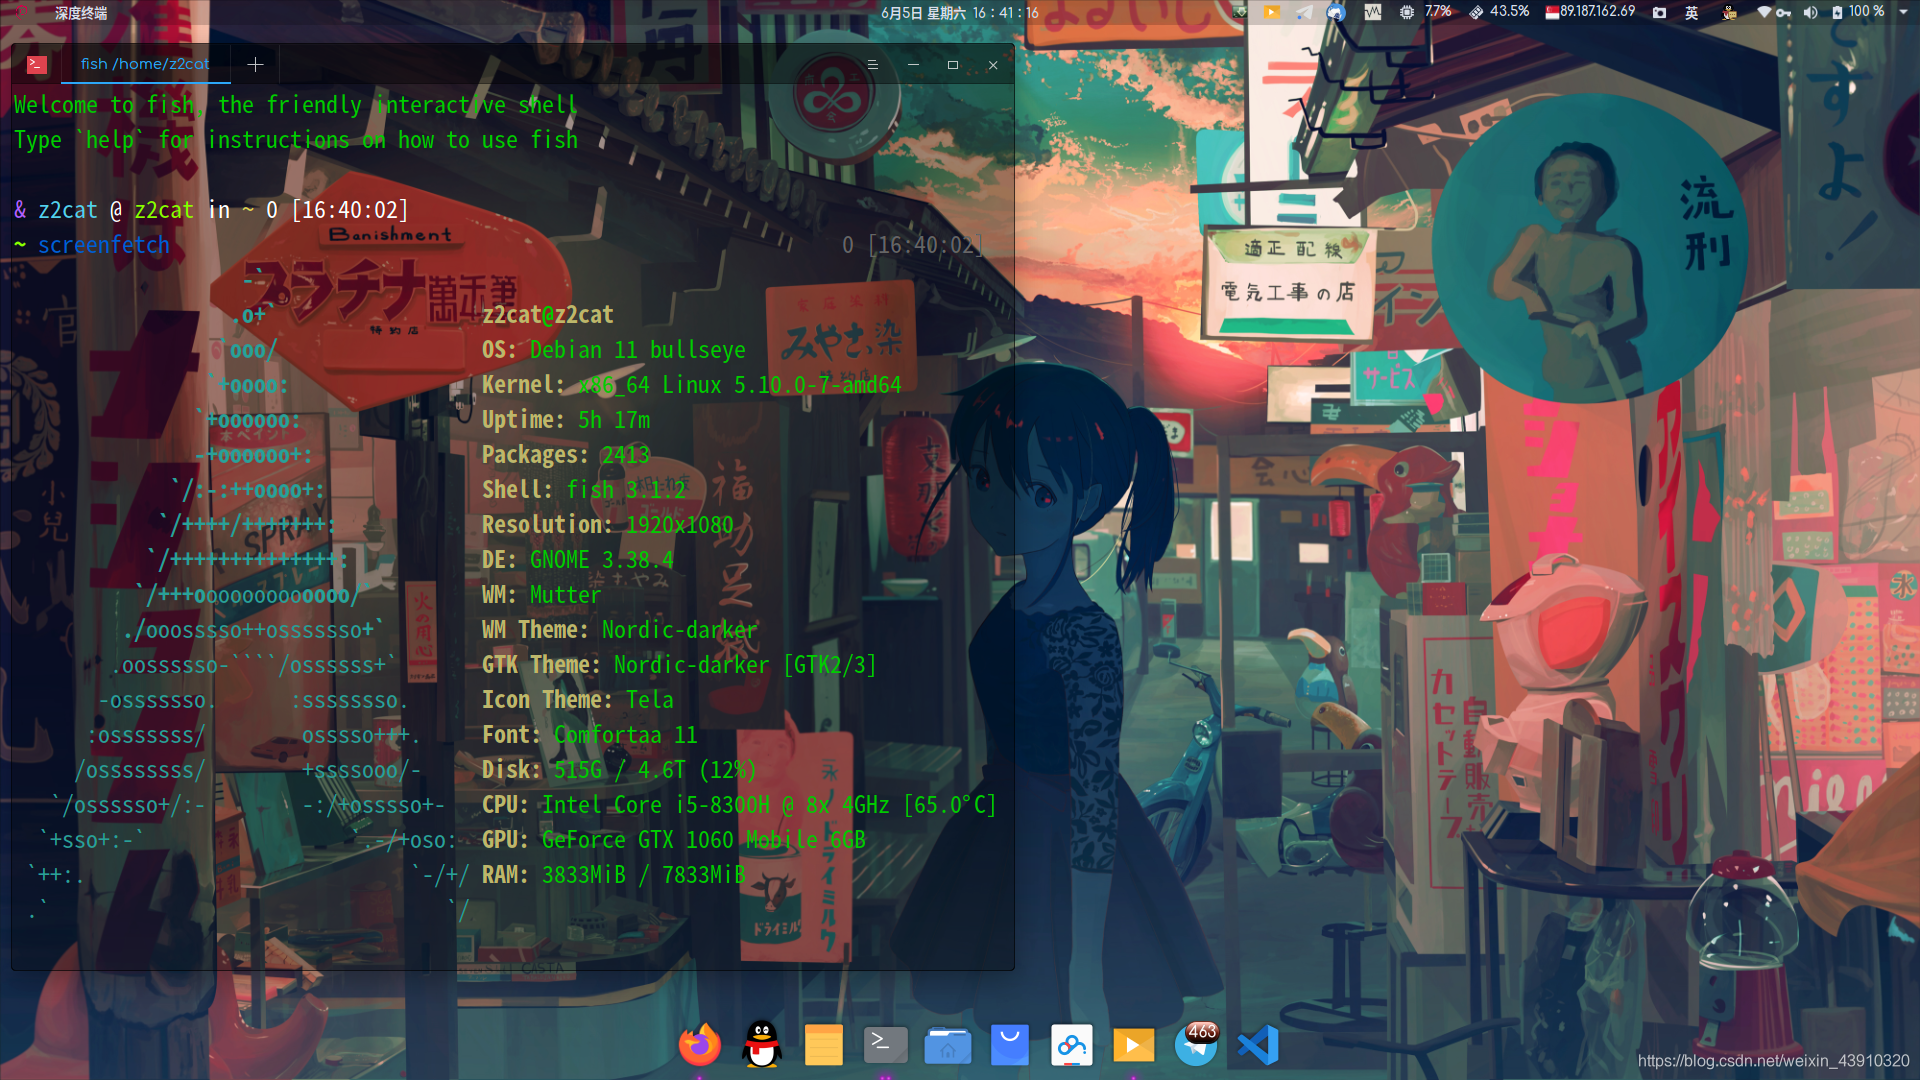
怎么更改screenfetch的ascii art
sudo gedit /bin/screemfetch
怎么更改big sur menu的苹果logo
我在github上找到了bigsuimenu的说明。
所以我直接在~/.local/share/gnome-shell/extensions 找到文件夹之后
用gimp在debian官网下了logo,切了一个不错的图

个人画
		"Debian")
			if [[ "$no_color" != "1" ]]; then
				c1=$(getColor 'green') # Green
				c2=$(getColor 'brown') # Yellow
				c3=$(getColor 'light red') # Orange
				c4=$(getColor 'red') # Red
				c5=$(getColor 'purple') # Purple
				c6=$(getColor 'blue') # Blue
			fi
			if [ -n "${my_lcolor}" ]; then
				c1="${my_lcolor}"
				c2="${my_lcolor}"
				c3="${my_lcolor}"
				c4="${my_lcolor}"
				c5="${my_lcolor}"
				c6="${my_lcolor}"
			fi
			startline="0"
			logowidth="37"
				fulloutput=(
"${c1}    _-\`\`\`\`\`-,           ,- '- .      %s"
"${c1}   .'   .- - |          | - -.  \`.   %s"
"${c1}  /.'  /                     \`.   \\  %s"
"${c2} :/   :      _...   ..._      \`\`   : %s"
"${c2} ::   :     /._ .\`:'_.._\\.    ||   : %s"
"${c2} ::    \`._ ./  ,\`  :    \\ . _.''   . %s"
"${c3} \`:.      /   |  -.  \\-. \\\\\_      /  %s"
"${c3}   \\:._ _/  .'   .@)  \\@) \` \`\\ ,.'   %s"
"${c3}      _/,--'       .- .\\,-.\`--\`.     %s"
"${c4}        ,'/''     (( \\ \`  )          %s"
"${c4}         /'/'  \\    \`-'  (           %s"
"${c4}          '/''  \`._,-----'           %s"
"${c5}           ''/'    .,---'            %s"
"${c5}            ''/'      ;:             %s"
"${c5}              ''/''  ''/             %s"
"${c6}                ''/''/''             %s"
"${c6}                  '/'/'              %s"
"${c6}                   \`;                %s")
		;;
个人效果

 浙公网安备 33010602011771号