Zabbix单台安装部署
一、服务器准备
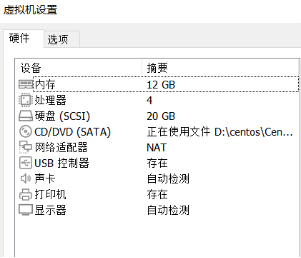
1、配置:centos7 虚拟机一台
配置如下:
2、网络+主机信息+IP地址
(1)网络:使用nat模式
(2)主机信息:#hostname
(3)IP地址:#ip addr
3、查看主机的系统版本信息
(1)[root@libin ~]# cat /etc/redhat-release
CentOS Linux release 7.9.2009 (Core)
4、暂时关掉防火墙和Selinux
(1)
#systemctl stop firewall.service
# firewall-cmd --state
not running
(2)
#sed -i "s/SELINUX=enforcing/SELINUX=disabled/g" /etc/sysconfig/selinux
# cat /etc/selinux/config
SELINUX=disabled
二、服务安装
安装Zabbix-server需要的环境(LAMP: httpd服务+数据库服务+php)
1、安装apache也就是httpd服务
#yum install -y httpd
#rpm -qa|grep httpd
httpd-2.4.6-97.el7.centos.x86_64
httpd-devel-2.4.6-97.el7.centos.x86_64
httpd-manual-2.4.6-97.el7.centos.noarch
httpd-tools-2.4.6-97.el7.centos.x86_64
2、 设置httpd服务开机自启动
# systemctl enable httpd.service
Created symlink from /etc/systemd/system/multi-user.target.wants/httpd.service to /usr/lib/systemd/system/httpd.service.
#echo $?
0
3、开启HTTP服务
# systemctl start httpd.service
#systemctl status httpd.service #查看服务状态
#sudo lsof -i:80 #查看http端口号启动是否正常
4、安装数据库—存储zabbix采集到的数据
注意:因为7版本的mysql要收费,所以我们这里安装mariadb代替mysql
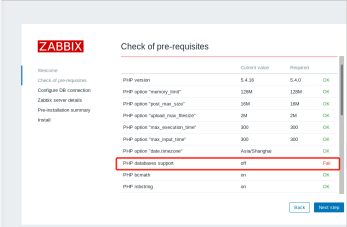
注:由于使用阿里 yum源进行安装会将marbiadb更新至最新版本 ,导致 与zabbix版本不匹配 导致出现一个错误的可能性:如图
mariadb-server mariadb-libs 两个安装包版本必须匹配
在使用本地yum源安装mariadb时,先将外网yum源 MV至备份文件夹
(1)使用本地iso镜像mariadb版本yum源:如
#mkdir /mnt/centos
#mount -o iso9660 /run/media/root/CentOS\ 7\ x86_64/ /mnt/centos/ #挂载镜像
#cd /run/media/root/CentOS\ 7\ x86_64/
[root@libin CentOS 7 x86_64]# ll
总用量 664
-rw-rw-r-- 3 root root 14 9月 5 2017 CentOS_BuildTag
drwxr-xr-x 3 root root 2048 9月 5 2017 EFI
-rw-rw-r-- 3 root root 227 8月 30 2017 EULA
-rw-rw-r-- 3 root root 18009 12月 10 2015 GPL
drwxr-xr-x 3 root root 2048 9月 5 2017 images
drwxr-xr-x 2 root root 2048 9月 5 2017 isolinux
drwxr-xr-x 2 root root 2048 9月 5 2017 LiveOS
drwxrwxr-x 2 root root 641024 9月 5 2017 Packages #镜像里面有安装包
drwxr-xr-x 2 root root 4096 9月 5 2017 repodata
-rw-rw-r-- 3 root root 1690 12月 10 2015 RPM-GPG-KEY-CentOS-7
-rw-rw-r-- 3 root root 1690 12月 10 2015 RPM-GPG-KEY-CentOS-Testing-7
-r--r--r-- 1 root root 2883 9月 6 2017 TRANS.TBL
[root@libin yum.repos.d]# yum-config-manager --add-repo="file://run/media/root/CentOS\ 7\ x86_64/" #将镜像导入yum.repo
[root@libin yum.repos.d]# vim run_media_root_CentOS\\\ 7\\\ x86_64_.repo
[run] #修改名称run
name=added from: file://run/media/root/CentOS\ 7\ x86_64/
baseurl=file:///run/media/root/CentOS\ 7\ x86_64/
enabled=1
(2)安装mariadb (*可以忽略)
*#yum --help | grep enab
*# yum install mariadb mariadb-server-5.5.68-1.el7 --enablerepo=run
*#yum list mariadb-server --showduplicates
*#yum list mariadb-libs --showduplicates
*#yum install mariadb mariadb-server-5.5.68-1.el7 --enablerepo=run
#yum install mariadb-server-5.5.56-2.el7 mariadb-libs-5.5.56-2.el7 #安装成功即可
#systemctl start mariadb #启动服务
# systemctl status mariadb.service #查看服务状态
#sudo lsof -i:3306 #查看服务端口状态
#mysql #进入数据库
#MariaDB [(none)]> select version(); #查看版本
+----------------+ | version() | +----------
------+ | 5.5.60-MariaDB | +----------------+
注:若是数据库不能识别保错 请将最新版本 mariadb-server 、mariadb-libs 进行删除,再安装与zabbix版本匹配的mariadb
*#yum remove mariadb-server
*# yum remove mariadb-libs
5、安装PHP环境
#yum install -y php php-mysql #安装PHP
# echo $?
0
#rpm -qa|grep php
[root@libin ~]# rpm -qa|grep php
php-common-5.4.16-48.el7.x86_64
php-gd-5.4.16-48.el7.x86_64
php-intl-5.4.16-48.el7.x86_64
php-xml-5.4.16-48.el7.x86_64
php-symfony-common-2.8.12-2.el7.noarch
php-bcmath-5.4.16-48.el7.x86_64
php-paragonie-random-compat-2.0.18-1.el7.noarch
php-5.4.16-48.el7.x86_64
php-fedora-autoloader-1.0.1-2.el7.noarch
php-symfony-polyfill-1.5.0-1.el7.noarch
php-password-compat-1.0.4-1.el7.noarch
php-cli-5.4.16-48.el7.x86_64
php-ldap-5.4.16-48.el7.x86_64
php-symfony-intl-2.8.12-2.el7.noarch
php-symfony-class-loader-2.8.12-2.el7.noarch
php-mysql-5.4.16-48.el7.x86_64
php-pdo-5.4.16-48.el7.x86_64
php-mbstring-5.4.16-48.el7.x86_64
6、正式安装Zabbix-server
注意:zabbix-server也要监控自身,所以也要同时安装zabbix-agent
#wget http://repo.zabbix.com/zabbix/3.4/rhel/7/x86_64/zabbix-release-3.4-2.el7.noarch.rpm #zabbix4.3版本地址
#rpm -qa |grep zabbix
#yum install -y zabbix-release-3.4-2.el7.noarch.rpm #这里安装的为zabbix4.3版本
#rpm -qa zabbix-server-mysql zabbix-get zabbix-web zabbix-web-mysql zabbix-agent zabbix-sender
#yum install -y zabbix-server-mysql zabbix-get zabbix-web zabbix-web-mysql zabbix-agent zabbix-sender #安装zabbix服务
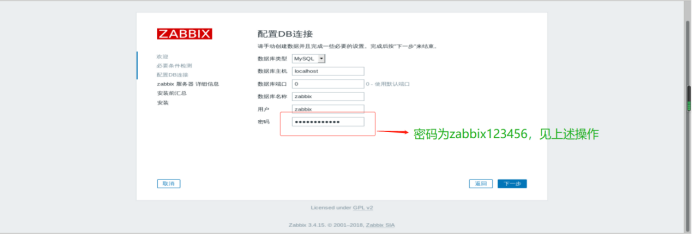
(1)在数据库中创建一个zabbix库并设置为utf8的字符编码格式
# mysql -uroot -p #登录数据库
Enter password:
MariaDB [(none)]> MariaDB [(none)]> create database zabbix character set utf8 collate utf8_bin;
MariaDB [(none)]> grant all privileges on zabbix.* to zabbix@localhost identified by 'zabbix123456'; ##这里和后面配置文件设置密码保持一致##
MariaDB [(none)]> flush privileges;
Query OK, 0 rows affected (0.00 sec)
MariaDB [(none)]> exit;
Bye
(2)向zabbix库导入表 — 初始化zabbix数据
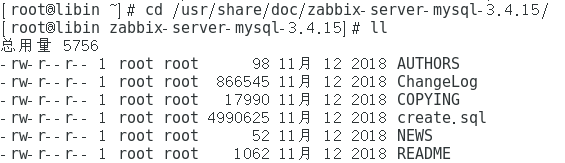
# cd /usr/share/doc/zabbix-server-mysql-3.4.15/
#ll
#gunzip create.sql.gz #使用gunzip命令 解压sql文件
# ll
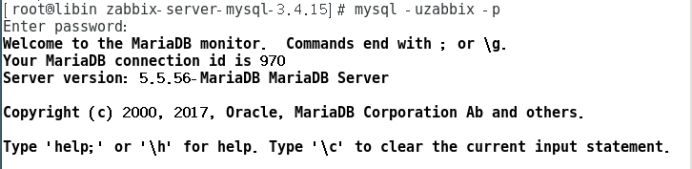
# mysql -uzabbix -p #zabbix用户 登录数据库
Enter password: zabbix123456 #上一步所设置的密码登录
MariaDB [(none)]> use zabbix;
Database changed
MariaDB [zabbix]> source create.sql; ### 对表进行导入
MariaDB [zabbix]> show tables;
MariaDB [zabbix]> exit;
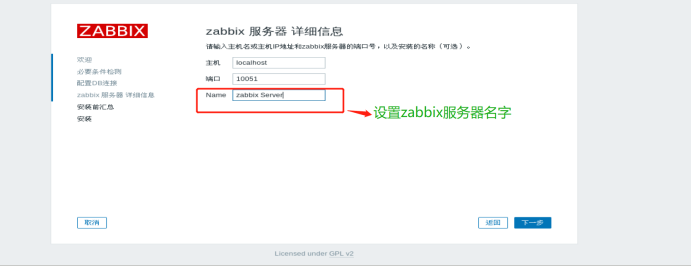
(3)启动zabbix-server并设置设置zabbix-server服务开机自启动
#systemctl start zabbix-server.service && echo $? #检查zabbix-server是否启动成功?
#ps -ef |grep zabbix_server #检查zabbix-server是否启动成功?
# netstat -lntup|grep zabbix #TCP侦听
(在sudo systemctl start zabbix-server.service启动的时候,实际上是调用的 /usr/sbin/zabbix_server -c /etc/zabbix/zabbix_server.conf 命令)
#systemctl enable zabbix-server.service #设置开机自启
(4)LAMP和Zabbix-server做关联配置
#cd /etc/httpd/conf.d/
#vim zabbix.conf

(6)重启HTTP的服务
#systemctl restart httpd.service && echo $?
三、登录zabbix的web管理页面进入初始化
(1)访问地址:http://server_ip_address/zabbix/setup.php
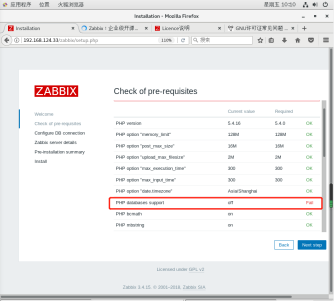
(该界面显示全OK则可以进入,否则需要进行排错)
注意:Password设置的数据库密码zabbix123456(grant all privileges on zabbix.* to zabbix@localhost identified by ‘zabbix123456’; )
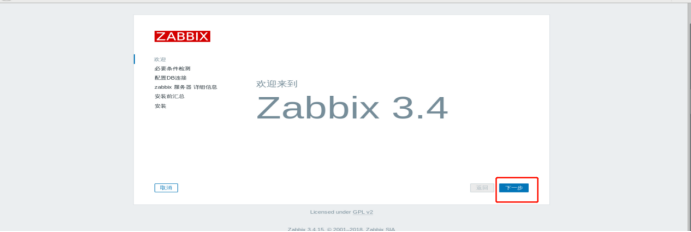


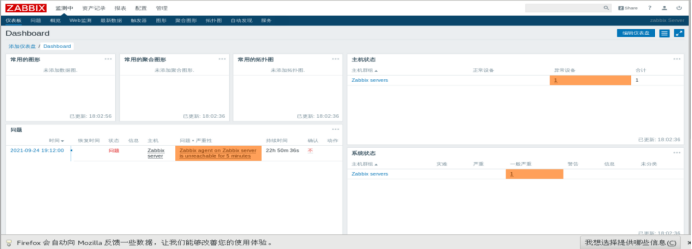
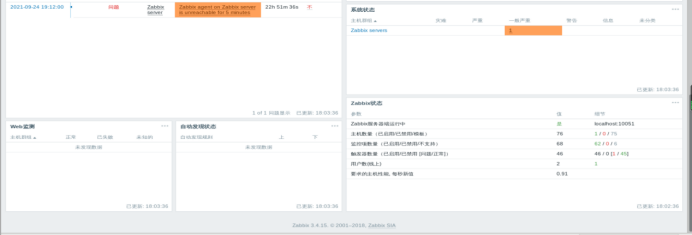
进入zabbix的web界面
(2)zabbix 若显示不出中文,修改zabbix的php源文件
[root@libin ~]# find /* | grep 'locales.inc.php'
find: ‘/run/user/1000/gvfs’: 权限不够
/usr/share/zabbix/include/locales.inc.php
[root@libin ~]# cat /usr/share/zabbix/include/locales.inc.php

[root@libin ~]# cat /usr/share/zabbix/include/locales.inc.php | grep 'CN'
'zh_CN' => ['name' => _('Chinese (zh_CN)'), 'display' => true],
'.eucCN',
(3)解决zabbix图像化 乱码现象
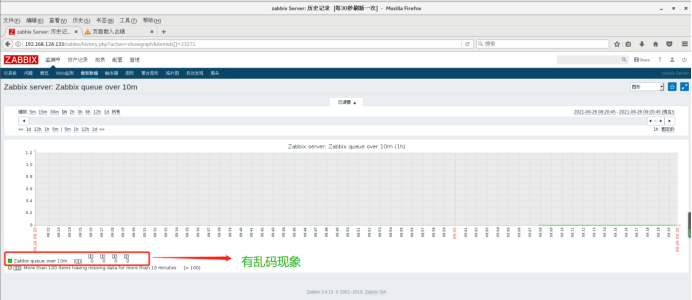
解决办法:从我们电脑win10(控制面板\字体)里面找到"黑体"(文件名:simhei.ttf),然后右键复制到桌面,再然后上传到linux服务器任意路径下面,具体步骤操作如下:

#将该字体拖到linux系统 任意文件夹
#进入字体配置文件目录,将原来的字体进行先备份
#修改配置文件vim /usr/share/zabbix/include/defines.inc.php
#重启zabbix httpd服务后,再次进入zabbix的web界面,字体乱码已经解决
#cd /usr/share/zabbix/fonts
# mv graphfont.ttf graphfont.ttf_bak20210926 #将原来字体进行备份
# cp /tmp/VMwareDnD/s3V8eu/simhei.ttf /usr/share/zabbix/fonts #将windos字体simhe字体拷贝到/fonts 目录下

# cd /usr/share/zabbix/include
# vim defines.inc.php

# systemctl restart zabbix-server.service #重启zabbix服务
# systemctl restart httpd #重启httpd服务


 浙公网安备 33010602011771号