canvas实现"雷达扫描"效果
今天来讲解“雷达扫描”效果demo,来源于QQ群里边有群友说想要个雷达效果,就尝试写了一下。
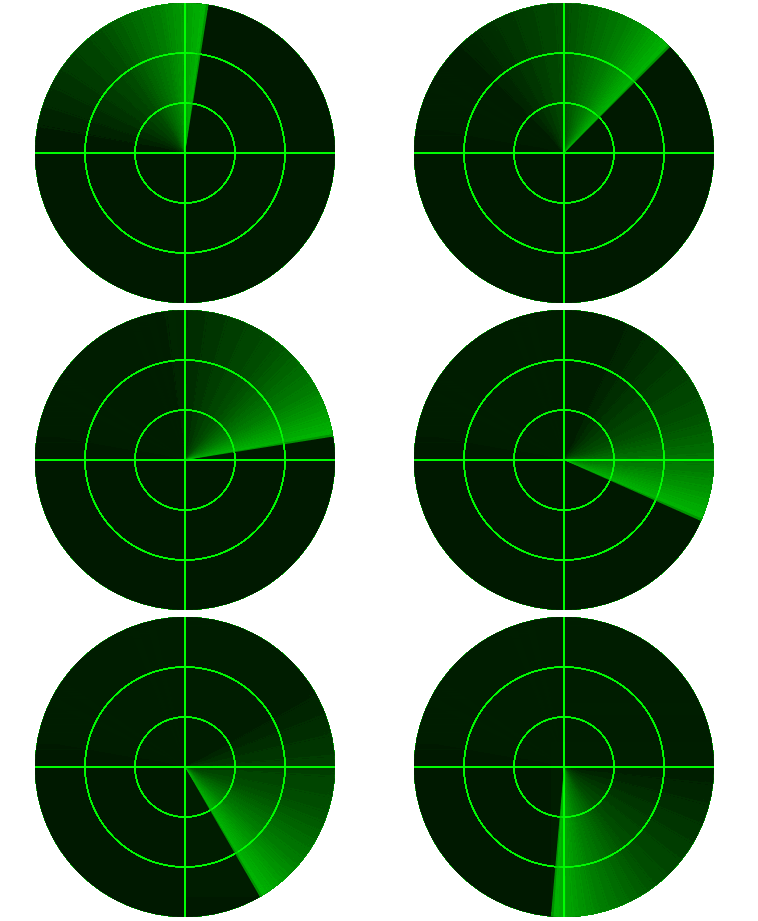
效果图:

demo链接: https://win7killer.github.io/can_demo/demo/radar.html
********************************************************************
这个东西,背景圆,坐标、圆圈都很简单实现,arc结合moveTo、lineTo就可以解决,背景色也不是问题,一句带过。
那么,有挑战的地方,就是这个扫描的东西
特点:
1、旋转
2、渐变
开始实现:
1、误入歧途
首先考虑了过渡色,实现过渡色之后,只需要旋转canvas,恩,完美~(头脑简单的例子,后边发现这思路行不通)
step1. *过渡色*
过渡色只有“线性过渡”、“辐射过渡(环形过渡)”,而这个效果需要的是一种类似于“扇形侧面过渡”(木有这种过度,我瞎叫的)。环形过渡并不满足需求,只能考虑线性过渡。
考虑到canvas路径的填充(fillStyle)可以使用过渡色对象,先实现第一帧的过渡,开搞。
代码如下:
1 var grd  = ctx.createLinearGradient(175,100,can.width,150);
2
3 grd.addColorStop(0,"rgba(0,255,0,0)");
4 grd.addColorStop(1,"rgba(0,255,0,1)");
然后绘制一个扇形,去填充
1 ctx.fillStyle = grd;
2 ctx.beginPath();
3 ctx.moveTo(150,150);
4 ctx.arc(150, 150, 150, -90/180*Math.PI, 0/180*Math.PI);
5 ctx.fill();
加上背景色
1 ctx.fillStyle = 'rgba(0,0,0,1)';
2 ctx.strokeStyle = 'rgba(0,255,0,1)';
3
4 ctx.arc(150,150,150,0,2*Math.PI);
5 ctx.fill();
效果图如下:

还算有那么点样子哦~,接下来就是让它动起来
step2. *旋转*
旋转思路:旋转点在canvas的中心点,围绕中心点旋转,然后不停的绘制扫描区的扇形。
用了之前的旋转函数
1 function drawRotate(deg, fn) {
2     ctx.save();
3     ctx.translate(can.width/2, can.height/2);
4     ctx.rotate(deg);
5     fn && fn(ctx);
6     ctx.restore();
7 }
但是!!!!真的转起来的时候,问题来了。
扇形的旋转完美,没问题,说明这个旋转函数也没问题。
问题出在过渡色身上。。。
过渡色创建的时候,走向是固定的,在渲染到扇形后,依旧是一样的走向(扇形每次都要重绘),导致出现错误的结果。
由于原来的错误代码不全了,所以就没图给大家看了。大家可以自己试一下。
有考虑到在旋转的过程中去改变过渡色走向,但是涉及到比较繁琐的计算,还是放弃了(比较懒,如果真的去算位置,应该是可以达到效果的)。
于是放弃,去吃午饭了,大脑肯定是去能量了。
2、迷途折返
午饭过后,继续思考,换思路。
经过考虑,想起以前做“字幕雨”(类似黑客帝国)的思路来。
附: 字幕雨链接: https://win7killer.github.io/can_demo/demo/text_rain.html
思路如下:
整体思路变化,先处理旋转,再处理过渡。
step1. 旋转
以小角度(1°-5°)绘制纯色的扇形,没错,就是纯色的,不要过渡色,然后旋转,以保证扫描区前边亮色。这样,旋转一周,会r让整个雷达高亮。
注意,这里的旋转不再是旋转canvas,而是不断改变绘制扇形的角度。
1 function drawRadar(iDeg) {
2     ctx.fillStyle = 'rgba(0,200,0,.7)';
3     ctx.beginPath();
4     ctx.moveTo(150, 150);
5     ctx.arc(150, 150, 150, (-2 * CFG.perDeg + iDeg) / 180 * Math.PI, (0 + iDeg) / 180 * Math.PI);
6     ctx.closePath();
7     ctx.fill();
8 }
step2. *扇形*
然后,处理过渡。仔细考虑, 这个并不是“过渡色”效果,真的不是,而是“渐进消隐”效果,就是出现后高亮,慢慢消失的效果。
此类“渐进消隐”效果的做法,很简单,用rgba半透明色(饱和度1的时候与背景色相同)填充整个canvas,一层一层覆盖上去,就会得到慢慢消失的效果。
loop以下代码:
1 function cover() {
2     ctx.save();
3     ctx.fillStyle = 'rgba(0,0,0,0.02)';
4     ctx.arc(150, 150, 150, 0, 2 * Math.PI);
5     ctx.fill();
6     ctx.restore();
7 }
在整个loop中先去覆盖之前的,然后去重绘坐标、圆环等,重绘该改变角度的扇形,就达到了效果,完美。
最终整体代码如下:
|
1
2
3
4
5
6
7
8
9
10
11
12
13
14
15
16
17
18
19
20
21
22
23
24
25
26
27
28
29
30
31
32
33
34
35
36
37
38
39
40
41
42
43
44
45
46
47
48
49
50
51
52
53
54
55
56
57
58
59
60
61
62
63
64
65
66
67
68
69
70
71
72
73
74
75
76
77
78
79
80
81
82
83
84
85
86
87
88
89
90
91
|
<!DOCTYPE html><html lang="zh"><head> <meta charset="UTF-8"> <meta name="viewport" content="width=device-width, initial-scale=1.0"> <meta http-equiv="X-UA-Compatible" content="ie=edge"> <title>radar</title> <style> canvas { margin: 20px auto; display: block; } </style></head><body> <canvas id="can" width=300 height=300></canvas> <script type="text/javascript"> var CFG = { perDeg: 1, };<br> var can = document.getElementById('can'); var ctx = can.getContext('2d'); var deg = 0; ctx.strokeStyle = 'rgba(0,255,0,1)'; function init() { ctx.fillStyle = 'rgba(0,50,0,1)'; ctx.arc(150, 150, 150, 0, 2 * Math.PI); ctx.fill(); var raf = window.requestAnimationFrame(loop); } function loop() { deg = (deg + CFG.perDeg); cover(); drawPosLine(); drawRadar(deg); raf = window.requestAnimationFrame(loop); } function cover() { ctx.save(); ctx.fillStyle = 'rgba(0,0,0,0.02)'; ctx.arc(150, 150, 150, 0, 2 * Math.PI); ctx.fill(); ctx.restore(); } function drawPosLine() { ctx.beginPath(); ctx.moveTo(150, 0); ctx.lineTo(150, 300); ctx.closePath(); ctx.stroke(); ctx.beginPath(); ctx.moveTo(0, 150); ctx.lineTo(300, 150); ctx.closePath(); ctx.stroke(); ctx.moveTo(150, 150); ctx.beginPath(); ctx.arc(150, 150, 100, 0 * Math.PI, 2 * Math.PI); ctx.closePath(); ctx.stroke(); ctx.moveTo(150, 150); ctx.beginPath(); ctx.arc(150, 150, 50, 0 * Math.PI, 2 * Math.PI); ctx.closePath(); ctx.stroke(); } function drawRadar(iDeg) { ctx.fillStyle = 'rgba(0,200,0,.7)'; ctx.beginPath(); ctx.moveTo(150, 150); ctx.arc(150, 150, 150, (-2 * CFG.perDeg + iDeg) / 180 * Math.PI, (0 + iDeg) / 180 * Math.PI); ctx.closePath(); ctx.fill(); } init(); </script></body></html> |
至此,完成效果,符合预期,完美~
****************************************************
<!DOCTYPE html>
<html lang="zh">

<head>
    <meta charset="UTF-8">
    <meta name="viewport" content="width=device-width, initial-scale=1.0">
    <meta http-equiv="X-UA-Compatible" content="ie=edge">
    <title>radar</title>
    <style>
        canvas {
            margin: 20px auto;
            display: block;
        }
    </style>
</head>

<body>
    <canvas id="can" width=300 height=300></canvas>

    <script type="text/javascript">
        var CFG = {
            perDeg: 1,
        };

        var aTarget = [];

        var can = document.getElementById('can');
        var ctx = can.getContext('2d');
        var deg = 0;
        ctx.strokeStyle = 'rgba(0,255,0,1)';

        function init() {
            ctx.fillStyle = 'rgba(0,50,0,1)';
            ctx.arc(150, 150, 150, 0, 2 * Math.PI);
            ctx.fill();
            var raf = window.requestAnimationFrame(loop);
        }

        function loop() {
            deg = (deg + CFG.perDeg);
            cover();
            drawPosLine();
            drawRadar(deg);
            raf = window.requestAnimationFrame(loop);
        }

        function cover() {
            ctx.save();
            ctx.fillStyle = 'rgba(0,0,0,0.02)';
            ctx.arc(150, 150, 150, 0, 2 * Math.PI);
            ctx.fill();
            ctx.restore();
        }

        function drawPosLine() {
            ctx.beginPath();
            ctx.moveTo(150, 0);
            ctx.lineTo(150, 300);
            ctx.closePath();
            ctx.stroke();

            ctx.beginPath();
            ctx.moveTo(0, 150);
            ctx.lineTo(300, 150);
            ctx.closePath();
            ctx.stroke();

            ctx.moveTo(150, 150);
            ctx.beginPath();
            ctx.arc(150, 150, 100, 0 * Math.PI, 2 * Math.PI);
            ctx.closePath();
            ctx.stroke();

            ctx.moveTo(150, 150);
            ctx.beginPath();
            ctx.arc(150, 150, 50, 0 * Math.PI, 2 * Math.PI);
            ctx.closePath();
            ctx.stroke();
        }

        function drawRadar(iDeg) {
            ctx.fillStyle = 'rgba(0,200,0,.7)';
            ctx.beginPath();
            ctx.moveTo(150, 150);
            ctx.arc(150, 150, 150, (-2 * CFG.perDeg + iDeg) / 180 * Math.PI, (0 + iDeg) / 180 * Math.PI);
            ctx.closePath();
            ctx.fill();
        }

        function bornTarget() {
            aTarget.push({
                deg: Math.round(Math.random() * 360),
                r: Math.round(Math.random() * can.width / 2)
            });
        }

        init();
    </script>
</body>

</html>


