rabbitmq(一)搭建以及创建简单的代码实例
使用Docker搭建的rabbitMq
docker pull
拉取镜像
docker pull rabbitmq:management
启动镜像
docker run -d --name rabbitmq
 -p 5671:5671 -p 5672:5672 -p 4369:4369 -p 25672:25672 -p 15671:15671 -p 15672:15672 rabbitmq:management
为什么会有这么多端口 是因为镜像本身也是有这么多端口的 只是在启动参数的时候写上去了
访问 IP:15672
出现如下界面 搭建完成

搭建java简单的示例项目
springboot
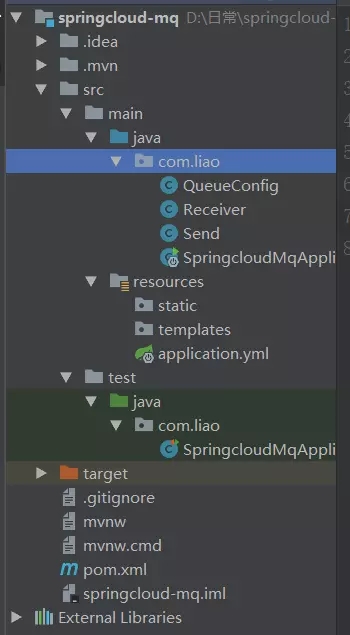
目录结构

项目配置
application.yml:
spring:
  application:
    name: liao
  rabbitmq:
    host: 127.0.0.1
    port: 5672
    username: 123
    password: 123456
QueueConfig.java
//在类头上记得加@Configuration
@Bean
    public Queue createQueue(){
        return new Queue("hello-queue");
    }
接收队列
Receiver.java
//监听多个队列
 //@RabbitListener(queues = {"hello-queue1","hello-queue2"})
@RabbitListener(queues = "hello-queue")
        public void process(User msg){
            System.out.println("接受到了消息:"+msg);
        }
发送消息
Send
@Autowired
    private AmqpTemplate amqpTemplate;
     public void  send(User msg){

         amqpTemplate.convertAndSend("hello-queue",msg);
     }
Test
@RunWith(SpringRunner.class)
@SpringBootTest(classes =SpringcloudMqApplication.class )
public class SpringcloudMqApplicationTests {

    @Autowired
    private  Send send;


    @Test
    public void contextLoads() {
        User user=new User();
        user.setId(1L);
        user.setUsername("yjakly");
    }

}
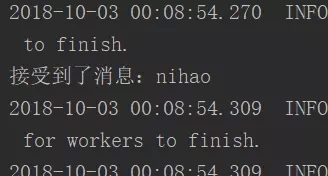
完成


