

结合 Hardhat 使用 Web3
原文在这里
简介
随着Hardhat插件hardhat-web3-v4最近的兼容性更新,Web3.Js现在可以作为插件在Hardhat中使用。
本教程将指导大家如何使用Web3js作为插件与区块链进行交互。
前置要求
本教程假定大家都了解如何编写智能合约,也都能很好地使用JavaScript/TypeScript。使用的NodeJS版本要高于v16。
注意
我们使用NPM来安装依赖。
步骤
初始化hardhat项目
安装必要的依赖项(包括hardhat-web3-v4)
编写智能合约
编译、测试和部署合约
测试和调用合约
初始化Hardhat项目
新建项目文件夹:
$ mkdir myproject
$ cd myproject
在当前目录下安装、初始化Hardhat:
$ npm install hardhat
$ npx hardhat init

安装必要的依赖项(包括hardhat-web3-v4)
选择TypeScript,剩下的全都选择Yes。系统将提示你安装所需的依赖项。回复yes就可以完成安装。安装Hardhat-web3-v4插件,我们使用npm:
npm install --save-dev @nomicfoundation/hardhat-web3-v4 'web3@4'
这将通过将其包含在node_modules文件夹中来将Web3.Js添加到我们的项目中。要使用此插件扩展Hardhat的功能,我们必须在Hardhat配置文件hardhat.config.ts中导入web3-v4插件。请在配置文件的顶部导入此内容。
import { HardhatUserConfig } from "hardhat/config";
import "@nomicfoundation/hardhat-toolbox";
import "@nomicfoundation/hardhat-web3-v4";  // <================

const config: HardhatUserConfig = {
  solidity: "0.8.19",
};

export default config;
默认情况下,hardhat-toolbox会被添加到这个文件中。我们需要明确地调用这个插件。这将修改Hardhat运行时环境 - HRE,并包括Web3类和实例化的web3对象。有了后者,我们会得到一个修改过的、随时可用的web3对象,它带有一个已初始化的local/Hardhat provider。该对象可以在项目中的任何地方使用,例如测试和部署文件。
编写智能合约
我们开始新项目的时候,Hardhat提供了一个简单的Lock合约。我们可以参考myproject/contracts/Lock.sol文件。
  // SPDX-License-Identifier: UNLICENSED
  pragma solidity ^0.8.9;

  // Uncomment this line to use console.log
  // import "hardhat/console.sol";

  contract Lock {
    uint public unlockTime;
    address payable public owner;

    event Withdrawal(uint amount, uint when);

    constructor(uint _unlockTime) payable {
      require(
        block.timestamp < _unlockTime,
        "Unlock time should be in the future"
      );

      unlockTime = _unlockTime;
      owner = payable(msg.sender);
    }

    function withdraw() public {
      // Uncomment this line, and the import of "hardhat/console.sol", to print a log in your terminal
      // console.log("Unlock time is %o and block timestamp is %o", unlockTime, block.timestamp);

      require(block.timestamp >= unlockTime, "You can't withdraw yet");
      require(msg.sender == owner, "You aren't the owner");

      emit Withdrawal(address(this).balance, block.timestamp);

      owner.transfer(address(this).balance);
    }
  }
Lock.sol是一个简单的时间锁定合约,在部署时接受任意数量的Ether,并期望一个在部署时将被赋值给状态变量的参数。只有当unlockTime不在未来时,标记为owner的地址才能通过withdraw函数提取合约的全部余额。
编译、测试和部署合约
- 编译、部署合约
$ npx hardhat compile
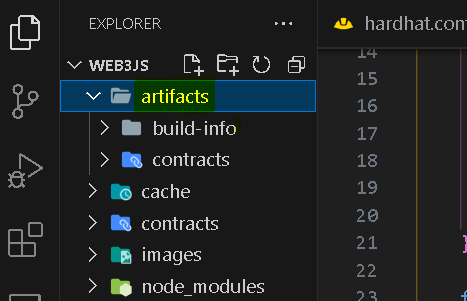
执行上面的命令会创建一个名为artifacts文件夹,其中包含着构建信息和编译好的合约。从这个目录中,我们将需要在测试和部署期间所谓的应用程序二进制接口 - ABI。
部署智能合约的话,我们需要如下修改script/deploy.ts。
首先,我们需要导入已经初始化的web3对象。之后再获取工件:
import { web3 } from "hardhat";
import artifacts from "../artifacts/contracts/Lock.sol/Lock.json";

async function main() {

}

// We recommend this pattern to be able to use async/await everywhere
// and properly handle errors.
main().catch((error) => {
  console.error(error);
  process.exitCode = 1;
});
在main函数中,我们使用一些web3.js的函数,例如.utils和.eth模块准备来部署:
async function main() {
  const currentTimestampInSeconds = Math.round(Date.now() / 1000);
  const unlockTime = currentTimestampInSeconds + 60;

  const lockedAmount = web3.utils.toWei("0.001", 'ether');

  const [deployer] = await web3.eth.getAccounts();
  const lockContract = new web3.eth.Contract(artifacts.abi);
  const rawContract = lockContract.deploy({
    data: artifacts.bytecode,
    arguments: [unlockTime],
  });

  const lock = await rawContract.send({
    from: deployer,
    gasPrice: "10000000000",
    value: lockedAmount.toString()
  });

  console.log(
    `Lock with ${web3.utils.toWei(
      lockedAmount,
      'ether'
    )}ETH and unlock timestamp ${unlockTime} deployed to ${lock.options.address}`
  );
}

// We recommend this pattern to be able to use async/await everywhere
// and properly handle errors.
main().catch((error) => {
  console.error(error);
  process.exitCode = 1;
});
执行以下命令将把Lock合约部署到内置于Hardhat的本地区块链上。我们使用Web3.js与区块链通信,将我们的智能合约数据广播到网络上。
$ npx hardhat run scripts/deploy.ts
测试、调用合约
通过上面的步骤,我们已经把编译后的智能合约部署到本地的区块链网络上了。现在是时候测试下我们的合约是否如我们所期望的了。因为我们使用Web3.js来向区块链广播和存储数据,所以我们也使用相同的协议来查询和修改数据。
使用下面的代码替换myproject/test/Lock.ts的内容:
  import {
    time,
    loadFixture,
  } from "@nomicfoundation/hardhat-toolbox/network-helpers";
  import { expect } from "chai";
  import { web3 } from "hardhat";
  import artifacts from "../artifacts/contracts/Lock.sol/Lock.json";

  describe("Lock", function () {
    async function deployOneYearLockFixture() {
      const ONE_YEAR_IN_SECS = 365 * 24 * 60 * 60;
      const ONE_GWEI = 1_000_000_000;

      const lockedAmount = ONE_GWEI;
      const unlockTime = (await time.latest()) + ONE_YEAR_IN_SECS;

      const lockContract = new web3.eth.Contract(artifacts.abi);
      lockContract.handleRevert = true;

      const [deployer, otherAccount] = await web3.eth.getAccounts();
      const rawContract = lockContract.deploy({
        data: artifacts.bytecode,
        arguments: [unlockTime],
      });

      // To know how much gas will be consumed, we can estimate it first.
      const estimateGas = await rawContract.estimateGas({
        from: deployer,
        value: lockedAmount.toString()
      });

      const lock = await rawContract.send({
        from: deployer,
        gas: estimateGas.toString(),
        gasPrice: "10000000000",
        value: lockedAmount.toString()
      });

      console.log("Lock contract deployed to: ", lock.options.address);
      return { lock, unlockTime, lockedAmount, deployer, otherAccount, rawContract };
    }

    describe("Deployment", function () {
      it("Should set the right unlockTime", async function () {
        const { lock, unlockTime } = await loadFixture(deployOneYearLockFixture);
        const setTime = await lock.methods.unlockTime().call();
        console.log("SetTime", setTime);
        expect(setTime).to.equal(unlockTime);
      });

      it("Should set the right deployer", async function () {
        const { lock, deployer } = await loadFixture(deployOneYearLockFixture);

        expect(await lock.methods.owner().call()).to.equal(deployer);
      });

      it("Should receive and store the funds to lock", async function () {
        const { lock, lockedAmount } = await loadFixture(
          deployOneYearLockFixture
        );
        const balance = await web3.eth.getBalance(String(lock.options.address));
        expect(balance).to.equal(lockedAmount);
      });

      it("Shouldn't fail if the unlockTime has arrived and the deployer calls it", async function () {
        const { lock, unlockTime, deployer } = await loadFixture(
          deployOneYearLockFixture
        );

        await time.increaseTo(unlockTime);
        await expect(lock.methods.withdraw().send({from: deployer})).not.to.be.reverted;
      });
    });
  });
在这个文件中,我们执行了与部署脚本中类似的步骤,使用deployOneYearLockFixture()中的ABI和bytecode准备和部署合约。为了从区块链上读取owner数据,我们使用了已部署合约的一个实例,即lock.methods.owner().call()。调用.call()不会改变区块链的状态,因此不需要钱包签名。
为了改变我们之前保存的数据的状态,我们需要访问我们所需功能的方法容器,并调用.send来向网络广播我们的意图lock.methods.withdraw().send({from: deployer})。
注意
使用.send()时,我们必须在from字段中明确提供交易的发送者(在上面的例子中是部署者账户的地址)。
我们可以使用下面的命令来执行测试:
$ npx hardhat test test/Lock.ts
之后我们会得到类似的结果:
/*
Lock
    Deployment
Lock contract deployed to:  0x5FbDB2315678afecb367f032d93F642f64180aa3
SetTime 1739193193n
      ✔ Should set the right unlockTime (884ms)
      ✔ Should set the right deployer (54ms)
      ✔ Should receive and store the funds to lock
      ✔ Shouldn't fail if the unlockTime has arrived and the deployer calls it
*/

声明:本作品采用署名-非商业性使用-相同方式共享 4.0 国际 (CC BY-NC-SA 4.0)进行许可,使用时请注明出处。
Author: mengbin
blog: mengbin
Github: mengbin92
cnblogs: 恋水无意
腾讯云开发者社区:孟斯特
