nginx的一些知识(一)
第8章 web网站的搭建
curl -Lv 网站地址:查看网站的请求信息和响应信息,并且会将结果输出出来
8.1 web网站的的传输原理过程
- 会进行DNS的解析
- 进行客户端和服务端进行三次握手协议
- 客户端端会发送请求查看服务端内容的信息
- 服务端会响应客户端的请求并且显示内容信息
- 客户端和服务端进行挥手协议
8.2 web网站的HHTP协议组成部分
8.2.1 web网站的请求报文
8.2.1.1 请求行
> GET / HTTP/1.1 /oldboy.jpg
8.2.1.1.1 请求方法
- GET 指客户端访问服务端的请求方法(指从服务端获取消息)
- POST 指客户端将信息提交给服务端
8.2.1.1.2 请求资源
- / 请求资源
- /oldboy.jpg 请求oldboy.jpg资源
8.2.1.1.3 版本协议
- HTTP/1.1 http请求版本1.1版本
- HTTP/1.0 http请求版本1.0版本
-
http1.0和http1.1的区别
http1.0:是短链接,每次链接只请求一次任务
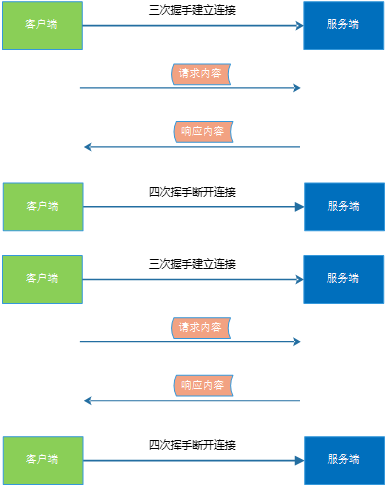
http1.1:是长链接,每次链接会请求多次任务,当没有任务的时候才会断开

-
请求头
> User-Agent: curl/7.29.0
> Host: www.baidu.com
8.2.1.2.1 指定服务端请求客户端的软件信息
User-Agent: curl/7.29.0
- 注:手机登录百度的时候,可能使用的是安卓版本的,电脑登录百度的时候,可能使用的是pc端的,客户端为了验证当前客户使用的是什么类型的终端来访问我服务器的
8.2.1.2.2 Host
blog.51cto.com
显示当前访问的网站页面是哪个
-
空行
为了分割请求头和请求主体的内容
-
请求主体
当前使用的是get方法,目前没有办法显示
8.2.2 web网站的响应报文
8.2.2.1 起始行
< HTTP/1.1 200 OK
8.2.2.1.1 响应的协议版本
HTTP/1.
8.2.2.1.2 服务器响应以后返回的状态码信息
200 OK
8.2.2.1.3 常见的状态吗有哪些?
- 200(ok) 正常的访问网站
- 301(Moved Permanently) 域名进行永久的跳转
- 302(Moved Temporarily) 域名进行临时跳转
- 304(Not Modified ) 本地进行缓存的信息
- 401(Unauthorized ) 访问认证失败
- 403(Forbidden) 此网站禁止被别人访问,首页文件不存在
- 404(Not Found) 访问服务器的资源不存在
- 413(Request Entity Too Large) 上传数据达到nginx上传的限制
- 500(Internal Server Error) 服务器内部的错误,一般是研发的前端asp代 码程序出现问题,或者数据库连接出现了错误
- 502(bad gateway) 错误的网关,一般为代理服务器请求后端服务 的时候,后端服务不可用或者没有响应造成的
- 503(service unavailable) 服务当前不可用,可能是服务器超载或者服务 器宕机造成的,
- 504(gateway timeout) 网关超时,通常是代理服务器访问后端的服务, 后端的服务没有在指定的时间里将数据返回 给前端的服务器
8.2.2.1.4 301和302的区别
- 301:代表的是永久跳转,会将返回的域名的信息保存在本地浏览器缓存里,下次再访问的时候在本地浏览器就会发生域名的更换跳转
-
302:代表的是临时跳转,不会将返回的域名信息保存在本地浏览器的缓存里,下次再访问的时候还会进行域名的跳转操作
8.2.2.1.5 500的一些数字的状态码是为什么
- 服务器编写的代码程序出现了问题
- 服务器出现了宕机
- 服务器的服务出现了问题
8.2.2.2 响应头
Accept-Ranges: bytes
< Cache-Control: private, no-cache, no-store, proxy-revalidate, no-transform
< Connection: Keep-Alive 长连接
< Content-Length: 2381
< Content-Type: text/html 静态资源
< Date: Wed, 06 Nov 2019 03:17:49 GMT
< Etag: "588604c8-94d"
< Last-Modified: Mon, 23 Jan 2017 13:27:36 GMT
< Pragma: no-cache
< Server: bfe/1.0.8.18
< Set-Cookie: BDORZ=27315; max-age=86400; domain=.baidu.com; path=/
8.2.2.3 空行
为了分割响应头和响应主体的内容
8.2.2.4 响应主体
基于html语言编写的一个静态网站
<!DOCTYPE html>
<!--STATUS OK--><html> <head><meta http-equiv=content-type content=text/html;charset=utf-8><meta http-equiv=X-UA-Compatible content=IE=Edge><meta content=always name=referrer><link rel=stylesheet type=text/css href=http://s1.bdstatic.com/r/www/cache/bdorz/baidu.min.css><title>百度一下,你就知道</title></head> <body link=#0000cc> <div id=wrapper> <div id=head> <div class=head_wrapper> <div class=s_form> <div class=s_form_wrapper> <div id=lg> <img hidefocus=true src=//www.baidu.com/img/bd_logo1.png width=270 height=129> </div> <form id=form name=f action=//www.baidu.com/s class=fm> <input type=hidden name=bdorz_come value=1> <input type=hidden name=ie value=utf-8> <input type=hidden name=f value=8> <input type=hidden name=rsv_bp value=1> <input type=hidden name=rsv_idx value=1> <input type=hidden name=tn value=baidu><span class="bg s_ipt_wr"><input id=kw name=wd class=s_ipt value maxlength=255 autocomplete=off autofocus></span><span class="bg s_btn_wr"><input type=submit id=su value=百度一下 class="bg s_btn"></span> </form> </div> </div> <div id=u1> <a href=http://news.baidu.com name=tj_trnews class=mnav>新闻</a> <a href=http://www.hao123.com name=tj_trhao123 class=mnav>hao123</a> <a href=http://map.baidu.com name=tj_trmap class=mnav>地图</a> <a href=http://v.baidu.com name=tj_trvideo class=mnav>视频</a> <a href=http://tieba.baidu.com name=tj_trtieba class=mnav>贴吧</a> <noscript> <a href=http://www.baidu.com/bdorz/login.gif?login&tpl=mn&u=http%3A%2F%2Fwww.baidu.com%2f%3fbdorz_come%3d1 name=tj_login class=lb>登录</a> </noscript> <script>document.write('<a href="http://www.baidu.com/bdorz/login.gif?login&tpl=mn&u='+ encodeURIComponent(window.location.href+ (window.location.search === "" ? "?" : "&")+ "bdorz_come=1")+ '" name="tj_login" class="lb">登录</a>');</script> <a href=//www.baidu.com/more/ name=tj_briicon class=bri style="display: block;">更多产品</a> </div> </div> </div> <div id=ftCon> <div id=ftConw> <p id=lh> <a href=http://home.baidu.com>关于百度</a> <a href=http://ir.baidu.com>About Baidu</a> </p> <p id=cp>©2017 Baidu <a href=http://www.baidu.com/duty/>使用百度前必读</a> <a href=http://jianyi.baidu.com/ class=cp-feedback>意见反馈</a> 京ICP证030173号 <img src=//www.baidu.com/img/gs.gif> </p> </div> </div> </div> </body> </html>
8.3 web网站的资源信息
8.3.1 静态资源信息
- 资源扩展名为jpg,html,txt
- 静态资源的信息资源是静态的,在网站不能随意进行操作
- 静态资源的信息资源是不用和数据库进行交互的
- 静态资源的信息容易让搜索引擎给收藏的
- 静态资源的信息在网站上的加载速度是比较快的
8.3.2 动态资源信息
- 动态资源的后缀为php,jsp,asp,do
- 动态资源的信息在网站上是可以进行很好的操作的,因为他与数据库进行交互的,他的数据资源都会存储到数据库里面
- 动态资源信息不容易被搜索引擎收录,动态资源地址栏里面有特殊字符号
- 动态资源由于和数据库需要进行交互,导致他的加载速度比较慢
8.3.3 伪静态资源信息
- 可以被搜索引擎很好的收录
- 可以在页面好很方便的对资源进行调整
- 动态页面资源可以和数据库进行交互
8.3.4 url和uri的意思
https://blog.51cto.com/artcommend/61
8.3.4.1 url的意思
统一资源定位符:https://blog.51cto.com
8.3.4.2 uri的意思
统一资源标识符:/artcommend/61
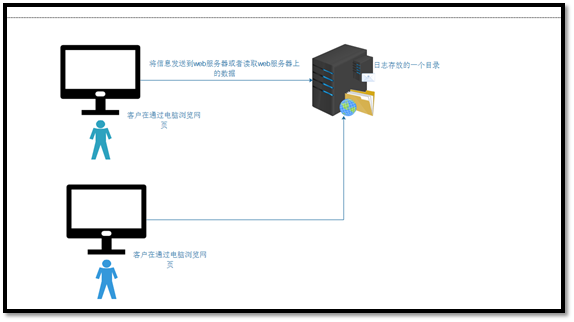
8.4 网站访问度量的方法
8.4.1 ip度量方法(参考值)
统计用户连接网站的IP地址(以公网地址来进行计算)
8.4.1.1 为什么这样的统计不精确
因为ip地址使用的外网的地址统计,所以当一个局域网的用户都来访问baidu.com的时候,在baidu那里只有一个外网的地址用户,所以百度在那里只会统计一个ip地址,这样精确度太低
8.4.2 pv度量方法(参考值)
根据没次去网站切换一个页面就算一个pv值来计算的
8.4.2.1 为什么这样统计不正确
因为pv统计的时候是根据页面的统计来进行计算的,当用户浏览淘宝的时候和在买房的时候你可能浏览的页面不一致,可能淘宝浏览2页最多4页左右可能就买了,但是买房可能浏览几百页都是有可能的,但是你不能说淘宝的网站没有买房的网站好
8.4.3 uv度量方法(企业常用的方法,相比上面的比较精)
根据每次的cookie值来进行统计
8.4.3.1 为什么uv统计相对准确点
uv统计的时候需要说cookie,用户每次浏览一个网页的时候,就会进行一次cookie的保存,当下一次在进行浏览网页的时候,会查看他的服务端(session)看下是不是有这个客户浏览网站的记录,如果有,则不会进行在次记录,如果没有,才会进行记录,这样他是根据主机的终端数量来进行统计的
8.4.4 常见的测量网站度量的统计方法有什么
- awk进行日志的分析
- piwik网站统计工具
- ELK工具的使用
- 第三方公司提供的(日志易,百度统计)
站长之家:http://alexa.chinaz.com/alexa_more.aspx
8.5 常用的网站服务软件
8.5.1 处理静态资源服务
- nginx:并发处理能力强,并且使用的资源少
- apache:串行处理事情,使用的资源多
- Tengine:是由淘宝网发起的一款web项目,它在nginx基础上,针对大访问量的网站需求,添加了很多的高级功能
8.5.2 处理动态资源服务
- tomcat:编写java项目使用的动态页面
- php:编写php项目使用的动态页面
8.6 nginx软件
8.6.1 nginx的概述说明
nginx并发处理静态页面的能力比较强,占用的资源比较少.
nginx软件是俄罗斯人发明的,C语言开发的,少量了python语言.
8.6.2 nginx的安装
8.6.2.1 nginx的非官方源安装
此下载的版本为1.12版本的,在这里使用yum install -y nginx 解决则可
8.6.2.2 nginx的官方源安装
8.6.2.2.1 打开网站找见官方源
http://nginx.org/en/linux_packages.html#RHEL-CentOS
[nginx-stable]
name=nginx stable repo
baseurl=http://nginx.org/packages/centos/$releasever/$basearch/
gpgcheck=1
enabled=1
gpgkey=https://nginx.org/keys/nginx_signing.key
module_hotfixes=true
8.6.2.2.2 在/etc/yum.repo.d/下面创建一个stable稳定版本的文件
[root@web01 ~] # cat /etc/yum.repos.d/nginx.repo
[nginx-stable]
name=nginx stable repo
baseurl=http://nginx.org/packages/centos/$releasever/$basearch/
gpgcheck=1
enabled=1
gpgkey=https://nginx.org/keys/nginx_signing.key
module_hotfixes=true
[root@web01 ~] #
8.6.2.2.3 使用yum进行安装
yum install -y nginx 查看版本为1.6.1版本则正常
8.6.2.3 nginx编译安装
8.6.2.3.1 下载编译安装包
wget http://nginx.org/download/nginx-1.16.1.tar.gz
8.6.2.3.2 下载nginx的一些关联软件
yum install openssl-devel pcre-devel -y
8.6.2.3.3 源码开始配置
/configure --prefix=/application/nginx-1.16.1 --with-http_ssl_module --with-http_stub_status_module
- --prefix=PATH 指定软件程序目录
- --sbin-path=PATH 指定软件命令文件存储路径
- --conf-path=PATH 指定软件配置文件保存路径
- --error-log-path=PATH 指定软件日志文件保存路径
- --user=USER 指定nginx服务worker进程管理用户
- --group=USER 指定nginx服务worker进程管理用户组
- --with-http_ssl_module 让nginx开启HTTPS功能
8.6.2.3.4 开始编译与安装
make && make install
8.7 nginx目录的介绍
8.7.1 常见的nginx目录
[root@web01 ~] # rpm -ql nginx
/etc/logrotate.d/nginx
/etc/nginx
/etc/nginx/conf.d
/etc/nginx/conf.d/default.conf
/etc/nginx/fastcgi_params
/etc/nginx/koi-utf
/etc/nginx/koi-win
/etc/nginx/mime.types
/etc/nginx/modules
/etc/nginx/nginx.conf
/etc/nginx/scgi_params
/etc/nginx/uwsgi_params
/etc/nginx/win-utf
/etc/sysconfig/nginx
/etc/sysconfig/nginx-debug
/usr/lib/systemd/system/nginx-debug.service
/usr/lib/systemd/system/nginx.service
/usr/lib64/nginx
/usr/lib64/nginx/modules
/usr/libexec/initscripts/legacy-actions/nginx
/usr/libexec/initscripts/legacy-actions/nginx/check-reload
/usr/libexec/initscripts/legacy-actions/nginx/upgrade
/usr/sbin/nginx
/usr/sbin/nginx-debug
/usr/share/doc/nginx-1.16.1
/usr/share/doc/nginx-1.16.1/COPYRIGHT
/usr/share/man/man8/nginx.8.gz
/usr/share/nginx
/usr/share/nginx/html
/usr/share/nginx/html/50x.html
/usr/share/nginx/html/index.html
/var/cache/nginx
/var/log/nginx
- 上面这么多的目录和文件怎么记住呢
8.7.1.1 日志切割文件
- /etc/logrotate.d/nginx 默认日志切割的文件
8.7.1.1.1 日志为什么要进行切割
如果一直存放在一个日志文件里面,会越来越大,当下次想分析的时候会造成日志太大,无法打开,或者打开太慢
8.7.1.1.2 日志常见的切割方式
- 通过系统自带的软件来进行实现
[root@web01 nginx] # cat /etc/logrotate.conf
weekly 定义按周进行切割
# keep 4 weeks worth of backlogs
rotate 4 定义保留切割的文件几份
# create new (empty) log files after rotating old ones
create 创建新的日志信息
# use date as a suffix of the rotated file
dateext 使用时间来作为切割日志文件的标识
# uncomment this if you want your log files compressed
#compress
# RPM packages drop log rotation information into this directory
include /etc/logrotate.d 加载目录中的配置文件信息
# no packages own wtmp and btmp -- we'll rotate them here
/var/log/wtmp { 指定单独日志文件进行切割处理
monthly 按月切割
create 0664 root utmp 创建权限为644 属主为root 属组为utmp
minsize 1M 最小大小为1M
rotate 1 只保留最新的1份切割文件
}
/var/log/btmp {
missingok
monthly
create 0600 root utmp
rotate 1
}
[root@web01 nginx] # cat /etc/logrotate.d/nginx
/var/log/nginx/*.log {
daily
missingok
rotate 52
compress 压缩
delaycompress 延迟压缩
notifempty 不空
create 640 nginx adm
sharedscripts
postrotate
if [ -f /var/run/nginx.pid ]; then
kill -USR1 `cat /var/run/nginx.pid` USR1代表的是服务进行平滑重启
fi
endscript
}
- 通过系统自带的脚本来进行实现
#!/bin/bash
mv /var/log/nginx/access.log /var/log/nginx/access_$(date +%F_%T).log
systemctl reload nginx
0 */6 * * * /bin/sh split_log.sh &>/dev/null
8.7.1.2 nginx的一些配置文件
- /etc/nginx nginx的程序目录
- /etc/nginx/nginx.conf nginx的主配置文件
- /etc/nginx/conf.d nginx程序的其他配置文件所存在的目录
- /etc/nginx/conf.d/default.conf nginx的程序扩展配置文件
- /etc/nginx/mime.types nginx支持的静态媒体资源类型
8.7.1.3 nginx的一些命令文件
- /usr/sbin/nginx nginx的命令文件
8.7.1.3.1 nginx的常见的命令
-v 显示版本信息并且退出
-V 显示版本和配置信息并且退出
-t 检测配置文件语法是否对并且执行退出
-T 检测配置文件并且将文件打开,并且退出
-q 抑制非错误信息输出
-s 识别信号信息
-p 设置nginx保存目录
-c 设置nginx的配置文件的保存路径
-g 在全局配置文件中设置指令信息
8.7.1.4 nginx的一些字符编码的文件
- /etc/nginx/koi-utf
- /etc/nginx/koi-win
- /etc/nginx/win-utf
8.7.1.5 nginx的一些接口配置文件
- /etc/nginx/fastcgi_params 实现将nginx的动态请求发送给动态 的服务(nginx-----接口-----php)
- /etc/nginx/scgi_params
- /etc/nginx/uwsgi_params 实现将nginx的动态请求发送给动态 的服务(nginx--------接口---python)
8.7.1.5.1 fastcgi和uwsgi和scgi这三个什么区别
- fastcgi是一种常驻型的CGI服务,他是独立在http服务器上进行工作的
- uwsgi和scgi是一种新型的协议服务,他是在http服务器和cgi服务之间传输数据的
8.7.1.6 nginx的一些日志文件
- /var/log/nginx 保存记录nginx的日志信息
[root@web01 ~] # cd /var/log/nginx/
[root@web01 nginx] # ll
total 48
-rw-r----- 1 nginx adm 22883 Nov 6 19:24 access.log
-rw-r----- 1 nginx adm 22595 Nov 7 08:38 error.log
[root@web01 nginx] #
8.7.1.7 nginx的一些文档信息
- /usr/share/doc/nginx-1.16.1
- /usr/share/doc/nginx-1.16.1/COPYRIGHT
- /usr/share/man/man8/nginx.8.gz
8.7.1.8 nginx的一些程序调试的文件(开发)
- /etc/sysconfig/nginx
- /etc/sysconfig/nginx-debug
8.7.1.9 nginx的一些调用库的文件
- /usr/lib64/nginx
- /usr/lib64/nginx/modules
- /usr/libexec/initscripts/legacy-actions/nginx
- /usr/libexec/initscripts/legacy-actions/nginx/check-reload
- /usr/libexec/initscripts/legacy-actions/nginx/upgrade
8.7.1.10 nginx调用系统服务状态的文件
- /usr/lib/systemd/system/nginx-debug.service
- /usr/lib/systemd/system/nginx.service
8.7.1.11 nginx程序的模块目录
- /etc/nginx/modules
8.7.1.12 nginx的站点目录
- /usr/share/nginx
8.7.1.13 nginx的缓存文件
- /var/cache/nginx
8.7.1.14 nginx的代码文件
- /usr/share/nginx/html
- /usr/share/nginx/html/50x.html 记录nginx默认的状态信息代码
- /usr/share/nginx/html/index.html 记录nginx默认的首页文件代码
8.7.2 nginx配置文件的讲解
主配置区域 程序核心功能配置信息
事件配置区域 程序性能参数信息
HTTP配置区域 网站服务功能信息
server配置区域 每一个网站页面配置信息
location配置区域 进行特殊功能设置 安全/跳转
if配置区域 访问信息进行判断
8.7.2.1 主配置文件的讲解
[root@web01 nginx] # cat /etc/nginx/nginx.conf
user www; nginx的work进程使用的用户
worker_processes 1; nginx的工作进程,默认为1,可以进行修改,最多修改成 自己的核心数或者核心数*2
error_log /var/log/nginx/error.log warn; 记录nginx执行中的错误日志路径和日志级别
pid /var/run/nginx.pid; 保存nginx的pid值
events {
worker_connections 1024; 并发处理事情的能力(最大=工作进程数*并发处理事 情的能力<65535)
}
http {
include /etc/nginx/mime.types; nginx能识别的静态资源媒体类型
default_type application/octet-stream; 当传输的文件没有任何后缀的时候,默认 使用的类型
log_format main '$remote_addr - $remote_user [$time_local] "$request" ' 产生的日志格式类型
'$status $body_bytes_sent "$http_referer" '
'"$http_user_agent" "$http_x_forwarded_for"';
access_log /var/log/nginx/access.log main; 产生的正确日志保存路径
sendfile on;
keepalive_timeout 65; 连接会话超时时间
include /etc/nginx/conf.d/*.conf; 加载扩展配置文件的路径
}
8.7.2.1.1 查看nginx使用的进程
[root@web01 nginx] # ps -ef | grep nginx
root 2457 1 0 08:38 ? 00:00:00 nginx: master process nginx
www 2458 2457 0 08:38 ? 00:00:00 nginx: worker process
root 2611 2480 0 08:39 pts/1 00:00:00 vim /etc/logrotate.d/nginx
root 4283 2250 0 10:43 pts/0 00:00:00 grep --color=auto nginx
You have new mail in /var/spool/mail/root
[root@web01 nginx] #
上述可知道nginx有2个进程,1个master进程,1个worker进程
root 2457 1 0 08:38 ? 00:00:00 nginx: master process nginx 主进程,相当于老板, 当master进程不存在,则意味着nginx服务关闭了
www 2458 2457 0 08:38 ? 00:00:00 nginx: worker process 工作进程,相当于员 工,工作进程不存在,不会造成nginx服务关闭
8.7.2.1.2 文件打开数是什么意思
就是你每次启动一个服务,会加载的配置文件有多少
命令:ulimit -a
[root@web01 nginx] # ulimit -a
core file size (blocks, -c) 0
data seg size (kbytes, -d) unlimited
scheduling priority (-e) 0
file size (blocks, -f) unlimited
pending signals (-i) 3766
max locked memory (kbytes, -l) 64
max memory size (kbytes, -m) unlimited
open files (-n) 65535 打开的文件数为65535
pipe size (512 bytes, -p) 8
POSIX message queues (bytes, -q) 819200
real-time priority (-r) 0
stack size (kbytes, -s) 8192
cpu time (seconds, -t) unlimited
max user processes (-u) 3766
virtual memory (kbytes, -v) unlimited
file locks (-x) unlimited
You have new mail in /var/spool/mail/root
[root@web01 nginx] #
修改文件打开数
[root@web01 ~] # tail -f /etc/security/limits.conf
#* soft core 0
#* hard rss 10000
#@student hard nproc 20
#@faculty soft nproc 20
#@faculty hard nproc 50
#ftp hard nproc 0
#@student - maxlogins 4
* - nofile 65535 将这个文件打开数修改则可以
# End of file
8.7.3 扩展配置文件的讲解
[root@web01 conf.d] # grep -vE "#|^$" default.conf
server {0
listen 80; 监听端口为默认的端口为80
server_name localhost; 服务的域名信息
location / {
root /usr/share/nginx/html; 站点目录(保存图片视频……)
index index.html index.htm; 设置首页文件
}
error_page 404 500 502 503 504 /error.html; 设置错误界面,进行友好提示
location = /error.html { 错误路径的网页
root /oldboy; 错误界面保存的路径
}
}
You have new mail in /var/spool/mail/root
[root@web01 conf.d] #
8.8 nginx搭建一个简单的静态网站
8.8.1 环境的准备
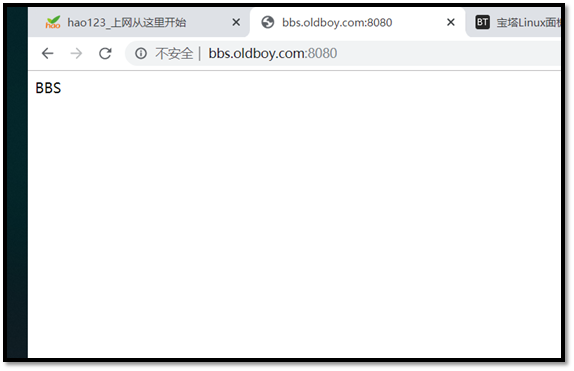
8.8.1.1 创建bbs的配置文件
[root@web01 conf.d] # cat bbs.conf
server {
listen 8080;
server_name bbs.oldboy.com;
location / {
root /html/bbs;
index index.html index.htm;
}
error_page 404 500 502 503 504 /error.html;
location = /error.html {
root /oldboy;
}
}
8.8.1.2 创建www的配置文件
[root@web01 conf.d] # cat www.conf
server {
listen 8080;
server_name www.oldboy.com;
location / {
root /html/www;
index index.html index.htm;
}
error_page 404 500 502 503 504 /error.html;
location = /error.html {
root /oldboy;
}
}
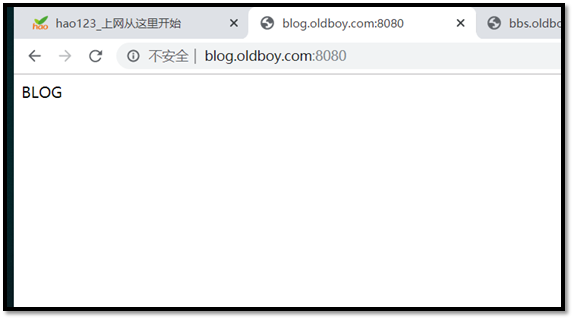
8.8.1.3 创建blog的配置文件
[root@web01 conf.d] # cat blog.conf
server {
listen 8080;
server_name blog.oldboy.com;
location / {
root /html/blog;
index index.html index.htm;
}
error_page 404 500 502 503 504 /error.html;
location = /error.html {
root /oldboy;
}
}
[root@web01 conf.d] #
8.8.2 编写网站代码信息
[root@web01 conf.d] # cd /html
You have new mail in /var/spool/mail/root
[root@web01 html] # tree
.
├── bbs
│ └── index.html 设置首页文件
├── blog
│ └── index.html 设置首页文件
└── www
├── index.html 设置首页文件
8.8.3 重启nginx服务
[root@web01 html] # systemctl restart nginx
You have new mail in /var/spool/mail/root
[root@web01 html] #
8.8.4 配置DNS解析地址(本地解析地址)
在C:\Windows\System32\drivers\etc\host里面添加
10.0.0.7 www.oldboy.com bbs.oldboy.com blog.oldboy.com
8.8.5 ping域名,看是否通畅
[f:\~]$ ping www.oldboy.com
正在 Ping www.oldboy.com [10.0.0.7] 具有 32 字节的数据:
来自 10.0.0.7 的回复: 字节=32 时间<1ms TTL=64
来自 10.0.0.7 的回复: 字节=32 时间<1ms TTL=64
10.0.0.7 的 Ping 统计信息:
数据包: 已发送 = 2,已接收 = 2,丢失 = 0 (0% 丢失),
往返行程的估计时间(以毫秒为单位):
最短 = 0ms,最长 = 0ms,平均 = 0ms
[f:\~]$ ping bbs.oldboy.com
正在 Ping www.oldboy.com [10.0.0.7] 具有 32 字节的数据:
来自 10.0.0.7 的回复: 字节=32 时间<1ms TTL=64
来自 10.0.0.7 的回复: 字节=32 时间<1ms TTL=64
10.0.0.7 的 Ping 统计信息:
数据包: 已发送 = 2,已接收 = 2,丢失 = 0 (0% 丢失),
往返行程的估计时间(以毫秒为单位):
最短 = 0ms,最长 = 0ms,平均 = 0ms
[f:\~]$ ping blog.oldboy.com
正在 Ping www.oldboy.com [10.0.0.7] 具有 32 字节的数据:
来自 10.0.0.7 的回复: 字节=32 时间<1ms TTL=64
来自 10.0.0.7 的回复: 字节=32 时间<1ms TTL=64
10.0.0.7 的 Ping 统计信息:
数据包: 已发送 = 4,已接收 = 4,丢失 = 0 (0% 丢失),
往返行程的估计时间(以毫秒为单位):
最短 = 0ms,最长 = 0ms,平均 = 0ms
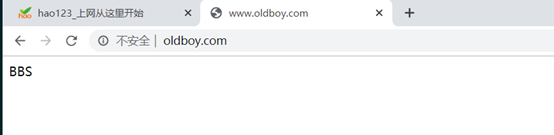
8.8.6 登录网站看是否正常
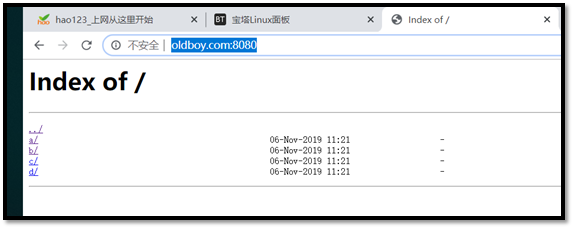
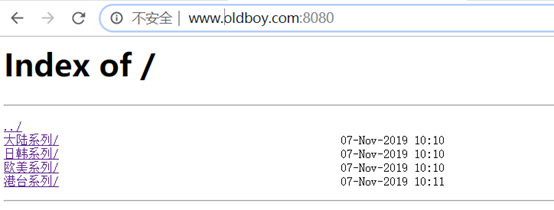
8.9 nginx实现搭建网络共享目录
8.9.1 编辑配置文件
[root@web01 conf.d] # vim www.conf
server {
listen 8080;
server_name www.oldboy.com;
charset utf-8; 设置编码为utf-8
location / {
root /html/www;
#index index.html index.htm; 将首页文件给注释
autoindex on; 设置autoindex on
}
error_page 404 500 502 503 504 /error.html;
location = /error.html {
root /oldboy;
}
}
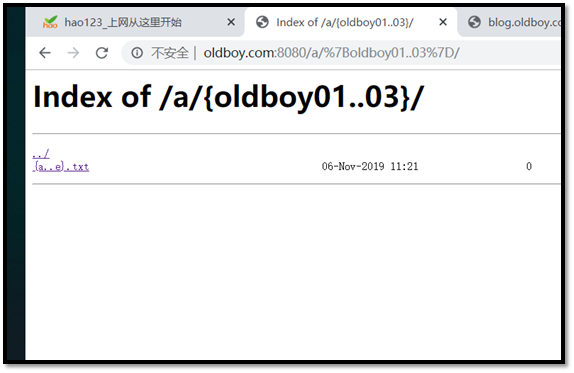
8.9.2 共享目录的设置
[root@web01 html] # tree.
└── www
├── a
│ └── {oldboy01..03}
│ └── {a..e}.txt
├── b
│ └── {oldboy01..03}
│ └── {a..e}.txt
├── c
│ └── {oldboy01..03}
│ └── {a..e}.txt
└── d
└── {oldboy01..03}
└── {a..e}.txt
8.9.3 查看配置是否成功
8.9.4 为什么txt文件可以打开,而php文件后缀的必须的下载
这是因为媒体资源类型文件里面包含有txt文件的后缀,而没有包含php文件袋额后缀,而媒体资源类型默认识别的是静态资源
[root@web01 html] # grep "txt" /etc/nginx/mime.types
text/plain txt; 有txt的类型
You have new mail in /var/spool/mail/root
[root@web01 html] # grep "php" /etc/nginx/mime.types 没有php的类型
[root@web01 html] #
8.10 nginx实现登录网站的方式
8.10.1 根据域名的方式

8.10.2 根据端口号的方式
8.10.2.1 为什么我输入www.oldboy.com回车按正常该是报错,为什么会找见bbs网站的内容
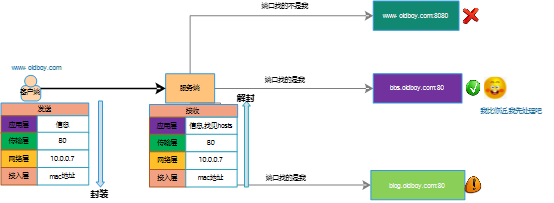
8.10.2.2 网站访问的原理
- 服务端将要访问的信息和端口号和IP地址进行打包发送给服务端
- 服务端接收到以后会一层一层拆分
- 拆分IP发现是找我的
- 拆分端口号发现是80,会找80端口对应的域名信息,发现是bbs和blog
- 服务器会根据最近的加载信息把bbs给加载成功
8.10.3 根据IP地址的方式
listen 172.16.1.7:80; 指定IP进行地址的监听
server_name bbs.oldboy.com;
8.11 网络服务的安全配置说明
8.11.1 网络服务的认证方式
8.11.1.1 找到认证的模块信息

8.11.1.2 找到范例

8.11.1.3 在服务器里面配置
[root@web01 conf.d] # vim www.conf
server {
listen 8080;
server_name www.oldboy.com;
charset utf-8;
root /html/www;
autoindex on;
auth_basic "财务认证"; 开启认证功能
auth_basic_user_file /etc/nginx/password; 指定认证的用户的保存密码文件
8.11.1.4 安装生成加密信息的htpasswd的软件
8.11.1.4.1 找见安装包

8.11.1.4.2 安装httpd-tools
[root@web01 conf.d] # yum -y install httpd-tools
Loaded plugins: fastestmirror, langpacks
Loading mirror speeds from cached hostfile
* base: mirrors.aliyun.com
* extras: mirrors.aliyun.com
* updates: mirrors.aliyun.com
base | 3.6 kB 00:00:00
epel | 5.3 kB 00:00:00
extras | 2.9 kB 00:00:00
nginx-stable
[root@web01 conf.d] # echo $?
0
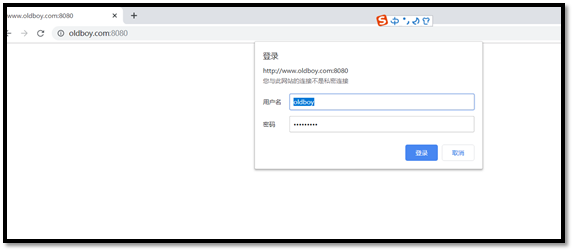
8.11.1.4.5 生成加密信息
[root@web01 conf.d] # htpasswd -bc /etc/nginx/password oldboy oldboy123 指定用户和创建加密密码
Adding password for user oldboy
[root@web01 conf.d] # cat /etc/nginx/password 查看密码文件
oldboy:$apr1$03tPr9Ot$v.hE6fqwvpHQjuQH.YJJs/
[root@web01 conf.d] # ll /etc/nginx/password
-rw------- 1 www www 45 Nov 8 09:09 /etc/nginx/password 密码必须的是worker进程指定的用户可以打开
[root@web01 conf.d] #
8.11.1.5 验证是否可以正常的使用

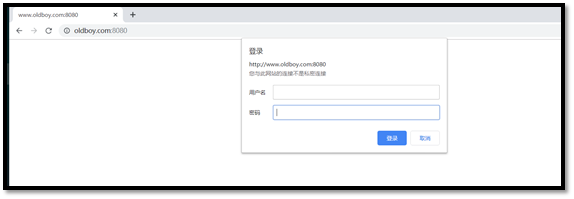
8.11.1.6 为什么密码不可以明文
8.11.1.6.1 设置密码为明文
[root@web01 nginx] # cat password
oldboy:oldboy123 明文密码
[root@web01 nginx] # ll password
-rw------- 1 www www 17 Nov 8 09:16 password 属主为www(工作进程)用户
8.11.1.6.2 再次登录网址
发现密码输入登录就是登录失败
结论:认证方式不能使用明文密码
8.11.2 根据地址进行访问
8.11.2.1 找到location的模块

8.11.2.2 访问大陆信息的是10.0.0.1
server {
listen 8080;
server_name www.oldboy.com;
charset utf-8;
root /html/www; 全局设置访问的站点
autoindex on; 全局设置指令信息
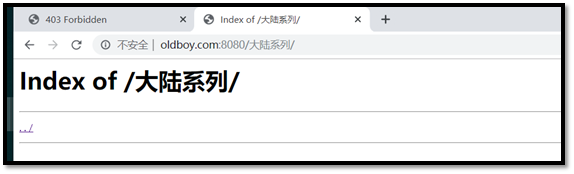
location /大陆系列 {
allow 10.0.0.1; 配置允许访问大陆系列的文件夹的ip
deny all; 设置不允许访问大陆系列的文件夹
}
}
演示:

8.11.2.3 访问日韩系列的是172.16.1.0/24
[root@web01 nginx] # vim conf.d/www.conf
server {
listen 8080;
server_name www.oldboy.com;
charset utf-8;
root /html/www; 全局设置访问的站点
autoindex on; 全局设置指令信息
#auth_basic "财务认证";
#auth_basic_user_file /etc/nginx/password;
location /日韩系列 {
allow 172.16.1.0/24; 配置允许访问日韩系列的文件夹的网段
deny all; 设置不允许访问日韩系列的文件夹
}
}
演示:
[root@m01 ~] # curl -v "www.oldboy.com:8080/日韩系列/"
* About to connect() to www.oldboy.com port 8080 (#0)
* Trying 172.16.1.7...
* Connected to www.oldboy.com (172.16.1.7) port 8080 (#0)
> GET /日韩系列/ HTTP/1.1
> User-Agent: curl/7.29.0
> Host: www.oldboy.com:8080
> Accept: */*
>
< HTTP/1.1 200 OK 访问成功
< Server: nginx/1.16.1
< Date: Fri, 08 Nov 2019 02:11:17 GMT
< Content-Type: text/html; charset=utf-8
< Transfer-Encoding: chunked
< Connection: keep-alive
<
<html>
<head><title>Index of /日韩系列/</title></head>
<body>
<h1>Index of /日韩系列/</h1><hr><pre><a href="../">../</a>
</pre><hr></body>
</html>
* Connection #0 to host www.oldboy.com left intact
[root@m01 ~] #
[root@m01 ~] # curl -v "www.oldboy.com:8080/大陆系列"
* About to connect() to www.oldboy.com port 8080 (#0)
* Trying 172.16.1.7...
* Connected to www.oldboy.com (172.16.1.7) port 8080 (#0)
> GET /大陆系列 HTTP/1.1
> User-Agent: curl/7.29.0
> Host: www.oldboy.com:8080
> Accept: */*
>
< HTTP/1.1 403 Forbidden 禁止访问
< Server: nginx/1.16.1
< Date: Fri, 08 Nov 2019 02:10:19 GMT
< Content-Type: text/html; charset=utf-8
< Content-Length: 153
< Connection: keep-alive
<
<html>
<head><title>403 Forbidden</title></head>
<body>
<center><h1>403 Forbidden</h1></center>
<hr><center>nginx/1.16.1</center>
</body>
</html>
* Connection #0 to host www.oldboy.com left intact
You have new mail in /var/spool/mail/root
[root@m01 ~] #
* Connection #0 to host www.oldboy.com left intact
8.12 网站服务状态信息收集
8.12.1 找到相应的模块


8.12.2 编辑配置文件
[root@web01 nginx] # vim /etc/nginx/conf.d/www.conf
server {
listen 8080;
server_name www.oldboy.com;
charset utf-8;
root /html/www;
autoindex on;
#auth_basic "财务认证";
#auth_basic_user_file /etc/nginx/password;
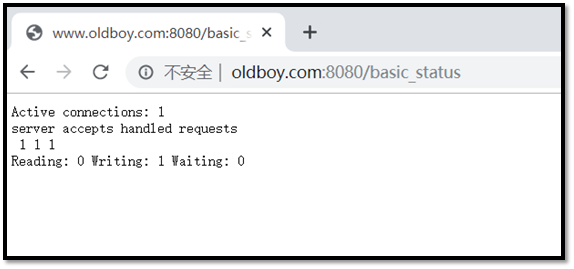
location = /basic_status { 监控网站状态信息
stub_status;
}
}
8.12.3 查看网页是否正常
8.12.4 状态信息解释
- Active connections 网站并发连接数量(激活的连接数量)
- accepts 网站开始接受了多少次三次握手的请求
- handled 网站接收到响应了多少次三次握手的请求
- requests 客户端总共发送的HTTP请求数量
- Reading 当前服务正在读取用户的http请求数量
- Writing 当前服务正在处理用户的http请求数量
- Waiting 当前正在等待被处理的请求数量
- accepts和handled一般情况下数量都是一样的,如果不一样的情况,就必须的注意点关注下,因为这会可能你的服务器性能达到了最高造成的
- 影响请求数量和响应的数量不一样的情况?
woker进程数量*每个work进程并发处理的进程数
例如:现在有5000个请求需要处理,每个work进程只能处理2400个请求,一共有2个work进程,这样只能处理4800个请求,还有200个没有办法请求,这种情况下,修改work或者work并发处理的数量,但是在修改的时候一定要注意你的服务器的硬件是否能支撑住(添加的work数量为当前系统的核心数,最多只能*2倍)
8.13 网站的日志信息
8.13.1 错误日志
[root@web01 nginx] # vim nginx.conf
user www;
worker_processes 1;
error_log /var/log/nginx/error.log warn; 错误日志的路径错误日志的级别
8.13.2 日志的级别有哪些
- debug 调试日志,这里的日志输出信息比较多
- info 信息级别
- notice 通知级别
- warn 警告级别
- error 错误级别
- crit 严重错误
- alert 超严重错误
- emerg 灾难级别
8.13.3 正确日志
[root@web01 bbb] # vim /etc/nginx/nginx.conf
log_format main '$remote_addr - $remote_user [$time_local] "$request" ' 日志输出格式
'$status $body_bytes_sent "$http_referer" '
'"$http_user_agent" "$http_x_forwarded_for"';
access_log /var/log/nginx/access.log main; 正确的日志保存的路径
8.13.4 日志输出格式讲解
10.0.0.1 - - [08/Nov/2019:20:45:35 +0800] "GET /%E5%A4%A7%E9%99%86%E7%B3%BB%E5%88%97/ HTTP/1.1" 200 172 "http://www.oldboy.com:8080/" "Mozilla/5.0 (Windows NT 10.0; WOW64) AppleWebKit/537.36 (KHTML, like Gecko) Chrome/78.0.3904.87 Safari/537.36" "-"
- $remote_addr 访问网站客户端源IP地址
- $remote_user 访问网站客户端用户地址
- [$time_local] 访问网站时间信息
- $request 请求行信息
- $status 状态码
- $body_bytes_sent 资源信息传输消耗的网络流量
- $http_referer 调用网站资源域名信息
- $http_user_agent 客户端访问软件信息
- $http_x_forwarded_for
8.14 网站的location
8.14.1 location的概念
Sets configuration depending on a request URI.
设置配置文件依赖请求的URI
Syntax: location [ = | ~ | ~* | ^~ ] uri { ... }
Default: —
Context: server, location
8.14.2 location后面接的匹配符号讲解
8.14.2.1 匹配符号意义
- = 精确的匹配
- ~ 模糊匹配
- ~* 忽略大小写的模糊匹配
- ^~ 最优先匹配
- 直接加目录 直接加目录
- -: 默认匹配(最不优的匹配)
8.14.2.2 匹配符号的讲解
8.14.2.2.1 =号匹配的讲解
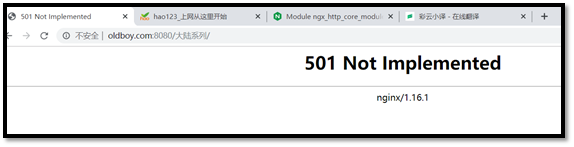
location = /大陆系列/ {
return 501;
#root /html/oldboy01;
#index index.html;
}
8.14.2.2.2 ~号匹配的讲解
location ~ /大陆系列/ {
root /html/oldboy01;
index index.html;
}

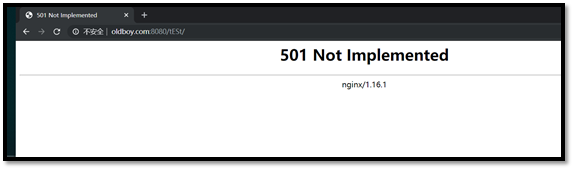
8.14.2.2.3 ~*的匹配
location ~* /test {
return 501;
}
8.14.2.2.4 ^~的匹配
location ^~ /test {
root /html/oldboy01;
index index.html;
}
location ~* /test {
return 501;
}
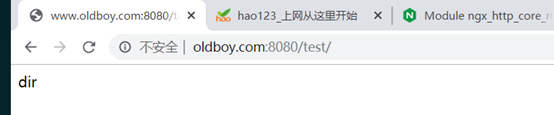
8.14.2.2.5 /dir/的匹配
location /test/ {
#return 501;
root /html/oldboy01;
index index.html;
}
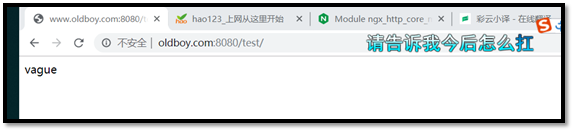
8.14.2.2.6 不加任何的匹配
location /test {
#return 501;
root /html/oldboy01;
index index.html;
}

8.15 网站页面的跳转
8.15.1 页面跳转常见的集中场景
8.15.1.1 老URL向新的URL进行跳转
8.15.1.1.1 错误的跳转方式
- 场景
- 编写配置文件
[root@web01 conf.d] # vim rewrite.conf
server {
listen 80;
server_name rewrite.oldboy.com rewrite.e60buy.com;
root /html;
index index.html;
rewrite ^/(.*) http://rewrite.oldboy.com/$1permenent; 只要是url的都会转成rewrite.oldboy.com
}
- 查看服务器的情况
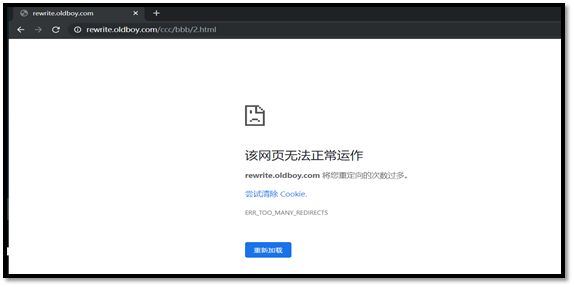
- 出现这种情况的原因
当rewrite.360buy.com来访问网站的时候,会经过跳转,跳转到rewrite.oldboy.com,并且将新的地址会记录到浏览器里面,下次浏览器按照这个地址来访问的时候,还会进行跳转,这会跳转成rewrite.oldboy.com,就这样就会进行死循环,当跳转次数超过设置的次数以后,就会报这个错误
8.15.1.1.2 rewrite跳转
临时跳转(redirect)
- URL跳转实现(使用的是多个server实现的)
[root@web01 conf.d] # vim rewrite.conf
1 server {
2 listen 80;
3 server_name rewrite.360buy.com;
4 location / {
5 rewrite /(.*) http://rewrite.oldboy.com/$1 redirect;
6 }
7 }
8 server {
9 listen 80;
10 server_name rewrite.oldboy.com;
11 root /html;
12 index 2.html;
13 }
- URL跳转实现(使用的是判断语句来实现的)
[root@web01 conf.d] # vim rewrite.conf
server {
listen 80;
server_name rewrite.oldboy.com rewrite.360buy.com;
root /html;
index 2.html;
location / {
if ($http_host ~* rewrite.360buy.com){ 判断语句,判断URL是不是匹配的
rewrite /(.*) http://rewrite.oldboy.com/$1 redirect;
}
}
}
- 界面展示

永久跳转
- URL跳转实现(使用的是多个server实现的)
[root@web01 conf.d] # vim rewrite.conf
1 server {
2 listen 80;
3 server_name rewrite.360buy.com;
4 location / {
5 rewrite /(.*) http://rewrite.oldboy.com/$1 premanent;
6 }
7 }
8 server {
9 listen 80;
10 server_name rewrite.oldboy.com;
11 root /html;
12 index 2.html;
13 }
- URL跳转实现(使用的是判断语句来实现的)
[root@web01 conf.d] # vim rewrite.conf
server {
listen 80;
server_name rewrite.oldboy.com rewrite.360buy.com;
root /html;
index 2.html;
location / {
if ($http_host ~* rewrite.360buy.com){ 判断语句,判断URL是不是匹配的
rewrite /(.*) http://rewrite.oldboy.com/$1premanent;
}
}
}
- 界面展示
8.15.1.2 老URI向新的URI进行跳转
8.15.1.2.1 rewrite跳转
语法
Syntax:: rewrite regex replacement [flag];正则表达式替换成什么
Default: —
Context: server, location, if
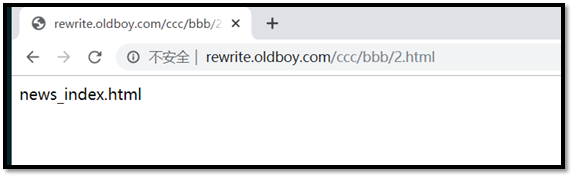
临时跳转(redirect)
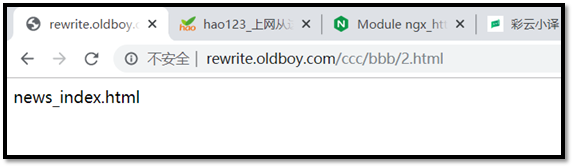
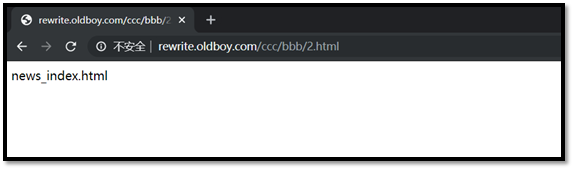
- 用户访问/abc/1.html --> 实际上真实访问是/ccc/bbb/2.html
- 编写配置文件
[root@web01 conf.d] # vim rewrite.conf
server {
listen 80;
server_name rewrite.oldboy.com;
root /html;
index index.html;
location ~ ^/abc {
rewrite ^(.*)$ /ccc/bbb/2.html redirect;
}
}
- 创建资源文件
[root@web01 html] # tree ccc
ccc
└── bbb
└── 2.html
1 directory, 1 file
[root@web01 html] #
- 查看网站发现已经成功
永久跳转(permanent)
[root@web01 conf.d] # vim rewrite.conf
server {
listen 80;
server_name rewrite.oldboy.com;
root /html;
index index.html;
location ~ ^/abc {
rewrite ^(.*)$ /ccc/bbb/2.html permanent;
}
}
临时跳转(redirect)
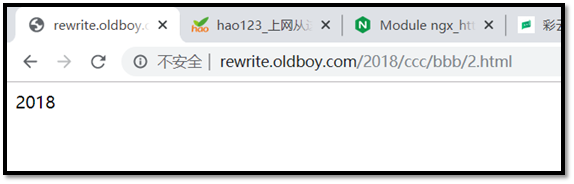
- 用户访问/2014/ccc/bbb/2.html实际上真实访问是/2018/ccc/bbb/2.html
- 编写配置文件
[root@web01 conf.d] # vim rewrite.conf
server {
listen 80;
server_name rewrite.oldboy.com;
root /html;
index index.html;
location ~ ^/2014 {
rewrite ^/2014/(.*) /2018/$1 redirect; 后项引用前项
}
}
- 创建资源文件
[root@web01 html] # tree 2018
2018
└── ccc
└── bbb
└── 2.html
2 directories, 1 file
You have new mail in /var/spool/mail/root
[root@web01 html] #
- 查看网站已经成功
永久跳转(permanent)
[root@web01 conf.d] # vim rewrite.conf
server {
listen 80;
server_name rewrite.oldboy.com;
root /html;
index index.html;
location ~ ^/2014 {
rewrite ^/2014/(.*) /2018/$1 premenent; 后项引用前项
}
}
-
用户访问course-11-22-33.html实际上真实访问是/course/11/22/33/course_33.html
临时跳转(redirect)
- 方式一:使用正则符号来替换
[root@web01 conf.d] # vim rewrite.conf
server {
listen 80;
server_name rewrite.oldboy.com;
root /html;
index index.html;
location ~ ^/course-11-22-33.html {
rewrite ^/(.*)-(.*)-(.*)-(.*)\.html /$1/$2/$3/$4/$1_$4.html redirect; 正则替换
}
}
- 方式二:使用普通的方式替换
[root@web01 conf.d] # vim rewrite.conf
server {
listen 80;
server_name rewrite.oldboy.com;
root /html;
index index.html;
location ~ ^/course-11-22-33.html {
rewrite ^/(.*) /course/11/22/33/course_33.html redirect;
}
}
- 创建资源目录
[root@web01 html] # tree course/
course/
└── 11
└── 22
└── 33
└── course_33.html
3 directories, 1 file
[root@web01 html] #
- 查看网站跳转成功

永久跳转(permanent)
[root@web01 conf.d] # vim rewrite.conf
server {
listen 80;
server_name rewrite.oldboy.com;
root /html;
index index.html;
location ~ ^/course-11-22-33.html {
rewrite ^/(.*)-(.*)-(.*)-(.*)\.html /$1/$2/$3/$4/$1_$4.html premenent; 正则替换
}
}
8.15.1.2.2 return跳转
Syntax: return code [text];
return code URL;
return URL;
Default: —
Context: server, location, if
- return 临时302 永久301
- 用户访问/abc/1.html --> 实际上真实访问是/ccc/bbb/2.html
[root@web01 conf.d] # vim rewrite.conf
server {
listen 80;
server_name rewrite.oldboy.com;
root /html;
index index.html;
location ~ ^/abc {
#rewrite ^/(.*)-(.*)-(.*)-(.*)\.html /$1/$2/$3/$4/$1_$4.html redirect;
#rewrite ^/(.*) /course/11/22/33/course_33.html redirect;
return 302 http://rewrite.oldboy.com/ccc/bbb/2.html;
}
}
- 创建资源文件
[root@web01 html] # tree ccc
ccc
└── bbb
└── 2.html
1 directory, 1 file
[root@web01 html] #
- 查看网站是否成功
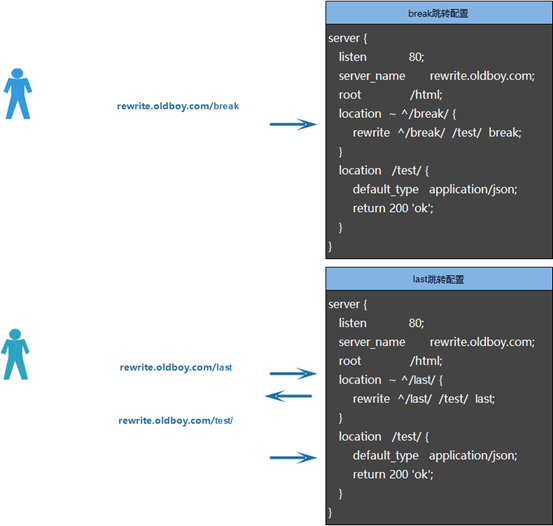
- last和break跳转
- 编写配置文件
[root@web01 conf.d] # vim rewrite.conf
server {
listen 80;
server_name rewrite.oldboy.com rewrite.360buy.com;
root /html;
index 2.html;
location ~ ^/break/ {
rewrite /break/ /test/ break; break跳转
}
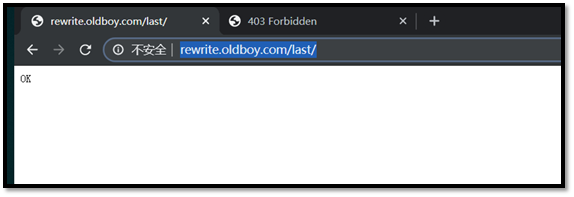
location ~ ^/last/ {
rewrite ^/last/ /test/ last; last跳转
}
location /test/ {
default_type application/json;
return 200 'OK';
}
}
- 创建test目录
[root@web01 html] # mkdir -p test
You have new mail in /var/spool/mail/root
[root@web01 html] # ll
- 查看last和break的结果
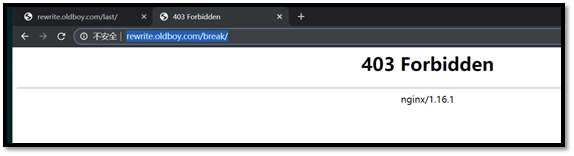
问题:为什么会出现一个没有首页文件,一个出现ok
break在打开配置文件之后,到了跳转这里找到了站点目录,接着会通过跳转找到test文件,找到test文件接着会默认找首页文件,但是首页文件不在这里,就会报没有首页文件
last在打开配置文件之后,找到跳转这里找到了站点目录,接着会通过跳转找到test文件,接着会将把test这个目录的信息会发送给客户端,客户端在打开配置文件,在找匹配test文件的location,找到则会返回值为200'OK'
结论
- break在跳转的时候会去站点目录下面去找,如果找不见,就会报404,如果找见目录找不见首页文件,会报首页文件没有,不会进行下一次的跳转(进行跳转后, 会直接到站点目录访问指定资源信息, 不会重新发出跳转后的请求)
- last在跳转时候会将跳转的信息发送给客户端,让客户端重新的访问新的location(进行跳转后, 让浏览器重新发出新的访问请求, 可以匹配其他的location信息)