小程序(uniapp)骨架屏应用
1.基本理解
骨架屏实现原理很简单,就是通过占位线框元素,渐进式加载数据。
骨架屏是结合了懒加载功能,在页面没有加载完成之前,先呈现页面基本结构。
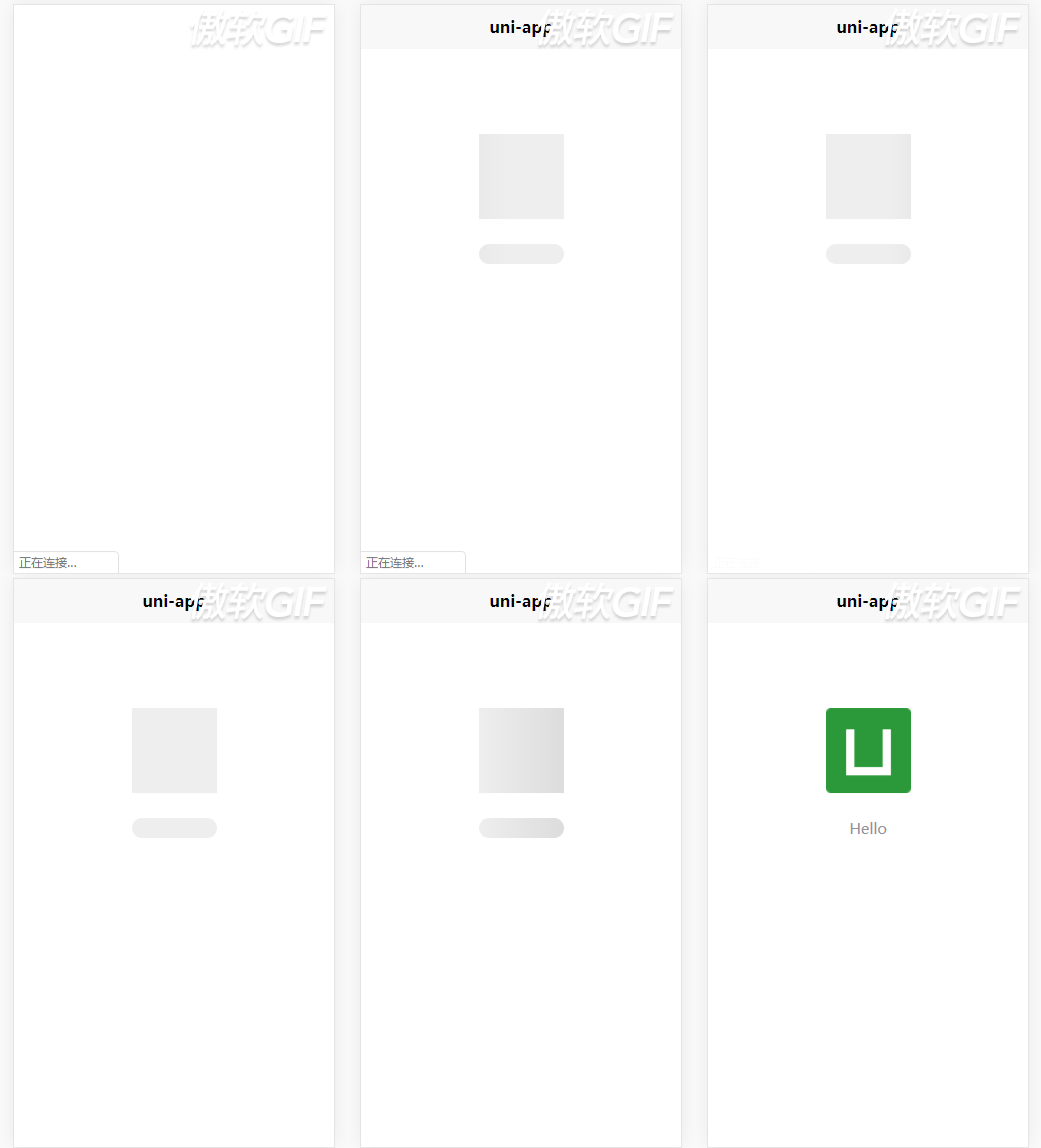
效果图

注意点:
1, 引入组建后, template 标签内加入<skeleton selector="skeleton" bgcolor="#FFF" v-if="showSkeleton"></skeleton>
- 其中
v-if="showSkeleton"为显示骨架屏显示的参数。
2, data对象中设置showSkeleton: true // 默认一开始进入页面加载骨架屏内容。
- 骨架屏渲染形状有两种:矩形 & 圆形
- 在想显示骨架屏的区域的父级标签的
class加入skeleton表示该class下的内容进行骨架屏元素加载 - 需要
渲染矩形,则在该元素上的class加入skeleton-rect - 需要渲染
圆形,则在该元素上的class加入skeleton-radius
3, 渲染数据。
- 渲染骨架屏的元素,需要先填充元素。使vue能够根据数据的长度进行渲染。
- 列表类数据 字段值可为空。例如:
dataList: [
    {
        title: '',
        author: '',
        pubTime: '',
        avatar: ''
    },
    {
        title: '',
        author: '',
        pubTime: '',
        avatar: ''
    }
]- 此时会渲染两条数据内容
如果要应用小程序,把uni替换成wx即可
skeleton.vue
<template>
  <div>
    <div class="wrap"
         :style="{'width':systemInfo.width+'px','height':systemInfo.height+'px', 'background-color':bgcolor}">
      <div v-for="(item,index) in skeletonRectLists"
           :index='index'
           :key='index'
           class="chiaroscuro"
           :style="{'width':item.width+'px','height':item.height+'px','background-color':'rgba(233, 2, 233,1)','position':'absolute','left':item.left+'px','top':item.top+'px'}">
      </div>
      <div v-for="(item,index) in skeletonCircleLists"
           :index='index'
           :key="'info2-'+index"
           class="chiaroscuro"
           :style="{'width':item.width+'px','height':item.height+'px','background-color':'rgba(233, , 233,1)','border-radius':item.width+'px','position':'absolute','left':item.left+'px','top':item.top+'px'}">
      </div>
    </div>
  </div>
</template>

<script>
/* eslint-disable */
export default {
  props: {
    bgcolor: { type: String, value: '#FFF' },
    selector: { type: String, value: 'skeleton' },
  },

  data() {
    return {
      systemInfo: {},
      skeletonRectLists: [],
      skeletonCircleLists: [],
    };
  },

  components: {},

  methods: {
    rectHandle: function() {
      const that = this;
      //绘制不带样式的节点
      uni
        .createSelectorQuery()
        .selectAll(`.${this.selector}-rect`)
        .boundingClientRect()
        .exec(function(res) {
          that.skeletonRectLists = res[0];
        });
    },

    radiusHandle: function() {
      const that = this;
      uni
        .createSelectorQuery()
        .selectAll(`.${this.selector}-radius`)
        .boundingClientRect()
        .exec(function(res) {
            console.log(res[0].length);
          that.skeletonCircleLists = res[0];
        });
    },
  },

  mounted: function() {
    //默认的首屏宽高,防止内容闪现
    const systemInfo = uni.getSystemInfoSync();
    (this.systemInfo = {
      width: systemInfo.windowWidth,
      height: systemInfo.windowHeight,
    });
    const that = this;
    //绘制背景
    uni
      .createSelectorQuery()
      .selectAll(`.${this.selector}`)
      .boundingClientRect()
      .exec(function(res) {
        that.systemInfo.height = res[0][0].height + res[0][0].top || 0;
      });

    //绘制矩形
    this.rectHandle();

    //绘制圆形
    this.radiusHandle();
  },
};
/* eslint-enable */
</script>

<style scoped>
.wrap {
  position: absolute;
  left: 0;
  top: 0;
  z-index: 9998;
  overflow: hidden;
}
.chiaroscuro {
  animation-duration: 1s;
  animation-fill-mode: forwards;
  animation-iteration-count: infinite;
  animation-name: placeHolderShimmer;
  animation-timing-function: linear;
  background: #f6f7f8;
  background: linear-gradient(to right, #eeeeee 8%, #dddddd 18%, #eeeeee 33%);
  background-size: 800px 104px;
  height: 40px;
  position: relative;
}
@keyframes placeHolderShimmer{
  0% {
    background-position: -468px 0
  }
  100% {
    background-position: 468px 0
  }
}
</style>
index.vue 页面
<template>
    <view class="content ">
        <skeleton selector="skeleton" bgcolor="#FFF" v-if="showSkeleton"></skeleton>
        <view class="skeleton">
            <image class="logo skeleton-rect" src="/static/logo.png"></image>
            <view class="text-area skeleton-radius">
                <text class="title">{{title}}</text>
            </view>
        </view>

    </view>
</template>

<script>
    import skeleton from '../index/skeleton'
    export default {
        data() {
            return {
                showSkeleton:true,
                title: 'Hello',

            }
        },
        components:{
            'skeleton':skeleton
        },
        created() {
            this.reloadData();
        },
        methods: {
             reloadData() {
                  setTimeout(() => {
                    this.showSkeleton = false
                  }, 2000)
                },
        }
    }
</script>


