
使用spring boot建立web socket demo
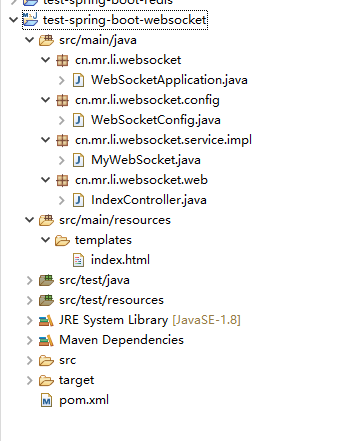
1.创建一个maven项目,结构如下:
2.开始粘贴代码了,首先pom.xml文件
 1 <project xmlns="http://maven.apache.org/POM/4.0.0" xmlns:xsi="http://www.w3.org/2001/XMLSchema-instance" xsi:schemaLocation="http://maven.apache.org/POM/4.0.0 https://maven.apache.org/xsd/maven-4.0.0.xsd">
 2   <modelVersion>4.0.0</modelVersion>
 3   <groupId>cn.mr.li</groupId>
 4   <artifactId>test-spring-boot-websocket</artifactId>
 5   <version>0.0.1-SNAPSHOT</version>
 6   <parent>
 7           <groupId>org.springframework.boot</groupId>
 8           <artifactId>spring-boot-starter-parent</artifactId>
 9           <version>1.5.8.RELEASE</version>
10   </parent>
11   <dependencies>
12           <dependency>
13               <groupId>org.springframework.boot</groupId>
14               <artifactId>spring-boot-starter-websocket</artifactId>
15           </dependency>
16           <dependency>
17               <groupId>org.springframework.boot</groupId>
18               <artifactId>spring-boot-starter-thymeleaf</artifactId>
19           </dependency>
20   </dependencies>
21
22 </project>
3.启动类 WebSocketApplication.java
 1 package cn.mr.li.websocket;
 2
 3 import org.springframework.boot.SpringApplication;
 4 import org.springframework.boot.autoconfigure.SpringBootApplication;
 5
 6 @SpringBootApplication
 7 public class WebSocketApplication {
 8
 9     public static void main(String[] args) {
10         SpringApplication.run(WebSocketApplication.class, args);
11     }
12 }
4.配置类 WebSocketConfig.java
 1 package cn.mr.li.websocket.config;
 2
 3 import org.springframework.context.annotation.Bean;
 4 import org.springframework.context.annotation.Configuration;
 5 import org.springframework.web.socket.server.standard.ServerEndpointExporter;
 6
 7 /**
 8  * 注册bean对象
 9  * @author YanLong.li
10  * @data 2020-10-21 15:37:23
11  *
12  */
13 @Configuration
14 public class WebSocketConfig {
15
16     @Bean
17     public ServerEndpointExporter serverEndpointExporter() {
18         return new ServerEndpointExporter();
19     }
20 }
5. MyWebSocket 服务器逻辑代码
 1 package cn.mr.li.websocket.service.impl;
 2
 3 import java.util.concurrent.CopyOnWriteArraySet;
 4
 5 import javax.websocket.OnClose;
 6 import javax.websocket.OnError;
 7 import javax.websocket.OnMessage;
 8 import javax.websocket.OnOpen;
 9 import javax.websocket.Session;
10 import javax.websocket.server.ServerEndpoint;
11
12 import org.springframework.stereotype.Component;
13
14 /**
15    *   服务端websocket的具体实现
16  *
17  * @author YanLong.li
18  * @data 2020-10-21 15:39:35
19  *
20  */
21 @ServerEndpoint(value = "/websocket")
22 @Component
23 public class MyWebSocket {
24
25      //用来存放每个客户端对应的MyWebSocket对象。
26     private static CopyOnWriteArraySet<MyWebSocket> webSocketSet = new CopyOnWriteArraySet<MyWebSocket>();
27
28     //与某个客户端的连接会话,需要通过它来给客户端发送数据
29     private Session session;
30
31     /**
32              * 连接建立成功调用的方法
33      */
34     @OnOpen
35     public void onOpen(Session session) {
36         this.session = session;
37         webSocketSet.add(this);     //加入set中
38         System.out.println("有新连接加入!当前在线人数为" + webSocketSet.size());
39         this.session.getAsyncRemote().sendText("恭喜您成功连接上WebSocket-->当前在线人数为:"+webSocketSet.size());
40     }
41
42     /**
43      * 连接关闭调用的方法
44      */
45     @OnClose
46     public void onClose() {
47         webSocketSet.remove(this);  //从set中删除
48         System.out.println("有一连接关闭!当前在线人数为" + webSocketSet.size());
49     }
50
51     /**
52              * 收到客户端消息后调用的方法
53      *
54      * @param message 客户端发送过来的消息*/
55     @OnMessage
56     public void onMessage(String message, Session session) {
57         System.out.println("来自客户端的消息:" + message);
58
59         //群发消息
60         broadcast(message);
61     }
62
63     /**
64             * 发生错误时调用
65      *
66      */
67     @OnError
68     public void onError(Session session, Throwable error) {
69         System.out.println("发生错误");
70         error.printStackTrace();
71     }
72
73     /**
74              * 群发自定义消息
75      * */
76     public  void broadcast(String message){
77         for (MyWebSocket item : webSocketSet) {
78                //同步异步说明参考:http://blog.csdn.net/who_is_xiaoming/article/details/53287691
79                //this.session.getBasicRemote().sendText(message);
80                item.session.getAsyncRemote().sendText(message);//异步发送消息.
81         }
82     }
83 }
6.IndexController.java
 1 package cn.mr.li.websocket.web;
 2
 3 import org.springframework.stereotype.Controller;
 4 import org.springframework.web.bind.annotation.RequestMapping;
 5
 6 @Controller
 7 public class IndexController {
 8
 9      /**
10       * 在不指定端口的情況下默認:http://127.0.0.1:8080/
11       * @return
12       */
13      @RequestMapping("/")
14      public String index(){
15             return "index";
16      }
17 }
7.访问页面代码 index.xml
 1 <!DOCTYPE HTML>
 2 <html>
 3 <head>
 4 <title>My WebSocket</title>
 5 <style>
 6    #message{
 7           margin-top:40px;
 8           border:1px solid gray;
 9           padding:20px;
10        }
11 </style>
12 </head>
13 <body>
14     <button onclick="conectWebSocket()">连接WebSocket</button>
15     <button onclick="closeWebSocket()">断开连接</button>
16     <hr />
17     <br />
18             消息:<input id="text" type="text" />
19     <button onclick="send()">发送消息</button>
20     <div id="message"></div>
21 </body>
22 <script type="text/javascript">
23     var websocket = null;
24     function conectWebSocket(){
25         //判断当前浏览器是否支持WebSocket
26         if ('WebSocket'in window) {
27                websocket = new WebSocket("ws://localhost:8080/websocket");
28         } else {
29                alert('Not support websocket')
30         }
31         //连接发生错误的回调方法
32         websocket.onerror = function() {
33                setMessageInnerHTML("error");
34         };
35         //连接成功建立的回调方法
36         websocket.onopen = function(event) {
37                setMessageInnerHTML("Loc MSG: 成功建立连接");
38         }
39         //接收到消息的回调方法
40         websocket.onmessage = function(event) {
41                setMessageInnerHTML(event.data);
42         }
43
44         //连接关闭的回调方法
45         websocket.onclose = function() {
46                setMessageInnerHTML("Loc MSG:关闭连接");
47         }
48         //监听窗口关闭事件,当窗口关闭时,主动去关闭websocket连接,防止连接还没断开就关闭窗口,server端会抛异常。
49         window.onbeforeunload = function() {
50                websocket.close();
51         }
52     }
53     //将消息显示在网页上
54     function setMessageInnerHTML(innerHTML) {
55         document.getElementById('message').innerHTML += innerHTML + '<br/>';
56     }
57     //关闭连接
58     function closeWebSocket() {
59         websocket.close();
60     }
61     //发送消息
62     function send() {
63         var message = document.getElementById('text').value;
64         websocket.send(message);
65     }
66 </script>
67 </html>
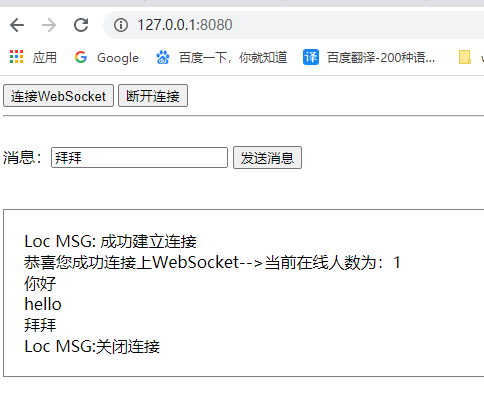
默认访问路径:http://127.0.0.1:8080/
正常访问后浏览器上的效果:
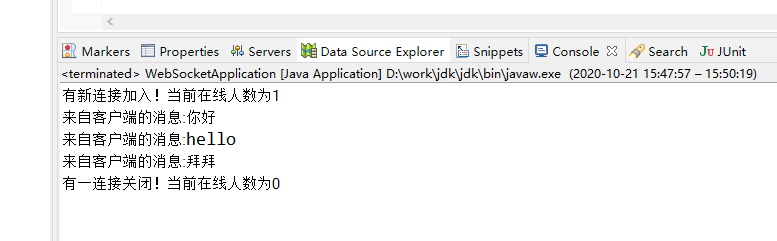
后台效果:
如果因为环境的乱七八糟原因,就多查多搜,多看,如果还搞不定那就先学学怎么做前期的工作,例如安装.搭建环境,之后再次尝试。
本文来自博客园,作者:~~mr.li~~,转载请注明原文链接:https://www.cnblogs.com/li-yan-long/p/13853035.html
