转载 WPF动态改变主题颜色
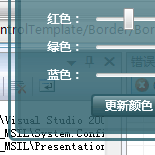
国内的WPF技术先行者周银辉曾介绍过如何动态改变应用程序的主题样式,今天我们来介绍一种轻量级的改变界面风格的方式——动态改变主题色。
程序允许用户根据自己的喜好来对界面进行配色,这种技术在很多软件中都有应用,比如这款名为AirPlay的音乐播放器软件:

下面我们就来自己动手实现这种技术:
首先在App.xaml文件中定义一个键值为“color”的单色笔刷,这个笔刷就是可以被用户改变的动态资源:
<SolidColorBrush x:Key="color" Color="SkyBlue" />
然后来设计这样一个界面:
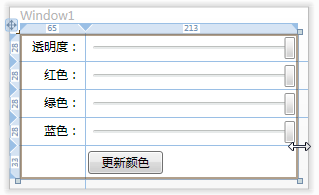
我们让用户通过4个滑块来分别定制颜色的A、R、G、B值,其完整代码为:
<Grid>
<Grid.RowDefinitions>
<RowDefinition Height="28" />
<RowDefinition Height="28" />
<RowDefinition Height="28" />
<RowDefinition Height="28" />
<RowDefinition Height="*" />
</Grid.RowDefinitions>
<Grid.ColumnDefinitions>
<ColumnDefinition Width="65*" />
<ColumnDefinition Width="213*" />
</Grid.ColumnDefinitions>
<Label Grid.Row="0" HorizontalContentAlignment="Right">透明度:</Label>
<Label Grid.Row="1" HorizontalContentAlignment="Right">红色:</Label>
<Label Grid.Row="2" HorizontalContentAlignment="Right">绿色:</Label>
<Label Grid.Row="3" HorizontalContentAlignment="Right">蓝色:</Label>
<Slider Grid.Row="0" Grid.Column="1" Margin="3" Name="a" SmallChange="1" LargeChange="15" Maximum="255" Value="255" />
<Slider Grid.Row="1" Grid.Column="1" Margin="3" Name="r" SmallChange="1" LargeChange="15" Maximum="255" Value="255" />
<Slider Grid.Row="2" Grid.Column="1" Margin="3" Name="g" SmallChange="1" LargeChange="15" Maximum="255" Value="255" />
<Slider Grid.Row="3" Grid.Column="1" Margin="3" Name="b" SmallChange="1" LargeChange="15" Maximum="255" Value="255" />
<Button Grid.Column="1" Grid.Row="4" HorizontalAlignment="Left" Margin="3,5,0,5" Name="button1" Width="75" Click="button1_Click">更新颜色</Button>
</Grid>
需注意,要把滑块的最大值设为255。
然后回到App.xaml中,我们来定义窗口、标签及按钮的样式:
窗口样式代码如下:
<Style x:Key="window" TargetType="Window">
<Setter Property="OverridesDefaultStyle" Value="true" />
<Setter Property="AllowsTransparency" Value="true" />
<Setter Property="SnapsToDevicePixels" Value="true" />
<Setter Property="WindowStyle" Value="None" />
<Setter Property="Template">
<Setter.Value>
<ControlTemplate TargetType="Window">
<Border BorderBrush="{DynamicResource color}" BorderThickness="3" CornerRadius="5" Padding="4">
<Border BorderBrush="{DynamicResource color}" BorderThickness="3" CornerRadius="5" Background="{DynamicResource color}">
<Border BorderBrush="#1000" BorderThickness="3" CornerRadius="5" Padding="6">
<Border.Background>
<LinearGradientBrush StartPoint="0,0" EndPoint="0,1">
<GradientStop Color="#3FFF" Offset="0.5" />
<GradientStop Color="#1666" Offset="0.5" />
</LinearGradientBrush>
</Border.Background>
<ContentPresenter />
</Border>
</Border>
</Border>
</ControlTemplate>
</Setter.Value>
</Setter>
</Style>
定义样式为几个Border进行嵌套,在最底层引用的之前定义的单色笔刷,在上层用低不透明度的白色和黑色覆盖以产生不同的层次效果。
标签样式为:
<Style TargetType="Label">
<Setter Property="Foreground" Value="#AAFFFFFF" />
</Style>
按钮样式为:
<Style TargetType="Button">
<Setter Property="Template">
<Setter.Value>
<ControlTemplate TargetType="Button">
<Border Background="{DynamicResource color}" CornerRadius="3">
<Border BorderThickness="2" CornerRadius="3" Padding="{TemplateBinding Padding}">
<Border.Background>
<LinearGradientBrush StartPoint="0,0" EndPoint="0,1">
<GradientStop Color="#6FFF" Offset="0" />
<GradientStop Color="#2000" Offset="1" />
</LinearGradientBrush>
</Border.Background>
<Border.BorderBrush>
<LinearGradientBrush StartPoint="0,0" EndPoint="0,1">
<GradientStop Color="#1000" Offset="0" />
<GradientStop Color="#4000" Offset="1" />
</LinearGradientBrush>
</Border.BorderBrush>
<TextBlock TextAlignment="Center" Foreground="#AFFF"><ContentPresenter /></TextBlock>
</Border>
</Border>
</ControlTemplate>
</Setter.Value>
</Setter>
</Style>
其原理与窗口样式相同。
然后回到主界面设计窗口,设置窗体的样式:
Style="{StaticResource window}"
接下来编辑后台代码,首先为窗体增加事件处理以提供拖动功能:
MouseLeftButtonDown="Window_MouseLeftButtonDown"
后台事件处理代码:
private void Window_MouseLeftButtonDown(object sender, MouseButtonEventArgs e)
{
this.DragMove();
}
为按钮增加事件处理来更新界面颜色:
private void button1_Click(object sender, RoutedEventArgs e)
{
更新颜色(Color.FromArgb((byte)a.Value, (byte)r.Value, (byte)g.Value, (byte)b.Value));
}
“更新颜色”方法代码如下:
public void 更新颜色(Color c)
{
this.Resources.Remove("color");
this.Resources.Add("color", new SolidColorBrush(c));
}
此方法首先移除资源“color”,然后再添加一个同名的新笔刷,这样就完成了动态替换工作。
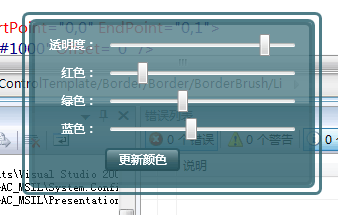
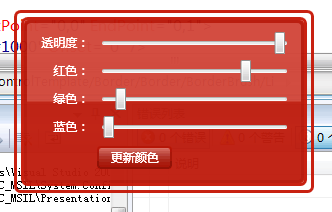
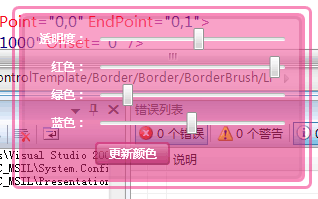
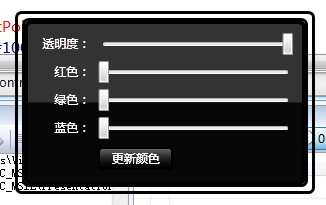
现在编译并执行程序,可以看到如下效果:
