Spring Cloud快速使用教程(一)
在研究spring cloud,下面是快速搭建方法
我使用的是IDEA 中文汉化版,大家可自行汉化
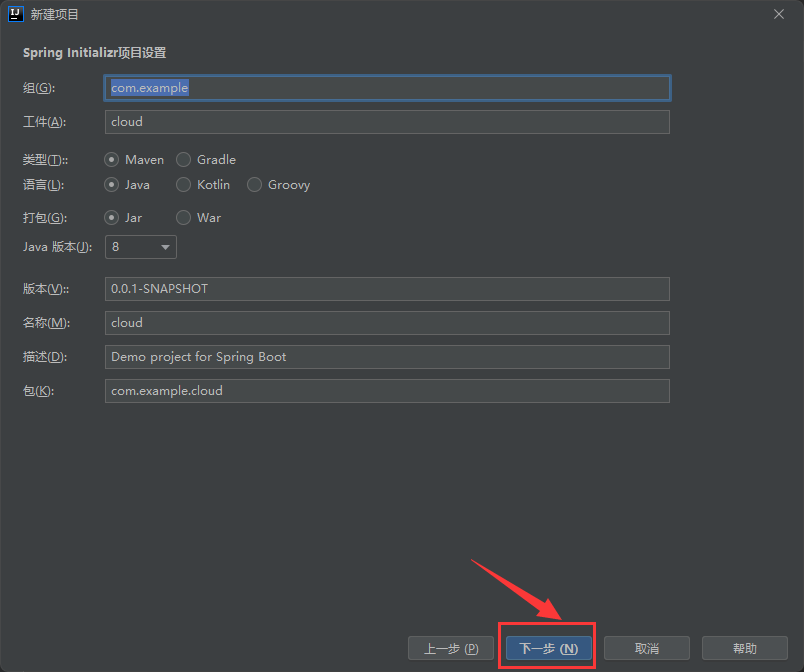
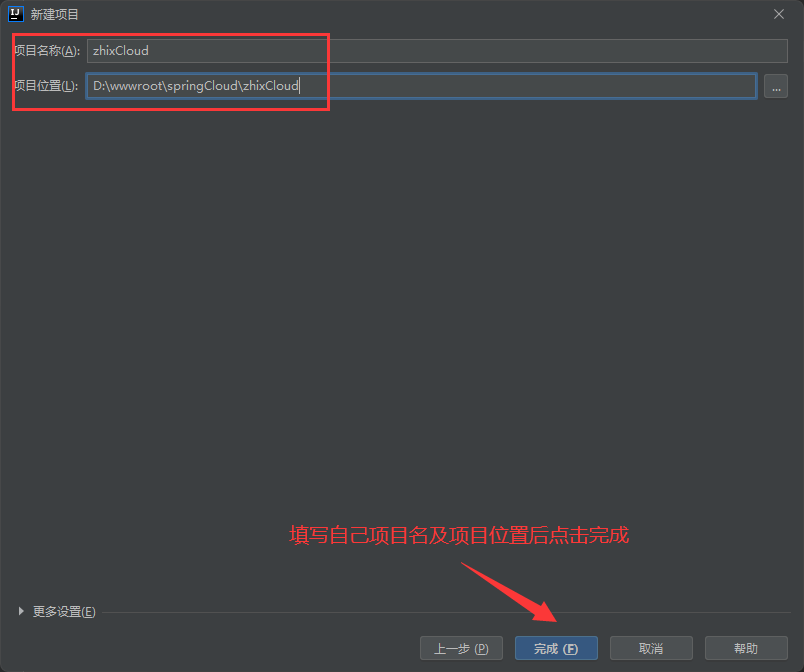
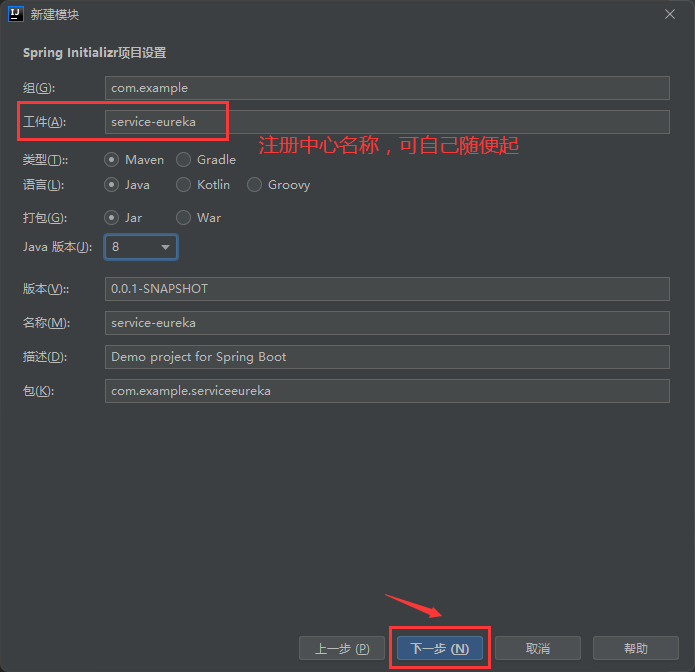
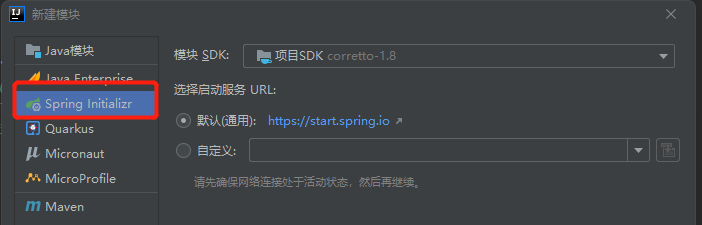
1、先创建一个工程

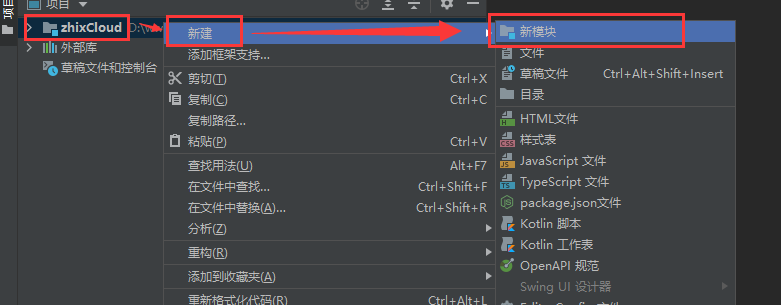
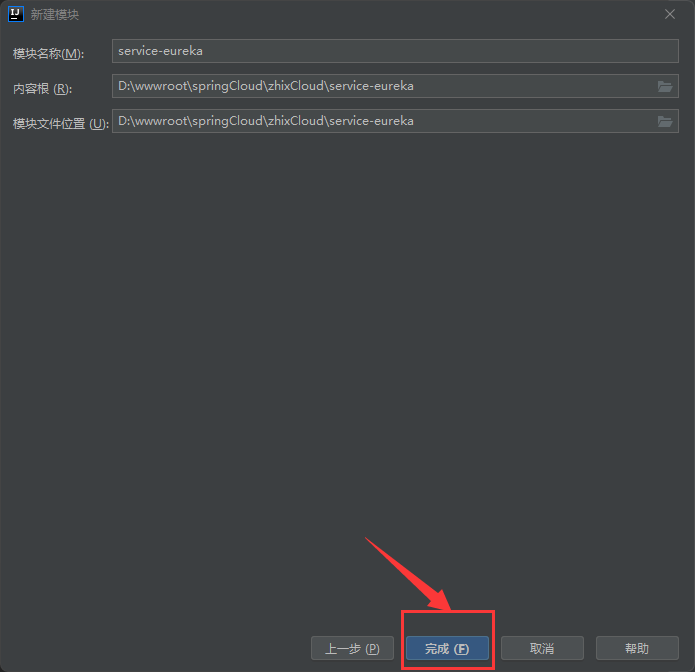
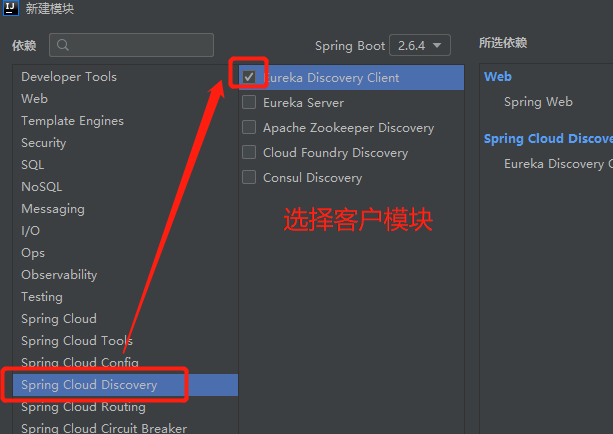
2、拉下来创建注册组件
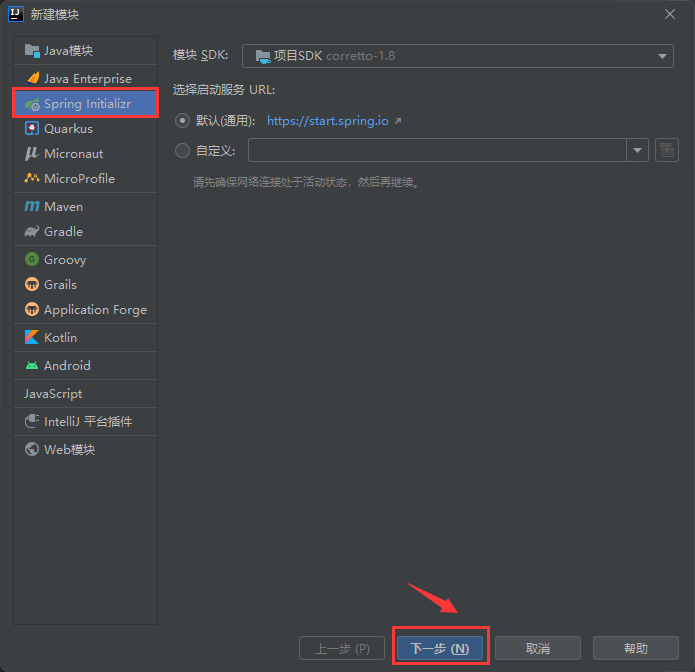
同样的选择springboot工程
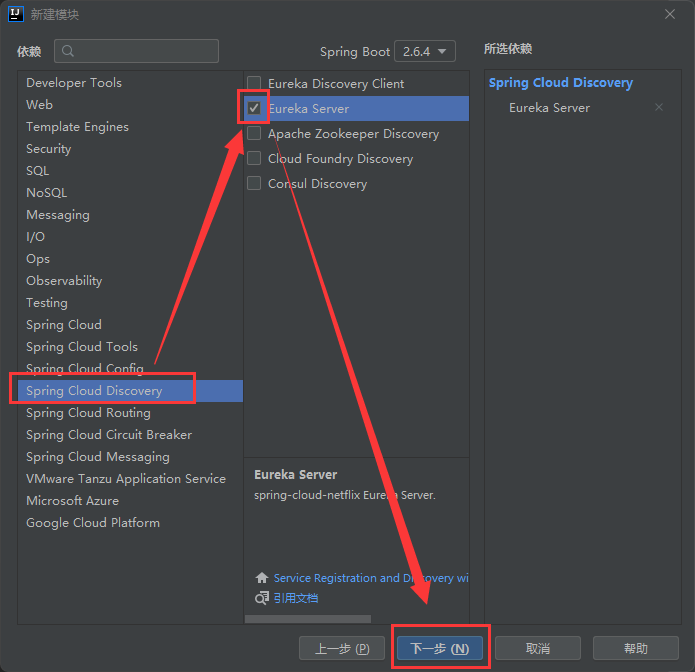
为eureka注册中心添加注解开启服务
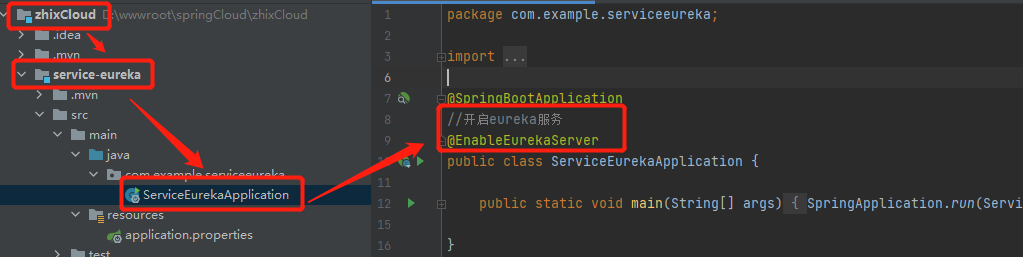
配置eureka注册中心配置文件 application.yml (注意缩进)
server:
  # 配置服务端口
  port: 8081
eureka:
  client:
    service-url:
      # 配置eureka服务器地址
      defaultZone: http://127.0.0.1:${server.port}/eureka
    #是否需要将自己注册到注册中心(注册中心集群需要设置为true)
    register-with-eureka: false
    #是否需要搜索服务信息 因为自己是注册中心所以为false
    fetch-registry: false
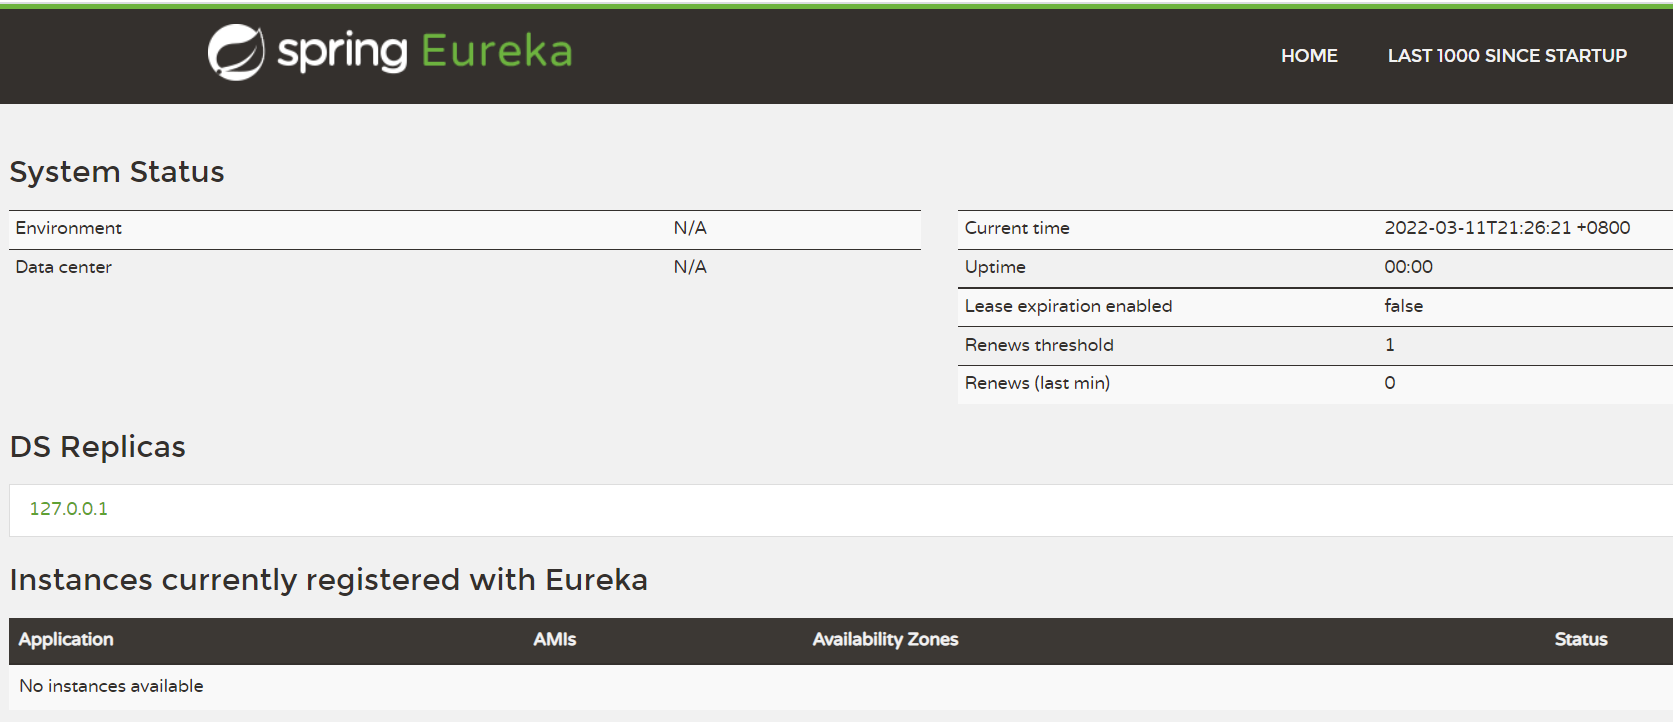
运行ServiceEurekaApplication文件启动项目, 访问注册中心
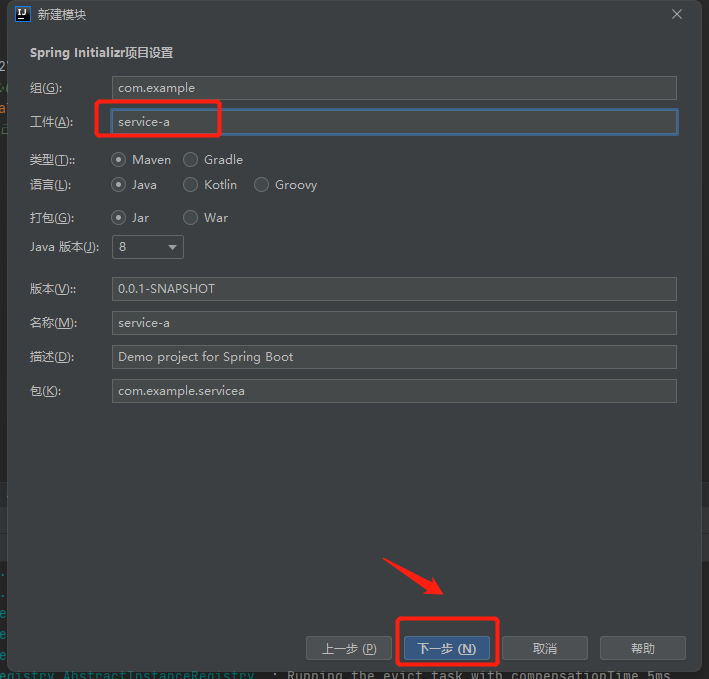
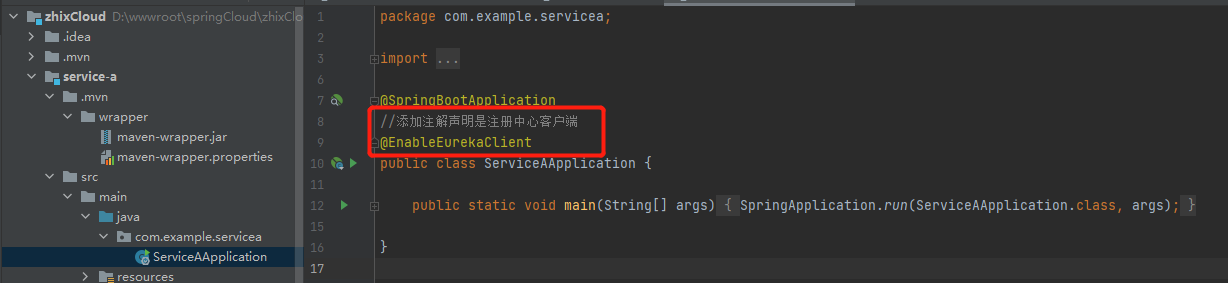
3、创建二个微服务 serviceA,serviceB
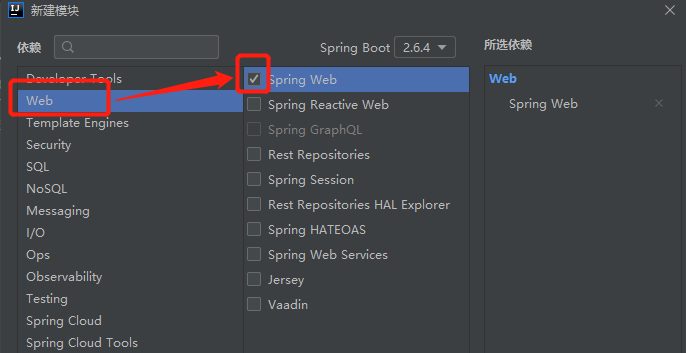
创建springboot模块
配置微服务的入口文件 @EnableEurekaClient (service-a和service-b的都要加)
配置application.yml
service-a:
server:
  # 服务端口号
  port: 8082
spring:
  application:
    # 服务名称 - 服务之间使用名称进行通讯
    name: service-objcat-a
eureka:
  client:
    service-url:
      # 填写注册中心服务器地址
      defaultZone: http://localhost:8081/eureka
    # 是否需要将自己注册到注册中心
    register-with-eureka: true
    # 是否需要搜索服务信息
    fetch-registry: true
  instance:
    # 使用ip地址注册到注册中心
    prefer-ip-address: true
    # 注册中心列表中显示的状态参数
    instance-id: ${spring.cloud.client.ip-address}:${server.port}
service-b:
server:
  # 服务端口号
  port: 8083
spring:
  application:
    # 服务名称 - 服务之间使用名称进行通讯
    name: service-objcat-b
eureka:
  client:
    service-url:
      # 填写注册中心服务器地址
      defaultZone: http://localhost:8081/eureka
    # 是否需要将自己注册到注册中心
    register-with-eureka: true
    # 是否需要搜索服务信息
    fetch-registry: true
  instance:
    # 使用ip地址注册到注册中心
    prefer-ip-address: true
    # 注册中心列表中显示的状态参数
    instance-id: ${spring.cloud.client.ip-address}:${server.port}
开启多个微服务。单个一个个开就很麻烦,我们使用RunDashboard就会方便很多
在工程目录下找.idea文件夹下的workspace.xml,在其中增加如下组件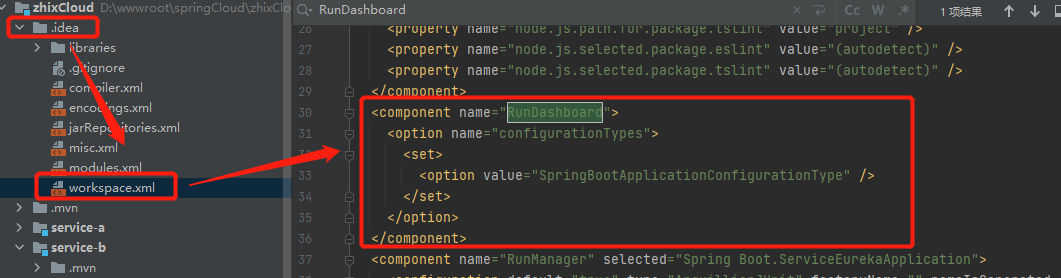
  <component name="RunDashboard">
    <option name="configurationTypes">
      <set>
        <option value="SpringBootApplicationConfigurationType" />
      </set>
    </option>
  </component>
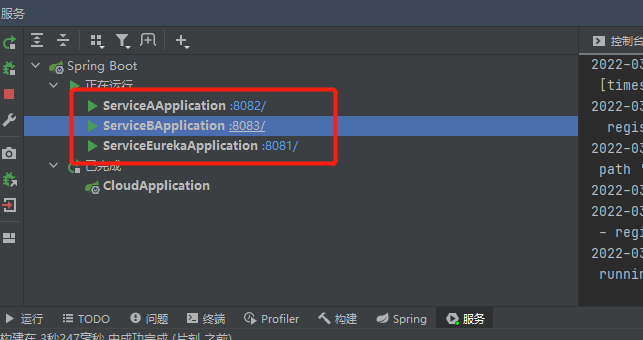
分别运行注册中心及微服务模块
出现端口号表示启动成功
编写测试接口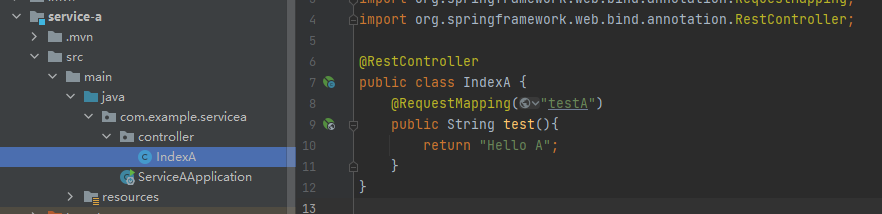
package com.example.servicea.controller;

import org.springframework.web.bind.annotation.RequestMapping;
import org.springframework.web.bind.annotation.RestController;

@RestController
public class IndexA {
    @RequestMapping("testA")
    public String test(){
        return "Hello A";
    }
}
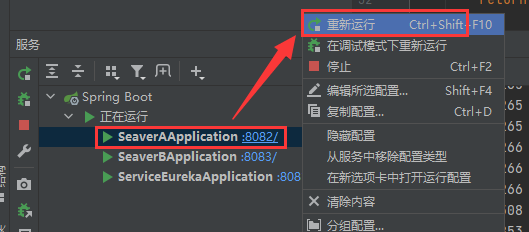
重启服务
访问下面地址即可访问到
Hello A
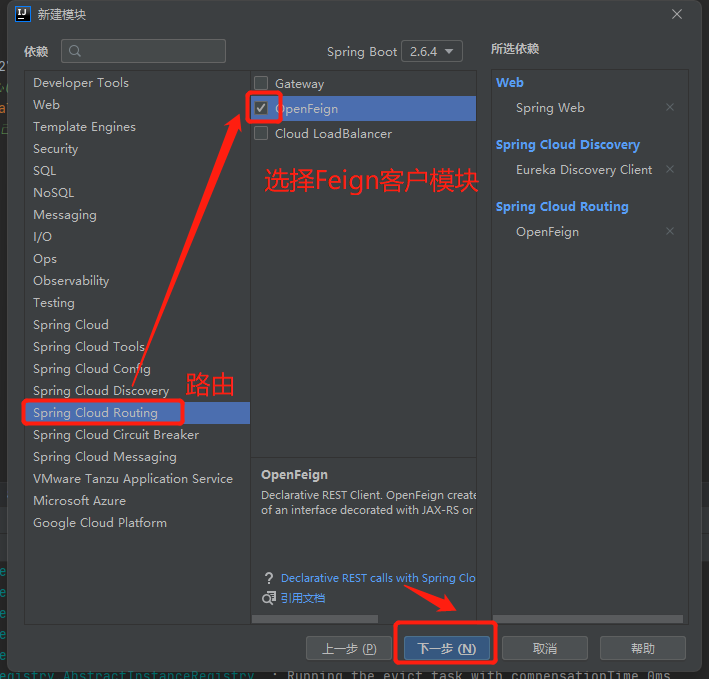
使用微服务b调用服务a的接口
这时我们就需要用到eurka(注册中心)和feign客户端了
首先我们在service-b中创建interface
在微服务b中, 创建一个ServiceAFeignClient接口:
其中应用名可以在eureka中找到
http://localhost:8081
ServiceAFeignClient:
package com.example.seaverb.controller;

import org.springframework.cloud.openfeign.FeignClient;
import org.springframework.web.bind.annotation.*;

// 填入注册中心中的应用名, 也就是要调用的微服务的应用名
// 在eureka页面中可以找到
@FeignClient("SERVICE-OBJCAT-A")
public interface ServiceAFeignClient {
   //路由名"testA"对应控制器IndexA的方法的路由名   例:此外对应是的IndexA  @requestMapping("testA")
    @RequestMapping("testA")
    public String IndexA();

    @RequestMapping("testA2")
    public String IndexA2(@RequestParam("id") String id);

    @PostMapping("testA3")
    public String IndexA3(@RequestParam("title") String title,@RequestParam("id") Integer id);

}
在Index.java 我增加了一个GET方式及POST方式接收微服务器之间传参方法可供参考
package com.example.seavera.controller;

import org.springframework.cloud.netflix.eureka.EnableEurekaClient;
import org.springframework.cloud.openfeign.EnableFeignClients;
import org.springframework.web.bind.annotation.*;

@RestController
// 添加注解声明是注册中心客户端
@EnableEurekaClient
// 实现不同子服务调用
@EnableFeignClients
public class IndexA {
    @RequestMapping("testA")
    public String test(){
        return "Hello A";
    }

    /**
     * 微服务GET接收传参实例
     * @param id
     * @return
     */
    @RequestMapping("testA2")
    public String test2(@RequestParam("id") String id){
        return "Hello A2 "+ id;
    }
    /**
     * 微服务POST接收传参实例
     * @param title
     * @param id
     * @return
     */
    @PostMapping(value = "testA3")
    public String test3(@RequestParam("title") String title,@RequestParam("id") Integer id){
        return "Hello A3 "+ title;
    }
}
在服务b中添加控制器

package com.example.seaverb.controller;
import org.springframework.beans.factory.annotation.Autowired;
import org.springframework.cloud.netflix.eureka.EnableEurekaClient;
import org.springframework.cloud.openfeign.EnableFeignClients;
import org.springframework.web.bind.annotation.*;
@RestController
// 添加注解声明是注册中心客户端
@EnableEurekaClient
// 实现不同子服务调用
@EnableFeignClients
public class IndexB {
@Autowired
private ServiceAFeignClient serviceAFeignClient;
@RequestMapping("call")
public String call(){
String test = "This is B";
String result = serviceAFeignClient.IndexA();
return "b to a 访问结果 ---" + result;
}
/**
* 微服务之间GET传参数 http://localhost:8083/call2?id=11
* 双方 @RequestParam("id") 必须指定相同的value值。只要不对应都会报错。
* @param id
* @return
*/
@RequestMapping("call2")
public String call2(@RequestParam("id") String id){
String test = "This is B";
String result = serviceAFeignClient.IndexA2(id);
return "b to a 访问结果 ---" + result;
}
/**
* 微服务之间POST传参数
* @param title
* @param id
* @return
*/
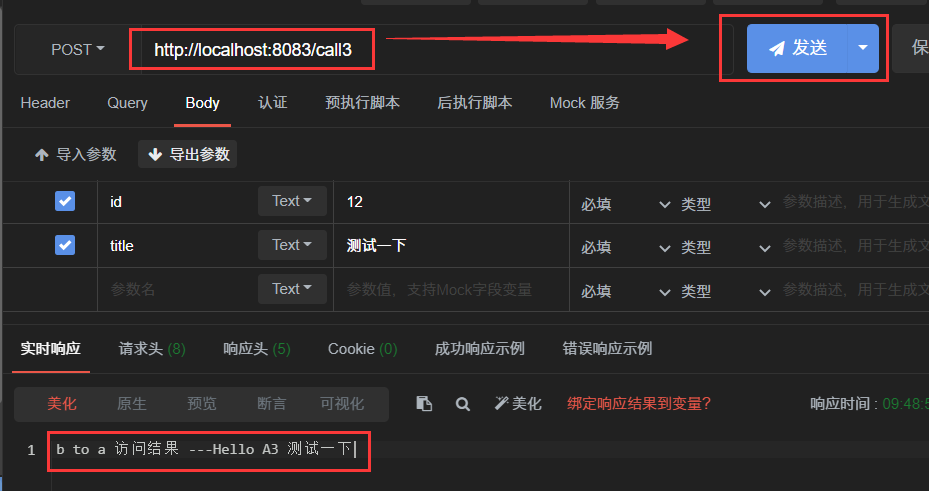
@PostMapping("call3")
public String call3(@RequestParam("title") String title,@RequestParam("id") Integer id){
String result = serviceAFeignClient.IndexA3(title,id);
return "b to a 访问结果 ---" + result;
}
}
解决@Autowired实例报错

重新运行服务b 在浏览器上访问试试吧
可以看到 b to a 访问结果 ---Hello A
使用GET传参访问
http://localhost:8083/call2?id=888
可以看到 b to a 访问结果 ---Hello A2 888
使用POST传参
PS: 在springcloud中一个子服务调用另一个子服务默认超时时间是1s, 也就是说要是被调用的子服务返回超过一秒就会出现错误, 针对此问题需要修改调用服务的yml文件.

举例: 在本案例中, service-a是被调用者, service-b是调用者, 则在service-b的yml文件中加入
ribbon:
  #建立连接超时时间
  ReadTimeout: 5000
  #读取资源超时间
  ConnectTimeout: 5000
service-b完整配置如下:
server:
  # 服务端口号
  port: 8083
spring:
  application:
    # 服务名称 - 服务之间使用名称进行通讯
    name: service-objcat-b
eureka:
  client:
    service-url:
      # 填写注册中心服务器地址
      defaultZone: http://localhost:8081/eureka
    # 是否需要将自己注册到注册中心
    register-with-eureka: true
    # 是否需要搜索服务信息
    fetch-registry: true
  instance:
    # 使用ip地址注册到注册中心
    prefer-ip-address: true
    # 注册中心列表中显示的状态参数
    instance-id: ${spring.cloud.client.ip-address}:${server.port}
ribbon:
  #建立连接超时时间
  ReadTimeout: 5000
  #读取资源超时间
  ConnectTimeout: 5000

 浙公网安备 33010602011771号