
如何使用 HTML5 Canvas 制作水波纹效果
今天,我们继续分享 JavaScript 实现的效果例子,这篇文章会介绍使用 JavaScript 实现水波纹效果。水波效果以图片为背景,点击图片任意位置都会触发。有时候,我们使用普通的 Javascript 就可以创建一个很有趣的解决功能。
Step 1. HTML
和以前一样,首先是 HTML 代码:
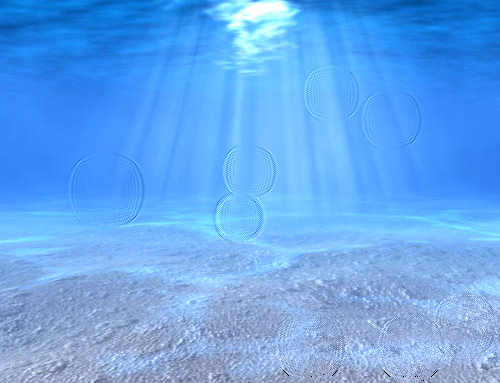
1 2 3 4 5 6 7 8 9 10 11 12 13 14 15 16 17 18 19 20 21 22 | <!DOCTYPE html><html> <head> <meta charset=utf-8 /> <title>Water drops effect</title> <link rel="stylesheet" href="css/main.css" type="text/css" /> <script src="js/vector2d.js" type="text/javascript" charset="utf-8"></script> <script src="js/waterfall.js" type="text/javascript" charset="utf-8"></script> </head> <body> <div class="example"> <h3><a href="#">Water drops effect</a></h3> <canvas id="water">HTML5 compliant browser required</canvas> <div id="switcher"> <img onclick='watereff.changePicture(this.src);' src="data_images/underwater1.jpg" /> <img onclick='watereff.changePicture(this.src);' src="data_images/underwater2.jpg" /> </div> <div id="fps"></div> </div> </body></html> |
Step 2. CSS
这是用到的 CSS 代码:
1 2 3 4 5 6 7 8 9 10 11 12 13 14 15 16 17 18 19 | body{background:#eee;margin:0;padding:0}.example{background:#FFF;width:600px;border:1px #000 solid;margin:20px auto;padding:15px;-moz-border-radius: 3px;-webkit-border-radius: 3px}#water { width:500px; height:400px; display: block; margin:0px auto; cursor:pointer;}#switcher { text-align:center; overflow:hidden; margin:15px;}#switcher img { width:160px; height:120px;} |
Step 3. JS
下面是主要的 JavaScript 代码:
1 2 3 4 5 6 7 8 9 10 11 12 13 14 15 16 17 18 19 20 21 22 23 24 25 26 27 28 29 30 31 32 33 34 35 36 37 38 39 40 41 42 43 44 45 46 47 48 49 50 51 52 53 54 55 56 57 58 59 60 61 62 63 64 65 66 67 68 69 70 71 72 73 74 75 76 77 78 79 80 81 82 83 84 85 86 87 88 89 90 91 92 93 94 95 96 97 98 99 100 101 102 103 104 105 106 107 108 109 110 111 112 113 114 115 116 117 118 119 120 121 122 123 124 125 126 127 128 129 130 131 | function drop(x, y, damping, shading, refraction, ctx, screenWidth, screenHeight){ this.x = x; this.y = y; this.shading = shading; this.refraction = refraction; this.bufferSize = this.x * this.y; this.damping = damping; this.background = ctx.getImageData(0, 0, screenWidth, screenHeight).data; this.imageData = ctx.getImageData(0, 0, screenWidth, screenHeight); this.buffer1 = []; this.buffer2 = []; for (var i = 0; i < this.bufferSize; i++){ this.buffer1.push(0); this.buffer2.push(0); } this.update = function(){ for (var i = this.x + 1, x = 1; i < this.bufferSize - this.x; i++, x++){ if ((x < this.x)){ this.buffer2[i] = ((this.buffer1[i - 1] + this.buffer1[i + 1] + this.buffer1[i - this.x] + this.buffer1[i + this.x]) / 2) - this.buffer2[i]; this.buffer2[i] *= this.damping; } else x = 0; } var temp = this.buffer1; this.buffer1 = this.buffer2; this.buffer2 = temp; } this.draw = function(ctx){ var imageDataArray = this.imageData.data; for (var i = this.x + 1, index = (this.x + 1) * 4; i < this.bufferSize - (1 + this.x); i++, index += 4){ var xOffset = ~~(this.buffer1[i - 1] - this.buffer1[i + 1]); var yOffset = ~~(this.buffer1[i - this.x] - this.buffer1[i + this.x]); var shade = xOffset * this.shading; var texture = index + (xOffset * this.refraction + yOffset * this.refraction * this.x) * 4; imageDataArray[index] = this.background[texture] + shade; imageDataArray[index + 1] = this.background[texture + 1] + shade; imageDataArray[index + 2] = 50 + this.background[texture + 2] + shade; } ctx.putImageData(this.imageData, 0, 0); }}var fps = 0;var watereff = { // variables timeStep : 20, refractions : 2, shading : 3, damping : 0.99, screenWidth : 500, screenHeight : 400, pond : null, textureImg : null, interval : null, backgroundURL : 'data_images/underwater1.jpg', // initialization init : function() { var canvas = document.getElementById('water'); if (canvas.getContext){ // fps countrt fps = 0; setInterval(function() { document.getElementById('fps').innerHTML = fps / 2 + ' FPS'; fps = 0; }, 2000); canvas.onmousedown = function(e) { var mouse = watereff.getMousePosition(e).sub(new vector2d(canvas.offsetLeft, canvas.offsetTop)); watereff.pond.buffer1[mouse.y * watereff.pond.x + mouse.x ] += 200; } canvas.onmouseup = function(e) { canvas.onmousemove = null; } canvas.width = this.screenWidth; canvas.height = this.screenHeight; this.textureImg = new Image(256, 256); this.textureImg.src = this.backgroundURL; canvas.getContext('2d').drawImage(this.textureImg, 0, 0); this.pond = new drop( this.screenWidth, this.screenHeight, this.damping, this.shading, this.refractions, canvas.getContext('2d'), this.screenWidth, this.screenHeight ); if (this.interval != null){ clearInterval(this.interval); } this.interval = setInterval(watereff.run, this.timeStep); } }, // change image func changePicture : function(url){ this.backgroundURL = url; this.init(); }, // get mouse position func getMousePosition : function(e){ if (!e){ var e = window.event; } if (e.pageX || e.pageY){ return new vector2d(e.pageX, e.pageY); } else if (e.clientX || e.clientY){ return new vector2d(e.clientX, e.clientY); } }, // loop drawing run : function(){ var ctx = document.getElementById('water').getContext('2d'); watereff.pond.update(); watereff.pond.draw(ctx); fps++; }}window.onload = function(){ watereff.init();} |
正如你所看到的,这里使用 Vector2D 函数,这个函数在 vector2d.js 里提供了。另一个很难的方法是使用纯数学实现,感兴趣的可以自己实验一下。
您可能感兴趣的相关文章


【推荐】国内首个AI IDE,深度理解中文开发场景,立即下载体验Trae
【推荐】编程新体验,更懂你的AI,立即体验豆包MarsCode编程助手
【推荐】抖音旗下AI助手豆包,你的智能百科全书,全免费不限次数
【推荐】轻量又高性能的 SSH 工具 IShell:AI 加持,快人一步
· .NET Core 中如何实现缓存的预热?
· 从 HTTP 原因短语缺失研究 HTTP/2 和 HTTP/3 的设计差异
· AI与.NET技术实操系列:向量存储与相似性搜索在 .NET 中的实现
· 基于Microsoft.Extensions.AI核心库实现RAG应用
· Linux系列:如何用heaptrack跟踪.NET程序的非托管内存泄露
· TypeScript + Deepseek 打造卜卦网站:技术与玄学的结合
· 阿里巴巴 QwQ-32B真的超越了 DeepSeek R-1吗?
· 【译】Visual Studio 中新的强大生产力特性
· 【设计模式】告别冗长if-else语句:使用策略模式优化代码结构
· 10年+ .NET Coder 心语 ── 封装的思维:从隐藏、稳定开始理解其本质意义
2013-09-14 40款很奇异的名片设计,吸引你的眼球《下篇》
2011-09-14 75佳精美的 CSS 网页设计作品欣赏(系列一)
2011-09-14 10个奇特的 HTML5 Canvas 应用试验