pytest(3) fixture用法讲解
前言
- setup、teardown可以实现在执行用例前或结束后加入一些操作,但这种都是针对整个脚本全局生效的
- 如果有以下场景:用例 1 需要先登录,用例 2 不需要登录,用例 3 需要先登录。很显然无法用 setup 和 teardown 来实现了
- fixture可以让我们自定义测试用例的前置条件
fixture的优势
- 命名方式灵活,不局限于 setup 和teardown 这几个命名
- conftest.py 配置里可以实现数据共享,不需要 import 就能自动找到fixture
- scope="module" 可以实现多个.py 跨文件共享前置
- scope="session" 以实现多个.py 跨文件使用一个 session 来完成多个用例
参数列表
@pytest.fixture(scope="function", params=None, autouse=False, ids=None, name=None)
def test():
print("fixture初始化的参数列表")
- scope:可以理解成fixture的作用域,默认:function,还有class、module、package、session四个【常用】
- autouse:默认:False,需要用例手动调用该fixture;如果是True,所有作用域内的测试用例都会自动调用该fixture
- name:默认:装饰器的名称,同一模块的fixture相互调用建议写个不同的name
测试用例如何调用fixture
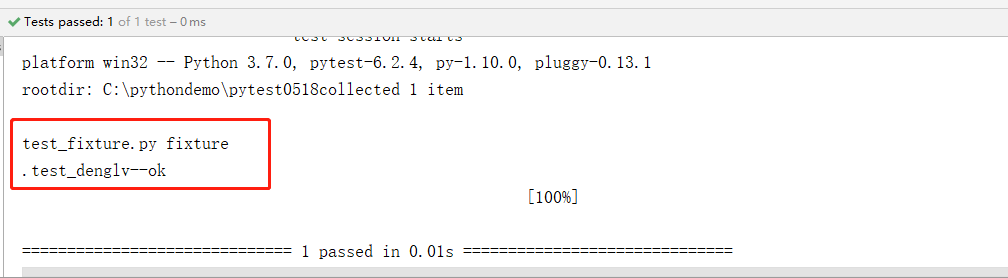
# 调用方式一
@pytest.fixture
def login():
    print('fixture')

def test_denglv(login):
    print('test_denglv--ok')
def test_denglv2():
    print('test_denglv2--OK')
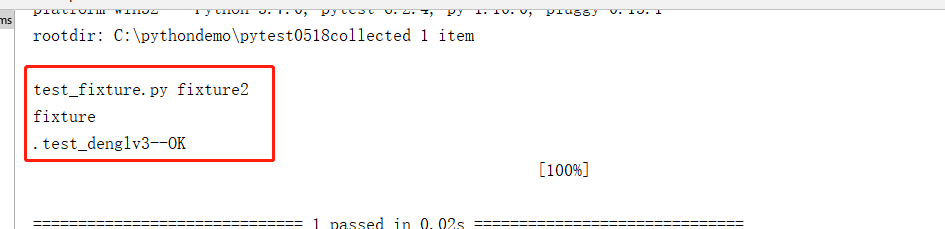
# 调用方式二
@pytest.mark.usefixtures('login2','login')
def test_denglv3():
    print('test_denglv3--OK')
执行结果
//参数位置影响执行顺序

 浙公网安备 33010602011771号