pytest夹具fixture、常用插件和allure报告
1.pytest夹具fixture
夹具:在用例执行之前,执行之后,自动的运行代码
1.1 创建fixture
- python函数+fixture装饰器
前后之分:yield
1 import pytest
2
3 @pytest.fixture
4 def func():
5     print('我是前置代码,在用例开始之前,执行【启动浏览器、链接数据库,创建测试数据...】')
6     yield
7     print('我是后置代码,在用例开始之后,执行【关闭浏览器、断开数据库、删除测试数据】')
1.2 使用fixture
1 def test_A(func):
2     #print('我开始执行用例') #启动浏览器
3     assert 1==1
4     #print('我执行结束了') #关闭浏览器
1.3 fixture的作用范围
pytest的fixture,支持5级作用域(unittest支持3级),让用例共享fixture
- function:每个用例不共享fixture的返回值,默认
- class:每个类中的用例,共享fixture
- module:每个模块(文件)中的用例,共享fixture
- package:每个包(目录)中的用例,共享fixture
- session:所有的用例,共享fixture
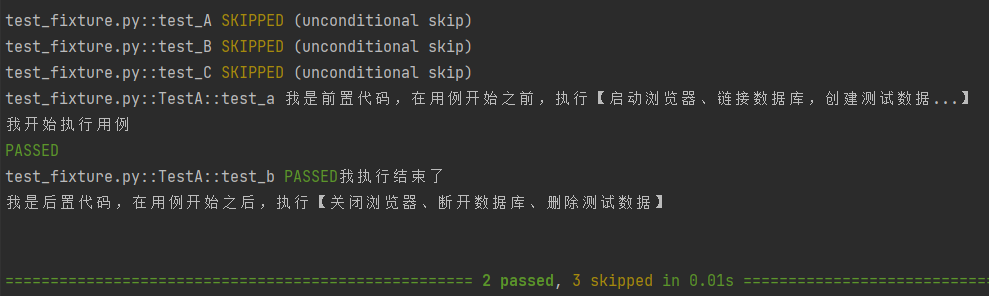
1.3.1 function
 1 import pytest
 2
 3 @pytest.fixture(scope="function")
 4 def func():
 5     print('我是前置代码,在用例开始之前,执行【启动浏览器、链接数据库,创建测试数据...】')
 6     print('我开始执行用例') #启动浏览器
 7     yield
 8     print('我执行结束了') #关闭浏览器
 9     print('我是后置代码,在用例开始之后,执行【关闭浏览器、断开数据库、删除测试数据】')
10
11
12 @pytest.mark.skip
13 def test_A(func):
14     #print('我开始执行用例') #启动浏览器
15     assert 1==1
16     #print('我执行结束了') #关闭浏览器
17
18 @pytest.mark.skip
19 def test_B(func):
20     #print('我开始执行用例') #连接数据库
21     assert 1 == 2
22     #print('我执行结束了') #关闭数据库连接
23
24 @pytest.mark.skip
25 def test_C(func):
26     #print('我开始执行用例') #连接数据库
27     assert 3 == 3
28     #print('我执行结束了') #关闭数据库连接

1.3.2 class
 1 import pytest
 2
 3 @pytest.fixture(scope="class")
 4 def func():
 5     print('我是前置代码,在用例开始之前,执行【启动浏览器、链接数据库,创建测试数据...】')
 6     print('我开始执行用例') #启动浏览器
 7     yield
 8     print('我执行结束了') #关闭浏览器
 9     print('我是后置代码,在用例开始之后,执行【关闭浏览器、断开数据库、删除测试数据】')
10
11
12 @pytest.mark.skip
13 def test_A(func):
14     #print('我开始执行用例') #启动浏览器
15     assert 1==1
16     #print('我执行结束了') #关闭浏览器
17
18 @pytest.mark.skip
19 def test_B(func):
20     #print('我开始执行用例') #连接数据库
21     assert 1 == 2
22     #print('我执行结束了') #关闭数据库连接
23
24 @pytest.mark.skip
25 def test_C(func):
26     #print('我开始执行用例') #连接数据库
27     assert 3 == 3
28     #print('我执行结束了') #关闭数据库连接
29
30
31 class TestA:
32     def test_a(self,func):
33         pass
34
35     def test_b(self,func):
36         pass
1.3.3 module
 1 import pytest
 2
 3 @pytest.fixture(scope="module")
 4 def func():
 5     print('我是前置代码,在用例开始之前,执行【启动浏览器、链接数据库,创建测试数据...】')
 6     print('我开始执行用例') #启动浏览器
 7     yield
 8     print('我执行结束了') #关闭浏览器
 9     print('我是后置代码,在用例开始之后,执行【关闭浏览器、断开数据库、删除测试数据】')
10
11
12 def test_A(func):
13     #print('我开始执行用例') #启动浏览器
14     assert 1==1
15     #print('我执行结束了') #关闭浏览器
16
17 def test_B(func):
18     #print('我开始执行用例') #连接数据库
19     assert 1 == 2
20     #print('我执行结束了') #关闭数据库连接
21
22 def test_C(func):
23     #print('我开始执行用例') #连接数据库
24     assert 3 == 3
25     #print('我执行结束了') #关闭数据库连接
26
27
28 class TestA:
29     def test_a(self,func):
30         pass
31
32     def test_b(self,func):
33         pass

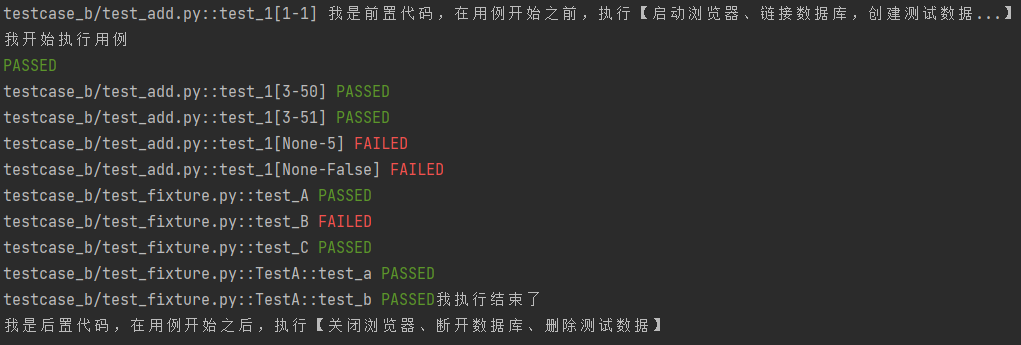
1.3.4 package

注意:需要把夹具文件conftest放在你需要的用例的目录,如果放在项目根路径,那package作用域和seesion作用域功能是一样的
 1 #test_abc.py
 2
 3 import pytest
 4
 5
 6 class TestABC:
 7     @pytest.mark.ut
 8     def test_ok(self,func):
 9         assert 1 == 1
10
11     @pytest.mark.ut
12     def test_fail(self,func):
13         assert 1 == 2
14
15     @pytest.mark.skip #无条件跳过
16     @pytest.mark.ui
17     def test_web(self):
18         assert 1==3
19
20     @pytest.mark.api
21     def test_api(self):
22         assert 2
23
24     @pytest.mark.skipif(True,reason='为真时跳过') #无条件跳过
25     @pytest.mark.ui
26     def test_UI(self):
27         assert 3
28
29     @pytest.mark.ui
30     @pytest.mark.xfail #预期失败
31     def test_app(self):
32         assert 4
33
34 #test_add.py
35
36 import pytest
37
38
39 def add(a, b):  # 计算a+b的结果
40     return a + b
41
42
43 @pytest.mark.parametrize(
44     "a,b",
45     [
46         (1, 1),
47         (3, 5),
48         ('3', '5'),
49         (None, '5'),
50         (None, False)
51     ]
52 )
53 def test_1(a, b,func):
54     # a = 1
55     # b = 1
56     c = add(a, b)
57     assert c == a + b
58
59 #test_fixture.py
60
61 import pytest
62
63 def test_A(func):
64     #print('我开始执行用例') #启动浏览器
65     assert 1==1
66     #print('我执行结束了') #关闭浏览器
67
68 def test_B(func):
69     #print('我开始执行用例') #连接数据库
70     assert 1 == 2
71     #print('我执行结束了') #关闭数据库连接
72
73 def test_C(func):
74     #print('我开始执行用例') #连接数据库
75     assert 3 == 3
76     #print('我执行结束了') #关闭数据库连接
77
78
79 class TestA:
80     def test_a(self,func):
81         pass
82
83     def test_b(self,func):
84         pass
85
86 #conftest.py
87
88 import pytest
89
90 @pytest.fixture(scope="package")
91 def func():
92     print('我是前置代码,在用例开始之前,执行【启动浏览器、链接数据库,创建测试数据...】')
93     print('我开始执行用例') #启动浏览器
94     yield
95     print('我执行结束了') #关闭浏览器
96     print('我是后置代码,在用例开始之后,执行【关闭浏览器、断开数据库、删除测试数据】
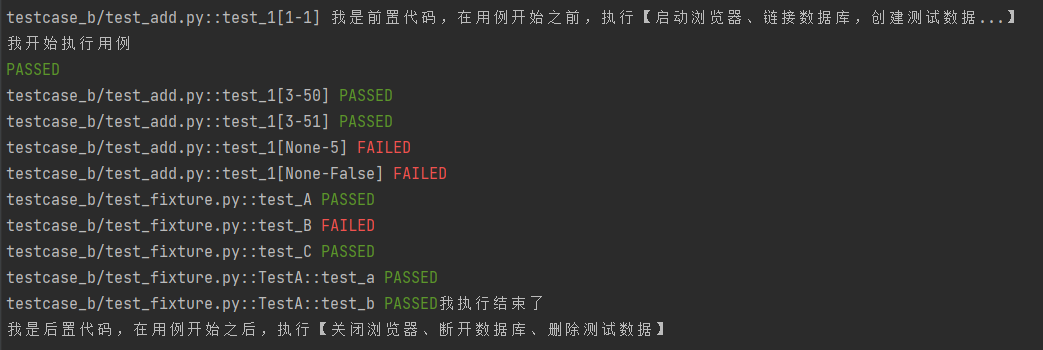
1.3.5 session
 1 #test_abc.py
 2
 3 import pytest
 4
 5
 6 class TestABC:
 7     @pytest.mark.ut
 8     def test_ok(self,func):
 9         assert 1 == 1
10
11     @pytest.mark.ut
12     def test_fail(self,func):
13         assert 1 == 2
14
15     @pytest.mark.skip #无条件跳过
16     @pytest.mark.ui
17     def test_web(self):
18         assert 1==3
19
20     @pytest.mark.api
21     def test_api(self):
22         assert 2
23
24     @pytest.mark.skipif(True,reason='为真时跳过') #无条件跳过
25     @pytest.mark.ui
26     def test_UI(self):
27         assert 3
28
29     @pytest.mark.ui
30     @pytest.mark.xfail #预期失败
31     def test_app(self):
32         assert 4
33
34 #test_add.py
35
36 import pytest
37
38
39 def add(a, b):  # 计算a+b的结果
40     return a + b
41
42
43 @pytest.mark.parametrize(
44     "a,b",
45     [
46         (1, 1),
47         (3, 5),
48         ('3', '5'),
49         (None, '5'),
50         (None, False)
51     ]
52 )
53 def test_1(a, b,func):
54     # a = 1
55     # b = 1
56     c = add(a, b)
57     assert c == a + b
58
59 #test_fixture.py
60
61 import pytest
62
63 def test_A(func):
64     #print('我开始执行用例') #启动浏览器
65     assert 1==1
66     #print('我执行结束了') #关闭浏览器
67
68 def test_B(func):
69     #print('我开始执行用例') #连接数据库
70     assert 1 == 2
71     #print('我执行结束了') #关闭数据库连接
72
73 def test_C(func):
74     #print('我开始执行用例') #连接数据库
75     assert 3 == 3
76     #print('我执行结束了') #关闭数据库连接
77
78
79 class TestA:
80     def test_a(self,func):
81         pass
82
83     def test_b(self,func):
84         pass
85
86 #conftest.py
87
88 import pytest
89
90 @pytest.fixture(scope="session")
91 def func():
92     print('我是前置代码,在用例开始之前,执行【启动浏览器、链接数据库,创建测试数据...】')
93     print('我开始执行用例') #启动浏览器
94     yield
95     print('我执行结束了') #关闭浏览器
96     print('我是后置代码,在用例开始之后,执行【关闭浏览器、断开数据库、删除测试数据】')
共享fixture好处:
- 节省fixture的执行时间
- 每一个用例都启动浏览器,然后关闭浏览器 4000个用例*7秒=28000秒
- 全局只启动一次浏览器,供每个用例使用:1*7s=7s
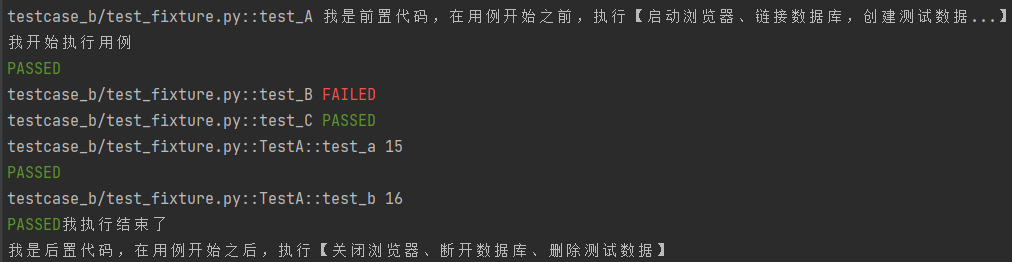
- 用例之间传递数据
 1 import pytest
 2
 3 def test_A(func):
 4     #print('我开始执行用例') #启动浏览器
 5     assert 1==1
 6     func.id=15
 7     #print('我执行结束了') #关闭浏览器
 8
 9
10 class TestA:
11     def test_a(self,func):
12         id=func.id
13         print(id)
14         func.id+=1
15
16     def test_b(self,func):
17         id=func.id
18         print(id)
19
20 import pytest
21
22 class clazz1:
23     pass
24
25 @pytest.fixture(scope="session")
26 def func():
27     print('我是前置代码,在用例开始之前,执行【启动浏览器、链接数据库,创建测试数据...】')
28     print('我开始执行用例') #启动浏览器
29     yield clazz1()
30     print('我执行结束了') #关闭浏览器
31     print('我是后置代码,在用例开始之后,执行【关闭浏览器、断开数据库、删除测试数据】')
共享fixture弊端:
- 共享之后,不会重复执行(例如,用例执行过程中,浏览器意外关闭,就不会再次启动浏览器)
1.4 conftest.py
从名字上看:测试配置文件(代码版)
从功能上看:可以被所有的用例自动导入,用来存放跨文件的fixture、hook
每个目录,都可以创建一个conftest.py,可以屏蔽上级目录的conftest.py
哪个conftest.py离测试用例越近,影响力越大
应该在根目录创建通用的conftest
然后在个别目录,创建特殊的conftest
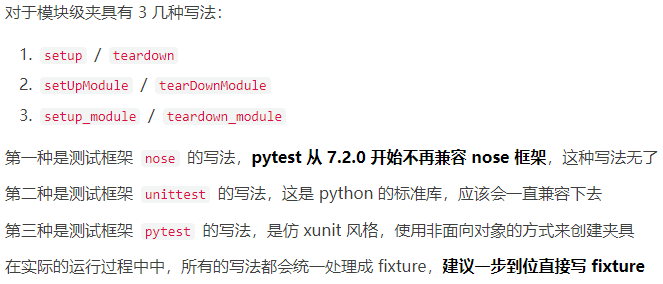
1.5 fixture的其他写法
https://mp.weixin.qq.com/s/iMQfm_7jwVFWD9cY2r94TA
2.pytest常用插件
有的插件,安装之后,自动启用
有的插件,安装之后,配置后才启用
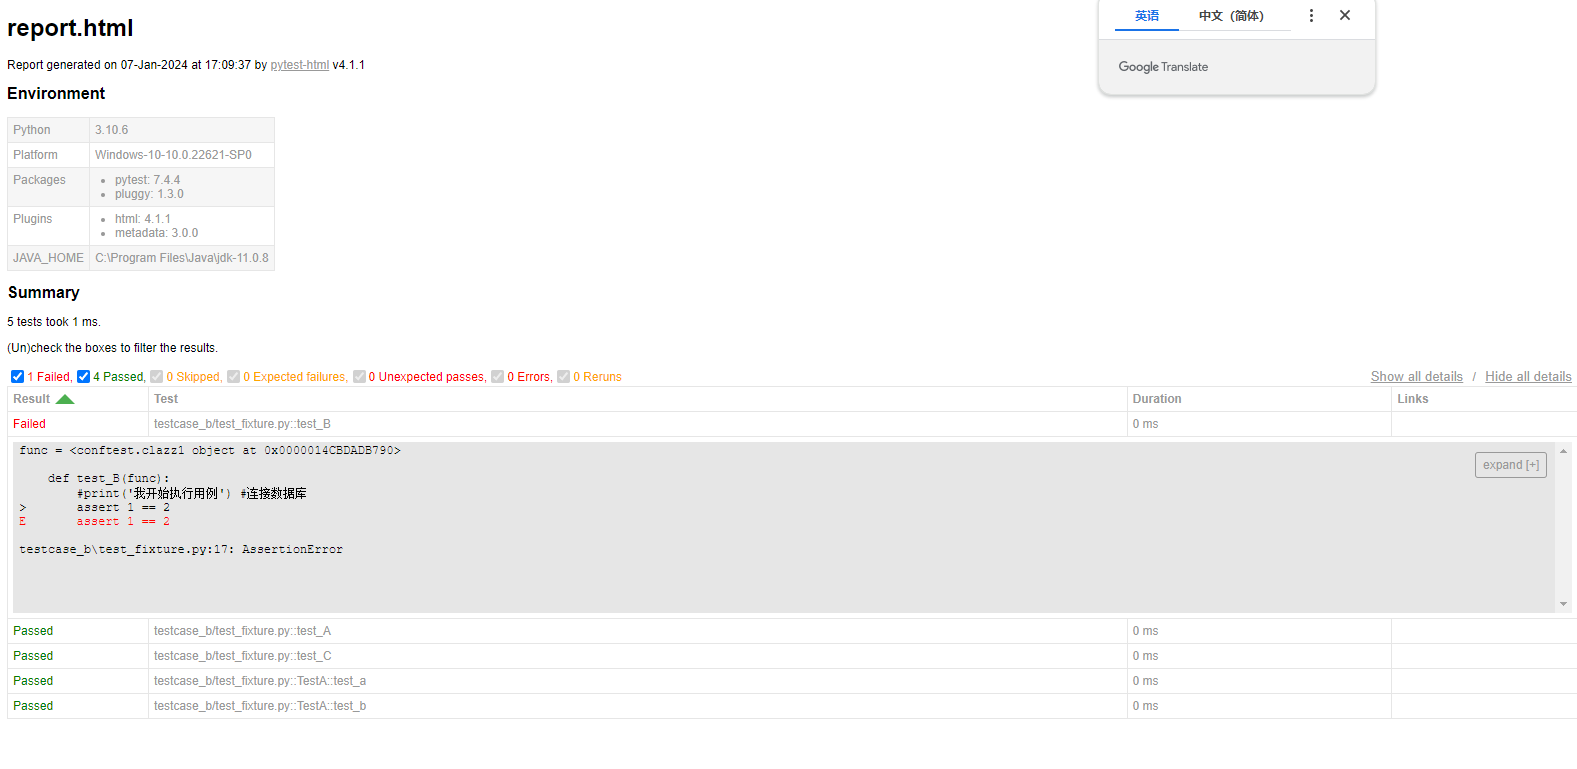
2.1 pytest-html
用途:生成html报告
安装:pip install pytest-html
配置:
addopts= --html=report.html --self-contained-html
2.2 pytest-xdist
用途:并法执行用例
安装:pip install pytest-xdist
配置:
[pytest]
addopts= -n 4
addopts= -n auto
addopts=-n 0
- 0 不使用并发
- 4 创建4个进程并发
- auto 创建和cpu相同数量的进程并发
2.3 pytest-rerunfailures
用途:用例失败之后,重新运行
安装:pip install pytest-rerunfailures
配置:
[pytest]
addopts= --reruns 5 --reruns-delay 1
1 import random
2
3
4 def test_abc():
5     a = random.randint(1, 5)
6     b = 5
7     assert a == b

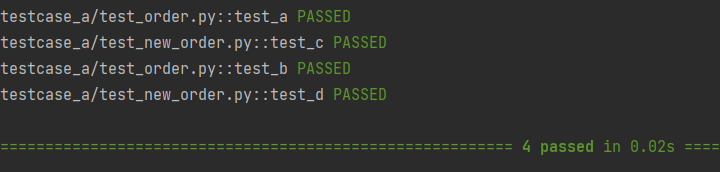
2.4 pytest-order
用途:自定义用例执行顺序
安装:pip install pytest-order
 1 #test_order.py
 2
 3 import pytest
 4
 5 @pytest.mark.order(1)
 6 def test_a():
 7     pass
 8
 9 @pytest.mark.order(3)
10 def test_b():
11     pass
12
13 #test_new_order.py
14 import pytest
15
16 @pytest.mark.order(2)
17 def test_c():
18     pass
19
20 @pytest.mark.order(4)
21 def test_d():
22     pass
预期效果:a,c,b,d
排序规则:
- 先执行有order标记的用例,后执行没有order标记的用例
- order标记越小,顺序越靠前
2.5 pytest-result-log
用途:将用例的名称和结果,保存到日志文件
安装:pip install pytest-result-log
配置:
[pytest]
log_file_level= info
log_file_format= %(levelname)-8s %(asctime)s [%(name)s:%(lineno)s] : %(message)s
log_file_date_format=%Y-%m-%d %H:%M:%S
result_log_level_verbose=info
2.6 allure-pytest
allure是一个Java测试报告框架
allure-pytest:是allure支持pytest插件
用途:生成allure能够识别的数据文件
安装:pip install allure-pytest
配置:
[pytest]
addopts=--alluredir=./temp --clean-alluredir
3.allure企业级测试报告
allure:是一个java测试报告框架
3.1 搭建java的jdk环境
JDK+Java源程序
JDK:
- 使用Pycharm自带的java.exe
- 如果单独安装。建议使用JDK17+
- 设置环境变量:JAVA_HONE,PATH
- 命令可以执行java.exe

E:\Program Files\JetBrains\PyCharm Community Edition 2023.1.2\jbr\bin
环境变量:
JAVA_HONE =E:\Program Files\JetBrains\PyCharm Community Edition 2023.1.2\jbr
PATH=PATH;E:\Program Files\JetBrains\PyCharm Community Edition 2023.1.2\jbr\bin
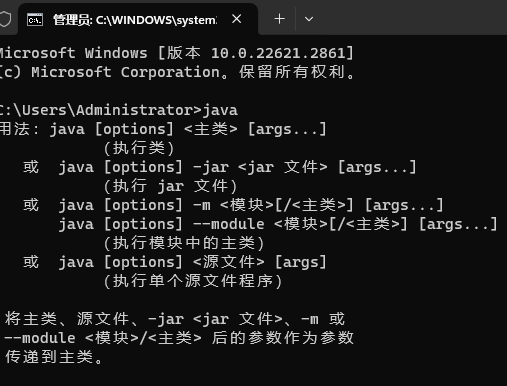
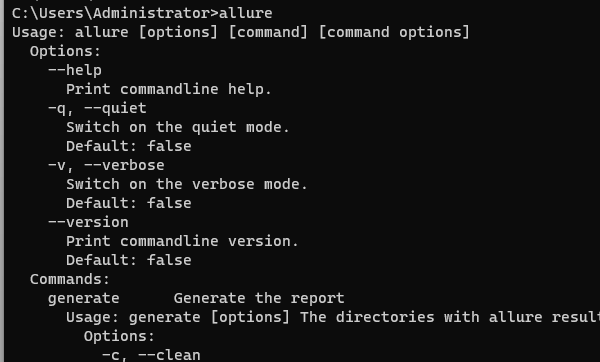
验证:
命令行窗口输入:java,能显示如截图一样的信息,说明环境变量设置成功
3.2 Allure环境搭建
1.解压 allure安装包
2.环境变量配置:PATH=PATH;D:\allure-2.24.1\bin\
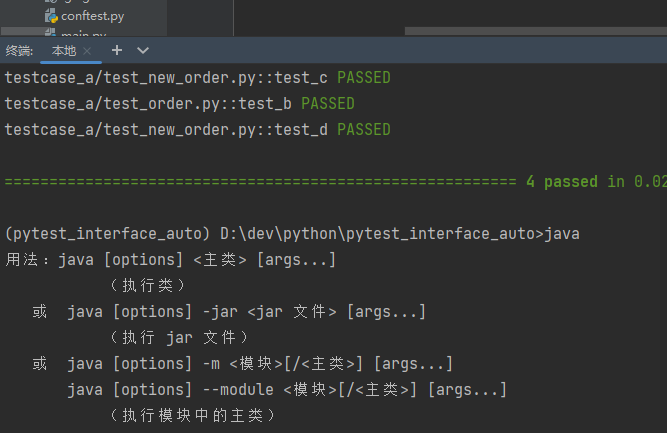
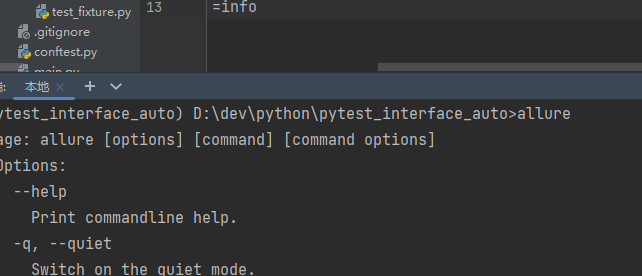
3.命令行验证:allure
pycharm分别执行:java和allure
3.3 生成报告
allure generate -c -o report temps
根据temps目录中的数据,生成报告并放在report目录中
allure seve temps
根据temps目录中的数据,生成报告并直接展示
3.4 内容定制
3.4.1 logo定制
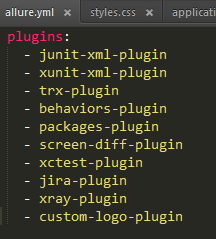
3.4.1.1 启用插件
D:\allure-2.18.1\config\allure.yml
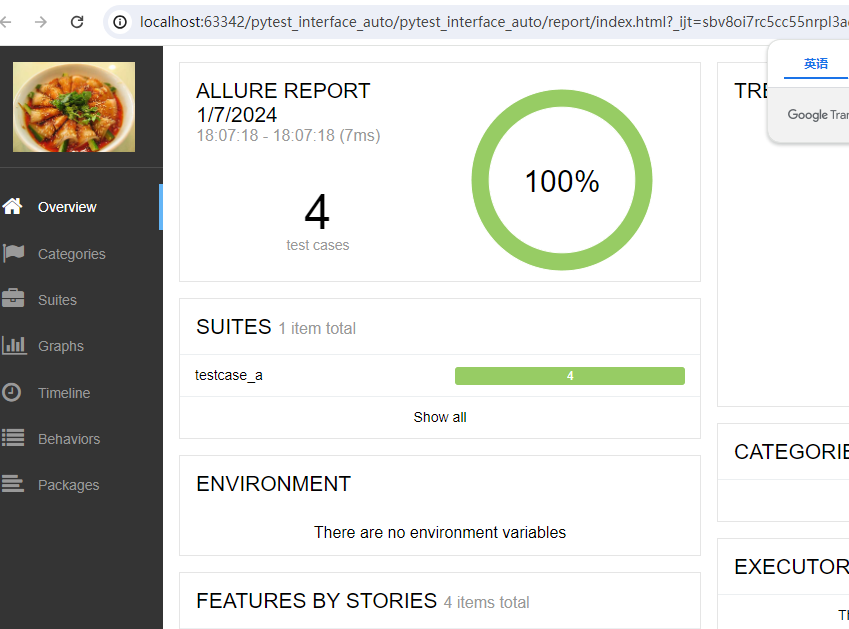
3.4.1.2 修改logo
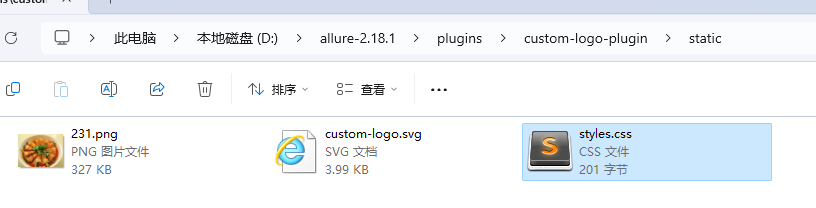
D:\allure-2.18.1\plugins\custom-logo-plugin\static\styles.css
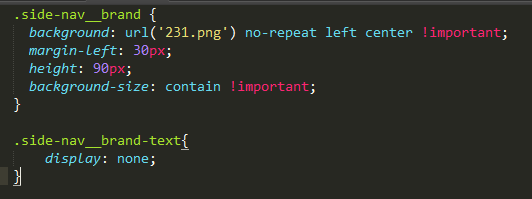
url('要修改的文件.png')
文件放入styles.css同一目录
重新生成报告
3.4.2 内容定制
 1 import pytest
 2 import allure
 3
 4 @allure.epic('自动化测试项目')
 5 @allure.feature('模块A')
 6 @allure.story('场景.功能')
 7 @allure.title('用例A')
 8 @pytest.mark.order(1)
 9 def test_a():
10     pass
11
12 @allure.epic('自动化测试项目')
13 @allure.feature('模块A')
14 @allure.story('场景.功能')
15 @allure.title('用例B')
16 @pytest.mark.order(3)
17 def test_b():
18     pass
19
20 @allure.epic('自动化测试项目')
21 @allure.feature('模块B')
22 @allure.story('场景.功能')
23 @allure.title('用例C')
24 @pytest.mark.order(1)
25 def test_c():
26     pass
27
28 @allure.epic('自动化测试项目')
29 @allure.feature('模块B')
30 @allure.story('场景.功能')
31 @allure.title('用例D')
32 @pytest.mark.order(3)
33 def test_d():
34     pass


 浙公网安备 33010602011771号