cocopods的入门教程
1. 安装Homebrew
`/bin/bash -c "$(curl -fsSL https://raw.githubusercontent.com/Homebrew/install/HEAD/install.sh)"`
2. 安装CocoaPods
brew cleanup -d -v

brew install cocoapods
尝试通过gem安装出错了,换成brew安装,很快就ok
3. 安装你的第一个依赖
首先关闭Xcode,然后打开终端,进入项目的主目录
cd ~/Path/To/Folder/Containing/IceCreamShop
然后执行
pod init
这将会在你的项目中创建Podfile.
然后使用Xcode来编辑它
open -a Xcode Podfile
注意:
不要使用TextEdit来编辑Podfile,因为它会将标准的引号替换成更具”grephically-appealing“的引号,这回导致CocoaPods变得混乱而出错。因此,你应该使用Xcode或其他的代码编辑器来编辑Podfile
默认的Podfile长这样:
# Uncomment the next line to define a global platform for your project
# platform :ios, '9.0'

target 'IceCreamShop' do
  # Comment the next line if you're not using Swift and don't want to use dynamic frameworks
  use_frameworks!

  # Pods for IceCreamShop

end
安装Alamofire
在 use_frameworks! 后添加:
pod 'Alamofire', '4.9.1'
然后进入项目的主目录,执行
pod install
你将看到如下的输出:
Analyzing dependencies
Adding spec repo `trunk` with CDN `https://cdn.cocoapods.org/`
Downloading dependencies
Installing Alamofire (4.9.1)
Generating Pods project
Integrating client project

[!] Please close any current Xcode sessions and use `IceCreamShop.xcworkspace` for this project from now on.
Pod installation complete! There is 1 dependency from the Podfile and 1 total pod installed.
此时,用Finder打开项目文件夹,你将看到 IceCreamShop.xcworkspace 文件和 Pods 文件夹.
注意:
就像命令行提示的一样,从这时候开始, 你必须通过 .xcworkspace 来打开项目,而不是 .xcodeproject。否则将会遇见build出错
恭喜你!你已经成功的添加了第一个依赖。
4. 再安装一个依赖
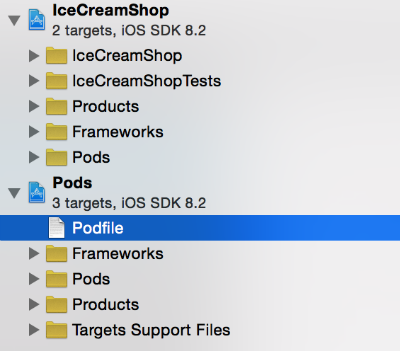
比起在命令行打开Podfile,现在可以在Xcode的workspace打开:

打开Podfile,在Alamofire行下添加:
pod 'MBProgressHUD', '~> 1.O'
然后再在Terminal执行 pod install.
参考链接: StackOverflow-ERROR: Error installing cocoapods: ERROR: Failed to build gem native extension
原编辑时间 2020-11-26
个性签名:时间会解决一切


 浙公网安备 33010602011771号