Quick Start NodeMCU / ESP8266 12E
先说明一下:本来想买常见的ESP 8266作为Arduinoi的WIFI模块,结果错买成ESP 8266 12E,发现网上的资料比较少。
ESP8266是WIFI芯片,它只是一块芯片必须要搭配相应的电路,而ESP12E是使用ESP8266做的WiFi模块,它有外置的flash以及PCB板载天线。12e出场自带了最新的安信可AT固件
NodeMcu是基于ESP8266-12E的一款硬件,编程语言使用lua脚本
一、连接到电脑
使用Micro USB线将MCU与电脑连接
二、配置附加开发板
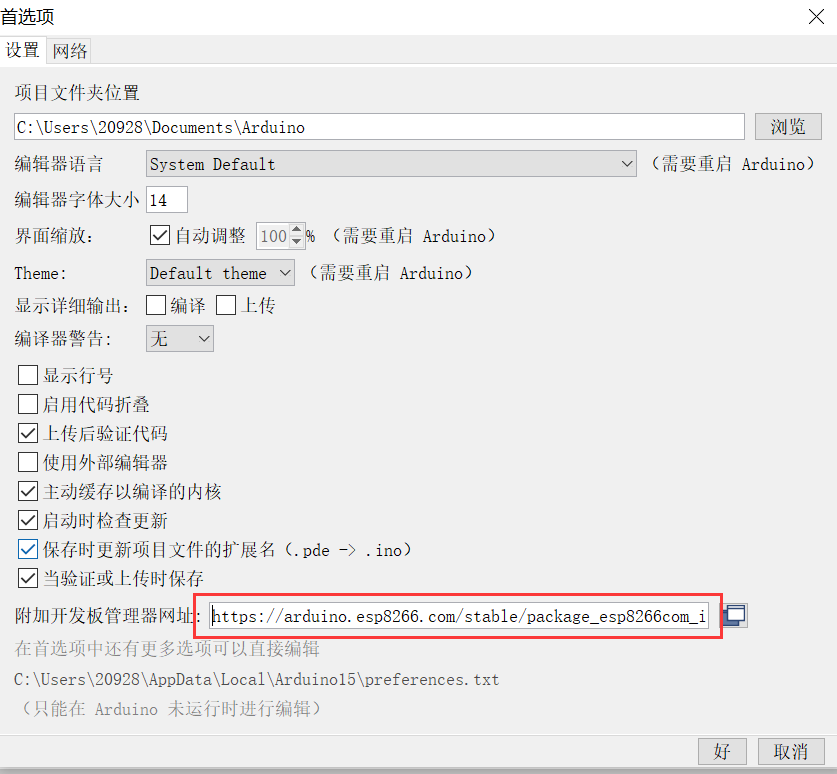
1、打开Arduino,选择“首选项”,在“附加开发板管理器网址”中填入http://arduino.esp8266.com/stable/package_esp8266com_index.json,然后点击确定保存这个地址。
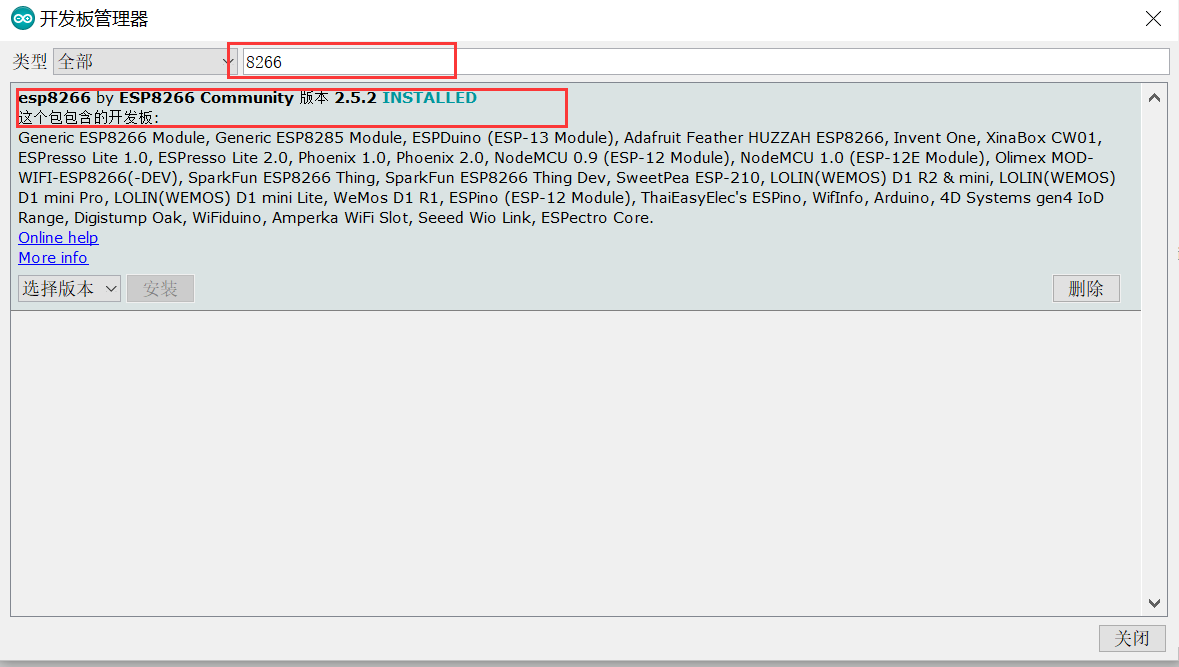
2、打开工具->开发板->开发板管理器
搜索8266,点击安装(源码在github上,可能比较慢)
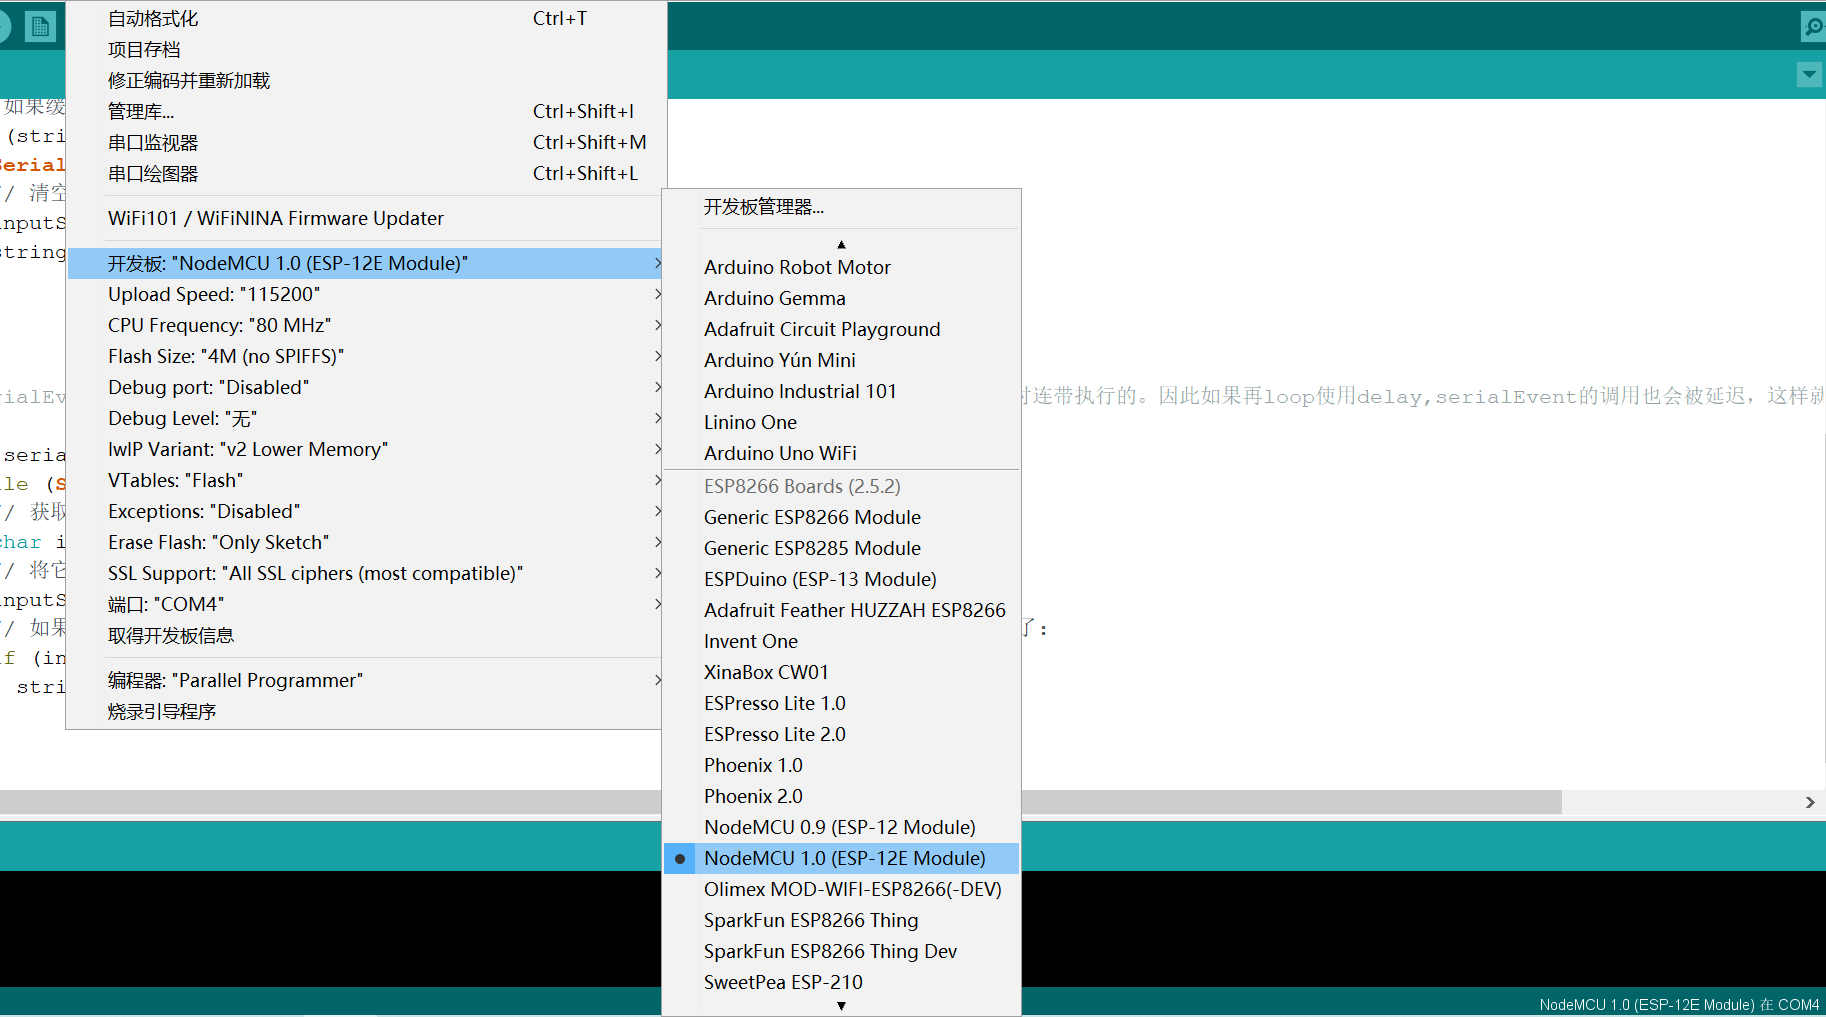
3、选择NodeMCU 1.0作为开发板
三、运行示例程序
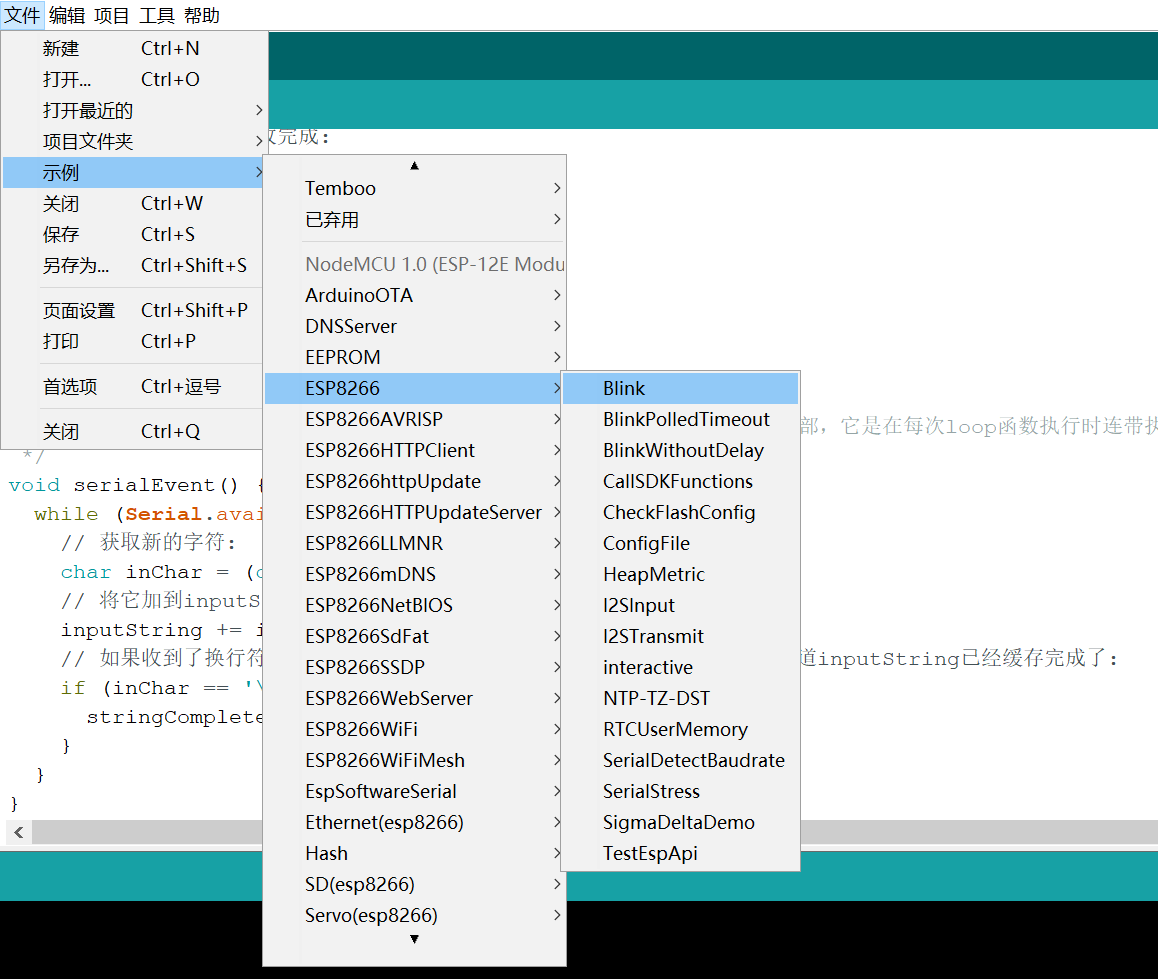
示例1
点击示例->ESP8266->Blink
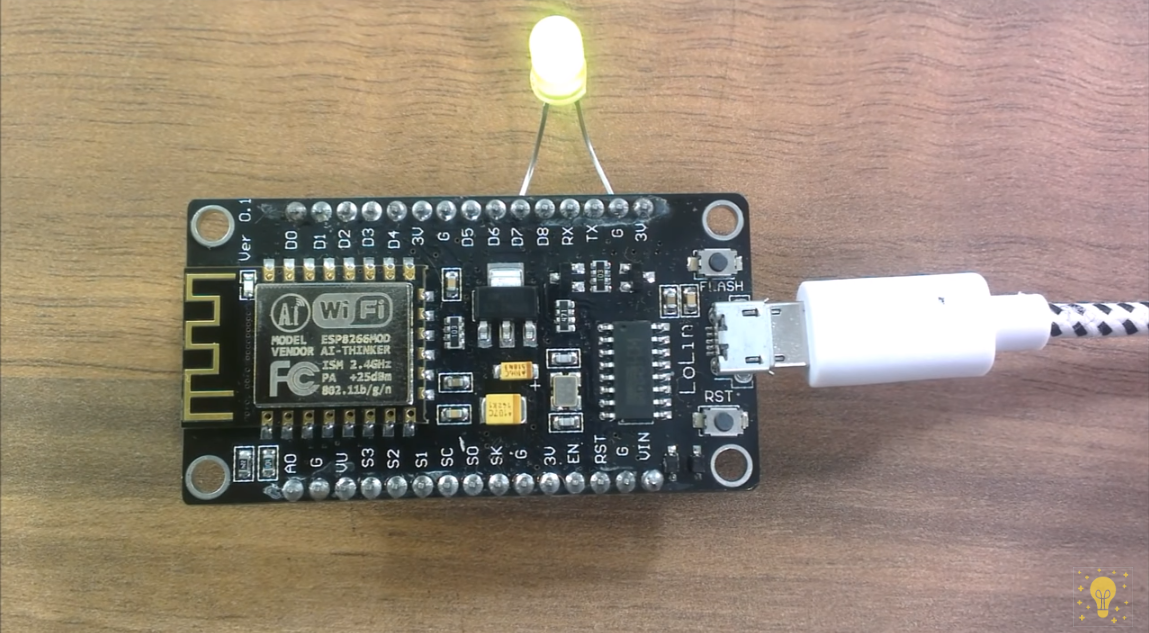
使用D7引脚,
void setup() {
  pinMode(D7, OUTPUT);     // Initialize the LED_BUILTIN pin as an output
}

// the loop function runs over and over again forever
void loop() {
  digitalWrite(D7, LOW);   // Turn the LED on (Note that LOW is the voltage level
  // but actually the LED is on; this is because
  // it is active low on the ESP-01)
  delay(1000);                      // Wait for a second
  digitalWrite(D7, HIGH);  // Turn the LED off by making the voltage HIGH
  delay(2000);                      // Wait for two seconds (to demonstrate the active low LED)
}
在D7和3V之间一个LED灯,就能观察到周期性闪烁!!
示例二
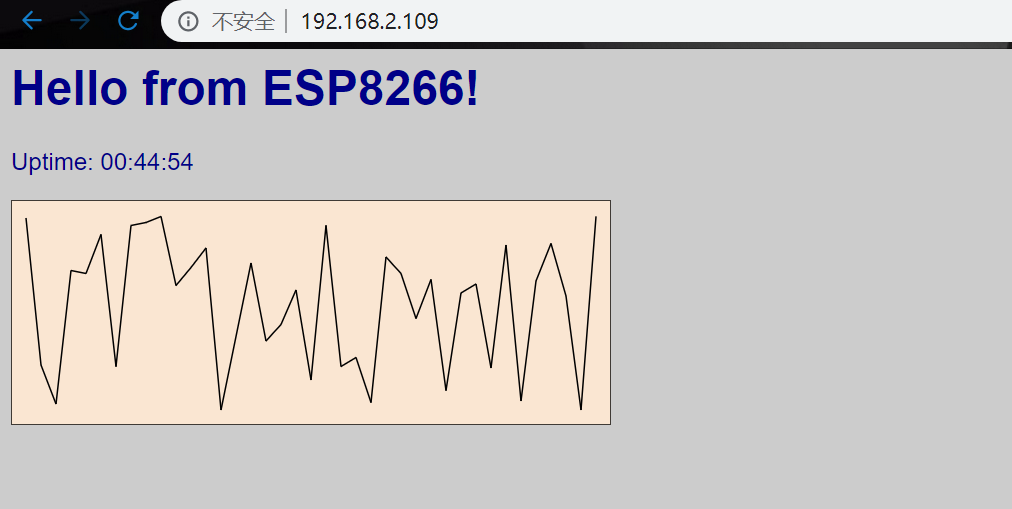
可以试试ESP8266WebServer下的AdvancedWebServer,这是一个Web服务器,可以显示由MCU构建的SVG图像。
需要修改ssid和password变量为自家的wifi的参数。
烧写方式和ESP8266普通的烧写方式是一样的,GPIO0拉低进入烧写模式,给板子复位过后选择下载程序,等下载完毕之后就可以运行了,其实这里有个bug,下载完成之后可以不用拉高GPIO0就会直接运行刚刚下载的程序了。
运行程序之后会打印8266的IP:
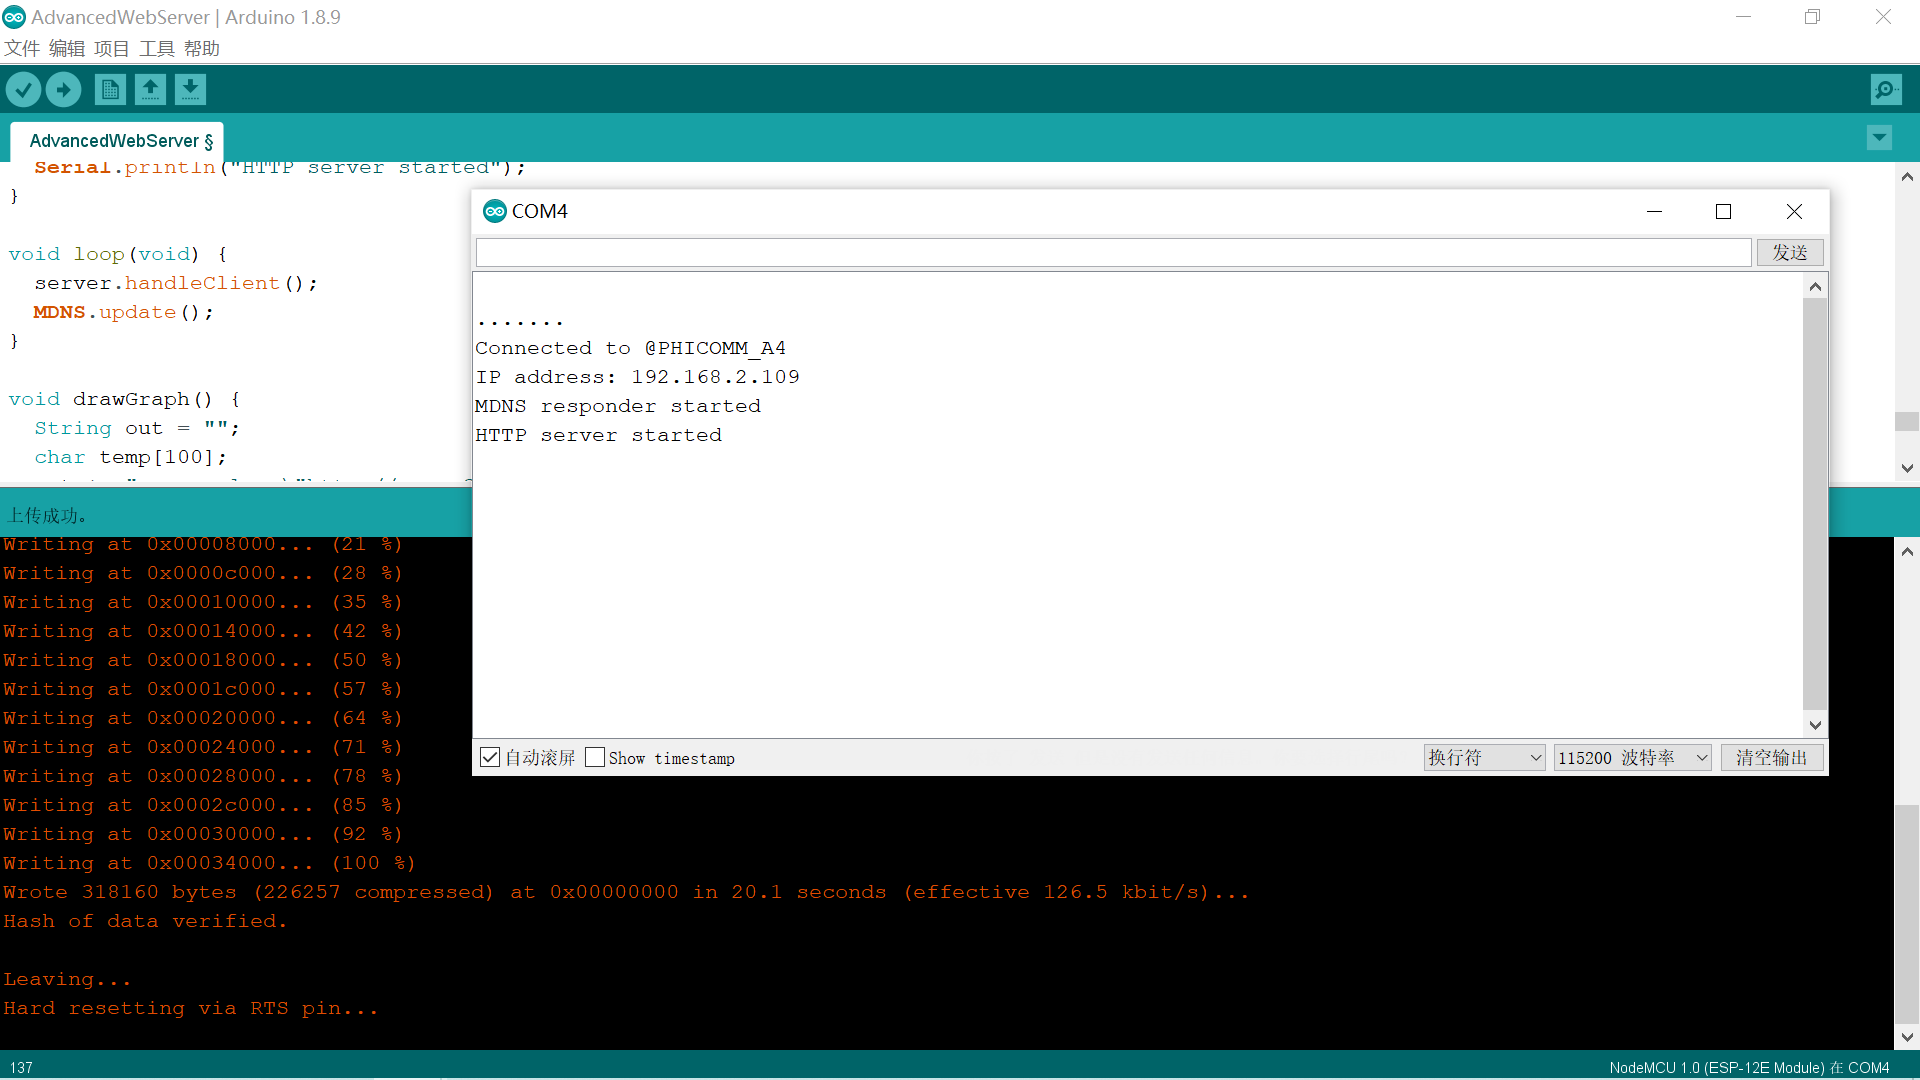
我们只需要用浏览器打开这个IP就可以看到8266输出的内容了。
参考链接:
1. https://zhidao.baidu.com/question/1926852602029293587.html
2. https://www.cnblogs.com/katachi/p/8468772.html

 浙公网安备 33010602011771号