HTML5+CSS3响应式设计(二)
上一节传送门《HTML5+CSS3响应式设计(一)》
设置 viewport meta标签后,任何浏览器都不再缩放页面了,这一节我们可以针对不同视口
来修正设计效果。
一、我们用一个ipad(1024*768)来说明这一点
上一节中我们的页面是960px宽度,我们ipad如果是横屏显示1024px,页面显示很正常。
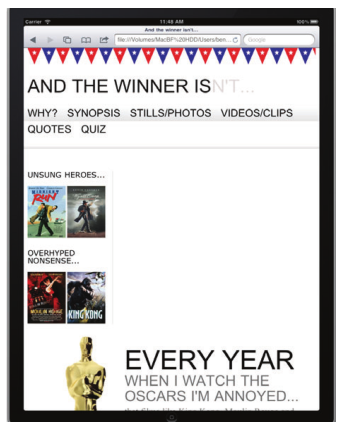
如果是竖屏显示768px,页面会被裁剪。
下面我们在样式表中增加媒体查询样式:
1 @media screen and (max-width: 768px) {
2     #wrapper {
3       width: 768px;
4     }
5     #header,#footer,#navigation {
6         width: 748px;
7     }
8 }
媒体查询针对视口宽度不大于 768 像素的情况,重新调整了外壳、头部、页脚以及导航
等页面元素的宽度。

添加上面的媒体查询后,虽然里面并不好看,但是好歹页面没有被裁减,整个页面信息都能看到!
同样可以采用该方法来调整一下局部:
 1 @media screen and (max-width: 768px) {
 2   #wrapper {
 3     width: 768px;
 4   }
 5   #header,#footer,#navigation {
 6     width: 748px;
 7   }
 8   #content,#sidebar {
 9      padding-right: 10px;
10     padding-left: 10px;
11     width: 728px;
12   }
13 }
二、响应式设计中应该让内容始终优先显示
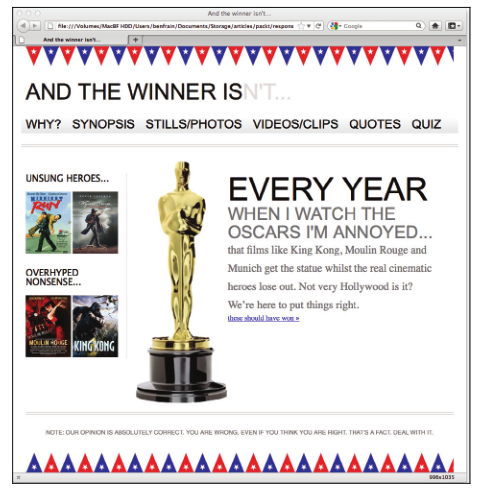
再来看下之前的界面:

为了便于之后的理解,也贴出页面结构的代码:
 1 <body>
 2     <div id="wrapper">
 3         <!-- the header and navigation -->
 4         <div id="header">
 5             <div id="navigation">
 6                 <ul>
 7                     <li><a href="#">navigation1</a></li>
 8                     <li><a href="#">navigation2</a></li>
 9                 </ul>
10             </div>
11         </div>
12         <!-- the sidebar -->
13         <div id="sidebar">
14             <p>here is the sidebar</p>
15         </div>
16         <!-- the content -->
17         <div id="content">
18             <p>here is the content</p>
19         </div>
20         <!-- the footer -->
21         <div id="footer">
22             <p>Here is the footer</p>
23         </div>
24     </div>
25 </body>
css如下:
 1     #wrapper {
 2         margin-right: auto;
 3         margin-left: auto;
 4         width: 960px;
 5     }
 6
 7     #header {
 8         margin-right: 10px;
 9         margin-left: 10px;
10         width: 940px;
11         background-color: #779307;
12     }
13
14     #navigation ul li {
15         display: inline-block;
16     }
17
18     #sidebar {
19         margin-right: 10px;
20         margin-left: 10px;
21         float: left;
22         background-color: #fe9c00;
23         width: 220px;
24     }
25
26     #content {
27         margin-right: 10px;
28         float: right;
29         margin-left: 10px;
30         width: 700px;
31         background-color: #dedede;
32     }
33
34     #footer {
35         margin-right: 10px;
36         margin-left: 10px;
37         clear: both;
38         background-color: #663300;
39         width: 940px;
40     }
这里我们的侧边栏在正文之前,试想一下,在移动端显示时,难道我们会先显示侧边栏再显示正文吗?(侧边栏信息的重要性不及内容)
所以在移动端,我们会优先显示正文,将侧边栏放在正文后面显示。
基于此处考虑,我们将侧边栏与正文互换一个位置:
1 <div id="content">
2   <p>here is the content</p>
3 </div>
4 <div id="sidebar">
5   <p>here is the sidebar</p>
6 </div>
互换后,对大屏幕的显示并没有什么影响,因为我们的侧边栏与内容用的是 float:left 和 float:right 属性,但是在 iPad上,则变成了首先显示内容区,下面才是侧边栏。
现在显示顺序已经是比较合理了,我们可以对小屏的内容追加一些样式,让其看起来更加漂亮一点。
三、给小屏添加一些媒体样式
 1         @media screen and (max-width: 768px) {
 2             #wrapper,
 3             #header,
 4             #footer,
 5             #navigation {
 6                 width: 768px;
 7                 margin: 0px;
 8             }
 9             #logo {
10                 text-align: center;
11             }
12             #navigation {
13                 text-align: center;
14                 background-image: none;
15                 border-top-color: #bfbfbf;
16                 border-top-style: double;
17                 border-top-width: 4px;
18                 padding-top: 20px;
19             }
20             #navigation ul li a {
21                 background-color: #dedede;
22                 line-height: 60px;
23                 font-size: 40px;
24             }
25             #content,
26             #sidebar {
27                 margin-top: 20px;
28                 padding-right: 10px;
29                 padding-left: 10px;
30                 width: 728px;
31             }
32             .oscarMain {
33                 margin-right: 30px;
34                 margin-top: 0px;
35                 width: 150px;
36                 height: 394px;
37             }
38             #sidebar {
39                 border-right: none;
40                 border-top: 2px solid #e8e8e8;
41                 padding-top: 20px;
42                 margin-bottom: 20px;
43             }
44             .sideBlock {
45                 width: 46%;
46                 float: left;
47             }
48             .overHyped {
49                 margin-top: 0px;
50                 margin-left: 50px;
51             }
52         }
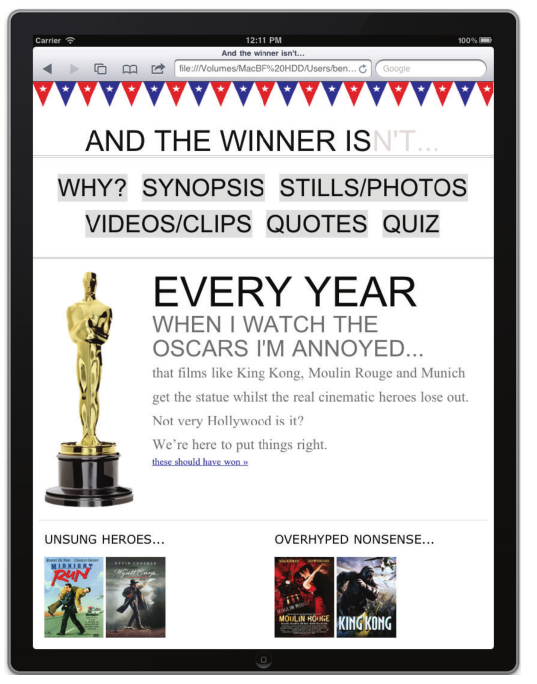
最终效果如下:

看上去很赞,但不要高兴太早,接下来就是见证无奈的时刻。

媒体查询尽其所能,根据设备特性应用了对应的样式。
但问题是,现有的媒体查询只覆盖了小范围的视口。视口宽度小于 768 像素的设备都将
看到内容被剪切,而视口介于 768 像素到 960 像素之间的设备,则会使用未受媒体查询
样式影响的原有样式,结果我们已经知道了,一旦视口宽度小于 960 像素,页面就无法
匹配
如果针对已知的特定访问设备,可以单独使用媒体查询来制作理想的设计效果,我们已
经见过专门适配 iPad 有多简单。但是这种策略有严重的缺陷,换句话说,它不能适应未
来的变化。
我们的设计应该在突变之前保持灵动。要做到这点,需要将呆板的固定布局修改成灵活的流式布局。


