[Python自学] Nginx+uWSGI启动django项目
一、uWSGI命令运行Django项目
1.Django配置
要让所有IP都能访问,需要配置ALLOWED_HOST:
# settings

ALLOWED_HOSTS = ["*"]
2.使用uWSGI启动django应用(踩坑)
在/root/admin_demo目录(django项目为admin_demo,放在/root下)下执行命令:
(venv_fb) [root@centos-venv-fb admin_demo]# uwsgi --http :8001 --static-map /static=/root/admin_demo/static --module admin_demo.wsgi
--http表示使用http协议。
:8001表示监听端口。
--module表示django项目中的wsgi.py模块。
--static-map表示静态资源请求,映射到实际的目录。否则无法返回静态资源。(坑)
3.uWSGI热加载
在uwsgi命令中使用--py-autoreload=1参数来开启热加载:
(venv_fb) [root@centos-venv-fb admin_demo]# uwsgi --http :8001 --static-map /static=/root/admin_demo/static --module admin_demo.wsgi --py-autoreload=1
当开启了热加载后,我们如果实时修改了后端python代码,uwsgi会自动帮我们加载,服务不会停。
二、uWSGI配置文件运行项目
1.创建一个uwsgi.ini配置文件
touch /etc/uwsgi.ini
写入如下配置信息:
[uwsgi]
# Django-related settings
# the base directory (full path)
chdir = /root/admin_demo  # 指定django项目的绝对路径
# Django's wsgi file
module = admin_demo.wsgi  # wsgi.py文件,这里写相对路径,chdir为相对路径
# the virtualenv (full path)
home = /root/.virtualenvs/venv_fb  # python虚拟环境home目录(绝对路径),使用cdvirtualenv来查看
# process-related settings
# master
master = true
# maximum number of worker processes
processes = 4  # 指定uwsgi启动的进程数,视机器配置来定
# the socket (use the full path to be safe
# socket = 0.0.0.0:8000  # uwsgi启动一个socket连接,当使用nginx+uwsgi的时候,使用socket参数
http = 0.0.0.0:8000  # uwsgi启动一个socket连接,当不使用nginx,直接使用uwsgi时,使用该参数
# ... with appropriate permissions - may be needed
# chmod-socket    = 664
# clear environment on exit
vacuum = true
2.使用uwsgi.ini配置文件启动
将uwsgi.ini配置文件拷贝到django项目目录下:
(venv_fb) [root@centos-venv-fb etc]# cp /etc/uwsgi.ini /root/admin_demo/
启动项目:
(venv_fb) [root@centos-venv-fb admin_demo]# uwsgi --ini uwsgi.ini
[uWSGI] getting INI configuration from uwsgi.ini
*** Starting uWSGI 2.0.18 (64bit) on [Thu Jan 30 21:45:19 2020] ***
compiled with version: 4.8.5 20150623 (Red Hat 4.8.5-39) on 30 January 2020 10:24:09
os: Linux-3.10.0-1062.9.1.el7.x86_64 #1 SMP Fri Dec 6 15:49:49 UTC 2019
nodename: centos-venv-fb
machine: x86_64
clock source: unix
pcre jit disabled
detected number of CPU cores: 4
current working directory: /root/admin_demo
detected binary path: /root/.virtualenvs/venv_fb/bin/uwsgi
uWSGI running as root, you can use --uid/--gid/--chroot options
*** WARNING: you are running uWSGI as root !!! (use the --uid flag) ***
chdir() to /root/admin_demo
your processes number limit is 14988
your memory page size is 4096 bytes
detected max file descriptor number: 1024
lock engine: pthread robust mutexes
thunder lock: disabled (you can enable it with --thunder-lock)
uWSGI http bound on 0.0.0.0:8000 fd 4
uwsgi socket 0 bound to TCP address 127.0.0.1:44810 (port auto-assigned) fd 3
uWSGI running as root, you can use --uid/--gid/--chroot options
*** WARNING: you are running uWSGI as root !!! (use the --uid flag) ***
Python version: 3.7.0 (default, Jun 28 2018, 13:15:42)  [GCC 7.2.0]
Set PythonHome to /root/.virtualenvs/venv_fb
*** Python threads support is disabled. You can enable it with --enable-threads ***
Python main interpreter initialized at 0x209b820
uWSGI running as root, you can use --uid/--gid/--chroot options
*** WARNING: you are running uWSGI as root !!! (use the --uid flag) ***
your server socket listen backlog is limited to 100 connections
your mercy for graceful operations on workers is 60 seconds
mapped 364520 bytes (355 KB) for 4 cores
*** Operational MODE: preforking ***
/root/admin_demo/static/
WSGI app 0 (mountpoint='') ready in 1 seconds on interpreter 0x209b820 pid: 3382 (default app)
uWSGI running as root, you can use --uid/--gid/--chroot options
*** WARNING: you are running uWSGI as root !!! (use the --uid flag) ***
*** uWSGI is running in multiple interpreter mode ***
spawned uWSGI master process (pid: 3382)
spawned uWSGI worker 1 (pid: 3383, cores: 1)
spawned uWSGI worker 2 (pid: 3384, cores: 1)
spawned uWSGI worker 3 (pid: 3385, cores: 1)
spawned uWSGI worker 4 (pid: 3386, cores: 1)
spawned uWSGI http 1 (pid: 3387)
解决uwsgi找不到静态文件的问题,在uwsgi.ini配置文件中加上:
static-map = /static=/root/admin_demo/static
让uwsgi在后台运行,在uwsgi.ini配置文件中加上:
daemonize = yes
再来运行:
(venv_fb) [root@centos-venv-fb admin_demo]# uwsgi --ini uwsgi.ini
[uWSGI] getting INI configuration from uwsgi.ini
[uwsgi-static] added mapping for /static => /root/admin_demo/static
查看进程信息:
(venv_fb) [root@centos-venv-fb admin_demo]# ps -ef | grep uwsgi
root       3405      1  0 21:50 ?        00:00:00 uwsgi --ini uwsgi.ini
root       3406   3405  0 21:50 ?        00:00:00 uwsgi --ini uwsgi.ini
root       3407   3405  0 21:50 ?        00:00:00 uwsgi --ini uwsgi.ini
root       3408   3405  0 21:50 ?        00:00:00 uwsgi --ini uwsgi.ini
root       3409   3405  0 21:50 ?        00:00:00 uwsgi --ini uwsgi.ini
root       3410   3405  0 21:50 ?        00:00:00 uwsgi --ini uwsgi.ini
root       3412   2561  0 21:51 pts/3    00:00:00 grep --color=auto uwsgi
三、Nginx+uWSGI
在前面的一二节中,我们已经可以使用uWSGI来启动Django项目。
下面我们配置Nginx作为反向代理服务器。
1.准备工作
1)安装nginx服务器
2)确认uWSGI服务监听端口
192.168.1.191:8000
3)去除uWSGI的一些配置
由于静态资源请求,我们可以直接让Nginx来处理,所以可以将uWSGI中的静态资源目录映射去除。
# 去除
static-map = /static=/root/admin_demo/static
如果使用supervisor来管理uwsgi进程,则将daemonize配置项也去除:
# 去除
daemonize = yes
4)修改uwsgi的重要配置
[uwsgi]
# Django-related settings
# the base directory (full path)
chdir = /root/admin_demo
# Django's wsgi file
module = admin_demo.wsgi
# the virtualenv (full path)
home = /root/.virtualenvs/venv_fb
# process-related settings
# master
master = true
# maximum number of worker processes
processes = 4
# the socket (use the full path to be safe
socket = 0.0.0.0:8000
#http = 0.0.0.0:8000
# ... with appropriate permissions - may be needed
# chmod-socket    = 664
# clear environment on exit
vacuum = true
#static-map = /static=/root/admin_demo/static
#daemonize=yes
非常重要:当我们要使用nginx+uwsgi时,需要使用socket配置项。而单独使用uwsgi时,则使用http配置项。
2.配置Nginx(踩坑)
1)配置nginx
Nginx安装在uwsgi同服务器。IP地址都为192.168.1.191。
Nginx安装目录为/opt/nginx。
vi /opt/nginx/conf/nginx.conf
修改其中部分配置:
http {
    include       mime.types;
    default_type  application/octet-stream;

    #log_format  main  '$remote_addr - $remote_user [$time_local] "$request" '
    #                  '$status $body_bytes_sent "$http_referer" '
    #                  '"$http_user_agent" "$http_x_forwarded_for"';

    #access_log  logs/access.log  main;
    #access_log  "pipe:rollback logs/access_log interval=1d baknum=7 maxsize=2G"  main;

    sendfile        on;
    #tcp_nopush     on;

    #keepalive_timeout  0;
    keepalive_timeout  65;

    #gzip  on;

    server {
        listen       80;  # nginx监听端口,即对外暴露端口
        server_name  192.168.1.191;  # 本机IP

        #charset koi8-r;

        #access_log  logs/host.access.log  main;
        #access_log  "pipe:rollback logs/host.access_log interval=1d baknum=7 maxsize=2G"  main;

        location / {  # 当我们访问192.168.1.191:80时,请求会转给uwsgi监听的8000端口
            include /opt/nginx/conf/uwsgi_params;  # 包含uwsgi_params中的配置(固定写)
            uwsgi_pass 192.168.1.191:8000;  # uwsgi服务器绑定地址和端口
        }


        location /static/ {
            alias /root/admin_demo/static/;  # 注意,这里使用nginx直接提供静态资源响应(uwsgi只做动态资源响应)
        }
    }  # server end
}  http end
3)解决静态资源访问403错误
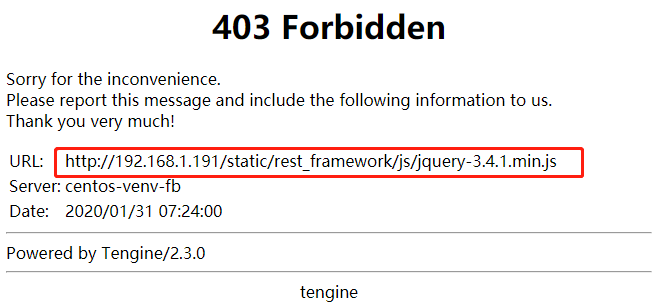
我们访问页面时,动态资源能够正常拿到,但静态资源,例如css、js、图片等资源都无法请求。
这是因为在Nginx的配置文件中,虽然我们配置了/static的访问路径:
location /static/ {
    alias /root/admin_demo/static/;
}
但是Nginx启动时使用的用户叫nobody,可以查看进程看到:
[root@centos-venv-fb admin_demo]# ps -ef | grep nginx
root       8255      1  0 08:08 ?        00:00:00 nginx: master process /opt/nginx/sbin/nginx -c /opt/nginx/conf/nginx.conf
nobody     8256   8255  0 08:08 ?        00:00:00 nginx: worker process
root       8258   7718  0 08:08 pts/2    00:00:00 grep --color=auto nginx
而nobody对静态资源文件没有访问权限。所以,我们在nginx的配置文件中将user修改为root即可:
#user  nobody;
user  root;
关于默认的nobody用户,可以参考:http://alisa365.com/linux/104.html 中的说明。
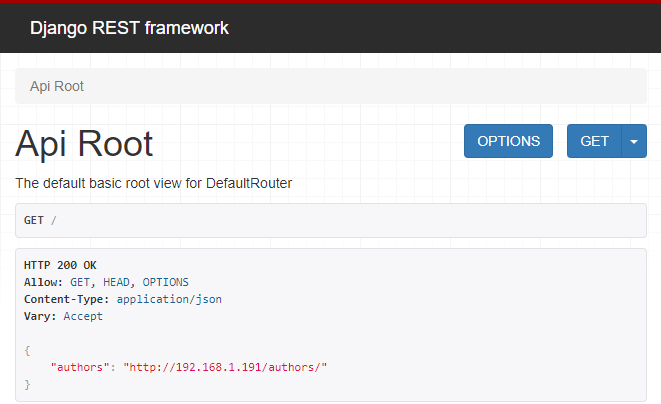
重新载入或重新启动Nginx后,可以正常访问静态资源:
systemctl restart nginx
systemctl reload nginx
☿
