[Linux系统] (8)Nginx
一、高并发基础架构
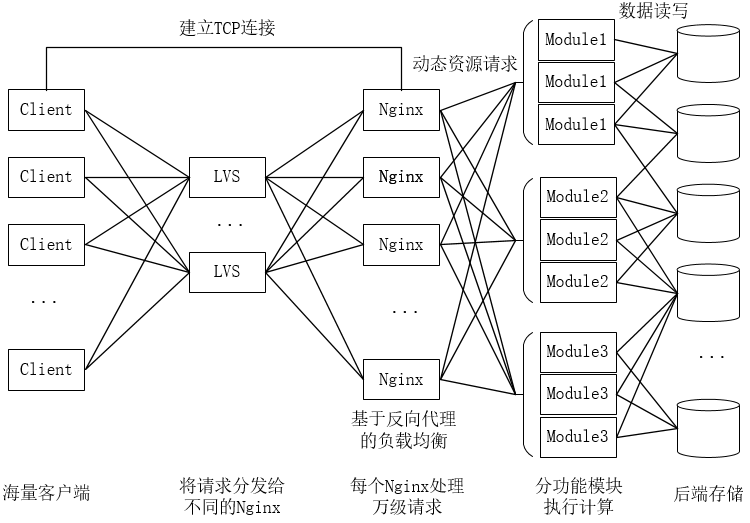
简要流程:
1.客户端发请求。
2.又LVS等四层负载均衡系统将请求转发给不同的Nginx服务器。
3.Nginx与客户端建立TCP连接,拿到请求后分析URI,然后将其转发给对应的功能模块服务(Tomcat容器)。
4.等待后端功能模块服务的响应。
5.功能模块进行计算,并从后端存储中获取数据,并返回。
6.Nginx收到响应后返回给客户端。
二、Nginx和Tengine
Nginx(engin x)是一个高性能的HTTP和反向代理服务器,也是一个IMAP/POP3/SMTP代理服务器。
主要以稳定性、丰富的功能集、低系统资源消耗而闻名。
官方测试nginx能够支撑5万并发连接,并且CPU、内存等资源消耗非常低,运行稳定。
什么是反向代理(通俗理解)?
正向代理:是代用户访问远程资源。 例如我们要访问国外的网站,我们可以通过位于香港等地的代理服务器来帮我们从国外获取资源,但我们请求的目的还是真正的国外服务器地址。国外服务器看到的请求方是代理服务器。
反向代理:就是帮后端资源进行代理,也就是我们看到的目标服务器就是该反向代理服务器,而看不到真正提供资源的服务器。我们看到的资源地址是反向代理服务器。
Nginx相对apache的优点:
1.nginx是轻量级,同样web服务,比apache占用更少的内存及资源。
2.抗并发,nginx是异步非阻塞的,而apache是阻塞型的,在高并发下nginx保持低资源消耗,高性能
3.高度模块化的设计,编写模块相对简单
4.社区活跃,各种高性能模块出品迅速
5.配置简洁
apache的优点:
1.rewrite强大
2.模块超多
3.bug少
最核心的不同:
apache是同步多进程模型(select),一个链接对应一个进程;nginx是异步(epoll),多个链接(万级别)对应一个进程。
nginx不会浪费时间在进程的切换上,所以效率很高。
三、安装Nginx(Tengine)
1.安装依赖
yum install gcc pcre-devel openssl-devel -y
2.下载tengine包,并解压
cd ~
wget http://tengine.taobao.org/download/tengine-2.3.0.tar.gz
tar zxf tengine-2.3.0.tar.gz
3.安装tengine
cd tengine-2.3.0
./configure --prefix=/opt/nginx
**企业标准安装:
./configure
--prefix=/usr
--sbin-path=/usr/sbin/nginx
--conf-path=/etc/nginx/nginx.conf
--error-log-path=/var/log/nginx/error.log
--http-log-path=/var/log/nginx/access.log
--pid-path=/var/run/nginx/nginx.pid
--lock-path=/var/lock/nginx.lock
--user=nginx
--group=nginx
--with-http_ssl_module
--with-http_flv_module
--with-http_stub_status_module
--with-http_gzip_static_module
--http-client-body-temp-path=/var/tmp/nginx/client/
--http-proxy-temp-path=/var/tmp/nginx/proxy/
--http-fastcgi-temp-path=/var/tmp/nginx/fcgi/
--http-uwsgi-temp-path=/var/tmp/nginx/uwsgi
--http-scgi-temp-path=/var/tmp/nginx/scgi
--with-pcre
make && make install
4.设置nginx为系统服务
添加nginx.service文件:
vi /usr/lib/systemd/system/nginx.service

[Unit]
Description=The nginx HTTP and reverse proxy server
After=syslog.target network.target remote-fs.target nss-lookup.target

[Service]
Type=forking
PIDFile=/opt/nginx/logs/nginx.pid
ExecStartPre=/opt/nginx/sbin/nginx -t
ExecStart=/opt/nginx/sbin/nginx -c /opt/nginx/conf/nginx.conf
ExecReload=/bin/kill -s HUP $MAINPID
ExecStop=/bin/kill -s QUIT $MAINPID
PrivateTmp=true

[Install]
WantedBy=multi-user.target
注意,所有path的部分都要修改为实际安装nginx的目录。
使用systemctl启动nginx:
systemctl start nginx.service
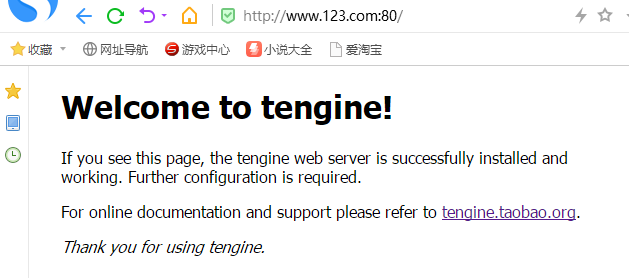
使用浏览器访问(默认监听80端口,可以在nginx.conf中修改):
其他服务操作:
# 设置开机启动
systemctl enable nginx.service
# 停止服务
systemctl stop nginx.service
# 重启服务
systemctl restart nginx.service
# 取消开机启动
systemctl disable nginx.service
# 查看服务运行状态
systemctl status nginx.service
查看所有已启动服务:
systemctl list-units --type=service
查看开机启动服务列表:
[root@real-server-1 conf]# systemctl list-unit-files

UNIT FILE                                     STATE
proc-sys-fs-binfmt_misc.automount             static
dev-hugepages.mount                           static
dev-mqueue.mount                              static
proc-sys-fs-binfmt_misc.mount                 static
sys-fs-fuse-connections.mount                 static
sys-kernel-config.mount                       static
sys-kernel-debug.mount                        static
tmp.mount                                     disabled
brandbot.path                                 enabled
systemd-ask-password-console.path             static
systemd-ask-password-plymouth.path            static
systemd-ask-password-wall.path                static
session-1.scope                               static
arp-ethers.service                            disabled
auditd.service                                enabled
autovt@.service                               enabled
blk-availability.service                      disabled
brandbot.service                              static
chrony-dnssrv@.service                        static
chrony-wait.service                           disabled
chronyd.service                               enabled
console-getty.service                         disabled
console-shell.service                         disabled
container-getty@.service                      static
cpupower.service                              disabled
crond.service                                 enabled
dbus-org.freedesktop.hostname1.service        static
dbus-org.freedesktop.import1.service          static
dbus-org.freedesktop.locale1.service          static
dbus-org.freedesktop.login1.service           static
dbus-org.freedesktop.machine1.service         static
dbus-org.freedesktop.timedate1.service        static
dbus.service                                  static
debug-shell.service                           disabled
dm-event.service                              static
dnsmasq.service                               disabled
四、配置Nginx(Tengine)
1.修改nginx配置文件
[root@real-server-1 conf]# vi /opt/nginx/conf/nginx.conf

      1
      # 虽然user nobody是注释掉的,但仍然在使用,当然也可以修改为任意用户。子进程worker是nobody用户所有。父进程是root用户的。
      2 #user  nobody;
      # worker_processes 是真正做事的进程的数量,一般为物理核心的1-2倍
      3 worker_processes  1;
      4
      # 配置日志
      5 #error_log  logs/error.log;
      6 #error_log  logs/error.log  notice;
      7 #error_log  logs/error.log  info;
      8 #error_log  "pipe:rollback logs/error_log interval=1d baknum=7 maxsize=2G";
      9
     10 #pid        logs/nginx.pid;
     11
     12
     # worker_connection很重要,除了修改此处的数字,还需要修改操作系统内核允许进程所能操作文件描述符的数量。
     # 使用ulimit -a可以查看当前内核允许的进程操作文件描述符的数量(open files)。
     # 操作系统所能操作文件描述符的总数一般和内存成正比(例如1GB对应10W个文件描述符)。
     # 我们在考虑worker_connnection时,除了考虑客户端连接数,还要考虑nginx从后端请求数据时的socket,所以需要配置得更大一些。
     # 使用ulimit -SHn 65535可以修改内核限制,并且这里也修改为对应的数量。
     13 events {
     14     #worker_connections  1024;
              worker_connections  65535;
     15 }
     16
     17 # load modules compiled as Dynamic Shared Object (DSO)
     18 #
     19 #dso {
     20 #    load ngx_http_fastcgi_module.so;
     21 #    load ngx_http_rewrite_module.so;
     22 #}
     23
   # http区域块,定义nginx的核心web功能
     24 http {
     25     include       mime.types;
     26     default_type  application/octet-stream;
     27
     # 日志记录的格式化,控制日志怎么记录,做日志分析的时候可以参照这里的规范(重要)
     # 有些公司使用nginx做小数据的采集,就可以直接使用日志来记录,例如传感器数据,直接访问nginx,将小数据传递过来,写进日志。
     28     #log_format  main  '$remote_addr - $remote_user [$time_local] "$request" '
     29     #                  '$status $body_bytes_sent "$http_referer" '
     30     #                  '"$http_user_agent" "$http_x_forwarded_for"';
     31
     32     #access_log  logs/access.log  main;
     33     #access_log  "pipe:rollback logs/access_log interval=1d baknum=7 maxsize=2G"  main;
     34
     # (重要)零拷贝,例如nginx读取文件内容,然后返回给客户端的过程。首先调内核,让内核读取文件,读到的内容放在内核的缓冲区。
     # 然后将内核缓冲区的内容拷贝到用户态buffer中。当要从socket发送给客户端时,又要从用户态buffer将内容拷贝到socket在内核的缓冲区。
     # 这样就要进行两次内核态和用户态之间的数据拷贝。
     # 零拷贝的意思就是,nginx调内核读取文件的时候,直接告诉内核文件和socker(也就是输入和输出),然后内核读取数据后,直接将数据用socket发送给客户端。
     # 这就减少了2次拷贝的时间,效率大大提高。
     35     sendfile        on;
     # 就是socket buffer是否写满才发送,类似于执行不执行flush。
     36     #tcp_nopush     on;
     37
     # http1.1扩充了一个字段叫keepalive,就是tcp链接保持长连接多久才断开。做实验我们为了看效果,设置为0。正式环境应该配一个合适的值。
     38     keepalive_timeout  0;
     39     #keepalive_timeout  65;
     40
     # 返回时是否压缩数据,减少IO和带宽消耗。可以提供更多的请求响应。
     41     #gzip  on;
     42
     # 其中一个虚拟服务器(nginx可以支持多个虚拟服务器,他可以用请求头中的Host域名来区分,通过浏览器F12查看)
     # 也就是说如果DNS上有两个域名指向同一个IP地址,nginx可以通过两个域名来提供2个虚拟服务,都使用80端口
     43     server {
     # 监听的端口是80
     44         listen       80;
     # 虚拟服务器名,就是域名。例如DNS中有两个域名,www.123.com,www.234.com,这里填写其中一个。
     45         server_name  localhost;  # www.123.com
     46
     47         #charset koi8-r;
     48
     49         #access_log  logs/host.access.log  main;
     50         #access_log  "pipe:rollback logs/host.access_log interval=1d baknum=7 maxsize=2G"  main;
     51
     # 访问的根,也就是http://www.123.com/
     52         location / {
     # root是相对路径,html就是我们安装nginx的地方/opt/nginx/html目录
     53             root   html;
     # index用来定义默认根页面
     54             index  index.html index.htm;
     55         }
     56
     57         #error_page  404              /404.html;
     58
     59         # redirect server error pages to the static page /50x.html
     60         #
     61         error_page   500 502 503 504  /50x.html;
     62         location = /50x.html {
     63             root   html;
     64         }
     65
     66         # proxy the PHP scripts to Apache listening on 127.0.0.1:80
     67         #
     68         #location ~ \.php$ {
     69         #    proxy_pass   http://127.0.0.1;
     70         #}
     71
     72         # pass the PHP scripts to FastCGI server listening on 127.0.0.1:9000
     73         #
     74         #location ~ \.php$ {
     75         #    root           html;
     76         #    fastcgi_pass   127.0.0.1:9000;
     77         #    fastcgi_index  index.php;
     78         #    fastcgi_param  SCRIPT_FILENAME  /scripts$fastcgi_script_name;
     79         #    include        fastcgi_params;
     80         #}
     81
     82         # deny access to .htaccess files, if Apache's document root
     83         # concurs with nginx's one
     84         #
     85         #location ~ /\.ht {
     86         #    deny  all;
     87         #}
     88     }   # server的end
    89 }  # http的end
其中Location是非常重要的,我们可以参看官方文档中Location的语法:
http://tengine.taobao.org/nginx_docs/cn/docs/http/ngx_http_core_module.html#location
可以看到以下内容:
让我们用一个例子解释上面的说法:

location = / {
    [ configuration A ]
}

location / {
    [ configuration B ]
}

location /documents/ {
    [ configuration C ]
}

location ^~ /images/ {
    [ configuration D ]
}

location ~* \.(gif|jpg|jpeg)$ {
    [ configuration E ]
}
请求“/”匹配配置A, 请求“/index.html”匹配配置B, 请求“/documents/document.html”匹配配置C, 请求“/images/1.gif”匹配配置D, 请求“/documents/1.jpg”匹配配置E。
符号解释:
"=":精确匹配
"/dir/":当前路径及子路径都匹配,最大前缀匹配,但注意,是用这个字段去和用户请求的URI匹配,而不是反过来。
"~":后面用正则表达式。区分大小写
"~*":后面用正则表达式。不区分大小写
"^~":阻断,匹配到这里就不再进行正则匹配,例如上面的/images/1.gif,匹配到/images/,就不再匹配后面的".gif结尾"。
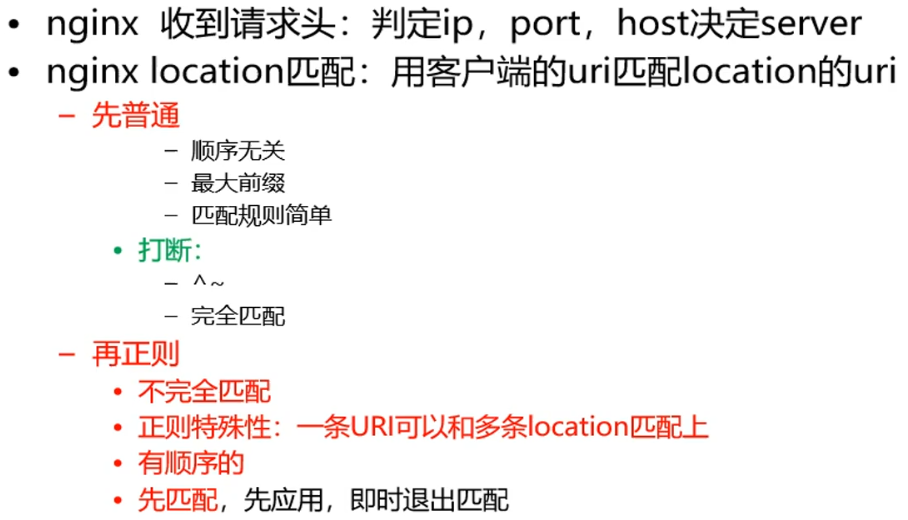
匹配规则:
他们有优先级关系: "=" > "^~" > "~ | ~*" > "/ | /dir/"
普通location之间是无匹配顺序的。而正则location之间是有顺序的,只要匹配到第一个就不匹配后面的。
如果匹配到^~项,后面的正则也不进行匹配。
普通location和正则location之间,先匹配普通的,再考虑是否匹配正则:
这里的考虑就是指“可能”,当普通location前使用了^~,则不匹配后面的正则。或者当普通location刚好匹配好(非最大前缀匹配),则也不匹配后面的正则。
如下图所示:
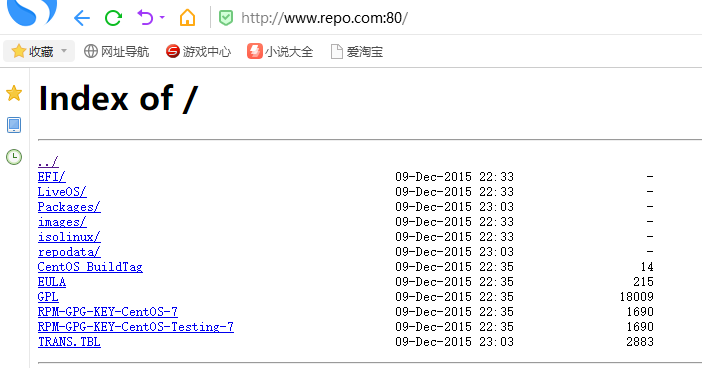
2.添加一个虚拟服务器(yum本地源)
# 这里添加一个虚拟服务器www.repo.com,将/mnt作为repo源,通过nginx发布
server {
    listen  80;
    server_name www.repo.com;
    location / {
        root /mnt;
        # autoindex就是将/mnt的文件列表展示出去
        autoindex on;
    }
}
这里的域名为www.repo.com,而访问index.html的域名为www.123.com,所以可以区分我们要访问哪个服务器。
配置完nginx.conf后,我们要重置nginx:
systemctl reload nginx.service
将光盘挂载在/mnt:
mount /dev/cdrom /mnt
在浏览器操作系统的hosts中添加响应的DNS映射:
#在windows的hosts中添加以下内容
192.168.1.201    real-server-1    www.123.com    www.repo.com
此时我们访问http://www.repo.com:80:
在访问http://www.123.com:80:
我们在浏览器的F12中查看一下两个域名访问时的host字段:
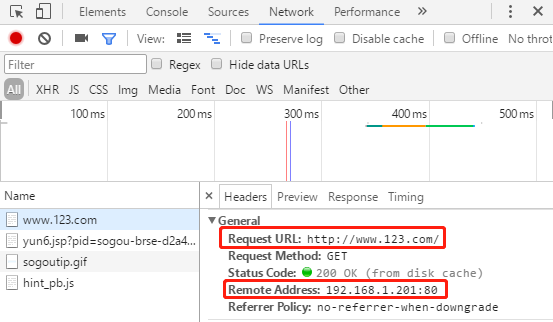
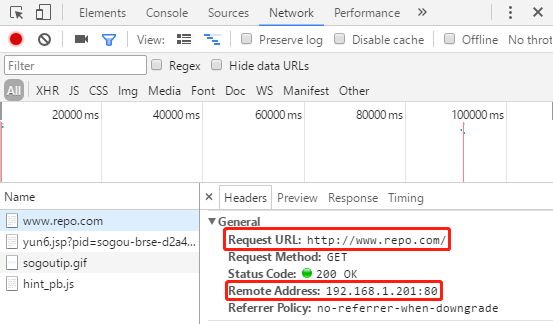
我们可以看到,两次请求的请求头中的Request URL分别是两个域名,Nginx就可以通过域名与配置文件的server_name匹配来区分我们要访问的服务,匹配到某个服务名后,再将域名后的URI(也就是"/"、"/search/"等)用location字段去匹配。
3.反向代理
在location中配置反向代理,将上面第一个server配置加上一个location做反向代理:
server {
        listen       8000;
        server_name  www.123.com;

        location / {
            root   html;
            index  index.html index.htm;
        }
        # 反向代理,访问192.168.1.202:80
        location /ooxx {
            proxy_pass http://192.168.1.202:80/;
        }
}
此时,我们访问www.123.com:80,就不是返回tengine的默认页面,而是会帮我们请求192.168.1.202:80的页面;

从结果可以看出,我们通过www.123.com:80/ooxx(也就是real-server-1 192.168.1.201)访问了real-server-2(192.168.1.202的服务),并返回给客户端。
示例:反向代理www.baidu.com:
server {
        listen       8000;
        server_name  www.123.com;

        location / {
            root   html;
            index  index.html index.htm;
        }
        # 反向代理,访问192.168.1.202:80
        location /ooxx {
            proxy_pass http://192.168.1.202:80/;
        }
        # 代理baidu首页
        location /baidu {
            proxy_pass https://www.baidu.com/;
        }
}
使用浏览器访问http://www.123.com/baidu:
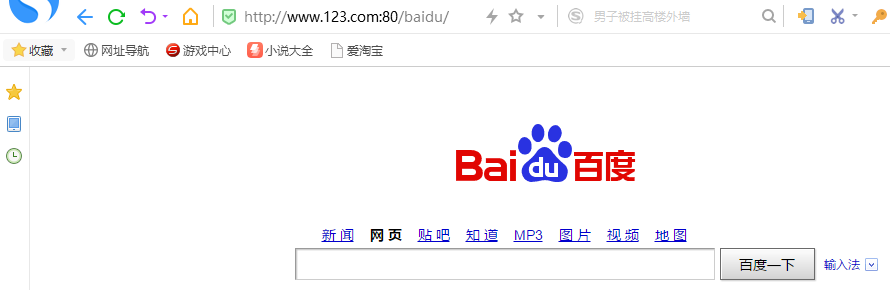
注意,这里的proxy_pass配置的是https://www.baidu.com。如果配置成http://www.baidu.com,则百度可能先返回页面跳转给浏览器,浏览器会直接用https://www.baidu.com去访问百度。所以这里一定要写成https协议。
我们使用代理后的百度进行搜索:
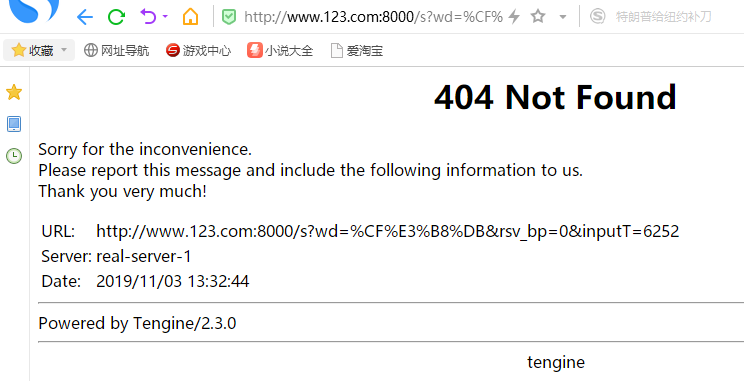
报错信息:找不到URL,主要关注后面的URI(s?wd=*****):
我们再添加一跳location:
server {
        listen       8000;
        server_name  www.123.com;

        location / {
            root   html;
            index  index.html index.htm;
        }
        # 反向代理,访问192.168.1.202:80
        location /ooxx {
            proxy_pass http://192.168.1.202:80/;
        }
        # 代理baidu首页
        location /baidu {
            proxy_pass https://www.baidu.com/;
        }
        # 匹配以/s开头的URI
        location ~* ^/s {
            proxy_pass https://www.baidu.com;
        }
}
注意:location /baidu和location ~* ^/s的proxy_pass最后一个带"/",一个不带"/",区别很大。
如果带"/"或"/xxx",则会直接使用其进行访问,例如www.baidu.com/xxx。
如果什么都不带,则会使用location的匹配到的URI来串接在后面进行访问,例如www.baidu.com/s?xxxxxxx(location ~* ^/s)。
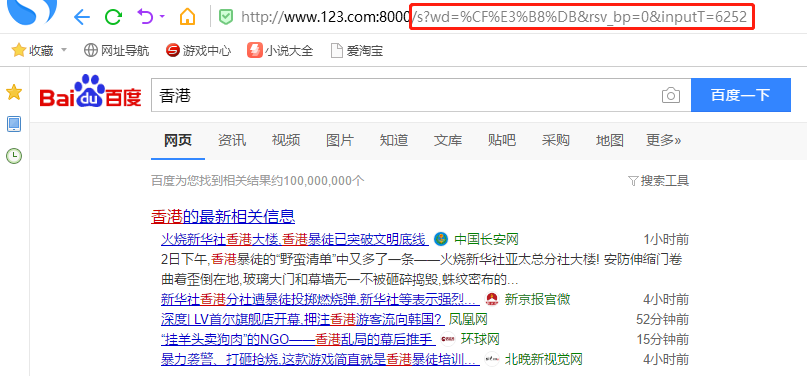
此时使用代理baidu搜索"香港":
4.负载均衡
在nginx配置文件中配置负载均衡:
# 在server前面定义一个upstream池
upstream leeoo {
        server 192.168.1.121:80;
        server 192.168.1.202;
}

# 然后在对应的location中,将目标服务器的域名或IP替换为leeoo
location /ooxx {
        proxy_pass http://leeoo/;
}
此时,当我们访问http://www.123.com:80/ooxx时,nginx会自动进行负载均衡,将轮询访问leeoo中的两台real server。
5.Session一致性问题
如果我们的后端服务器使用的是tomcat等容器,需要为用户保存Session。当Nginx将一个用户链接负载到不同的后端服务器时,我们需要保证他们能够使用同一个Session对用户进行验证,否则会出现让用户重复登录的问题;
1)首先,要保证集群中的服务器时间一致性。
2)使用专门管理Session的软件,或者使用memcache、Redis等内存数据库等来帮助Tomcat共享Session。
在192.168.1.199上安装memcached:
yum install memcached -y
使用以下命令启动:
memcached -d -m 128m -p 11211 -l 192.168.1.199 -u root -P /tmp/
-m是使用128M内存空间
-p是使用11211端口进行通信
-l是服务器地址
-u用户名
使用netstat查看memcached监听情况:
[root@lvs-server-1 etc]# netstat -natp | grep 11211
tcp        0      0 192.168.1.199:11211     0.0.0.0:*               LISTEN      1540/memcached
在192.168.1.202和192.168.1.121上安装JDK和Tomcat:
下载JDK和Tomcat:
apache-tomcat-7.0.96.tar.gz
jdk-7u80-linux-x64.rpm
安装JDK:
rpm -i jdk-7u80-linux-x64.rpm
配置环境变量:
vi /etc/profile

# 在最后添加
export JAVA_HOME=/usr/java/jdk1.7.0_80
export PATH=$PATH:$JAVA_HOME/bin

# 使其生效
source /etc/profile
运行jps命令,检查是否安装成功:
[root@real-server-2 etc]# jps
1793 Jps
解压Tomcat:
tar xf apache-tomcat-7.0.96.tar.gz
创建一个页面,让其打印Session:
cd ~/apache-tomcat-7.0.96/webapps/ROOT
cp index.jsp index.jsp.bak
vi index.jsp

from 192.168.1.202<br>Session: <%= session.getId()%>
启动Tomcat:
cd ~/apache-tomcat-7.0.96/bin
./startup.sh
[root@real-server-2 bin]# ./startup.sh
Using CATALINA_BASE:   /root/apache-tomcat-7.0.96
Using CATALINA_HOME:   /root/apache-tomcat-7.0.96
Using CATALINA_TMPDIR: /root/apache-tomcat-7.0.96/temp
Using JRE_HOME:        /usr/java/jdk1.7.0_80
Using CLASSPATH:       /root/apache-tomcat-7.0.96/bin/bootstrap.jar:/root/apache-tomcat-7.0.96/bin/tomcat-juli.jar
Tomcat started.
访问192.168.1.202:8080:

重复刷新,Session是不会变化的,因为我们访问的是同一个Tomcat服务器。
在192.168.1.202和192.168.1.121上都安装好Tomcat之后,我们使用nginx来做负载均衡(192.168.1.201上):
在/opt/nginx/conf/nginx.conf中做如下配置:
upstream tom {
        server 192.168.1.121:8080;
        server 192.168.1.202:8080;
}

server {
        listen       80;
        server_name  www.123.com;

        location / {
            root   html;
            index  index.html index.htm;
        }

        location /cat/ {
            proxy_pass http://tom/;
        }
}
重新载入:
systemctl reload nginx
然后此时访问www.123.com:80:
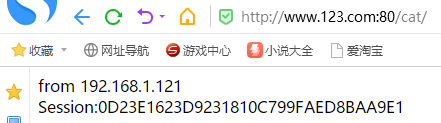
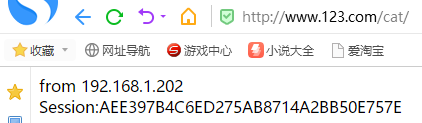
我们可以看到,重复访问的时候,负载均衡是起效的,但是他们的Session不一致的。
停掉两台机器的Tomcat:
cd ~/apache-tomcat-7.0.96/bin
./shutdown.sh
配置Tomcat使用memcached:
cd /root/apache-tomcat-7.0.96/conf
vi context.xml
在最后添加如下内容:
<Manager className="de.javakaffee.web.msm.MencachedBackupSessionManager"
        memcachedNodes="n1:192.168.1.199:11211"
    sticky="false"
    lockingMode="auto"
    sessionBackupAsync="false"
        requestUriIgnorePattern=".*\.(ico|png|gif|jpg|css|js)$"
    sessionBackupTimeout="1000" transcoderFactoryClass="de.javakaffee.web.msm.serializer.kryo.KryoTranscoderFactory"
/>
再为Tomcat的lib中补充需要的一些jar包:
[root@real-server-2 tomcat_jar]# ll
total 804
-rw-r--r-- 1 root root  43398 Feb 26  2019 asm-3.2.jar
-rw-r--r-- 1 root root  94830 Feb 26  2019 kryo-1.04.jar
-rw-r--r-- 1 root root  62112 Feb 26  2019 kryo-serializers-0.11.jar
-rw-r--r-- 1 root root 142281 Feb 26  2019 memcached-session-manager-1.7.0.jar
-rw-r--r-- 1 root root  11283 Feb 26  2019 memcached-session-manager-tc7-1.8.1.jar
-rw-r--r-- 1 root root   4879 Feb 26  2019 minlog-1.2.jar
-rw-r--r-- 1 root root  26511 Feb 26  2019 msm-kryo-serializer-1.7.0.jar
-rw-r--r-- 1 root root  11615 Feb 26  2019 reflectasm-1.01.jar
-rw-r--r-- 1 root root 407912 Feb 26  2019 spymemcached-2.7.3.jar
将这些jar包拷贝到Tomcat的lib目录中:
cp ~/tomcat_jar/* ~/apache-tomcat-7.0.96/lib
重新启动tomcat,后再次尝试访问http://www.123.com/cat,发现负载均衡正常,Session也不会发生变化。

