[Linux系统] (3)应用安装方式详解(编译安装、rpm包安装、yum安装)
软件的安装方式:
- 编译安装
- RPM包安装
- yum安装
一、编译安装
1.下载一个源码安装包:tengine-2.3.0.tar.gz。这是淘宝二次开发过的nginx。将其解压。
tar xf tengine-2.3.0.tar.gz
2.查看解压后的目录:

[root@centos-clone1 tengine-2.3.0]# ll
total 820
-rw-rw-r--  1 root root    889 Mar 25  2019 AUTHORS.te
drwxrwxr-x  6 root root   4096 Mar 25  2019 auto
-rw-rw-r--  1 root root 295057 Mar 25  2019 CHANGES
-rw-rw-r--  1 root root  23830 Mar 25  2019 CHANGES.cn
-rw-rw-r--  1 root root 450114 Mar 25  2019 CHANGES.ru
-rw-rw-r--  1 root root  30541 Mar 25  2019 CHANGES.te
drwxrwxr-x  2 root root   4096 Mar 25  2019 conf
-rwxrwxr-x  1 root root   2502 Mar 25  2019 configure
drwxrwxr-x  4 root root    103 Mar 25  2019 contrib
drwxrwxr-x  3 root root     51 Mar 25  2019 docs
drwxrwxr-x  2 root root     38 Mar 25  2019 html
-rw-rw-r--  1 root root   1715 Mar 25  2019 LICENSE
drwxrwxr-x  2 root root     20 Mar 25  2019 man
drwxrwxr-x 22 root root   4096 Mar 25  2019 modules
drwxrwxr-x  3 root root     19 Mar 25  2019 packages
-rw-rw-r--  1 root root   3421 Mar 25  2019 README.markdown
drwxrwxr-x 10 root root     95 Mar 25  2019 src
drwxrwxr-x  4 root root     41 Mar 25  2019 tests
-rw-rw-r--  1 root root     43 Mar 25  2019 THANKS.te
3.我们可以看到其中有READNME文本,阅读内容,其中有一个Installation章节,里面告诉我们如果对源码进行编译安装:
Installation
============

Tengine can be downloaded at [http://tengine.taobao.org/download/tengine.tar.gz](http://tengine.taobao.org/download/tengine.tar.gz). You can also checkout the latest source code from GitHub at [https://github.com/alibaba/tengine](https:
//github.com/alibaba/tengine)

To install Tengine, just follow these three steps:

    $ ./configure
    $ make
    # make install
4../configure操作:
我们要使用make命令进行编译,必须有一个MakeFile,而configure脚本就是用来检查依赖和生成Makefile文件的。
查看configure脚本的参数:
[root@centos-clone1 tengine-2.3.0]# ./configure --help

  --help                             print this message

  --prefix=PATH                      set installation prefix
  --sbin-path=PATH                   set nginx binary pathname
  --modules-path=PATH                set modules path
  --conf-path=PATH                   set nginx.conf pathname
  --error-log-path=PATH              set error log pathname
  --pid-path=PATH                    set nginx.pid pathname
  --lock-path=PATH                   set nginx.lock pathname

  --user=USER                        set non-privileged user for
                                     worker processes
  --group=GROUP                      set non-privileged group for
                                     worker processes

  --build=NAME                       set build name
  --builddir=DIR                     set build directory

  --with-select_module               enable select module
  --without-select_module            disable select module
  --with-poll_module                 enable poll module
  --without-poll_module              disable poll module

  --without-procs                    disable procs module

  --with-threads                     enable thread pool support

  --with-file-aio                    enable file AIO support

  --with-http_ssl_module             enable ngx_http_ssl_module
  --with-http_v2_module              enable ngx_http_v2_module
  --with-http_realip_module          enable ngx_http_realip_module
  --with-http_addition_module        enable ngx_http_addition_module
  --with-http_xslt_module            enable ngx_http_xslt_module
  --with-http_xslt_module=dynamic    enable dynamic ngx_http_xslt_module
  --with-http_image_filter_module    enable ngx_http_image_filter_module
  --with-http_image_filter_module=dynamic
                                     enable dynamic ngx_http_image_filter_module
  --with-http_geoip_module           enable ngx_http_geoip_module
  --with-http_geoip_module=dynamic   enable dynamic ngx_http_geoip_module
  --with-http_sub_module             enable ngx_http_sub_module
  --with-http_dav_module             enable ngx_http_dav_module
  --with-http_flv_module             enable ngx_http_flv_module
  --with-http_mp4_module             enable ngx_http_mp4_module
  --with-http_gunzip_module          enable ngx_http_gunzip_module
  --with-http_gzip_static_module     enable ngx_http_gzip_static_module
  --with-http_auth_request_module    enable ngx_http_auth_request_module
  --with-http_random_index_module    enable ngx_http_random_index_module
  --with-http_secure_link_module     enable ngx_http_secure_link_module
  --with-http_degradation_module     enable ngx_http_degradation_module
  --with-http_slice_module           enable ngx_http_slice_module
  --with-http_stub_status_module     enable ngx_http_stub_status_module

  --without-http_charset_module      disable ngx_http_charset_module
  --without-http_gzip_module         disable ngx_http_gzip_module
  --without-http_ssi_module          disable ngx_http_ssi_module
  --without-http_ssl_module          disable ngx_http_ssl_module
  --without-http_userid_module       disable ngx_http_userid_module
  --without-http_access_module       disable ngx_http_access_module
  --without-http_auth_basic_module   disable ngx_http_auth_basic_module
  --without-http_mirror_module       disable ngx_http_mirror_module
  --without-http_autoindex_module    disable ngx_http_autoindex_module
  --without-http_geo_module          disable ngx_http_geo_module
  --without-http_map_module          disable ngx_http_map_module
  --without-http_split_clients_module disable ngx_http_split_clients_module
  --without-http_referer_module      disable ngx_http_referer_module
  --without-http_rewrite_module      disable ngx_http_rewrite_module
  --without-http_proxy_module        disable ngx_http_proxy_module
  --without-http_fastcgi_module      disable ngx_http_fastcgi_module
  --without-http_uwsgi_module        disable ngx_http_uwsgi_module
  --without-http_scgi_module         disable ngx_http_scgi_module
  --without-http_grpc_module         disable ngx_http_grpc_module
  --without-http_memcached_module    disable ngx_http_memcached_module
  --without-http_limit_conn_module   disable ngx_http_limit_conn_module
  --without-http_limit_req_module    disable ngx_http_limit_req_module
  --without-http_empty_gif_module    disable ngx_http_empty_gif_module
  --without-http_browser_module      disable ngx_http_browser_module
  --without-http_stub_status_module  disable ngx_http_stub_status_module
  --without-http_upstream_hash_module
                                     disable ngx_http_upstream_hash_module
  --without-http_upstream_ip_hash_module
                                     disable ngx_http_upstream_ip_hash_module
  --without-http_upstream_least_conn_module
                                     disable ngx_http_upstream_least_conn_module
  --without-http_upstream_random_module
                                     disable ngx_http_upstream_random_module
  --without-http_upstream_keepalive_module
                                     disable ngx_http_upstream_keepalive_module
  --without-http_upstream_zone_module
                                     disable ngx_http_upstream_zone_module

  --with-http_perl_module            enable ngx_http_perl_module
  --with-http_perl_module=dynamic    enable dynamic ngx_http_perl_module
  --with-perl_modules_path=PATH      set Perl modules path
  --with-perl=PATH                   set perl binary pathname

  --without-http-upstream-rbtree     disable using rbtree for upstream lookup

  --with-http_lua_module             enable ngx_http_lua_module (will also enable --with-md5 and --with-sha1)
  --with-luajit-inc=PATH             set LuaJIT headers path (where lua.h/lauxlib.h/... are located)
  --with-luajit-lib=PATH             set LuaJIT library path (where libluajit-5.1.{a,so} are located)
  --with-lua-inc=PATH                set Lua headers path (where lua.h/lauxlib.h/... are located)
  --with-lua-lib=PATH                set Lua library path (where liblua.{a,so} are located, only support Lua-5.1.x)
  --http-log-path=PATH               set http access log pathname
  --http-client-body-temp-path=PATH  set path to store
                                     http client request body temporary files
  --http-proxy-temp-path=PATH        set path to store
                                     http proxy temporary files
  --http-fastcgi-temp-path=PATH      set path to store
                                     http fastcgi temporary files
  --http-uwsgi-temp-path=PATH        set path to store
                                     http uwsgi temporary files
  --http-scgi-temp-path=PATH         set path to store
                                     http scgi temporary files

  --without-http                     disable HTTP server
  --without-http-cache               disable HTTP cache

  --with-mail                        enable POP3/IMAP4/SMTP proxy module
  --with-mail=dynamic                enable dynamic POP3/IMAP4/SMTP proxy module
  --with-mail_ssl_module             enable ngx_mail_ssl_module
  --without-mail_pop3_module         disable ngx_mail_pop3_module
  --without-mail_imap_module         disable ngx_mail_imap_module
  --without-mail_smtp_module         disable ngx_mail_smtp_module

  --with-stream                      enable TCP/UDP proxy module
  --with-stream=dynamic              enable dynamic TCP/UDP proxy module
  --with-stream_ssl_module           enable ngx_stream_ssl_module
  --with-stream_realip_module        enable ngx_stream_realip_module
  --with-stream_geoip_module         enable ngx_stream_geoip_module
  --with-stream_geoip_module=dynamic enable dynamic ngx_stream_geoip_module
  --with-stream_ssl_preread_module   enable ngx_stream_ssl_preread_module
  --with-stream_sni                  enable dynamic server block
  --without-stream_limit_conn_module disable ngx_stream_limit_conn_module
  --without-stream_access_module     disable ngx_stream_access_module
  --without-stream_geo_module        disable ngx_stream_geo_module
  --without-stream_map_module        disable ngx_stream_map_module
  --without-stream_split_clients_module
                                     disable ngx_stream_split_clients_module
  --without-stream_return_module     disable ngx_stream_return_module
  --without-stream_upstream_hash_module
                                     disable ngx_stream_upstream_hash_module
  --without-stream_upstream_least_conn_module
                                     disable ngx_stream_upstream_least_conn_module
  --without-stream_upstream_random_module
                                     disable ngx_stream_upstream_random_module
  --without-stream_upstream_zone_module
                                     disable ngx_stream_upstream_zone_module

  --with-google_perftools_module     enable ngx_google_perftools_module
  --with-cpp_test_module             enable ngx_cpp_test_module

  --add-module=PATH                  enable external module
  --add-dynamic-module=PATH          enable dynamic external module

  --with-compat                      dynamic modules compatibility

  --with-cc=PATH                     set C compiler pathname
  --with-cpp=PATH                    set C preprocessor pathname
  --with-cc-opt=OPTIONS              set additional C compiler options
  --with-ld-opt=OPTIONS              set additional linker options
  --with-cpu-opt=CPU                 build for the specified CPU, valid values:
                                     pentium, pentiumpro, pentium3, pentium4,
                                     athlon, opteron, sparc32, sparc64, ppc64

  --without-pcre                     disable PCRE library usage
  --with-pcre                        force PCRE library usage
  --with-pcre=DIR                    set path to PCRE library sources
  --with-pcre-opt=OPTIONS            set additional build options for PCRE
  --with-pcre-jit                    build PCRE with JIT compilation support

  --with-zlib=DIR                    set path to zlib library sources
  --with-zlib-opt=OPTIONS            set additional build options for zlib
  --with-zlib-asm=CPU                use zlib assembler sources optimized
                                     for the specified CPU, valid values:
                                     pentium, pentiumpro

  --with-libatomic                   force libatomic_ops library usage
  --with-libatomic=DIR               set path to libatomic_ops library sources

  --with-jemalloc                    force jemalloc library usage
  --with-jemalloc=DIR                set path to jemalloc library files

  --with-openssl=DIR                 set path to OpenSSL library sources
  --with-openssl-opt=OPTIONS         set additional build options for OpenSSL

  --with-debug                       enable debug logging
我们可以从帮助中看出,可以指定安装的位置,甚至各个不同文件有不同的安装位置。
后面的with和without控制编译的模块(软件是模块化开发的)。
我们一般采用默认安装,或者指定 --prefix:
[root@centos-clone1 tengine-2.3.0]# ./configure
checking for OS
 + Linux 3.10.0-1062.1.2.el7.x86_64 x86_64
checking for C compiler ... not found

./configure: error: C compiler cc is not found
在运行configure脚本的时候,报错,说缺少C compiler,即系统没有安装gcc编译器,从这里我们可以看出该软件是由C语言编写的。
使用yum安装gcc:
yum install gcc -y
再次运行configure,提示缺少pcre和openssl。
我们使用以下命令在yum仓库中查找相应的安装包:
yum search pcre
[root@centos-clone1 tengine-2.3.0]# yum search pcre
Loaded plugins: fastestmirror
Loading mirror speeds from cached hostfile
 * base: mirrors.aliyun.com
 * epel: hkg.mirror.rackspace.com
 * extras: mirrors.aliyun.com
 * updates: mirrors.aliyun.com
============================================================================================================ N/S matched: pcre =============================================================================================================
ghc-pcre-light-devel.x86_64 : Haskell pcre-light library development files
mingw32-pcre.noarch : MinGW Windows pcre library
mingw32-pcre-static.noarch : Static version of the mingw32-pcre library
mingw64-pcre.noarch : MinGW Windows pcre library
mingw64-pcre-static.noarch : Static version of the mingw64-pcre library
ocaml-pcre.x86_64 : Perl compatibility regular expressions (PCRE) for OCaml
ocaml-pcre-devel.x86_64 : Development files for ocaml-pcre
pcre-devel.i686 : Development files for pcre
pcre-devel.x86_64 : Development files for pcre
pcre-static.i686 : Static library for pcre
pcre-static.x86_64 : Static library for pcre
pcre-tools.x86_64 : Auxiliary utilities for pcre
pcre2-devel.i686 : Development files for pcre2
pcre2-devel.x86_64 : Development files for pcre2
pcre2-static.i686 : Static library for pcre2
pcre2-static.x86_64 : Static library for pcre2
pcre2-tools.x86_64 : Auxiliary utilities for pcre2
pcre2-utf16.i686 : UTF-16 variant of PCRE2
pcre2-utf16.x86_64 : UTF-16 variant of PCRE2
pcre2-utf32.i686 : UTF-32 variant of PCRE2
pcre2-utf32.x86_64 : UTF-32 variant of PCRE2
ghc-pcre-light.x86_64 : Perl5 compatible regular expression library
opensips-regex.x86_64 : RegExp via PCRE library
pcre.i686 : Perl-compatible regular expression library
pcre.x86_64 : Perl-compatible regular expression library
pcre2.i686 : Perl-compatible regular expression library
pcre2.x86_64 : Perl-compatible regular expression library
我们看到有许多版本的pcre可供安装,由于缺少pcre依赖库,我们选择安装pcre-devel开发包,32位还是64位无需我们自己选择,yum会根据硬件信息自动选择:
yum install pcre-devel -y
同理我们安装openssl-devel:
yum install openssl-devel -y
然后再执行./configure就可以成功生成MakeFile了:
Configuration summary
  + using system PCRE library
  + using system OpenSSL library
  + using system zlib library
  + jemalloc library is disabled

  nginx path prefix: "/usr/local/nginx"
  nginx binary file: "/usr/local/nginx/sbin/nginx"
  nginx modules path: "/usr/local/nginx/modules"
  nginx configuration prefix: "/usr/local/nginx/conf"
  nginx configuration file: "/usr/local/nginx/conf/nginx.conf"
  nginx pid file: "/usr/local/nginx/logs/nginx.pid"
  nginx error log file: "/usr/local/nginx/logs/error.log"
  nginx http access log file: "/usr/local/nginx/logs/access.log"
  nginx http client request body temporary files: "client_body_temp"
  nginx http proxy temporary files: "proxy_temp"
  nginx http fastcgi temporary files: "fastcgi_temp"
  nginx http uwsgi temporary files: "uwsgi_temp"
  nginx http scgi temporary files: "scgi_temp"
5.查看MakeFile的内容:
[root@centos-clone1 tengine-2.3.0]# more Makefile

default:        build

clean:
        rm -rf Makefile objs

build:
        $(MAKE) -f objs/Makefile

install:
        $(MAKE) -f objs/Makefile install

modules:
        $(MAKE) -f objs/Makefile modules

upgrade:
        /usr/local/nginx/sbin/nginx -t

        kill -USR2 `cat /usr/local/nginx/logs/nginx.pid`
        sleep 1
        test -f /usr/local/nginx/logs/nginx.pid.oldbin

        kill -QUIT `cat /usr/local/nginx/logs/nginx.pid.oldbin`
解释:
1) default、clean、build、install、modules、upgrade这些都是make后面可以带的命令。
2) 在这里,default 指向build,所以直接使用make命令,相当于make build。
3) 在build中,我们看到实际上调用的是objs目录中的Makefile。
4) install中,调用的是make -f objs/Makefile install,所以我们调用make install时,install这个参数是传递到objs/Makefile的。
5) 所以,configure所生成的MakeFile实际上是一个导航文件。
6.查看objs/Makefile文件:
install:        build
        test -d '$(DESTDIR)/usr/local/nginx' || mkdir -p '$(DESTDIR)/usr/local/nginx'

        test -d '$(DESTDIR)/usr/local/nginx/sbin' \
                || mkdir -p '$(DESTDIR)/usr/local/nginx/sbin'
        test ! -f '$(DESTDIR)/usr/local/nginx/sbin/nginx' \
                || mv '$(DESTDIR)/usr/local/nginx/sbin/nginx' \
                        '$(DESTDIR)/usr/local/nginx/sbin/nginx.old'
        cp objs/nginx '$(DESTDIR)/usr/local/nginx/sbin/nginx'

        test -d '$(DESTDIR)/usr/local/nginx/conf' \
                || mkdir -p '$(DESTDIR)/usr/local/nginx/conf'

        cp conf/koi-win '$(DESTDIR)/usr/local/nginx/conf'
        cp conf/koi-utf '$(DESTDIR)/usr/local/nginx/conf'
        cp conf/win-utf '$(DESTDIR)/usr/local/nginx/conf'

        test -f '$(DESTDIR)/usr/local/nginx/conf/mime.types' \
                || cp conf/mime.types '$(DESTDIR)/usr/local/nginx/conf'
        cp conf/mime.types '$(DESTDIR)/usr/local/nginx/conf/mime.types.default'
上述内容是objs/Makefile中的一小部分,install章节,解释如下:
1) 首先判断是否存在/usr/local/nginx 目录,如果不存在则创建该目录,所以我们指定一个目录安装的话,会自动创建目录。
2) install大部分都是文件释放的过程,也就是将编译好的文件拷贝到指定的安装目录下。所以install是很快的,而编译是比较缓慢的。
7.使用make编译
8.使用make install安装
9.进入安装好的目录/usr/local/sbin,运行nginx
cd /usr/local/nginx/sbin
./nginx
10.打开浏览器,访问192.168.1.121:80
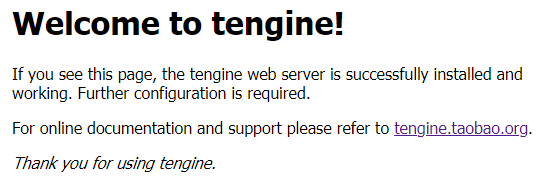
看上以上内容,说明nginx编译安装完成,并正确运行。
二、RPM包安装
1.下载一个JDK 的RPM安装包:
jdk-7u80-linux-x64.rpm
2.使用命令安装JDK:
rpm -i jdk-7u80-linux-x64.rpm
在这里,我们一般可能会使用-ivh选项。-v表示提供更多的详细输出,-h表示打印hash marks,一般vh搭配只用。但是使用-v的话会额外开销IO等。
[root@centos-clone1 ~]# rpm -i jdk-7u80-linux-x64.rpm
Unpacking JAR files...
        rt.jar...
        jsse.jar...
        charsets.jar...
        tools.jar...
        localedata.jar...
        jfxrt.jar...
安装完毕。
3.查询安装的位置
# 查询机器中所有安装的软件(编译安装的不在其列)
rpm -qa
查询是否安装了JDK:
[root@centos-clone1 ~]# rpm -qa | grep jdk
jdk-1.7.0_80-fcs.x86_64
通过软件的名称来查询安装在什么位置:
[root@centos-clone1 ~]# rpm -ql jdk-1.7.0_80-fcs | more
/etc
/etc/.java
/etc/.java/.systemPrefs
/etc/.java/.systemPrefs/.system.lock
/etc/.java/.systemPrefs/.systemRootModFile
/etc/init.d/jexec
/usr
/usr/java
/usr/java/jdk1.7.0_80
/usr/java/jdk1.7.0_80/COPYRIGHT
/usr/java/jdk1.7.0_80/LICENSE
/usr/java/jdk1.7.0_80/README.html
/usr/java/jdk1.7.0_80/THIRDPARTYLICENSEREADME-JAVAFX.txt
/usr/java/jdk1.7.0_80/THIRDPARTYLICENSEREADME.txt
/usr/java/jdk1.7.0_80/bin
/usr/java/jdk1.7.0_80/bin/ControlPanel
/usr/java/jdk1.7.0_80/bin/appletviewer
...
...
我们重点关注JDK的JAVA_HOME在 /usr/java/jdk1.7.0_80 这个目录。JDK带的一系列命令在 /usr/java/jdk1.7.0_80/bin 下。
4.设置环境变量
在windows中我们安装JDK后,需要配置一些环境变量,而在linux中通过rpm安装后,运行java:
[root@centos-clone1 ~]# java -version
java version "1.7.0_80"
Java(TM) SE Runtime Environment (build 1.7.0_80-b15)
Java HotSpot(TM) 64-Bit Server VM (build 24.80-b11, mixed mode)
我们发现,java命令可以直接运行。
我们再尝试运行JDK带的其他命令,例如jps:
[root@centos-clone1 ~]# jps
-bash: jps: command not found
发现jps无法运行,而jps和java命令一样,存在于/usr/java/jdk1.7.0_80/bin下的,是为什么呢?
先查看java命令在哪里:
[root@centos-clone1 ~]# whereis java
java: /usr/bin/java
再去/usr/bin中:
[root@centos-clone1 bin]# ll java
lrwxrwxrwx 1 root root 26 Oct 22 14:56 java -> /usr/java/default/bin/java
我们发现,java是一个软链接,他指向我们安装的目录/usr/java/jdk1.7.0_80/bin中的java命令。
这里的目录是/usr/java/default/bin/java,其中的default我们可以通过在/usr/java中看到:
[root@centos-clone1 java]# ll
total 4
lrwxrwxrwx 1 root root   16 Oct 22 14:56 default -> /usr/java/latest
drwxr-xr-x 8 root root 4096 Oct 22 14:55 jdk1.7.0_80
lrwxrwxrwx 1 root root   21 Oct 22 14:56 latest -> /usr/java/jdk1.7.0_80
default指向latest,latest指向JAVA_HOME,所以default就是JAVA_HOME,所以/usr/java/default/bin/java就是JAVA_HOME/bin/java。
在这种情况下java命令肯定可以执行,但是jps在bin下,bin目录尚未加入PATH环境变量,所以系统无法找到jps命令。
我们创建JAVA_HOME并在PATH中添加JAVA_HOME/bin:
vi /etc/profile
在最后添加以下内容:
export JAVA_HOME=/usr/java/jdk1.7.0_80
export PATH=$PATH:$JAVA_HOME/bin
运行source命令使其重新加载配置文件:
source /etc/profile
此时我们再次运行jps:
[root@centos-clone1 java]# jps
28430 Jps
发现jps成功运行。
5.rpm命令
# 查询已经安装的所有包
rpm -qa
# 查询指定的包是否安装
rpm -q PACKAGE_NAME
# 查询指定包的说明信息
rpm -qi PACKAGE_NAME
# 查询指定包安装后释放的文件列表
rpm -ql PACKAGE_NAME
# 查询指定包安装的配置文件
rpm -qc PACKAGE_NAME
# 查询指定包安装的帮助文件
rpm -qd PACKAGE_NAME
# 查询指定包包含的脚本
rpm -q --scripts PACKAGE_NAME
# 查询文件由哪个rpm包安装生成的
rpm -qf /path/to/somefile
# 在rpm包尚未安装时,查询其说明信息,以及安装以后会生成的文件
rpm -qpi /PATH/TO/PACKAGE_FILE
特别注意rpm -qf命令,该命令可以用来通过某个文件反向查询来自哪个rpm包,非常好的功能。
例如某个命令被误删除了,例如ifconfig:
[root@centos-clone1 java]# type ifconfig
ifconfig is hashed (/usr/sbin/ifconfig)
# 将/sbin/ifconfig移动到tmp
mv /sbin/ifconfig /tmp
# 查看hash缓存
[root@centos-clone1 java]# hash
hits    command
   2    /usr/sbin/ifconfig
   1    /usr/java/jdk1.7.0_80/bin/jps
   1    /usr/bin/mv
# 清除hash缓存
[root@centos-clone1 java]# hash -r
# 再次执行ifconfig发现在/sbin中找不到ifconfig
[root@centos-clone1 java]# ifconfig
-bash: ifconfig: command not found
通过rpm -qf来反向查询安装什么包可以安装ifconfig命令:
[root@centos-clone1 java]# rpm -qf /sbin/ifconfig
net-tools-2.0-0.25.20131004git.el7.x86_64
我们可以看到安装net-tools包就可以恢复ifconfig,我们卸载旧的net-tools,并重新安装:
yum remove net-tools -y
yum install net-tools -y
安装完成后则可正常运行ifconfig:
[root@centos-clone1 tmp]# ifconfig
eth0: flags=4163<UP,BROADCAST,RUNNING,MULTICAST>  mtu 1500
        inet 192.168.1.121  netmask 255.255.255.0  broadcast 192.168.1.255
        inet6 240e:398:c4:3b50:20c:29ff:fe27:d31d  prefixlen 64  scopeid 0x0<global>
        inet6 fe80::20c:29ff:fe27:d31d  prefixlen 64  scopeid 0x20<link>
        ether 00:0c:29:27:d3:1d  txqueuelen 1000  (Ethernet)
        RX packets 852771  bytes 302673365 (288.6 MiB)
        RX errors 0  dropped 611215  overruns 0  frame 0
        TX packets 61176  bytes 7202303 (6.8 MiB)
        TX errors 0  dropped 0 overruns 0  carrier 0  collisions 0

lo: flags=73<UP,LOOPBACK,RUNNING>  mtu 65536
        inet 127.0.0.1  netmask 255.0.0.0
        inet6 ::1  prefixlen 128  scopeid 0x10<host>
        loop  txqueuelen 1000  (Local Loopback)
        RX packets 4  bytes 336 (336.0 B)
        RX errors 0  dropped 0  overruns 0  frame 0
        TX packets 4  bytes 336 (336.0 B)
        TX errors 0  dropped 0 overruns 0  carrier 0  collisions 0
三、从光盘中安装RPM包
1.将光盘放入光驱(虚拟机直接替换CD光盘)
2.挂载光驱
[root@centos-clone1 dev]# mount /dev/cdrom /mnt
mount: /dev/sr0 is write-protected, mounting read-only
3.查看/mnt
[root@centos-clone1 ~]# ll /mnt
total 92
-r--r--r-- 1 root root    14 Dec 10  2015 CentOS_BuildTag
dr-xr-xr-x 3 root root  2048 Dec 10  2015 EFI
-r--r--r-- 1 root root   215 Dec 10  2015 EULA
-r--r--r-- 1 root root 18009 Dec 10  2015 GPL
dr-xr-xr-x 3 root root  2048 Dec 10  2015 images
dr-xr-xr-x 2 root root  2048 Dec 10  2015 isolinux
dr-xr-xr-x 2 root root  2048 Dec 10  2015 LiveOS
dr-xr-xr-x 2 root root 55296 Dec 10  2015 Packages
dr-xr-xr-x 2 root root  4096 Dec 10  2015 repodata
-r--r--r-- 1 root root  1690 Dec 10  2015 RPM-GPG-KEY-CentOS-7
-r--r--r-- 1 root root  1690 Dec 10  2015 RPM-GPG-KEY-CentOS-Testing-7
-r--r--r-- 1 root root  2883 Dec 10  2015 TRANS.TBL
我们看到有一个文件夹叫Packages,其中全部都是光盘提供的rpm安装包:
[root@centos-clone1 Packages]# ll | wc -l
337
由于这里是一个mini版的CentOS7的安装镜像,所以其中只包含了337个rpm包,如果DVD版,则有3000多个rpm包。
我们找到需要的rpm包,拷贝到本地就可以进行安装了。
4.rpm包安装的缺点
我们在安装JDK的时候没有发现任何问题。
但是我们在安装其他某些软件时,例如早期Apache提供的httpd安装包,则会出现缺少依赖的问题:

这些缺少的依赖都需要我们手工去进行查找和安装,费时费力,所以催生了yum仓库。
四、yum仓库安装软件
1.yum介绍
yum工具类似C/S架构,但是他的计算部分设计在客户端完成。
也就是说正常C/S架构,客户端的主要功能交互和展现,而计算部分放在Server端进行。
但是yum为了使后端仓库能够多样化,即搭建在不同的架构上,例如http、ftp以及文件系统:
http://
ftp://
file://
安装所需的依赖关系又yum客户端自己计算,然后从仓库请求需要的包。
仓库端存储两类文件:
1.所有rpm安装包
2.rpm包的元数据描述文件
2.yum安装软件的简要流程
1.yum获取仓库提供的元数据描述文件
2.计算安装某个软件所需要的所有包清单和版本信息
3.直接找仓库要所需的包
4.按顺序进行安装
3.仓库在哪?
查看yum配置:
[root@centos-clone1 Packages]# cd /etc/yum.repos.d/
[root@centos-clone1 yum.repos.d]# ll
total 40
-rw-r--r--. 1 root root 2523 Jun 16  2018 CentOS-Base.repo
-rw-r--r--  1 root root 1309 Sep  5 21:05 CentOS-CR.repo
-rw-r--r--  1 root root  649 Sep  5 21:05 CentOS-Debuginfo.repo
-rw-r--r--  1 root root  314 Sep  5 21:05 CentOS-fasttrack.repo
-rw-r--r--  1 root root  630 Sep  5 21:05 CentOS-Media.repo
-rw-r--r--  1 root root 1331 Sep  5 21:05 CentOS-Sources.repo
-rw-r--r--  1 root root 6639 Sep  5 21:05 CentOS-Vault.repo
-rw-r--r--  1 root root  951 Oct  3  2017 epel.repo
-rw-r--r--  1 root root 1050 Oct  3  2017 epel-testing.repo
所有的repo文件都是源。我们打开CentOS-Base.repo看看:
[base]
name=CentOS-$releasever - Base - mirrors.aliyun.com
failovermethod=priority
baseurl=http://mirrors.aliyun.com/centos/$releasever/os/$basearch/
        http://mirrors.aliyuncs.com/centos/$releasever/os/$basearch/
        http://mirrors.cloud.aliyuncs.com/centos/$releasever/os/$basearch/
gpgcheck=1
gpgkey=http://mirrors.aliyun.com/centos/RPM-GPG-KEY-CentOS-7

#released updates
[updates]
name=CentOS-$releasever - Updates - mirrors.aliyun.com
failovermethod=priority
baseurl=http://mirrors.aliyun.com/centos/$releasever/updates/$basearch/
        http://mirrors.aliyuncs.com/centos/$releasever/updates/$basearch/
        http://mirrors.cloud.aliyuncs.com/centos/$releasever/updates/$basearch/
gpgcheck=1
gpgkey=http://mirrors.aliyun.com/centos/RPM-GPG-KEY-CentOS-7
以上是部分内容。
解释:
1) 方括号中的[base]、[updates]是每一个源的名称,必须唯一,我们可以给其任意取名。
2) name表示描述,可以任意写。
3) baseurl是最关键的,他的值就是仓库的地址,可以是http、ftp、file等各种形式,只要仓库能提供读取功能就可以。如果这些链接的地址都在国外,则可能下载缓慢或不稳定。
4) gpgcheck和gpgkey是安全认证之类的东西,暂时不关心。
4.修改为本地源
我们搞明白repo文件以后,就可以通过修改其中的baseurl来替换源地址。
也可以通过163,阿里云等企业直接提供的repo文件替换原始repo文件:
# 首先备份原始的CentOS-Base.repo
mv /etc/yum.repos.d/CentOS-Base.repo /etc/yum.repos.d/CentOS-Base.repo.backup
wget -O /etc/yum.repos.d/CentOS-Base.repo http://mirrors.aliyun.com/repo/Centos-7.repo
wget -O /etc/yum.repos.d/CentOS-Base.repo http://mirrors.163.com/.help/CentOS7-Base-163.repo
5.清理和更新元数据
清理本机上缓存的仓库元数据:
yum clean all
重新下载更新后仓库的元数据:
yum makecache
6.查看目前有哪些库
[root@centos-clone1 yum.repos.d]# yum repolist
Loaded plugins: fastestmirror
Loading mirror speeds from cached hostfile
 * base: mirrors.aliyun.com
 * epel: hkg.mirror.rackspace.com
 * extras: mirrors.aliyun.com
 * updates: mirrors.aliyun.com
repo id                                                                                             repo name                                                                                                                         status
base/7/x86_64                                                                                       CentOS-7 - Base - mirrors.aliyun.com                                                                                              10,097
epel/x86_64                                                                                         Extra Packages for Enterprise Linux 7 - x86_64                                                                                    13,416
extras/7/x86_64                                                                                     CentOS-7 - Extras - mirrors.aliyun.com                                                                                               304
updates/7/x86_64                                                                                    CentOS-7 - Updates - mirrors.aliyun.com                                                                                              611
repolist: 24,428
在上述源中,只有epel是国外源,其他都是国内aliyun的源。
7.将epel源也更新成国内源
删除或备份原本的epel.repo以及epel-testing.repo:
mv /etc/yum.repos.d/epel.repo /etc/yum.repos.d/epel.repo.backup
mv /etc/yum.repos.d/epel-testing.repo /etc/yum.repos.d/epel-testing.repo.backup
下载aliyun提供的epel源:
wget -O /etc/yum.repos.d/epel-7.repo http://mirrors.aliyun.com/repo/epel-7.repo
清除缓存,并重新下载元数据:
yum clean all
yum makecache
五、创建本地仓库(光盘文件)
1.挂载DVD光盘
mount /dev/cdrom /mnt
2.备份所有repo文件
cd /etc/yum.repos.d
mkdir backup
mv -f *.repo backup
3.新建或拷贝一份repo文件
cp backup/CentOS-Base.repo ./
mv CenOS-Base.repo local.repo
4.修改local.repo内容为如下内容:
[localrepo]
name=local repo
baseurl=file:///mnt
gpgcheck=0
重点就是baseurl=file:///mnt
关闭gpgcheck,设置为0
其中file://是协议头,/mnt表示仓库位置
目录只需要写到能看到repodate文件夹的那一层:
[root@centos-clone1 mnt]# ll /mnt
total 92
-r--r--r-- 1 root root    14 Dec 10  2015 CentOS_BuildTag
dr-xr-xr-x 3 root root  2048 Dec 10  2015 EFI
-r--r--r-- 1 root root   215 Dec 10  2015 EULA
-r--r--r-- 1 root root 18009 Dec 10  2015 GPL
dr-xr-xr-x 3 root root  2048 Dec 10  2015 images
dr-xr-xr-x 2 root root  2048 Dec 10  2015 isolinux
dr-xr-xr-x 2 root root  2048 Dec 10  2015 LiveOS
dr-xr-xr-x 2 root root 55296 Dec 10  2015 Packages
dr-xr-xr-x 2 root root  4096 Dec 10  2015 repodata
-r--r--r-- 1 root root  1690 Dec 10  2015 RPM-GPG-KEY-CentOS-7
-r--r--r-- 1 root root  1690 Dec 10  2015 RPM-GPG-KEY-CentOS-Testing-7
-r--r--r-- 1 root root  2883 Dec 10  2015 TRANS.TBL
5.清除缓存,更新元数据:
[root@centos-clone1 yum.repos.d]# yum clean all
dLoaded plugins: fastestmirror
^HCleaning repos: localrepo
Cleaning up list of fastest mirrors
Other repos take up 472 M of disk space (use --verbose for details)


[root@centos-clone1 yum.repos.d]# yum makecache
Loaded plugins: fastestmirror
Determining fastest mirrors
localrepo                                                                                                                                                                                                            | 3.6 kB  00:00:00
(1/4): localrepo/group_gz                                                                                                                                                                                            | 3.6 kB  00:00:00
(2/4): localrepo/filelists_db                                                                                                                                                                                        | 240 kB  00:00:00
(3/4): localrepo/primary_db                                                                                                                                                                                          | 617 kB  00:00:00
(4/4): localrepo/other_db                                                                                                                                                                                            | 167 kB  00:00:00
Metadata Cache Created
6.查看当前源信息
[root@centos-clone1 ~]# yum repolist

Loaded plugins: fastestmirror
Loading mirror speeds from cached hostfile
repo id                                                                                                            repo name                                                                                                          status
!localrepo                                                                                                         local repo                                                                                                         335
repolist: 335
可以看到当前本地源中一共有335个包。
如果不是使用的mini版光盘,而是使用DVD1光盘,则显示有6000多个包,而DVD1中只有3000多个,剩余的部分在DVD2中,所以将DVD1和DVD2都下载下来,然后合并Packages目录。
六、yum命令
1.yum常用命令
# 查看源的信息
yum repolist
# 清楚源数据缓存
yum clean all
# 重新下载元数据
yum makecache

# 查询所有已安装的包和可用包
yum list
yum list | grep net-tools
# 查找安装包
yum search net-tools
# 查看包信息
yum info net-tools
# 安装包
yum install net-tools
# 删除已安装软件,后者删除更干净
yum remove | erase
2.yum组命令
# 查看已安装组和可安装组
yum grouplist
# 查看组信息
yum groupinfo
# 安装组
yum groupinstall
# 删除组
yum groupremove
# 升级组
yum groupupdate
3.例如安装中文组件
安装中文支持组件:
yum groupinstall "Chinese Support" -y
修改环境变量LANG:
# 临时修改为中文
echo $LANG
LANG=zh_CN.UTF-8
我们可以安装中文版的man:
yum install man man-pages man-pages-zh-CN -y
方便我们学习bash命令。

【推荐】国内首个AI IDE,深度理解中文开发场景,立即下载体验Trae
【推荐】编程新体验,更懂你的AI,立即体验豆包MarsCode编程助手
【推荐】抖音旗下AI助手豆包,你的智能百科全书,全免费不限次数
【推荐】轻量又高性能的 SSH 工具 IShell:AI 加持,快人一步