

spring cloud服务提供与调用示例
本文创建方式采用intellij IDEA 创建项目
1.创建基于Eureka的注册中心。
在打开项目中右键,选择new 选择moudle

然后下一步
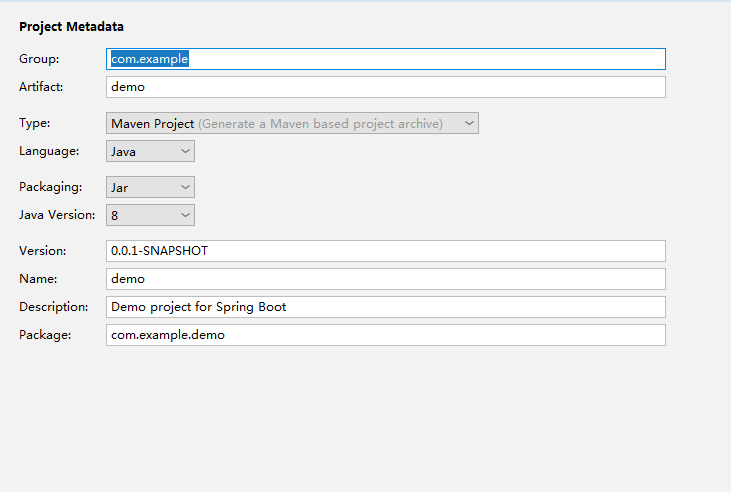
输入要创建的项目的信息

选择web下面的web,选择cloud discovery下面的 Eureka server 下一步,创建项目
然后同步pom.xml文件内容、

<?xml version="1.0" encoding="UTF-8"?>
<project xmlns="http://maven.apache.org/POM/4.0.0" xmlns:xsi="http://www.w3.org/2001/XMLSchema-instance"
         xsi:schemaLocation="http://maven.apache.org/POM/4.0.0 http://maven.apache.org/xsd/maven-4.0.0.xsd">
    <modelVersion>4.0.0</modelVersion>
    <parent>
        <groupId>org.springframework.boot</groupId>
        <artifactId>spring-boot-starter-parent</artifactId>
        <version>2.1.3.RELEASE</version>
        <relativePath/> <!-- lookup parent from repository -->
    </parent>
    <groupId>com.example</groupId>
    <artifactId>server</artifactId>
    <version>0.0.1-SNAPSHOT</version>
    <name>server</name>
    <description>Demo project for Spring Boot</description>

    <properties>
        <java.version>1.8</java.version>
        <spring-cloud.version>Greenwich.SR1</spring-cloud.version>
    </properties>

    <dependencies>
        <dependency>
            <groupId>org.springframework.boot</groupId>
            <artifactId>spring-boot-starter-web</artifactId>
        </dependency>
        <dependency>
            <groupId>org.springframework.cloud</groupId>
            <artifactId>spring-cloud-starter-netflix-eureka-server</artifactId>
        </dependency>

        <dependency>
            <groupId>org.springframework.boot</groupId>
            <artifactId>spring-boot-starter-test</artifactId>
            <scope>test</scope>
        </dependency>
    </dependencies>

    <dependencyManagement>
        <dependencies>
            <dependency>
                <groupId>org.springframework.cloud</groupId>
                <artifactId>spring-cloud-dependencies</artifactId>
                <version>${spring-cloud.version}</version>
                <type>pom</type>
                <scope>import</scope>
            </dependency>
        </dependencies>
    </dependencyManagement>

    <build>
        <plugins>
            <plugin>
                <groupId>org.springframework.boot</groupId>
                <artifactId>spring-boot-maven-plugin</artifactId>
            </plugin>
        </plugins>
    </build>

    <repositories>
        <repository>
            <id>spring-milestones</id>
            <name>Spring Milestones</name>
            <url>https://repo.spring.io/milestone</url>
        </repository>
    </repositories>

</project>
在启动文件中选择
@SpringBootApplication
@EnableEurekaServer
public class ServerApplication {

    public static void main(String[] args) {
        SpringApplication.run(ServerApplication.class, args);
    }

}
配置文件
1 2 3 4 5 6 7 8 9 10 11 12 13 | server: port: 8000eureka: instance: hostname: localhost client: fetch-registry: false register-with-eureka: false serviceUrl: defaultZone: http://localhost:8000/eureka/spring: application: name: spring-cloud-eureka |
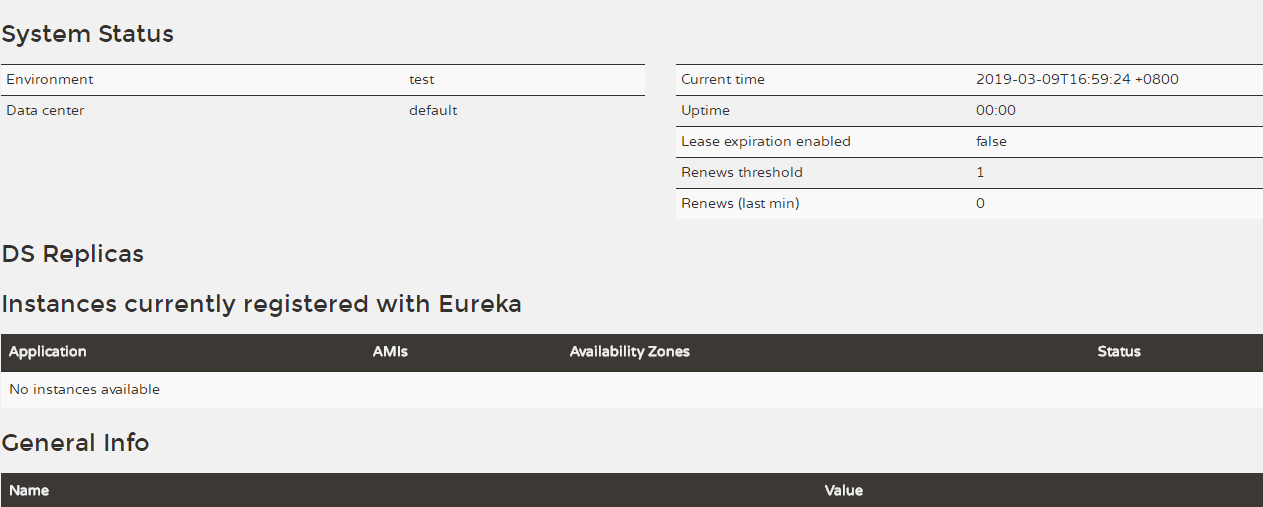
创建完,我们去运行下,运行正常后,我们去访问localhost:8000, 到下面的界面,这样我们Eureka 注册中心就创建成功,
下面我们去创建server端,和client;
server端呢创建中与Eureka选择不同的在于cloud discovery中,这里需要选择cloud Discovery
然后创建完,去同步对应的pom.xml文件
在启动类编写如下
@SpringBootApplication
@EnableDiscoveryClient
public class ServeroneApplication {

    public static void main(String[] args) {
        SpringApplication.run(ServeroneApplication.class, args);
    }

}
配置文件
server:
  port: 8001
eureka:
  instance:
    hostname: localhost
  client:
    serviceUrl:
      defaultZone: http://localhost:8000/eureka/
spring:
  application:
    name: spring-serverserver
我们需要编写一个提供服务的接口
@RestController
public class HelloController {

    @RequestMapping("/hello")
    public String indesx(@RequestParam String name) {
        return "hello "+name+",this is first messge";
    }
}
这样我们就可以实现我们的server端
然后我们去创建client端
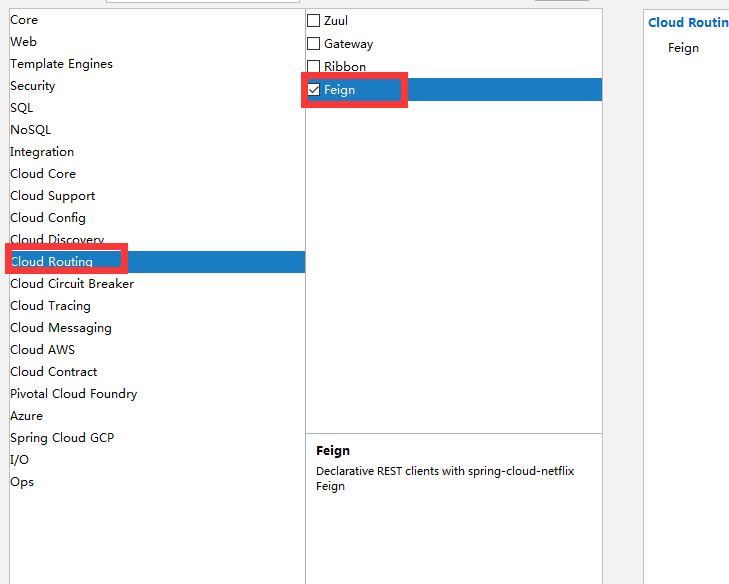
client端多需要在server上创建多一个Feign
那么我们在启动类,如下
@SpringBootApplication
@EnableDiscoveryClient
@EnableFeignClients
public class DemoApplication {

    public static void main(String[] args) {
        SpringApplication.run(DemoApplication.class, args);
    }

}
配置文件
server:
  port: 8002
eureka:
  instance:
    hostname: localhost
  client:
    serviceUrl:
      defaultZone: http://localhost:8000/eureka/
spring:
  application:
    name: spring-client
那么我们去写调用server的服务
@FeignClient(name= "spring-serverserver")
public interface HelloRemote {
    @RequestMapping(value = "/hello")
    public String hello(@RequestParam(value = "name") String name);
}
实现接口
@RestController
public class ConsumerController {

    @Autowired
    HelloRemote lloRemote;

    @RequestMapping("/hello/{name}")
    public String index(@PathVariable("name") String name) {
        return lloRemote.hello(name);
    }
}
这样我们就实现了服务的注册与调用。
那么我们去启动服务进行测试,服务注册成功,我们去启动服务调用端

服务调用端成功,

那么我们去测试下,我们先去测试看单独访问服务是否正常
输入http://localhost:8001/hello?name=liwanlei
显示

那么我们看下另外一个调用这个服务的服务
http://localhost:8002/hello/name
那么我们看下返回

这样我们调试成功。
户端已经成功的通过feign调用了远程服务,并且将结果返回到了浏览器。
分类:
java

 访问量
访问量

【推荐】国内首个AI IDE,深度理解中文开发场景,立即下载体验Trae
【推荐】编程新体验,更懂你的AI,立即体验豆包MarsCode编程助手
【推荐】抖音旗下AI助手豆包,你的智能百科全书,全免费不限次数
【推荐】轻量又高性能的 SSH 工具 IShell:AI 加持,快人一步
· 如何编写易于单元测试的代码
· 10年+ .NET Coder 心语,封装的思维:从隐藏、稳定开始理解其本质意义
· .NET Core 中如何实现缓存的预热?
· 从 HTTP 原因短语缺失研究 HTTP/2 和 HTTP/3 的设计差异
· AI与.NET技术实操系列:向量存储与相似性搜索在 .NET 中的实现
· 周边上新:园子的第一款马克杯温暖上架
· Open-Sora 2.0 重磅开源!
· 分享 3 个 .NET 开源的文件压缩处理库,助力快速实现文件压缩解压功能!
· Ollama——大语言模型本地部署的极速利器
· DeepSeek如何颠覆传统软件测试?测试工程师会被淘汰吗?