1. 修改data中的数据
        this.setData({
            msg:'Sakura'
        })
控制台输出data中的数据
console.log(this.data.msg)
2. 绑定事件 bindxxx 是不阻止冒泡事件绑定 catchxxx 是阻止冒泡事件绑定
    <!-- tap是点击事件 -->
    <view class="goStudy" bindtap="clickParent">
        <text bindtap="clickChild">hello world</text>
    </view>
    <!-- tap是点击事件 -->
    <view class="goStudy" catchtap="clickParent">
        <text catchtap="clickChild">hello world</text>
    </view>
事件函数写在js中,与data平级
    // 事件回调函数
    clickParent(){
        console.log('clickParent')
    },

    clickChild(){
        console.log('clickChild')
    },
3. 路由跳转 详情参考https://developers.weixin.qq.com/miniprogram/dev/api/route/wx.navigateTo.html
    <!-- 路由跳转 -->
    <view class="goStudy">
        <text catchtap="toLogs">hello world</text>
    </view>
   toLogs() {
        wx.navigateTo({
            url: '/pages/logs/logs',
        })
    },
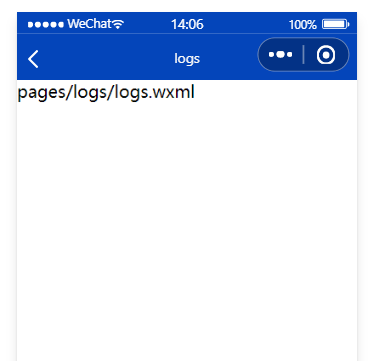
4. 单个页面需要配置头部栏的样式需要在自己页面的json文件中修改,不用加window
{
  "usingComponents": {},
  "navigationBarTitleText": "logs"
}

5.获取用户信息
在index.wxml中
<button bindtap="getUserProfile">获取用户信息</button>
在index.js中设置回调
    data: {
        msg: '初始化数据',
        // 用户信息存储
        userInfo:{},
        // 判断用户是否登录
        hasUserInfo:false,
        imgSrc:'/static/images/nvsheng.jpg'
    },

    // 第一次授权获取用户信息
    getUserProfile() {
        wx.getUserProfile({
            desc: '用于完善基本用户资料', // 声明获取用户个人信息后的用途,后续会展示在弹窗中,请谨慎填写
            // 用户同意之后才会执行下面的回调
            success: (res) => {
                this.setData({
                    userInfo: res.userInfo,
                    hasUserInfo: true
                })
                this.setData({
                    msg:res.userInfo.nickName,
                    imgSrc:res.userInfo.avatarUrl
                })
            }
        })
    },
6. 缓存用户信息
    /**
     * 生命周期函数--监听页面加载
     */
    onLoad: function (options) {
        // 当第一次登录成功后将数据缓存,在后续进入小程序后在下方函数中读取用户基本信息
        wx.getStorage({
            key: 'userInfo',
            success: (res) => {
                this.setData({
                    // 判断是否读取缓存成功 失败的话需要再次登录
                    'userStrong':true
                })
                this.setData({
                    'userInfo':res.data,
                    msg:res.data.nickName,
                    imgSrc:res.data.avatarUrl
                })
            },
            fail:(err) => {
                this.setData({
                    // 判断是否读取缓存成功 失败的话需要再次登录
                    userStrong:false
                })
            }
          })
    },
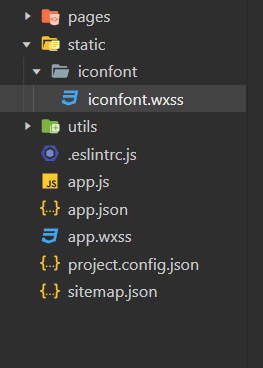
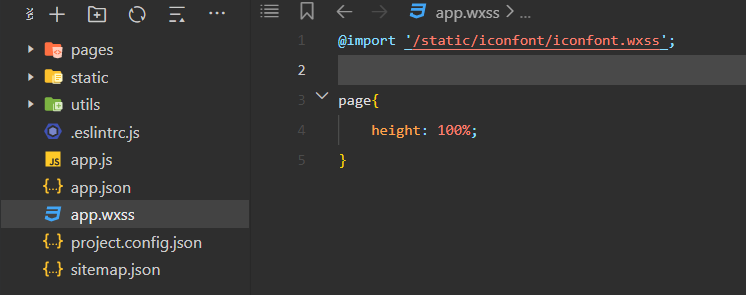
7. 使用字体图标 --- 需要在根目录下创建一个static(静态资源文件夹)文件夹,在其中创建一个iconfont.wxss文件,把icon样式全部复制到其中,再在app.wxss(也可以是需要使用的页面中的wxss文件,看需求)中通过@import '地址路径' 引入


8. 小程序轮播图插件 swiper 在组件的视图容器中 https://developers.weixin.qq.com/miniprogram/dev/component/swiper.html

9. 小程序可滚动视图区域scroll-view 需要注意的是 当需样式需要display:flex的时候一定要在 scroll-view中添加 enable-flex 属性
https://developers.weixin.qq.com/miniprogram/dev/component/scroll-view.html
        <scroll-view class="bottomRecommended" enable-flex scroll-x>
            <view class="scrolItem">
                <image src="http://p1.music.126.net/Bz3447-ENzLNDvgF0sOMRg==/109951166671301977.jpg?imageView&quality=89"></image>
                <text>可滚动视图区域。使用竖向滚动时,需要给scroll-view</text>
            </view>
    //...
        </scroll-view>
效果如下

如要实现多行文本省略则需要在样式中添加
      text-overflow: -o-ellipsis-lastline;
      overflow: hidden;
      text-overflow: ellipsis;
      display: -webkit-box;
      -webkit-line-clamp: 3;
      -webkit-box-orient: vertical;
10. 发送网络请求 wx.request(Object object) 详情见: https://developers.weixin.qq.com/miniprogram/dev/api/network/request/wx.request.html
- 注意点:
- 协议必须是https协议
- 一个接口最多配置20个域名
- 并发限制上限是10个
- 开发过程中设置不校验合法域名: 开发工具 ---> 右上角详情 ----> 本地设置 ---> 不校验
2. 当协议是https的时候需要配置域名,在开发管理---开发设置---服务器域名 中配置

11. 微信ajax请求封装 与 等待异步任务完成后获取数据方法
1. ajax请求封装
import config from '../utils/config.js'
export default (url, data = {}, method = "GET") => {
    return new Promise((resolve,reject) => {
        wx.request({
          url:config.host+url,
          data,
          method,
          success:(res)=>{
              //使用promise后,成功回调返回的值
            resolve(res.data)
          },
          fail:(err)=>{
              //使用promise后,失败回调返回的值
            reject(err)
          }
        })
    })
}
2. 等待一步请求结束获取返回值
    // 使用async 和 await 来等待异步任务结束后获取返回值(这样避免获取空值)
    onLoad: async function (options) {
        let data = await request('/banner', {
            type: 2
        })

        console.log(data)
    },
12. 列表渲染wx:for 和wx:key 参考: https://developers.weixin.qq.com/miniprogram/dev/reference/wxml/list.html
1. vx:key跟vue不一样,不需要使用对象.xxx来作为key,直接把需要用作key的属性名写入即可,并且不需要加大括号
2. item 和 index默认为遍历出的内容 和 下标
        <swiper-item wx:for="{{bannerList}}" wx:key="bannerId">
            <image src="{{item.pic}}"></image>
        </swiper-item>
13. 自定义组件 参考:https://developers.weixin.qq.com/miniprogram/dev/reference/api/Component.html#properties-%E5%AE%9A%E4%B9%89
1. 需要在根目录下创建一个components文件夹,在其中创建需要定义的组件文件夹,并在其中定义组件

2. 在需要引入组件的页面的json文件中引入
{
  "usingComponents": {
    "NavHeader":"/components/NavHeader/NavHeader"
  }
}
3. 在页面中插入组件
    <view class="windIndicator">
        <NavHeader NavTop="排行" NavBot="热歌风向标"/>
    </view>
4. 向组件中传递参数 需要在组件的js文件中设置
    /**
     * 组件的属性列表
     */
    properties: {
        NavTop:{
            type:String,
            value:"NavTop默认值"
        },
        NavBot:{
            type:String,
            value:"NavBot默认值"
        }
    },
5.在页面中使用组件标签的位置中,向组件添加属性传递参数
    <view class="windIndicator">
        <NavHeader NavTop="排行" NavBot="热歌风向标"/>
    </view>
14. tabBar页面导航条 在需要使用导航条的页面的json文件中添加配置 参
考:https://developers.weixin.qq.com/miniprogram/dev/reference/configuration/app.html#tabBar
1. 注意: icon文件必须为本地文件,不可以外部引入,放在根目录下的static静态资源中
    "tabBar": {
        "list": [{
                "pagePath": "pages/index/index",
                "text": "主页",
                "iconPath": "/static/images/tabs/tab-home.png",
                "selectedIconPath": "/static/images/tabs/tab-home-current.png"
            },
            {
                "pagePath": "pages/video/video",
                "text": "视频",
                "iconPath": "/static/images/tabs/select.png",
                "selectedIconPath": "/static/images/tabs/selected.png"
            },
            {
                "pagePath": "pages/personal/personal",
                "text": "个人中心",
                "iconPath": "/static/images/tabs/tab-my.png",
                "selectedIconPath": "/static/images/tabs/tab-my-current.png"
            }
        ]
    },
15. 收集表单数据
1. 需要在标签中添加 bindinput 事件---"当input其中的值发生改变的时候就会触发事件回调"
2. 需要在标签中添加 data-XXX 属性,用来标识发生改变的input标签是哪一个,XXX是自定义的属性名称 最后赋值的是这个标签的标识名称
<input type="text" data-type="phone" placeholder="请输入手机号码" bindinput="getLoginMess"/>
3. 通过js获取数据: e.target.dataset.type 获取到了 标识名称(标识名称与data中存储的变量名刚好相同,所以setData可以简写为 [type] 不需要再if判断了)
    getLoginMess(e){
        let type = e.target.dataset.type;
        this.setData({
            [type]:e.detail.value
        })
    },
16. 获取用户唯一ID 参考: https://developers.weixin.qq.com/miniprogram/dev/api/open-api/login/wx.login.html
wx.login(Object object)
服务器必须要写好接口,我们把用户唯一标识发送给服务器,然后服务器把 登录凭证(code), AppID(小程序ID), AppSecret(小程序密钥) 一起发送给微信的服务
器,则微信会返回 用户唯一登录标识openid
最后服务器将用户的信息与唯一登录标识openid进行整合加密成token发送给客户端也就是我们的网页


