LSTM文本生成(二)
一、概述
1.主题:整个文本将基于《安娜卡列妮娜》这本书的英文文本作为LSTM模型的训练数据,输入为单个字符,通过学习整个英文文档的字符(包括字母和标点符号等)来进行文本生成。
2.单词层级和字符层级的区别:
1、基于字符的语言模型的好处在于处理任何单词,标点和其他文档结构时仅需要很小的词汇量,而且更加灵活。
2、语言模型的目标是根据之前的 token 预测下一个 token。标准的做法是最后一层在词汇表的每个 token 上计算一个 softmax。当词汇库较大时,softmax 步骤和相关的梯度计算就会成为训练语言模型的性能瓶颈。
在开始建模之前,我们首先要明确我们的输入和输出。即输入是字符,输出是预测出的新字符。
3、相比于基于字符的模型,基于单词的模型显示出更高的准确性。这是因为后一种模式需要一个更大的网络来学习长期相关关系,因为它不仅要记住单词的顺序,还必须学会去预测一个单词在语法上的正确性。
3.原文
《安娜卡列尼娜》文本生成——利用TensorFlow构建LSTM模型
https://zhuanlan.zhihu.com/p/27087310
二、模型构建
文本生成模型构建主要包括以下四个部分:
-
1.数据预处理:加载数据、转换数据、分割数据mini-batch
-
2.模型构建:输入层,LSTM层,输出层,训练误差,loss,optimizer
-
3.模型训练:设置模型参数对模型进行训练
-
4.生成新文本:使用训练好的模型,输入一个单词,得到后续输出。
1. 数据预处理
思考:如何构造RNN中的训练格式的样本?
训练过程,输入的数据是以batch形式完成的。每个batch包含 batch_size 个样本,每个样本长度设置为 n_seqs,即包含n_seqs个字符。现在有一个长度为N个字符的原始文本。可知:训练集可以划分为m个batch
同时,原始文本先转换为字符对应的索引。
因为LSTM是用前一个字符预测后一个字符,所以,label 的值为 x 后移一个字符。
import time
import numpy as np
import tensorflow as tf
with open('data/anna.txt','r') as f:
    text = f.read()
vocab = set(text)
vocab_to_int = {c:i for i,c in enumerate(vocab)}
int_to_vocab = dict(enumerate(vocab))
encoded = np.array([vocab_to_int[c] for c in text],dtype=np.int32)

def get_batches(arr,batch_size,n_seqs):
    # batch_size:一个batch中样本数
    # n_seqs:每个样本的长度
    batch_len = batch_size * n_seqs
    n_batches = int(len(arr)/ batch_len)
    # 这里我们仅保留完整的batch,对于不能整除的部分进行舍弃
    arr = arr[:batch_len * n_batches]
    arr = arr.reshape((batch_size,-1))
    for n in range(0,arr.shape[1],n_steps):
        x = arr[:, n:n+n_steps]
        y = np.zeros_like(x)
        # y 为当前batch中x向左平移一个单位的结果
        y[:,:-1],y[:,-1] = x[:,1:], x[:,0]
        yield x,y
2. 输入层
每次输入一个batch
def build_inputs(batch_size, n_seqs):
    '''
    构建输入层

    batch_size: 每个batch中的序列个数
    n_seqs: 每个序列包含的字符数
    '''
    inputs = tf.placeholder(tf.int32, shape=(batch_size, n_seqs), name='inputs')
    targets = tf.placeholder(tf.int32, shape=(batch_size, n_seqs), name='targets')

    # 加入keep_prob
    keep_prob = tf.placeholder(tf.float32, name='keep_prob')

    return inputs, targets, keep_prob
3.LSTM层
tf.contrib.rnn有两个包:
BasicLSTMCell: 平常说的LSTM,
LSTMCell: LSTM升级版,加了clipping,projection layer,peep-hole等操作。
MultiRNNCell:实现了对基本LSTM cell的顺序堆叠。
dynamic_rnn:实现循环调用LSTMCell,实现神经网络前向计算。
def build_lstm(lstm_size,num_layers,batch_size,keep_prob):
    def lstm_cell():

        lstm = tf.nn.rnn_cell.BasicLSTMCell(lstm_size)
        drop = tf.contrib.rnn.DropoutWrapper(lstm, output_keep_prob=keep_prob)
        return drop
    # 堆叠多个LSTM单元。每层的单元都是重新实例化的,而非同一个。
    cell = tf.contrib.rnn.MultiRNNCell([lstm_cell() for _ in range(num_layers)])
    initial_state = cell.zero_state(batch_size,tf.float32)
    return cell,initial_state
4.输出层
指整个网络的的最终输出。
输出层采用softmax,它与LSTM进行全连接。对于每一个字符来说,它经过LSTM后的输出大小是(1,lstm_size),
所以一个batch经过LSTM的输出为\((batch\_size,n\_seqs,lstm\_size)\)。要将这个输出与softmax全连接层建立连接,就需要将LSTM的输出reshape为\((batch\_size*n\_seqs,lstm\_size)\)。
softmax层的结点数应该是vocab的大小(我们要计算概率分布)。因此整个LSTM层到softmax层权重矩阵的大小为\((lstm\_size,vocab\_size)\)。
最终的输出logits为\((batch\_size*n\_seqs,vocab\_size)\)
out为 \((batch\_size*n\_seqs,vocab\_size)\)
def build_output(lstm_output, in_size, out_size):
    '''
    构造输出层

    lstm_output: lstm层的输出结果
    in_size: lstm输出层重塑后的size
    out_size: softmax层的size

    '''

    # 将lstm的输出按照列concate,例如[[1,2,3],[7,8,9]],
    # tf.concat的结果是[1,2,3,7,8,9]
    seq_output = tf.concat(lstm_output,1) # tf.concat(values,concat_dim)
    # reshape
    x = tf.reshape(seq_output, [-1, in_size])

    # 将lstm层与softmax层全连接
    with tf.variable_scope('softmax'):
        softmax_w = tf.Variable(tf.truncated_normal([in_size, out_size], stddev=0.1))
        softmax_b = tf.Variable(tf.zeros(out_size))

    # 计算logits
    logits = tf.matmul(x, softmax_w) + softmax_b

    # softmax层返回概率分布
    out = tf.nn.softmax(logits, name='predictions')

    return out, logits
5.损失函数
采用tf.nn.softmax_cross_entropy_with_logits交叉熵来计算loss。
该函数进行两步运算:
首先对logits进行softmax计算,
根据softmax计算后的结果和labels来计算交叉熵损失。
计算出的结果是向量形式, shape = (batch_size,),因此需要 reduce_mean来进行求均值。
def build_loss(logits, targets, lstm_size, num_classes):
    '''
    根据logits和targets计算损失

    logits: 全连接层的输出结果(不经过softmax)
    targets: 真实标签,形状为(batch_size,n_seqs)
    lstm_size
    num_classes: vocab_size

    '''

    # One-hot编码
    y_one_hot = tf.one_hot(targets, num_classes)
    y_reshaped = tf.reshape(y_one_hot, logits.get_shape())

    # Softmax cross entropy loss
    loss = tf.nn.softmax_cross_entropy_with_logits(logits=logits, labels=y_reshaped)
    loss = tf.reduce_mean(loss)

    return loss
6. 优化器
采用gradient clippling的方式来防止梯度爆炸。即通过设置一个阈值,当gradients超过这个阈值时,就将它重置为阈值大小,这就保证了梯度不会变得很大。
优化器的构造流程:
1、找到网络中的可训练参数,因为要对 w,b进行更新,
2、计算梯度:tf.gradients(loss,训练参数),
3、梯度裁剪:tf.clip_by_global_norm(梯度,阈值),
4、实例化一个优化器:train_op = tf.train.AdadeltaOptimizer(学习率)
5、优化器进行梯度下降更新训练参数,得到一个op:optimizer = train_op.apply_gradients(zip(grades,tvars))
def build_optimizer(loss, learning_rate, grad_clip):
    '''
    构造Optimizer

    loss: 损失
    learning_rate: 学习率

    '''

    # 使用clipping gradients
    tvars = tf.trainable_variables()
    grads, _ = tf.clip_by_global_norm(tf.gradients(loss, tvars), grad_clip)
    train_op = tf.train.AdamOptimizer(learning_rate)
    optimizer = train_op.apply_gradients(zip(grads, tvars))

    return optimizer
三、模型训练
1.经过上面五个步骤,我们完成了所有的模块设置。将这些部分组合起来,构建一个类。
class CharRNN:

    def __init__(self, num_classes, batch_size=64, n_seqs=50,
                       lstm_size=128, num_layers=2, learning_rate=0.001,
                       grad_clip=5, sampling=False):

        # 预测阶段,batch_size=1,文本长度=1;即输入一个字符,预测下一个字符。
        if sampling == True:
            batch_size, n_seqs = 1, 1
        else:
            batch_size, n_seqs = batch_size, n_seqs

        tf.reset_default_graph()

        # 输入层
        self.inputs, self.targets, self.keep_prob = build_inputs(batch_size, n_seqs)

        # LSTM层
        cell, self.initial_state = build_lstm(lstm_size, num_layers, batch_size, self.keep_prob)

        # 对输入进行one-hot编码
        x_one_hot = tf.one_hot(self.inputs, num_classes)

        # 运行RNN outputs  [batch_size,n_seqs,lstm_size]
        outputs, state = tf.nn.dynamic_rnn(cell, x_one_hot, initial_state=self.initial_state)
        self.final_state = state

        # 预测结果
        self.prediction, self.logits = build_output(outputs, lstm_size, num_classes)

        # Loss 和 optimizer (with gradient clipping)
        self.loss = build_loss(self.logits, self.targets, lstm_size, num_classes)
        self.optimizer = build_optimizer(self.loss, learning_rate, grad_clip)
2、训练阶段
1、实例化CharRNN
2、给定输入数据:feed字典
3、对sess.run([op],feed)
batch_size = 100         # Sequences per batch
n_seqs = 100          # 序列长度
lstm_size = 512         # Size of hidden layers in LSTMs
num_layers = 2          # Number of LSTM layers
learning_rate = 0.001    # Learning rate
keep_prob = 0.5         # Dropout keep probability``
config = tf.ConfigProto(
        allow_soft_placement=True, # 自动选择CPU 还是GPU
        log_device_placement=False # 是否打印设备日志
    )


epochs = 20
save_every_n = 200 # 200个batch保存一次模型
model = CharRNN(len(vocab), batch_size=batch_size, n_seqs=n_seqs,
                lstm_size=lstm_size, num_layers=num_layers,
                learning_rate=learning_rate)
saver = tf.train.Saver(max_to_keep=100) # Maximum number of recent checkpoints to keep. Defaults to 5。默认保存最近的5个模型的参数。

with tf.Session(config=config) as sess:
    sess.run(tf.global_variables_initializer())
    counter = 0
    for e in range(epochs):
        new_state = sess.run(model.initial_state)
        loss = 0
        for x,y in get_batches(encoded,batch_size,n_seqs):
            counter += 1
            start = time.time()
            feed = {
                model.inputs:x,
                model.targets:y,
                model.keep_prob:keep_prob,
                model.initial_state:new_state
            }
            batch_loss,new_state,_ = sess.run([model.loss,model.final_state,model.optimizer],feed_dict=feed)
            end = time.time()
             # control the print lines
            if counter % 100 == 0:
                print('轮数: {}/{}... '.format(e+1, epochs),
                      '训练步数: {}... '.format(counter),
                      '训练误差: {:.4f}... '.format(batch_loss),
                      '{:.4f} sec/batch'.format((end-start)))

            if (counter % save_every_n == 0):
                saver.save(sess, "checkpoints/i{}_l{}.ckpt".format(counter, lstm_size))
    saver.save(sess,"checkpoints/i{}_l{}.ckpt".format(counter,lstm_size))
ps:训练过程遇到的问题
1、开始使用CPU进行训练,最后的训练误差为3.2,感觉出了问题。换成GPU之后:
轮数: 19/20...  训练步数: 3600...  训练误差: 1.2566...  0.1666 sec/batch
轮数: 19/20...  训练步数: 3700...  训练误差: 1.2511...  0.1556 sec/batch
轮数: 20/20...  训练步数: 3800...  训练误差: 1.1943...  0.1606 sec/batch
轮数: 20/20...  训练步数: 3900...  训练误差: 1.2473...  0.1626 sec/batch
四、文本生成:
现在我们可以基于我们的训练参数进行文本的生成。当我们输入一个字符时,LSTM会预测下一个字符,我们再将新的字符进行输入,这样能不断的循环下去生成本文。
为了减少噪音,每次的预测值我会选择最可能的前5个进行随机选择,比如输入h,预测结果概率最大的前五个为[o,e,i,u,b],我们将随机从这五个中挑选一个作为新的字符,让过程加入随机因素会减少一些噪音的生成。
def pick_top_n(preds, vocab_size, top_n=5):
    """
    从预测结果中选取前top_n个最可能的字符

    preds: 预测结果
    vocab_size
    top_n
    """
    p = np.squeeze(preds)
    # 将除了top_n个预测值的位置都置为0
    p[np.argsort(p)[:-top_n]] = 0
    # 归一化概率
    p = p / np.sum(p)
    # 随机选取一个字符
    c = np.random.choice(vocab_size, 1, p=p)[0]
    return c
np.squeeze(),从数组的形状中删除单维条目,即把shape中为1的维度去掉。
在预测阶段,输入样本形状为(1,1)
preds为输出层的输出,即(1,83),表示当前输入字符为字符表中每个字符的概率。
p = np.array([长度为83的列表]),取top_n个值。
def sample(checkpoint, n_samples, lstm_size, vocab_size, prime="The "):
    """
    生成新文本

    checkpoint: 某一轮迭代的参数文件
    n_sample: 新文本的字符长度
    lstm_size: 隐层结点数
    vocab_size
    prime: 起始文本
    """
    # 将输入的单词转换为单个字符组成的list
    samples = [c for c in prime]
    # sampling=True意味着batch的size=1 x 1
    model = CharRNN(len(vocab), lstm_size=lstm_size, sampling=True)
    saver = tf.train.Saver()
    with tf.Session() as sess:
        # 加载模型参数,恢复训练
        saver.restore(sess, checkpoint)
        new_state = sess.run(model.initial_state)
        for c in prime:
            x = np.zeros((1, 1))
            # 输入单个字符
            x[0,0] = vocab_to_int[c]
            feed = {model.inputs: x,
                    model.keep_prob: 1.,
                    model.initial_state: new_state}
            preds, new_state = sess.run([model.prediction, model.final_state],
                                         feed_dict=feed)
        c = pick_top_n(preds, len(vocab))
        # 添加字符到samples中
        samples.append(int_to_vocab[c])

        # 不断生成字符,直到达到指定数目
        for i in range(n_samples):
            x[0,0] = c
            feed = {model.inputs: x,
                    model.keep_prob: 1.,
                    model.initial_state: new_state}
            preds, new_state = sess.run([model.prediction, model.final_state],
                                         feed_dict=feed)

            c = pick_top_n(preds, len(vocab))
            samples.append(int_to_vocab[c])

    return ''.join(samples)
在for循环中,每次输出的结果包含字符和隐状态,隐状态作为下一步网络的输入,字符保存到列表作为最后的生成文本。
tf.train_latest_checkpoint()方法,可以选择最后的训练的参数作为网络参数。
# 选用最终的训练参数作为输入进行文本生成
checkpoint = tf.train.latest_checkpoint('checkpoints')
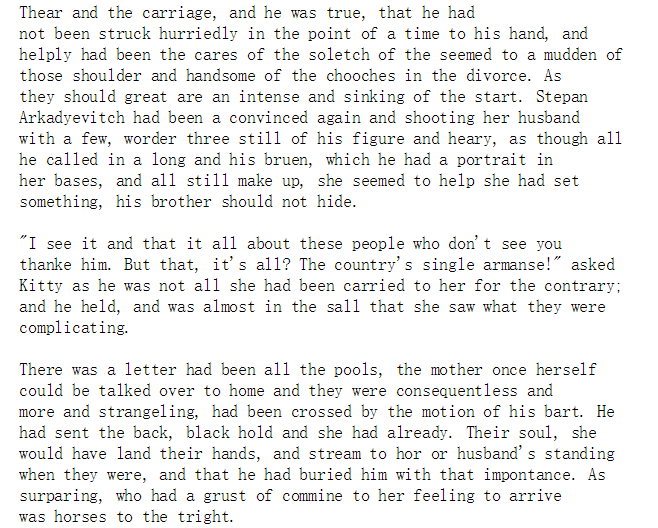
samp = sample(checkpoint, 2000, lstm_size, len(vocab), prime="The")
print(samp)
参考资料
1、字符级NLP优劣分析:在某些场景中比词向量更好用
https://flashgene.com/archives/28609.html
2、《安娜卡列尼娜》文本生成——利用TensorFlow构建LSTM模型
https://zhuanlan.zhihu.com/p/27087310
3、TensorFlow学习笔记(5):交叉熵损失函数实现
https://zhuanlan.zhihu.com/p/44901953

 浙公网安备 33010602011771号