很详细的SpringBoot整合UEditor教程
很详细的SpringBoot整合UEditor教程
UEditor只提供JSP版本的后端入口代码。但提供了项目源码,因此可以根据业务需求修改源代码。
此处使用了SpringBoot框架,配备了Thymeleaf模板引擎,所以没有必要再添加jsp来兼容UEditor,可通过修改源码满足需要。下面是详细教程。
1.新建SpringBoot项目,添加web和thymeleaf包
pom文件如下:
-
-
<project xmlns="http://maven.apache.org/POM/4.0.0" xmlns:xsi="http://www.w3.org/2001/XMLSchema-instance"
-
xsi:schemaLocation="http://maven.apache.org/POM/4.0.0 http://maven.apache.org/xsd/maven-4.0.0.xsd">
-
<modelVersion>4.0.0</modelVersion>
-
-
<groupId>com.example</groupId>
-
<artifactId>ueditor-test</artifactId>
-
<version>0.0.1-SNAPSHOT</version>
-
<packaging>jar</packaging>
-
-
<name>ueditor-test</name>
-
<description>Demo project for Spring Boot</description>
-
-
<parent>
-
<groupId>org.springframework.boot</groupId>
-
<artifactId>spring-boot-starter-parent</artifactId>
-
<version>1.5.2.RELEASE</version>
-
-
<relativePath/> <!-- lookup parent from repository -->
-
</parent>
-
-
<properties>
-
<project.build.sourceEncoding>UTF-8</project.build.sourceEncoding>
-
<project.reporting.outputEncoding>UTF-8</project.reporting.outputEncoding>
-
<java.version>1.8</java.version>
-
<!--修改thymeleaf版本-->
-
<thymeleaf.version>3.0.3.RELEASE</thymeleaf.version>
-
<thymeleaf-layout-dialect.version>2.1.0</thymeleaf-layout-dialect.version>
-
</properties>
-
-
<dependencies>
-
<dependency>
-
<groupId>org.springframework.boot</groupId>
-
<artifactId>spring-boot-starter-thymeleaf</artifactId>
-
</dependency>
-
<dependency>
-
<groupId>org.springframework.boot</groupId>
-
<artifactId>spring-boot-starter-web</artifactId>
-
</dependency>
-
-
<dependency>
-
<groupId>org.springframework.boot</groupId>
-
<artifactId>spring-boot-starter-test</artifactId>
-
<scope>test</scope>
-
</dependency>
-
</dependencies>
-
-
<build>
-
<plugins>
-
<plugin>
-
<groupId>org.springframework.boot</groupId>
-
<artifactId>spring-boot-maven-plugin</artifactId>
-
</plugin>
-
</plugins>
-
</build>
-
-
-
</project>
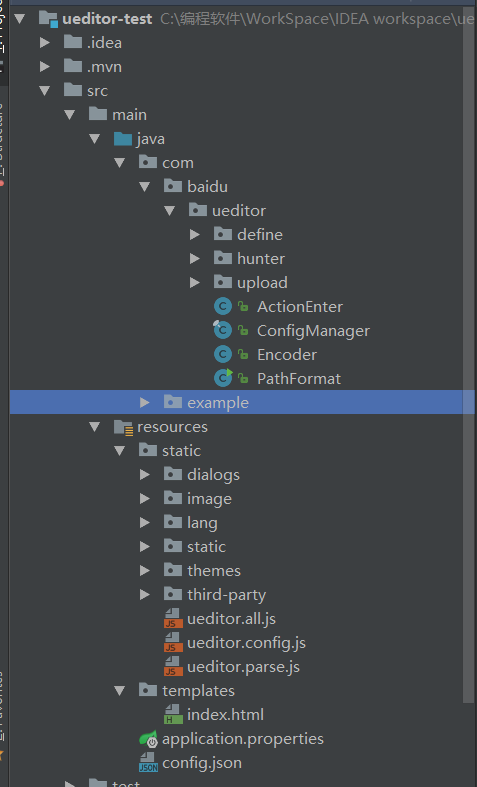
2.从官网下载源代码并解压至项目,注意config.json我拷到了resources根路径下,如图:
3.添加UEditorController,跳转到index页面:
-
package com.example;
-
-
import org.springframework.stereotype.Controller;
-
import org.springframework.web.bind.annotation.RequestMapping;
-
-
/**
-
* Created by ldb on 2017/4/9.
-
*/
-
-
public class UEditorController {
-
-
-
-
private String showPage(){
-
return "index";
-
}
-
-
-
}
4.运行项目。访问路径localhost:8080,跳转到如下界面即是源码已拷贝成功
5.此时发现上传图片功能不能用。下面接着看。修改pom,添加UEditor依赖的Jar包。pom文件如下:
-
-
<project xmlns="http://maven.apache.org/POM/4.0.0" xmlns:xsi="http://www.w3.org/2001/XMLSchema-instance"
-
xsi:schemaLocation="http://maven.apache.org/POM/4.0.0 http://maven.apache.org/xsd/maven-4.0.0.xsd">
-
<modelVersion>4.0.0</modelVersion>
-
-
<groupId>com.example</groupId>
-
<artifactId>ueditor</artifactId>
-
<version>0.0.1-SNAPSHOT</version>
-
<packaging>jar</packaging>
-
-
<name>ueditor</name>
-
<description>Demo project for Spring Boot</description>
-
-
<parent>
-
<groupId>org.springframework.boot</groupId>
-
<artifactId>spring-boot-starter-parent</artifactId>
-
<version>1.5.2.RELEASE</version>
-
<relativePath/> <!-- lookup parent from repository -->
-
</parent>
-
-
<properties>
-
<project.build.sourceEncoding>UTF-8</project.build.sourceEncoding>
-
<project.reporting.outputEncoding>UTF-8</project.reporting.outputEncoding>
-
<java.version>1.8</java.version>
-
<thymeleaf.version>3.0.3.RELEASE</thymeleaf.version>
-
<thymeleaf-layout-dialect.version>2.1.0</thymeleaf-layout-dialect.version>
-
</properties>
-
-
<dependencies>
-
<dependency>
-
<groupId>org.springframework.boot</groupId>
-
<artifactId>spring-boot-starter-thymeleaf</artifactId>
-
</dependency>
-
<dependency>
-
<groupId>org.springframework.boot</groupId>
-
<artifactId>spring-boot-starter-web</artifactId>
-
</dependency>
-
-
<dependency>
-
<groupId>org.springframework.boot</groupId>
-
<artifactId>spring-boot-starter-test</artifactId>
-
<scope>test</scope>
-
</dependency>
-
-
<!--UEditor依赖的jar包 -->
-
<dependency>
-
<groupId>org.json</groupId>
-
<artifactId>json</artifactId>
-
</dependency>
-
<dependency>
-
<groupId>commons-fileupload</groupId>
-
<artifactId>commons-fileupload</artifactId>
-
<version>1.3.2</version>
-
</dependency>
-
<dependency>
-
<groupId>commons-codec</groupId>
-
<artifactId>commons-codec</artifactId>
-
<version>1.9</version>
-
</dependency>
-
</dependencies>
-
-
<build>
-
<plugins>
-
<plugin>
-
<groupId>org.springframework.boot</groupId>
-
<artifactId>spring-boot-maven-plugin</artifactId>
-
</plugin>
-
</plugins>
-
</build>
-
-
-
</project>
-
package com.example;
-
-
import com.baidu.ueditor.ActionEnter;
-
import org.springframework.stereotype.Controller;
-
import org.springframework.web.bind.annotation.RequestMapping;
-
-
import javax.servlet.http.HttpServletRequest;
-
import javax.servlet.http.HttpServletResponse;
-
import java.io.IOException;
-
import java.io.PrintWriter;
-
-
/**
-
* Created by ldb on 2017/4/9.
-
*/
-
-
public class UEditorController {
-
-
-
-
private String showPage(){
-
return "index";
-
}
-
-
-
public void config(HttpServletRequest request, HttpServletResponse response) {
-
response.setContentType("application/json");
-
String rootPath = request.getSession().getServletContext().getRealPath("/");
-
try {
-
String exec = new ActionEnter(request, rootPath).exec();
-
PrintWriter writer = response.getWriter();
-
writer.write(exec);
-
writer.flush();
-
writer.close();
-
} catch (IOException e) {
-
e.printStackTrace();
-
}
-
-
}
-
}
-
package com.baidu.ueditor;
-
-
import com.baidu.ueditor.define.ActionMap;
-
import org.json.JSONArray;
-
import org.json.JSONObject;
-
-
import java.io.*;
-
import java.net.URISyntaxException;
-
import java.util.HashMap;
-
import java.util.Map;
-
-
/**
-
* 配置管理器
-
* @author hancong03@baidu.com
-
*
-
*/
-
public final class ConfigManager {
-
-
private final String rootPath;
-
private final String originalPath;
-
private final String contextPath;
-
private static final String configFileName = "config.json";
-
private String parentPath = null;
-
private JSONObject jsonConfig = null;
-
// 涂鸦上传filename定义
-
private final static String SCRAWL_FILE_NAME = "scrawl";
-
// 远程图片抓取filename定义
-
private final static String REMOTE_FILE_NAME = "remote";
-
-
/*
-
* 通过一个给定的路径构建一个配置管理器, 该管理器要求地址路径所在目录下必须存在config.properties文件
-
*/
-
private ConfigManager ( String rootPath, String contextPath, String uri ) throws FileNotFoundException, IOException {
-
-
rootPath = rootPath.replace( "\\", "/" );
-
-
this.rootPath = rootPath;
-
this.contextPath = contextPath;
-
-
if ( contextPath.length() > 0 ) {
-
this.originalPath = this.rootPath + uri.substring( contextPath.length() );
-
} else {
-
this.originalPath = this.rootPath + uri;
-
}
-
-
this.initEnv();
-
-
}
-
-
/**
-
* 配置管理器构造工厂
-
* @param rootPath 服务器根路径
-
* @param contextPath 服务器所在项目路径
-
* @param uri 当前访问的uri
-
* @return 配置管理器实例或者null
-
*/
-
public static ConfigManager getInstance ( String rootPath, String contextPath, String uri ) {
-
-
try {
-
return new ConfigManager(rootPath, contextPath, uri);
-
} catch ( Exception e ) {
-
return null;
-
}
-
-
}
-
-
// 验证配置文件加载是否正确
-
public boolean valid () {
-
return this.jsonConfig != null;
-
}
-
-
public JSONObject getAllConfig () {
-
-
return this.jsonConfig;
-
-
}
-
-
public Map<String, Object> getConfig ( int type ) {
-
-
Map<String, Object> conf = new HashMap<String, Object>();
-
String savePath = null;
-
-
switch ( type ) {
-
-
case ActionMap.UPLOAD_FILE:
-
conf.put( "isBase64", "false" );
-
conf.put( "maxSize", this.jsonConfig.getLong( "fileMaxSize" ) );
-
conf.put( "allowFiles", this.getArray( "fileAllowFiles" ) );
-
conf.put( "fieldName", this.jsonConfig.getString( "fileFieldName" ) );
-
savePath = this.jsonConfig.getString( "filePathFormat" );
-
break;
-
-
case ActionMap.UPLOAD_IMAGE:
-
conf.put( "isBase64", "false" );
-
conf.put( "maxSize", this.jsonConfig.getLong( "imageMaxSize" ) );
-
conf.put( "allowFiles", this.getArray( "imageAllowFiles" ) );
-
conf.put( "fieldName", this.jsonConfig.getString( "imageFieldName" ) );
-
savePath = this.jsonConfig.getString( "imagePathFormat" );
-
break;
-
-
case ActionMap.UPLOAD_VIDEO:
-
conf.put( "maxSize", this.jsonConfig.getLong( "videoMaxSize" ) );
-
conf.put( "allowFiles", this.getArray( "videoAllowFiles" ) );
-
conf.put( "fieldName", this.jsonConfig.getString( "videoFieldName" ) );
-
savePath = this.jsonConfig.getString( "videoPathFormat" );
-
break;
-
-
case ActionMap.UPLOAD_SCRAWL:
-
conf.put( "filename", ConfigManager.SCRAWL_FILE_NAME );
-
conf.put( "maxSize", this.jsonConfig.getLong( "scrawlMaxSize" ) );
-
conf.put( "fieldName", this.jsonConfig.getString( "scrawlFieldName" ) );
-
conf.put( "isBase64", "true" );
-
savePath = this.jsonConfig.getString( "scrawlPathFormat" );
-
break;
-
-
case ActionMap.CATCH_IMAGE:
-
conf.put( "filename", ConfigManager.REMOTE_FILE_NAME );
-
conf.put( "filter", this.getArray( "catcherLocalDomain" ) );
-
conf.put( "maxSize", this.jsonConfig.getLong( "catcherMaxSize" ) );
-
conf.put( "allowFiles", this.getArray( "catcherAllowFiles" ) );
-
conf.put( "fieldName", this.jsonConfig.getString( "catcherFieldName" ) + "[]" );
-
savePath = this.jsonConfig.getString( "catcherPathFormat" );
-
break;
-
-
case ActionMap.LIST_IMAGE:
-
conf.put( "allowFiles", this.getArray( "imageManagerAllowFiles" ) );
-
conf.put( "dir", this.jsonConfig.getString( "imageManagerListPath" ) );
-
conf.put( "count", this.jsonConfig.getInt( "imageManagerListSize" ) );
-
break;
-
-
case ActionMap.LIST_FILE:
-
conf.put( "allowFiles", this.getArray( "fileManagerAllowFiles" ) );
-
conf.put( "dir", this.jsonConfig.getString( "fileManagerListPath" ) );
-
conf.put( "count", this.jsonConfig.getInt( "fileManagerListSize" ) );
-
break;
-
-
}
-
-
conf.put( "savePath", savePath );
-
conf.put( "rootPath", this.rootPath );
-
-
return conf;
-
-
}
-
-
private void initEnv () throws FileNotFoundException, IOException {
-
-
File file = new File( this.originalPath );
-
-
if ( !file.isAbsolute() ) {
-
file = new File( file.getAbsolutePath() );
-
}
-
-
this.parentPath = file.getParent();
-
-
String configContent = this.readFile( this.getConfigPath() );
-
-
try{
-
JSONObject jsonConfig = new JSONObject( configContent );
-
this.jsonConfig = jsonConfig;
-
} catch ( Exception e ) {
-
this.jsonConfig = null;
-
}
-
-
}
-
-
-
private String getConfigPath () {
-
//return this.parentPath + File.separator + ConfigManager.configFileName;
-
try {
-
//获取classpath下的config.json路径
-
return this.getClass().getClassLoader().getResource("config.json").toURI().getPath();
-
} catch (URISyntaxException e) {
-
return null;
-
}
-
}
-
-
private String[] getArray ( String key ) {
-
-
JSONArray jsonArray = this.jsonConfig.getJSONArray( key );
-
String[] result = new String[ jsonArray.length() ];
-
-
for ( int i = 0, len = jsonArray.length(); i < len; i++ ) {
-
result[i] = jsonArray.getString( i );
-
}
-
-
return result;
-
-
}
-
-
private String readFile ( String path ) throws IOException {
-
-
StringBuilder builder = new StringBuilder();
-
-
try {
-
-
InputStreamReader reader = new InputStreamReader( new FileInputStream( path ), "UTF-8" );
-
BufferedReader bfReader = new BufferedReader( reader );
-
-
String tmpContent = null;
-
-
while ( ( tmpContent = bfReader.readLine() ) != null ) {
-
builder.append( tmpContent );
-
}
-
-
bfReader.close();
-
-
} catch ( UnsupportedEncodingException e ) {
-
// 忽略
-
}
-
-
return this.filter( builder.toString() );
-
-
}
-
-
// 过滤输入字符串, 剔除多行注释以及替换掉反斜杠
-
private String filter ( String input ) {
-
-
return input.replaceAll( "/\\*[\\s\\S]*?\\*/", "" );
-
-
}
-
-
}
此处需要先转为URI再getPath(),否则如果你的项目路径带空格或者带中文则无法读取到文件
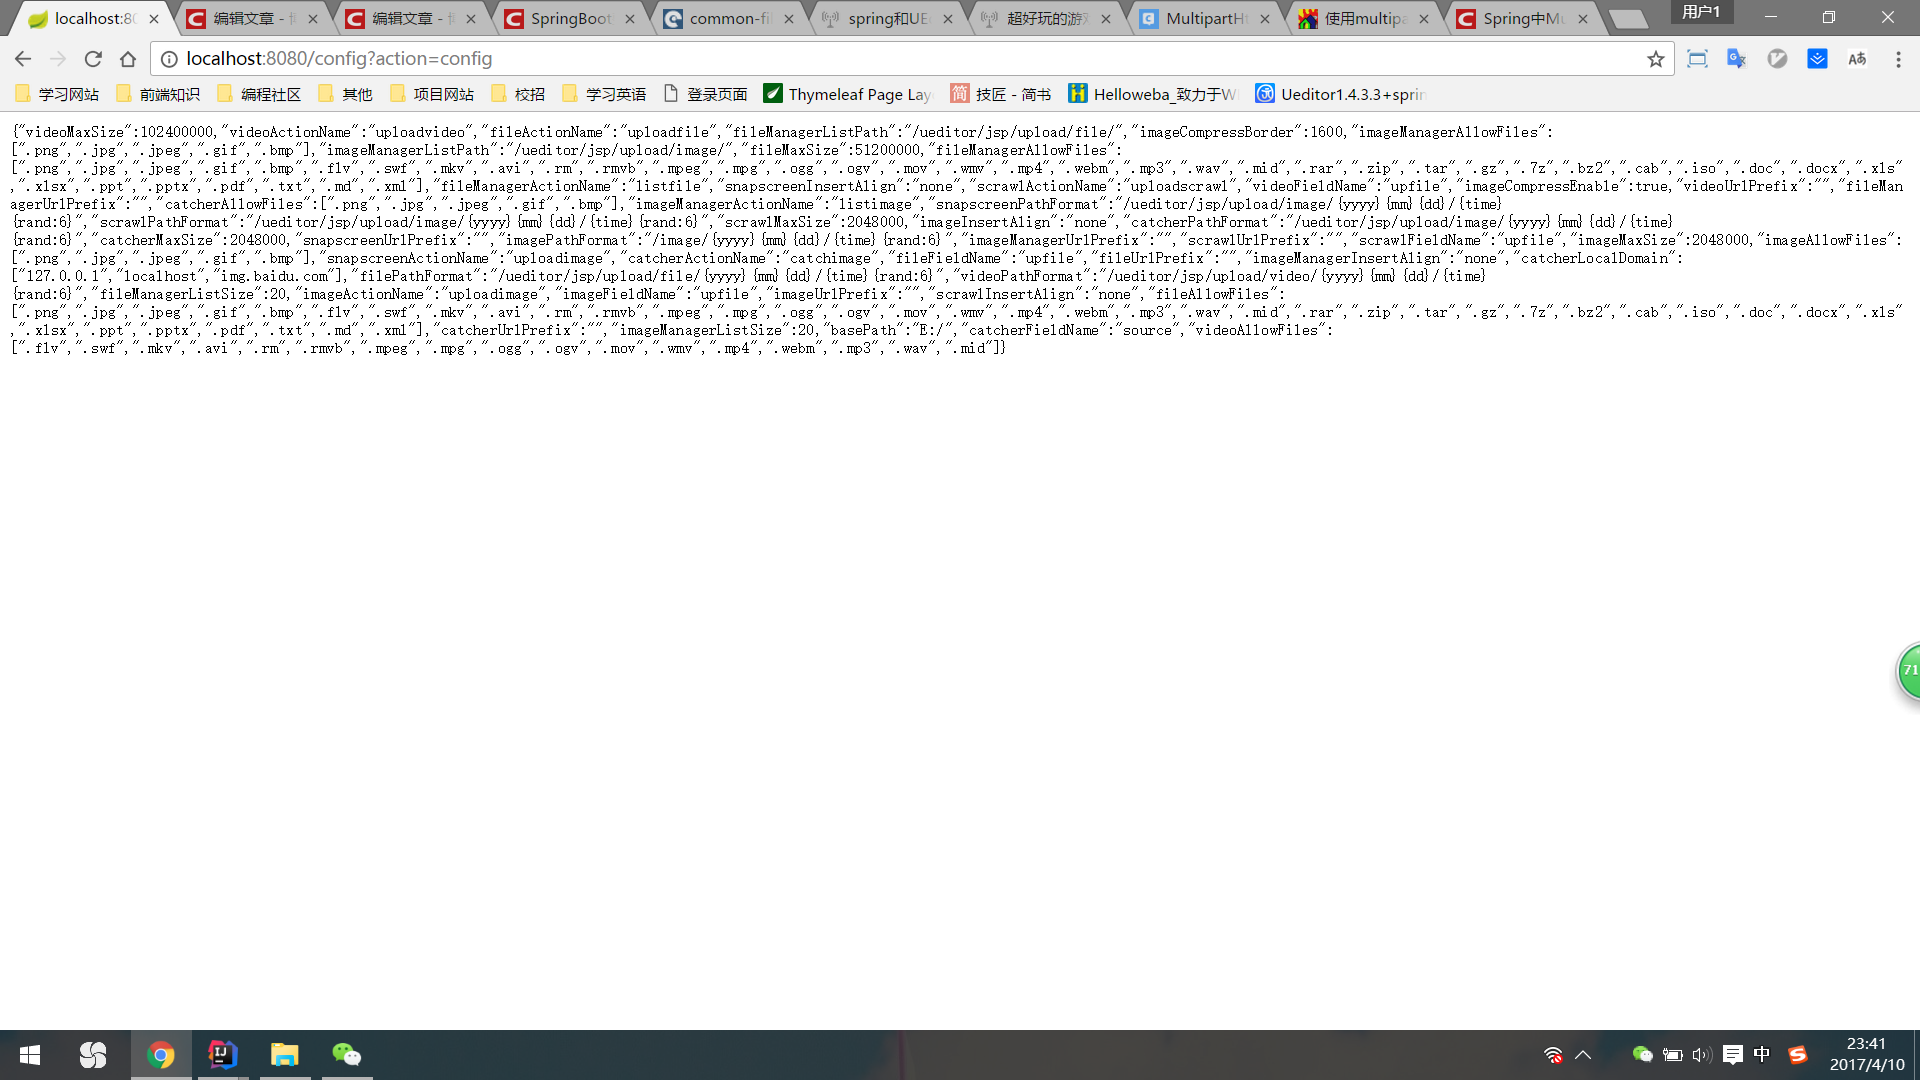
8.运行项目路径http://localhost:8080/config?action=config,如下图显示则表示可读取到config.json文件
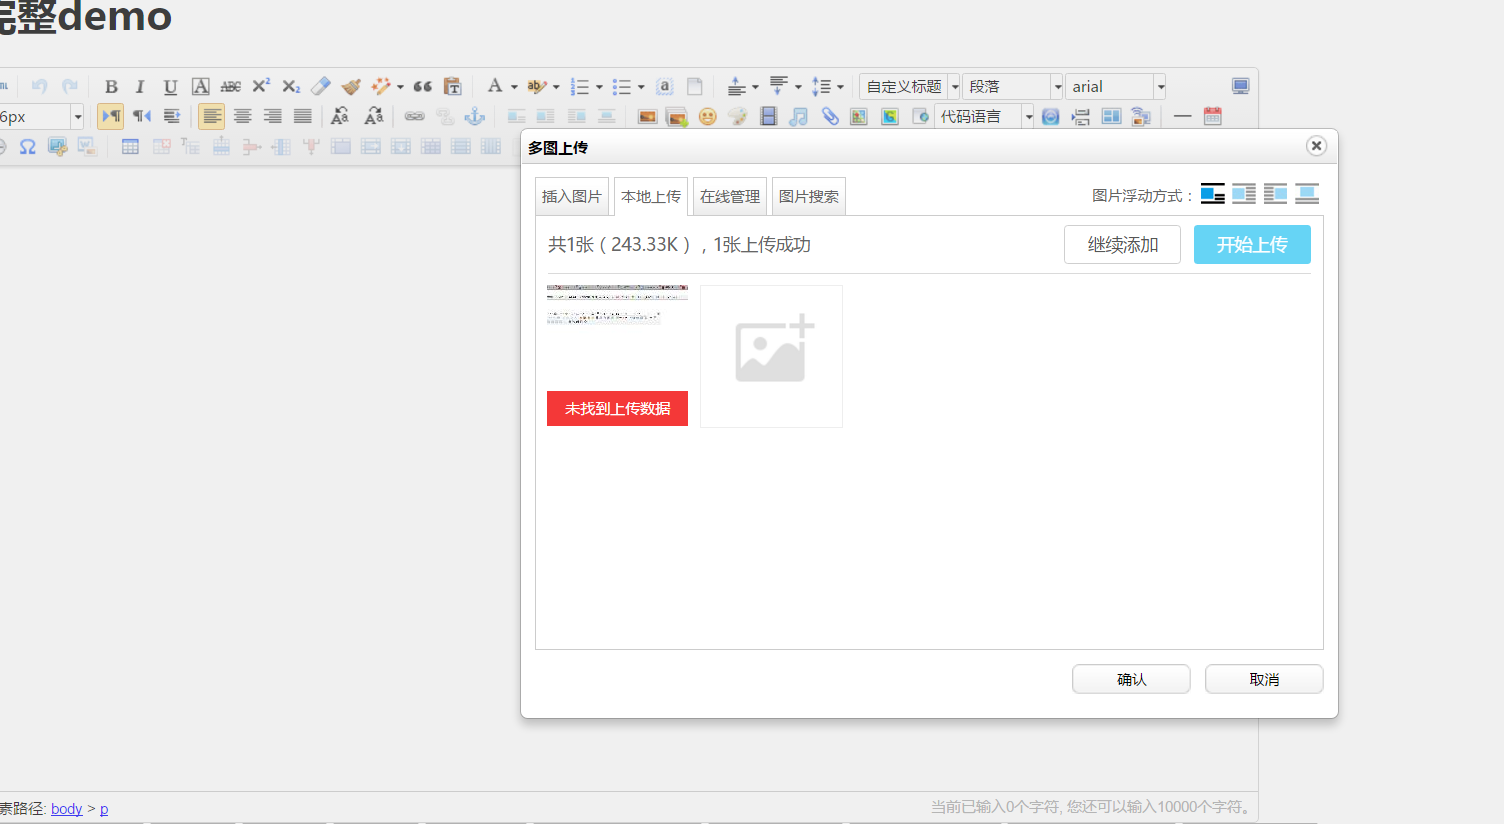
9.此时点击上传图片显示 如下
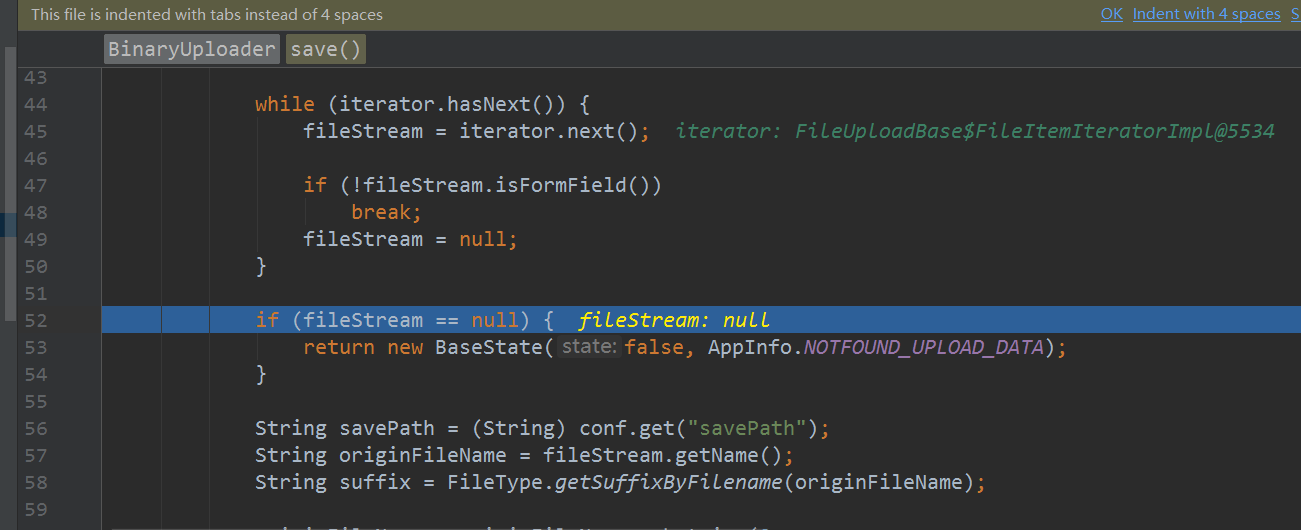
提示未找到上传数据。继续一步步debug,发现在BinaryUploader类竟然无法获取到字节流
google得到原因是因为SpringMVC框架对含字节流的request进行了处理,此处传的是处理过的request,故获取不到字节流。此时采用SpringMVC框架的解析器multipartResolver。修改源码如下:
-
package com.baidu.ueditor.upload;
-
-
import com.baidu.ueditor.PathFormat;
-
import com.baidu.ueditor.define.AppInfo;
-
import com.baidu.ueditor.define.BaseState;
-
import com.baidu.ueditor.define.FileType;
-
import com.baidu.ueditor.define.State;
-
import org.apache.commons.fileupload.servlet.ServletFileUpload;
-
import org.springframework.web.multipart.MultipartFile;
-
import org.springframework.web.multipart.MultipartHttpServletRequest;
-
-
import javax.servlet.http.HttpServletRequest;
-
import java.io.IOException;
-
import java.io.InputStream;
-
import java.util.Arrays;
-
import java.util.List;
-
import java.util.Map;
-
-
public class BinaryUploader {
-
-
public static final State save(HttpServletRequest request,
-
Map<String, Object> conf) {
-
// FileItemStream fileStream = null;
-
// boolean isAjaxUpload = request.getHeader( "X_Requested_With" ) != null;
-
-
if (!ServletFileUpload.isMultipartContent(request)) {
-
return new BaseState(false, AppInfo.NOT_MULTIPART_CONTENT);
-
}
-
-
// ServletFileUpload upload = new ServletFileUpload(
-
// new DiskFileItemFactory());
-
//
-
// if ( isAjaxUpload ) {
-
// upload.setHeaderEncoding( "UTF-8" );
-
// }
-
-
try {
-
// FileItemIterator iterator = upload.getItemIterator(request);
-
//
-
// while (iterator.hasNext()) {
-
// fileStream = iterator.next();
-
//
-
// if (!fileStream.isFormField())
-
// break;
-
// fileStream = null;
-
// }
-
//
-
// if (fileStream == null) {
-
// return new BaseState(false, AppInfo.NOTFOUND_UPLOAD_DATA);
-
// }
-
MultipartHttpServletRequest multipartRequest = (MultipartHttpServletRequest) request;
-
MultipartFile multipartFile = multipartRequest.getFile(conf.get("fieldName").toString());
-
if(multipartFile==null){
-
return new BaseState(false, AppInfo.NOTFOUND_UPLOAD_DATA);
-
}
-
-
String savePath = (String) conf.get("savePath");
-
//String originFileName = fileStream.getName();
-
String originFileName = multipartFile.getOriginalFilename();
-
String suffix = FileType.getSuffixByFilename(originFileName);
-
-
originFileName = originFileName.substring(0,
-
originFileName.length() - suffix.length());
-
savePath = savePath + suffix;
-
-
long maxSize = ((Long) conf.get("maxSize")).longValue();
-
-
if (!validType(suffix, (String[]) conf.get("allowFiles"))) {
-
return new BaseState(false, AppInfo.NOT_ALLOW_FILE_TYPE);
-
}
-
-
savePath = PathFormat.parse(savePath, originFileName);
-
-
String physicalPath = (String) conf.get("rootPath") + savePath;
-
-
//InputStream is = fileStream.openStream();
-
InputStream is = multipartFile.getInputStream();
-
State storageState = StorageManager.saveFileByInputStream(is,
-
physicalPath, maxSize);
-
is.close();
-
-
if (storageState.isSuccess()) {
-
storageState.putInfo("url", PathFormat.format(savePath));
-
storageState.putInfo("type", suffix);
-
storageState.putInfo("original", originFileName + suffix);
-
}
-
-
return storageState;
-
// } catch (FileUploadException e) {
-
// return new BaseState(false, AppInfo.PARSE_REQUEST_ERROR);
-
} catch (IOException e) {
-
}
-
return new BaseState(false, AppInfo.IO_ERROR);
-
}
-
-
private static boolean validType(String type, String[] allowTypes) {
-
List<String> list = Arrays.asList(allowTypes);
-
-
return list.contains(type);
-
}
-
}
此时进行上传图片,已经能够成功上传了。
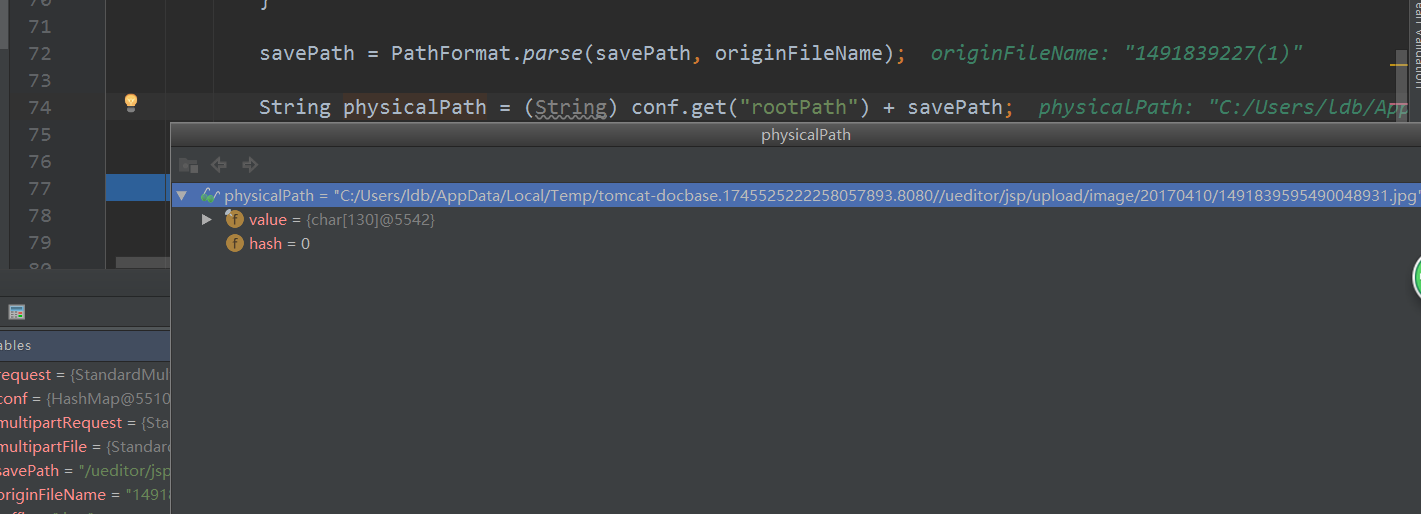
10.可是图片究竟上传到哪里了呢?继续一步步debug发现,上传到如图路径
如图路径为tomcat缓存路径,只要重启下tomcat该文件就会被删除。我们需要将其存储到磁盘中。此时修改config.json文件。
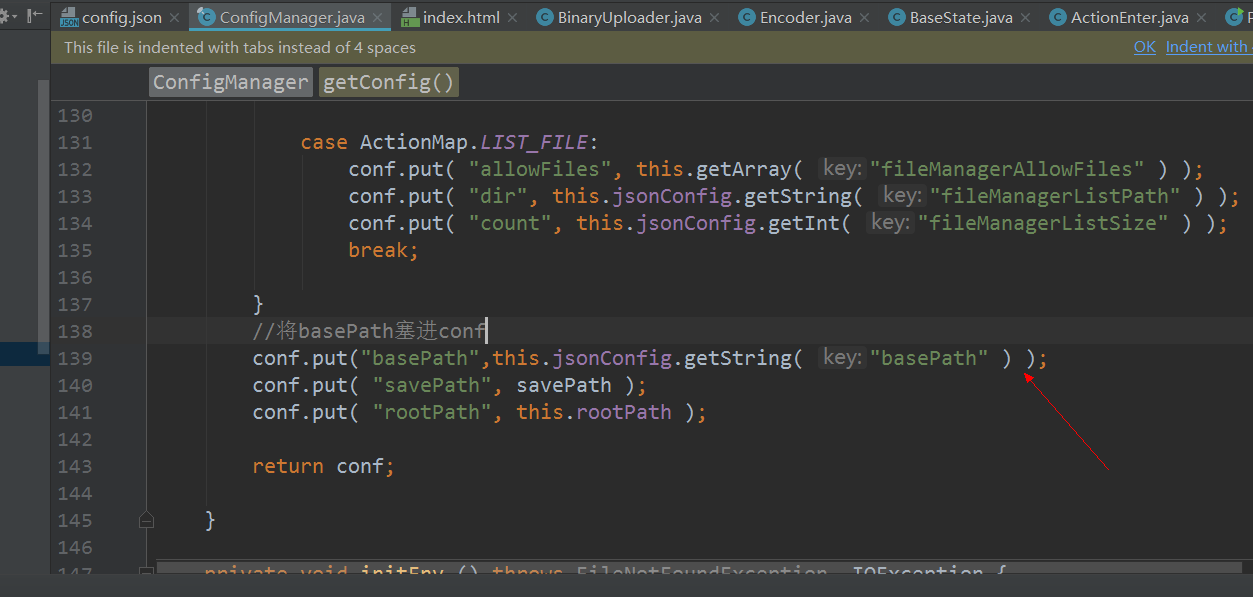
红色箭头为修改处。我需要将文件存储到E:/image/**下,此处我多添加了basePath,是想把视频、音乐等静态资源都存储到E盘。由于添加了basePath,需要修改配置。通过debug来到ConfigManage
添加红色箭头代码,将basePath塞进配置文件里。之后继续来到上传文件类BinaryUploader,修改如下代码:
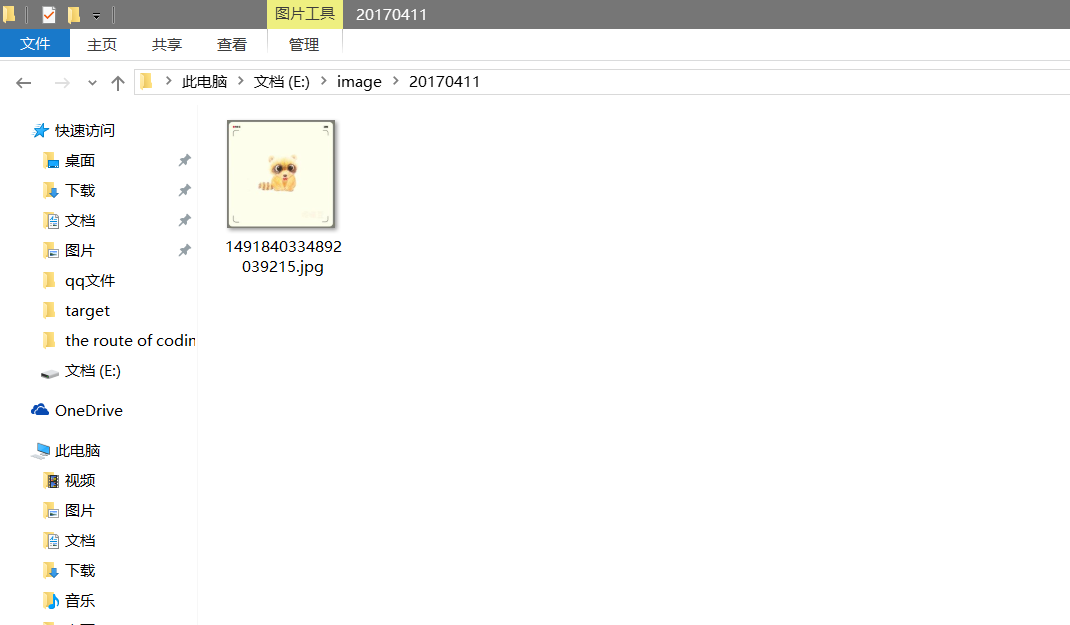
运行项目,点击添加图片。打开E盘的image目录,如图,成功上传到E盘对应路径
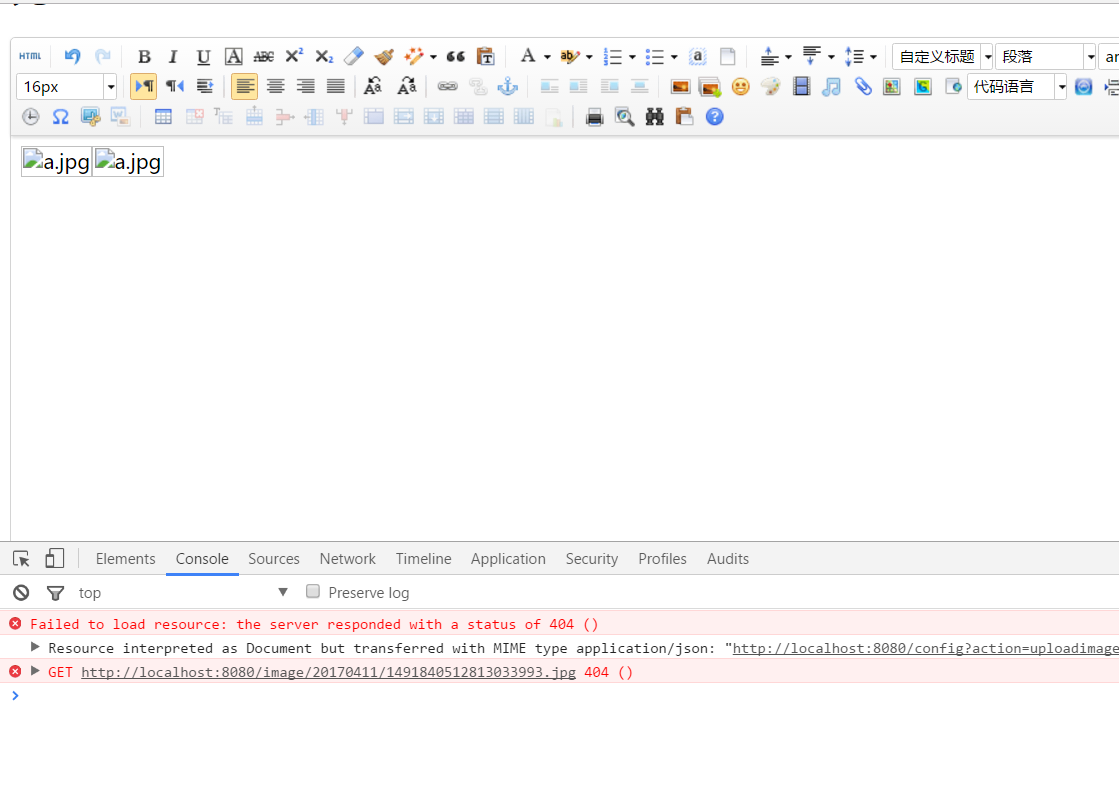
11.打开浏览器,发现页面无法加载图片。如下图:
打开浏览器调试器。如图
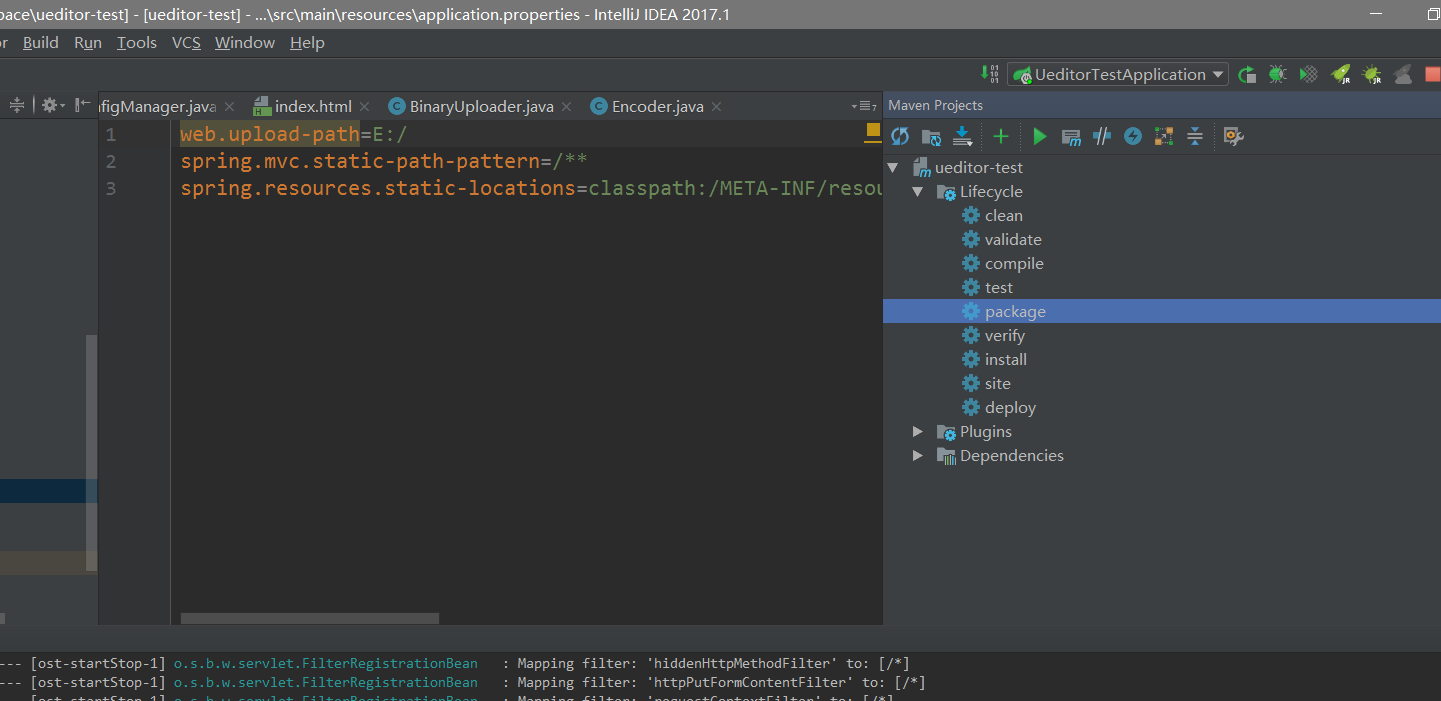
无法获取到图片。这是当然的,因为我们把图片存在E盘了,而spring并没有对E盘目录进行映射。此时我们加入路径映射。打开application.properties文件,添加如下代码
web.upload-path=E:/
spring.mvc.static-path-pattern=/**
spring.resources.static-locations=classpath:/META-INF/resources/,classpath:/resources/,classpath:/static/,classpath:/public/,file:${web.upload-path}
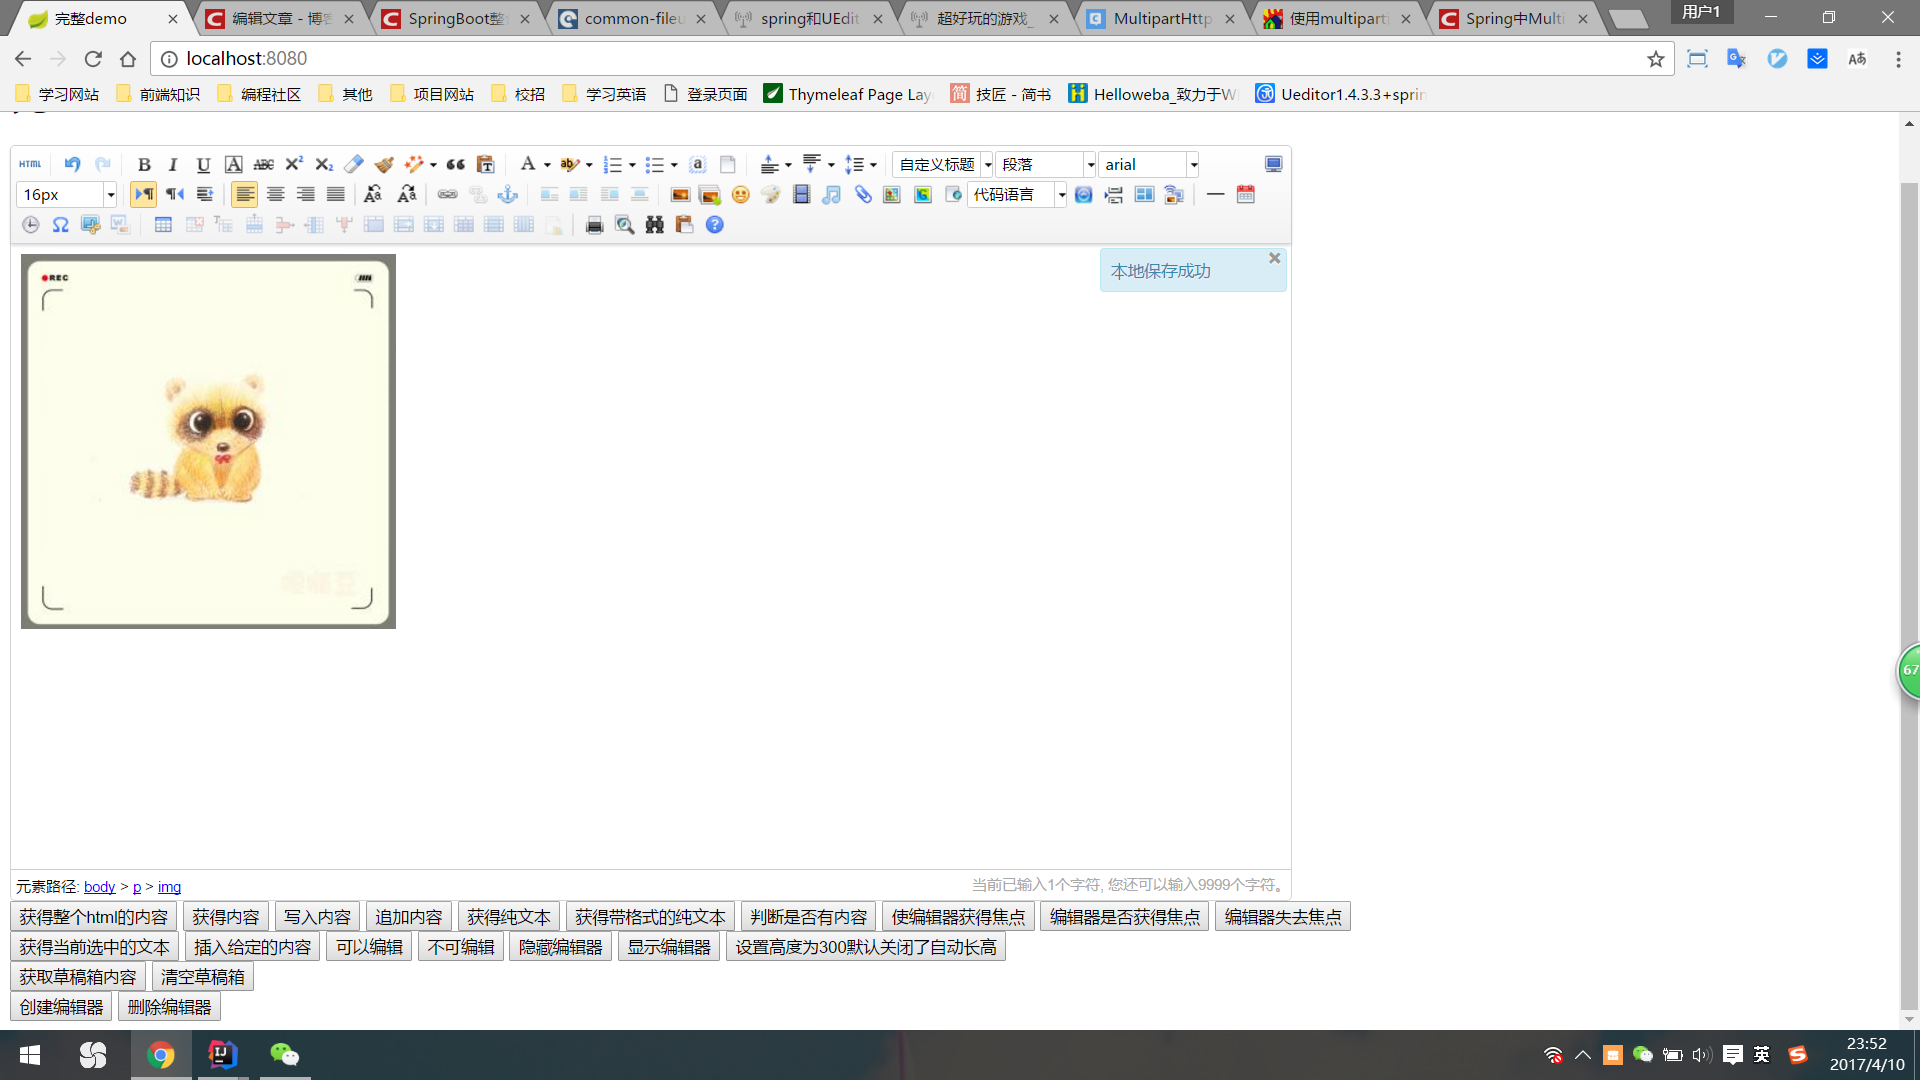
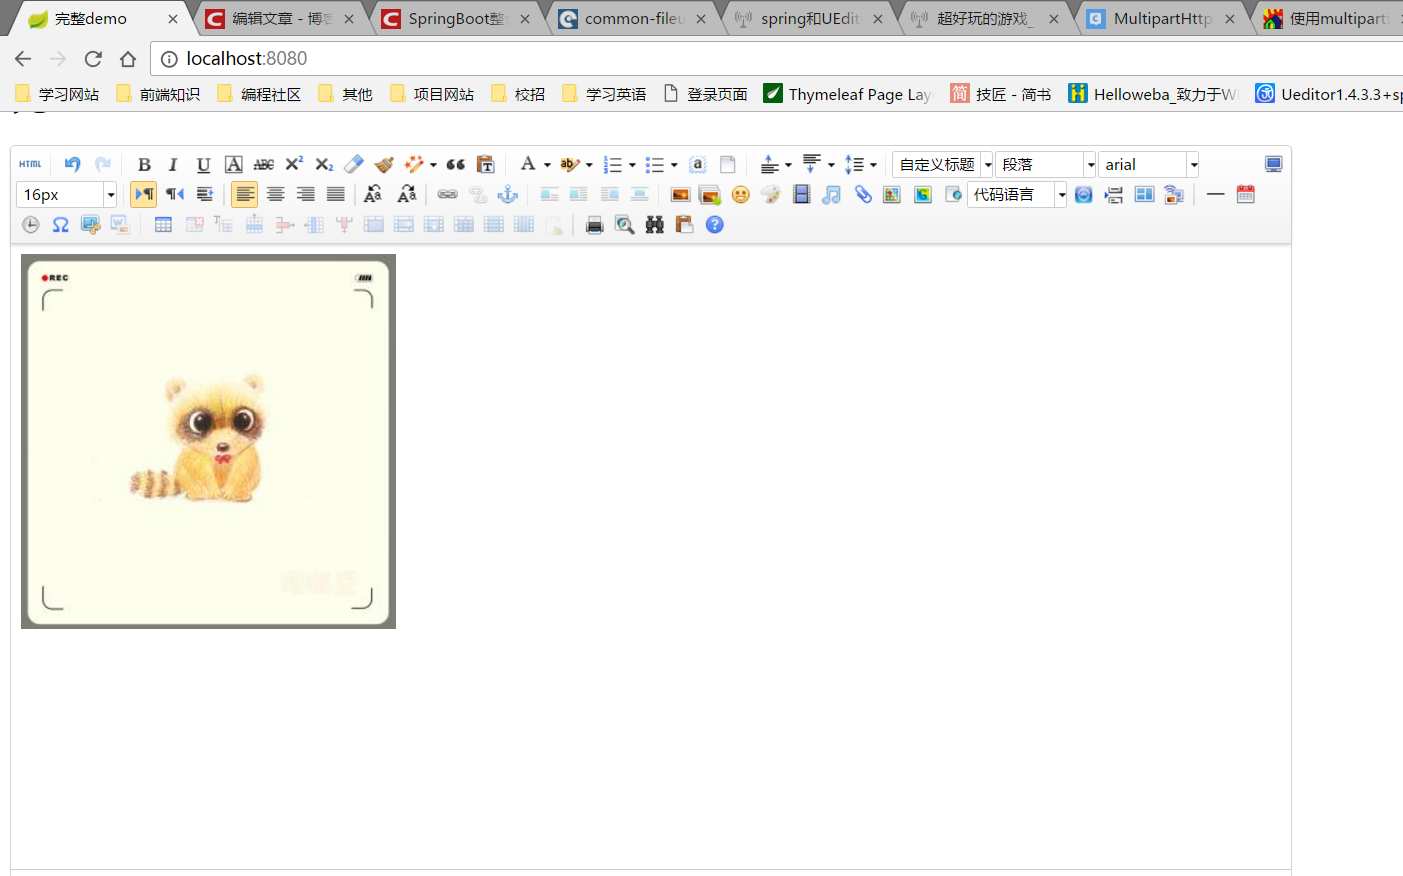
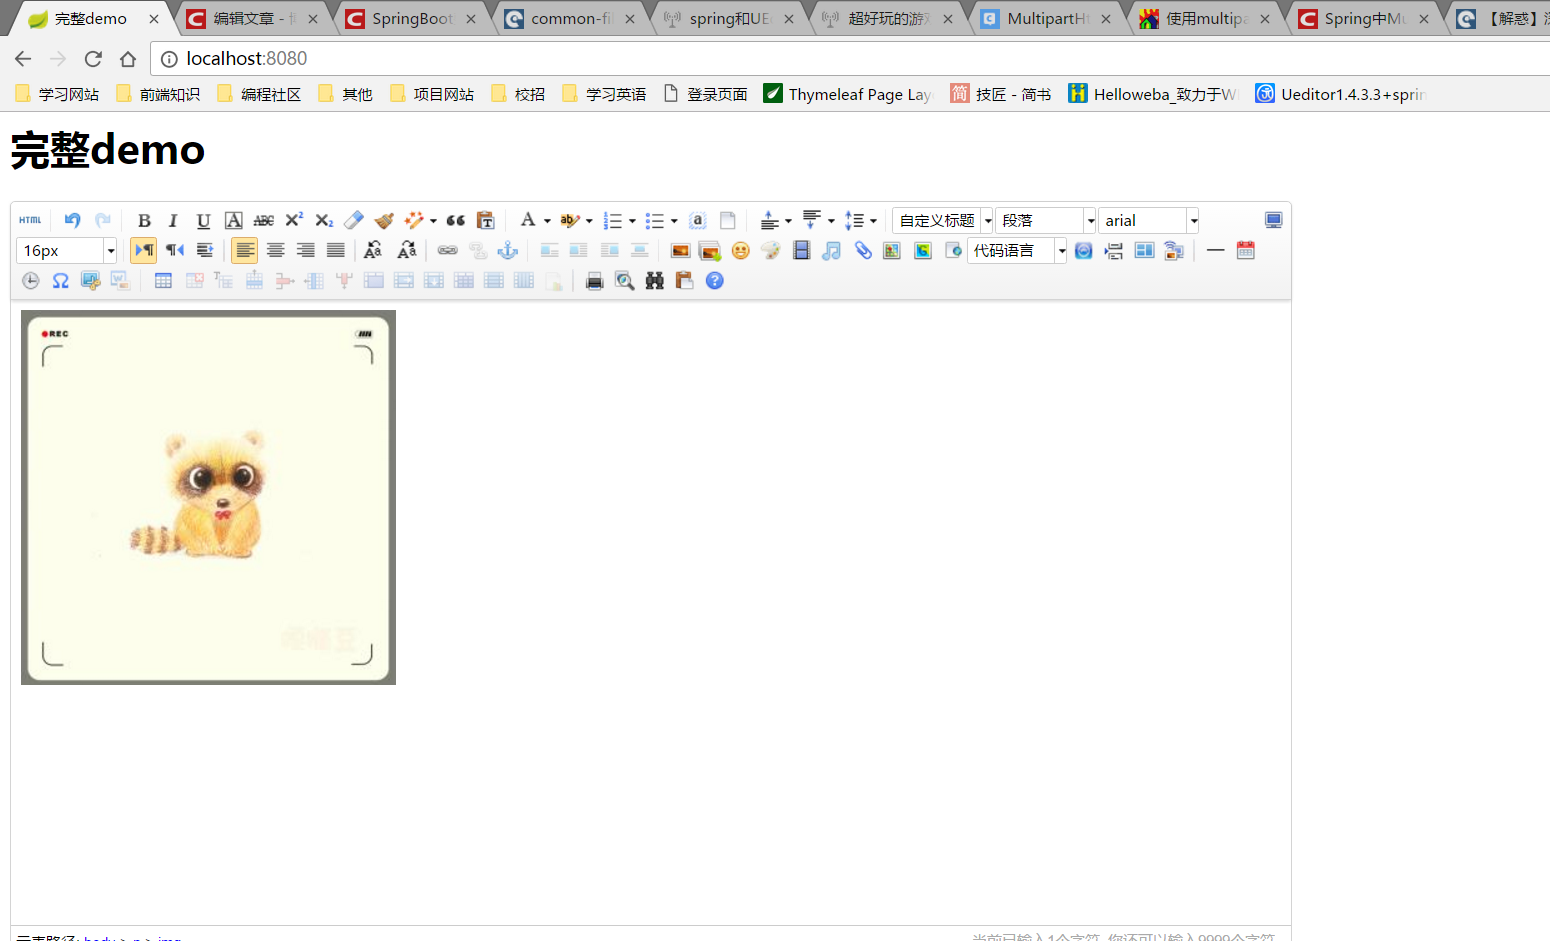
此时重新运行项目,点击上传图片,图片已经能够正常显示了。
12.至此,SpringBoot整合UEditor应该完了吧。别急,SpringBoot主张打包成Jar包运行,我们用Maven来打包运行试试
java -jar
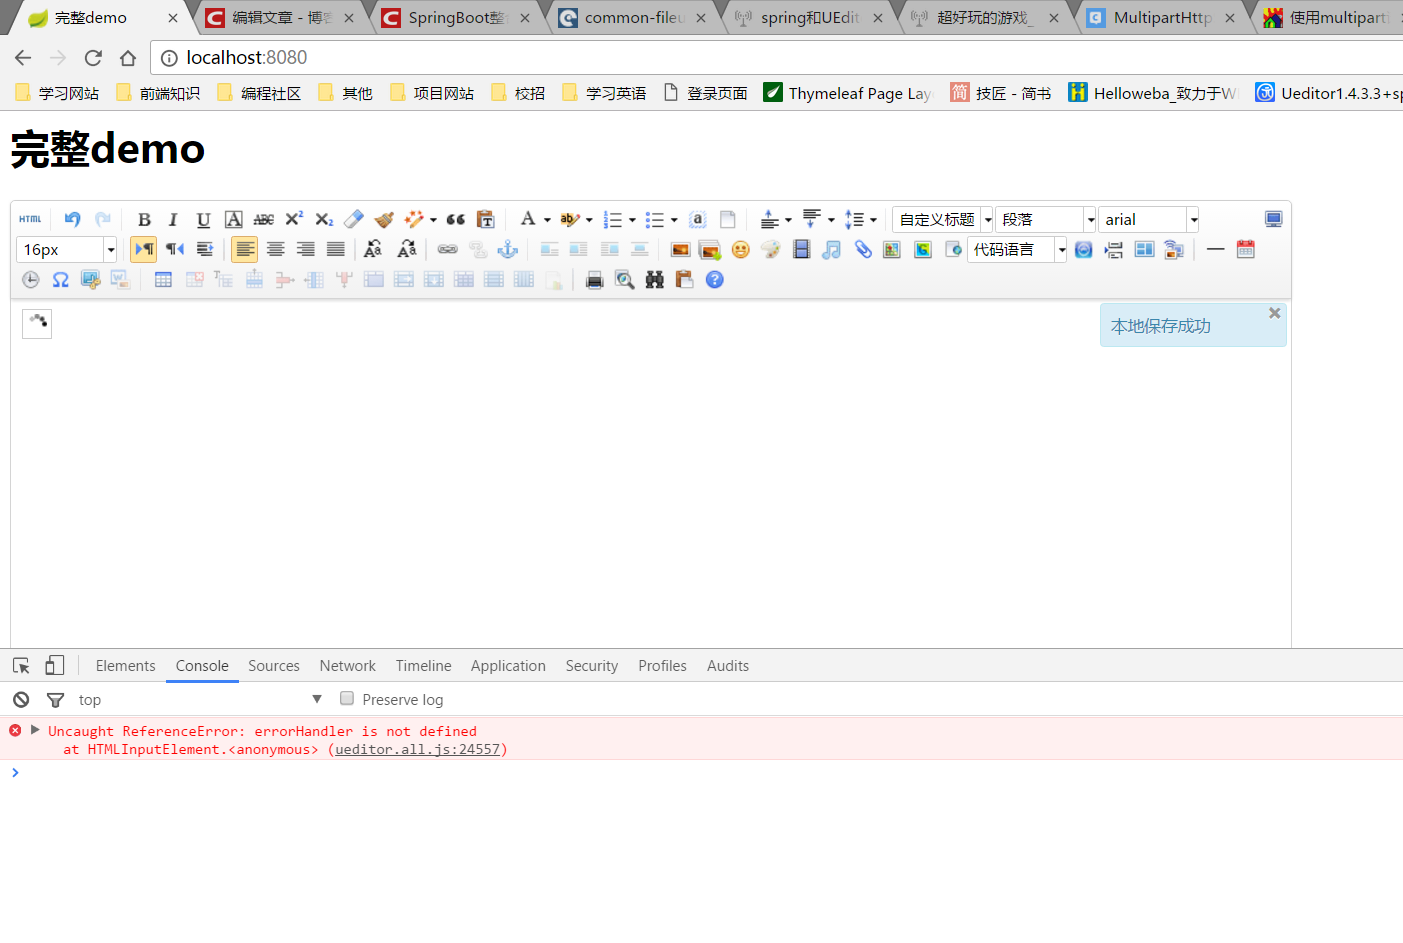
打开项目地址,点击上传图片,发现竟然上传不了了??!!
这是怎么回事呢?为什么打成Jar包后就无法上传图片了呢。经过不断的debug和google。。发现了在Jar包里无法以ClassLoader.getResource().getPath()获得的路径读取文件,得用Class类的getResourceAsStream()来读取。具体博文如下:
http://hxraid.iteye.com/blog/483115?page=3#comments
13.那么我们就来修改源码,改成getResourceAsStream读取config.json文件吧。打开ConfigManager类,修改initEnv方法
-
private void initEnv () throws FileNotFoundException, IOException {
-
-
File file = new File( this.originalPath );
-
-
if ( !file.isAbsolute() ) {
-
file = new File( file.getAbsolutePath() );
-
}
-
-
this.parentPath = file.getParent();
-
-
//String configContent = this.readFile( this.getConfigPath() );
-
String configContent = this.filter(IOUtils.toString(this.getClass().getClassLoader().getResourceAsStream("config.json")));
-
-
try{
-
JSONObject jsonConfig = new JSONObject( configContent );
-
this.jsonConfig = jsonConfig;
-
} catch ( Exception e ) {
-
this.jsonConfig = null;
-
}
-
-
}
14. ok了,再次打包,运行项目
成功了!!!
项目源码:https://github.com/llldddbbb/ueditor-test
本次教程到此结束。谢谢大家
百度富文本编辑器Ueditor 集成springboot(不修改源码)
阅读数 4954
项目中使用到百度的富文本编辑器ueditor,网上也有相关的博客做了比较全面的介绍,只是需要较多时间去一一整理,个人认为这其中的难点主要在于加载ueditor的配置文件config.json,网上的教...博文来自: jfh389987366的博客
SpringBoot中使用UEditor基本配置(图文详解)
阅读数 4499
最近因工作需要,在自己研究百度的富文本编辑器UEditor,这个过程中也遇到很多问题,这里写一下我的心得和总结,希望帮到需要帮助的人。正文如下:第一步:创建SpringBoot项目 首先我使...博文来自: BigPotR
spring Boot + Ueditor整合
阅读数 8124
前阵子因项目需要,加入富文本编辑器,货比三家还是决定使用度娘旗下的Ueditor,下载下的jsp版本单独在tomcat上运行没什么问题,但在与springboot整合过程中出现了问题,研究了好久看了好...博文来自: 萧枫的博客
springboot+maven+ueditor
阅读数 496
ueditor官网下载jsp版本包解压放在src/main/resources/static目录下将config.json放在src/main/resources目录下修改ueditor.config...博文来自: caibird_li的博客
SpringBoot整合富文本编辑器(UEditor)
阅读数 3229
UEditro是一款比较好用的富文本编辑器,所谓的富文本编辑器就是和服务器交互的数据不是普通的字符串文件,而是一些内容包含比较广的字符串,一般是指的html页面,目前比较好用的是百度的UEditor,...博文来自: sky274548769的博客
SpringBoot 整合 ueditor
05-10spring boot整合UEditor,不改源码,真实有效
阅读数 850
UEditor以前在php项目中使用过,是一款非常强大的富文本编辑器,内部实现了各种上传功能,我们甚至不用写任何代码,只需要在所需的项目中正确引入ueditor即可。最近在学习javaspringb...博文来自: Forever_and_ever的博客
springboot+ueditor
阅读数 1291
首先是springboot的项目到官网下载解压放到一直出现 “ueditor.all.min.js:9后台配置项返回格式出错,上传功能将不能正常使用!”似乎是路径不对,原始配置是无法找到config....博文来自: y_xiaoha的博客
SpringBoot整合UEditor教程 - qq_38091831的博客 - CSDN博客
10-17
很详细的SpringBoot整合UEditor教程 04-10 1.4万 UEditor只提供JSP版本的后端...来自: 小宝的博客 spring boot 、springMVC环境集成百度ueditor富文本编辑器,使用...
springboot集成ueditor - liubang159的博客 - CSDN博客
10-23
很详细的SpringBoot整合UEditor教程 04-10 1.4万 UEditor只提供JSP版本的后端...来自: 小宝的博客 百度富文本编辑器Ueditor 集成springboot(不修改源码) 02-...
springboot集成ueditor
09-15SpringBoot + Spring Security + UEditor整合笔记
阅读数 181
UEditor已经停止维护,最后版本停留在16年,但胜在插件多,所有一直在使用。UEditor的核心控制器是JSP写的,但是SpringBoot抛弃了JSP,导致兼容性出现很大的问题。所以需要将Ued...博文来自: 晒太阳的猫
springboot+maven+ueditor - caibird_li的博客 - CSDN博客
11-21
headers = "Accept=application/json") public String ueditor(@RequestParam("action...很详细的SpringBoot整合UEditor教程 - 小宝的博客 04-10 1.6万 UEditor只...
关于springboot与ueditor的整合。 - sinat_36803510的..._CSDN博客
4-5
很详细的SpringBoot整合UEditor教程 04-10 阅读数 2万+ UEditor只提供JSP版本...博文 来自: 小宝的博客 百度富文本编辑器Ueditor 集成springboot(不修改源码) ...
SpringBoot接入Ueditor编辑器 - 在下的博客 - CSDN博客
11-16
很多时候我们需要使用到富文本编辑器,这里我就分享一下SpringBoot接入百度的UEditor...很详细的SpringBoot整合UEditor教程- 小宝的博客 04-10 1.6万 UEditor只提供...
springboot整合ueditor 后端篇(简洁版) - xu1204013031的博客 -...
3-29
很详细的SpringBoot整合UEditor教程 04-10 阅读数 2万+ UEditor只提供JSP版本...博文 来自: 小宝的博客 springboot 集成百度编辑器ueditor 07-27 阅读数 2273...
springboot整合ueditor 后端篇(简洁版)
阅读数 668
此文适合前后端分离的ueditor整合springboot,首先要理解ueditor只是个前端的js工具,绝大部分功能都是前端完成。但是但是图片,视频等需要和后端交互的功能就需要稍微配置一下后端,让那...博文来自: xu1204013031的博客
springboot 集成百度编辑器ueditor
阅读数 2707
最简单的方式集成百度编辑器1.下载百度编辑器源码2.springboot静态资源配置在resources下面。将ueditor的静态资源放入项目中如:我的资源路径为:/resources/js/plu...博文来自: 永不止步
spring Boot + Ueditor整合 - 萧枫的博客 - CSDN博客
4-5
很详细的SpringBoot整合UEditor教程 04-10 阅读数 2万+ UEditor只提供JSP版本...博文 来自: 小宝的博客 百度富文本编辑器Ueditor 集成springboot(不修改源码) ...
springboot整合ueditor 前端篇 - xu1204013031的博客 - CSDN博客
10-26
很详细的SpringBoot整合UEditor教程 04-10 1.5万 UEditor只提供JSP版本的后端...来自: 小宝的博客 编辑器ueditor和springboot 的整合 08-21 3443 1.先导入...
编辑器ueditor和springboot 的整合 - 白天不懂夜的黑的..._CSDN博客
10-28
很详细的SpringBoot整合UEditor教程 04-10 1.5万 UEditor只提供JSP版本的后端入口...来自: 小宝的博客 spring Boot + Ueditor整合 09-26 6546 前阵子因项目...
项目中用到的2个工具类代码:FTP与SendMail
阅读数 4237
今天刚写了几个代码,用在正在开发的项目中虽然是从各处找来的,但是经过我修改完善了一下1SendMail--用于项目中贺卡的发送 原本来自于aistill原作的代码:http://www.csdn.ne...博文来自: 冰云BLOG
SpringBoot整合UEditor文本编辑器
04-24springboot ueditor 整合篇
阅读数 622
一、上传文件到本地版本 项目地址:https://github.com/weiangongsi/ueditor-spring-boot-starter 文件导入 新建springboot项目 ...博文来自: 李浩洋
编辑器ueditor和springboot 的整合
阅读数 4740
1.先导入ueditor所有的包:在springbootstatic下2.导入需要的ueditor的js3.配置ueditor.config.js的//服务器统一请求接口路径://,serverUrl...博文来自: 白天不懂夜的黑的博客
SpringBoot接入Ueditor编辑器
阅读数 380
很多时候我们需要使用到富文本编辑器,这里我就分享一下SpringBoot接入百度的UEditor编辑器的方法;下载UEditor编辑器官网:https://ueditor.baidu.com/webs...博文来自: 在下的博客
SpringBoot整合ueditor
阅读数 453
SpringBoot整合ueditor教程,不需要更高源码,支持,html或者是集成了jsp两种方式一、使用springboot集成jsp方式1、下载jsp版本的ueditor2、搭建springbo...博文来自: xljx_1的博客
Spring Boot项目百度UEditor上传图片
阅读数 3261
业务背景springboot项目实现富文本框上传图片到富文本框中,可新增、编辑图片保存在独立的FastDFS服务器上开发步骤下载源码UEditor官网下载地址我下载的版本是【1.4.3.3Jsp版本】...博文来自: thebigdipperbdx的博客
关于springboot与ueditor的整合。
阅读数 6338
最近做项目,需要用到ueditor上传图片,之前也用过ueditor,不过当时的使用仅限于字体简单的格式,一直没出过什么问题,虽然每次启动项目会在页面爆出一个问题“后台配置项错误,上传功能不能正常使用...博文来自: sinat_36803510的博客
vue + Springboot 前后端分离集成UEditor
阅读数 1306
UEditor只提供JSP版本的后端入口代码。但是它提供了项目源码,因此我们可以根据业务需求来修改源代码。现在开始集成UEditor 1、下载UEditor官网最新的jsp版本的包,下载完成解压之后得...博文来自: qq_38960998的博客
springboot thymeleaf ueditor 填坑
阅读数 2114
搞了两小时,累死哥哥了我的项目结构是:springboot+maven+mybatis+thymeleaf ... 呸呸呸,这些都不重要啦下面开始正题说说问题吧: 刚开始我从官网下载的jsp版本的新...博文来自: Lee的程序空间
springboot 集成ueditor
阅读数 5882
1下载ueditor的jsp版本这里不做介绍,自行下载即可2将文件放在ser/main/resources/static中将下载好的文件夹放在3导入ueditor的jar包导入ueditor的jar包...博文来自: jiaHey的博客
Spring Boot整合UEditor,解决找不到上传文件的问题
阅读数 9232
在实践中如果贸然尝试使用Controller会导致上传文件失败,原因是因为SpringBoot的Request不能强转成为MultipartRequest,只能通过注解请求数据的键作为参数才能获得上传...博文来自: 杨若瑜的技术博客
spring boot 、springMVC环境集成百度ueditor富文本编辑器,使用七牛云存储图片
阅读数 9876
基于springboot的项目中要用到富文本编辑器,但百度UEditor的后台代码给出的是jsp版本的实现,由于项目使用的thymeleaf,不愿为了一个插件单独添加jsp支持;且项目中又使用七牛存储...博文来自: zrk1000的专栏
python图片处理类之~PIL.Image模块(ios android icon图标自动生成处理)
阅读数 6万+
1.从pyCharm提示下载PIL包 http://www.pythonware.com/products/pil/ 2.解压后,进入到目录下cd/Users/jianan/Downloads/Ima...博文来自: 专注于cocos+unity+服务器全栈
关于SpringBoot bean无法注入的问题(与文件包位置有关)
阅读数 18万+
问题场景描述整个项目通过Maven构建,大致结构如下:核心Spring框架一个modulespring-boot-baseservice和dao一个moduleserver-core提供系统后台数据管...博文来自: 开发随笔
Isometric Game 及译法漫谈
阅读数 7702
原文地址:点击打开链接作者按:本文探讨了IsometricGame相关的背景知识。为了避免读者感觉枯燥(除了游戏之外的有些概念确实枯燥),作者尽量采取“用图说话”的方式,文字尽量简短,图解尽量简明。而...博文来自: 图灵教育
MySQL5.6 数据库主从(Master/Slave)同步安装与配置详解
阅读数 14万+
安装环境操作系统:CentOS6.5数据库版本:MySQL5.6.27主机A:192.168.1.1(Master)主机B:192.168.1.2(Slave)这里强调的数据库的版本,是因为MySQL...博文来自: 徐刘根的博客
基于springboot+vue+element+ueditor实现前后端分离的富文本框实现
阅读数 6737
SpringBoot整合UEditor教程
阅读数 362
UEditor只提供JSP版本的后端入口代码。但提供了项目源码,因此可以根据业务需求修改源代码。此处使用了SpringBoot框架,配备了Thymeleaf模板引擎,所以没有必要再添加jsp来兼容UE...博文来自: Yoga0301的博客
springboot整合ueditor源码(自己写,测试可用,不需要修改ueditor源码)
01-12springboot 添加百度的ueditor
阅读数 388
ueditor提示:“后端配置项没有正常加载,上传插件不能正常使用!”,搞了我一天都没有搞好,直到看到这篇帖子,太感谢了!1下载ueditor的jsp版本这里不做介绍,自行下载即可2将文件放在ser/...博文来自: u010261944的博客
Spring Boot集成百度Ueditor
阅读数 269
转自:https://www.cnblogs.com/liter7/p/7745606.html在此感谢遇到的问题: 1.将ueditor加入/static目录下,能正常显示,但是出现“请求后台配置...博文来自: ----------
springboot + thymeleaf + mybatis + ueditor
阅读数 991
前面讲了简单的ueditor搭建,今天记录一下上传和图片空间的开发:由于springboot不好放图片,放上去也会让后面我的打的包越来越大,这不科学,所以用项目外的图片服务器,这路我用的七牛云,当然也...博文来自: Lee的程序空间
vue2+ueditor+springboot
阅读数 1377
本文主要阐述的是vue2+ueditor+springboot的整合。此处记录下碰到的坑:在使用springboot中font-awesome的处理 org.apache.maven.pluginsm...博文来自: 青年可的博客
spring boot 整合ueditor的问题
如题,spring boot 整合ueditor进行图片上传,搞了半天,唯一的收获就是能打开前端的jsp页面,然后把图片上传,但是因为需要把图片的信息存到mysql中,所以后台controller需要论坛
spring boot 集成ueditor
阅读数 142
1,将配置文件的获取方式修改成,由sprongmvc controller 中返回2,在使用到ueditor 的地址加入上传请求的拦截,并将上传地址返回给ueditor 配置中心3,自定义上传接口由于...博文来自: gu_zhang_w的博客
Ueditor 集成SpringBoot 打成jar包放到服务器出现的问题
阅读数 748
打成jar百度的富文本就会出现这个问题本地环境不会,上了测试机就会,是读取不到后台配置信息造成的controller.jsp这个文件读取不到项目的真实路径,遇到同样问题的人可以打下log看下所以这种情...博文来自: 走过程序员的路
springboot集成Ueditor(踩坑)
阅读数 187
本人只是将平时的笔记心得与大家分享一下项目需要用到富文本,本人选择百度的Ueditor,虽然功能很强大,但坑非常多,我们来慢慢踩。1、下载ueditorjsputf-8我这里给出,我下载的地址http...博文来自: qq_41603102的博客
SpringBoot 配置富文本编辑器 xheditor
阅读数 3720
一年前写过一篇:struts2配置xheditor的文章。那时候还在用ssh,现在开始用springboot。本来想配置CSDN的markdown编辑器的,可惜在github上找不到。所以,还是用回轻...博文来自: 小浩子的博客
Spring Boot+Thymeleaf+UEditor 图文上传
阅读数 1180
在APP中,介绍类文章都是图文混排形式展示。本文分享SpringBoot+Thymeleaf+ UEditor图文上传。第一步:下载并配置UEditor 1、UEditor下载地址:http://ue...博文来自: YLJ2012127的博客
Spring Boot + thymeleaf + UEditor整合
阅读数 789
因为公司项目需求,需要使用富文本编辑器,货比三家选择了百度的UEditor。然而做这个时,我这个小萌新连SpringBoot都不太清楚,所以给自己挖了很多坑,然后一直在填坑.....首先到官网下载源码...博文来自: Rude_M的博客
编写C语言版本的卷积神经网络CNN之一:前言与Minst数据集
阅读数 2万+
卷积神经网络是深度学习的基础,但是学习CNN却不是那么简单,虽然网络上关于CNN的相关代码很多,比较经典的是tiny_cnn(C++)、DeepLearnToolbox(Matlab)等等,但通过C语...博文来自: tostq的专栏
【深度剖析HMM(附Python代码)】1.前言及隐马尔科夫链HMM的背景
阅读数 1万+
1. 前言 隐马尔科夫HMM模型是一类重要的机器学习方法,其主要用于序列数据的分析,广泛应用于语音识别、文本翻译、序列预测、中文分词等多个领域。虽然近年来,由于RNN等深度学习方法的发展,HMM模型...博文来自: tostq的专栏
Alibaba-AndFix Bug热修复框架原理及源码解析
阅读数 4万+
小憩之后,继续为你解读AndFix热修复框架,呵呵。上一篇Alibaba-AndFix Bug热修复框架的使用已经介绍了AndFix的使用,这篇主要介绍AndFix原理以及源码解析。AndFix原理A...博文来自: 我是乔同学
如何在ArcGIS Online中构建自己的应用程序模板初级篇-显示地图
阅读数 4万+
开发ArcGIS Online应用程序模板之前,需要了解怎么使用ArcGIS API for JavaScript。 在ArcGIS Online当中如何构架自己的应用程序模板,我们得先要了...博文来自: ArcGIS产品与技术专栏
彻底解决MFC/C#中在控件上播放opencv的Mat类型帧视频-亲测满足实时性要求
阅读数 1237
做MFC+opencv项目时,对于我来说,将视频显示到相应控件上(static或者picture)这个问题一直存在,虽然之前写个一个帖子,介绍了一种将opencv的显示window贴到相应控件上的方法...博文来自: 沐阳2100的博客
OpenCV+OpenGL 双目立体视觉三维重建
阅读数 4万+
0.绪论这篇文章主要为了研究双目立体视觉的最终目标——三维重建,系统的介绍了三维重建的整体步骤。双目立体视觉的整体流程包括:图像获取,摄像机标定,特征提取(稠密匹配中这一步可以省略),立体匹配,三维重...博文来自: shiter编写程序的艺术
【HTTP】Fiddler(一) - Fiddler简介
阅读数 30万+
1.为什么是Fiddler? 抓包工具有很多,小到最常用的web调试工具firebug,达到通用的强大的抓包工具wireshark.为什么使用fiddler?原因如下: a.Firebug虽然可以抓包...博文来自: 专注、专心
Android Multimedia框架总结(二十三)MediaCodec补充及MediaMuxer引入(附案例)
阅读数 7373
前言:前面几章都是分析MediaCodec相关源码,有收到提问,说MediaCodec到底是硬解码还是软解码?看下今天的Agenda: MediaCodec到底是硬解码还是软解码 MediaMuxer...博文来自: 逆流的鱼yuiop
webService学习(二)—— 调用自定义对象参数
阅读数 2万+
webService学习(二)—— 调用自定义对象参数 本文主要内容: 1、如何通过idea进行webService Client的简单实现(不再使用wsimport的方式,其实是ide帮我们做了...博文来自: 止水的专栏
QT选择目录等常用文件/文件夹操作
阅读数 2万+
QT 创建文件夹 bool QDir::mkdir ( const QString & dirName ) const 创建一个子目录名为目录名。[喝小酒的网摘]http://blog....博文来自: K7的专栏
搭建图片服务器《二》-linux安装nginx
阅读数 3万+
nginx是个好东西,Nginx (engine x) 是一个高性能的HTTP和反向代理服务器,也是一个IMAP/POP3/SMTP服务器。Nginx是由伊戈尔·赛索耶夫为俄罗斯访问量第二的Rambl...博文来自: maoyuanming0806的博客
灰度图像的自动阈值分割(Otsu 法)
阅读数 3万+
灰度图像的自动阈值分割(Otsu 法)机器视觉领域许多算法都要求先对图像进行二值化。这种二值化操作阈值的选取非常重要。阈值选取的不合适,可能得到的结果就毫无用处。今天就来讲讲一种自动计算阈值的方法。这...博文来自: Ivan 的专栏
linux上安装Docker(非常简单的安装方法)
阅读数 20万+
最近比较有空,大四出来实习几个月了,作为实习狗的我,被叫去研究Docker了,汗汗! Docker的三大核心概念:镜像、容器、仓库 镜像:类似虚拟机的镜像、用俗话说就是安装文件。 容器:类似一个轻量...博文来自: 我走小路的博客
jquery/js实现一个网页同时调用多个倒计时(最新的)
阅读数 44万+
jquery/js实现一个网页同时调用多个倒计时(最新的) 最近需要网页添加多个倒计时. 查阅网络,基本上都是千遍一律的不好用. 自己按需写了个.希望对大家有用. 有用请赞一个哦! //js ...博文来自: Websites
强连通分量及缩点tarjan算法解析
阅读数 57万+
强连通分量: 简言之 就是找环(每条边只走一次,两两可达) 孤立的一个点也是一个连通分量 使用tarjan算法 在嵌套的多个环中优先得到最大环( 最小环就是每个孤立点) 定义: int Ti...博文来自: 九野的博客







 浙公网安备 33010602011771号
-
-
-
(6个月前#20楼)File file = new File( this.originalPath );