zrender源码分析3--初始化Painter绘图模块
接上次分析到初始化ZRender的源码,这次关注绘图模块Painter的初始化
入口1:new Painter(dom, this.storage);
// zrender.js
/**
 * ZRender接口类,对外可用的所有接口都在这里!!
 * storage(M)、painter(V)、handler(C)为内部私有类,外部接口不可见
 * 非get接口统一返回支持链式调用~
 *
 * @param {string} id 唯一标识
 * @param {HTMLElement} dom dom对象,不帮你做document.getElementById
 *
 * @return {ZRender} ZRender实例
 */
function ZRender(id, dom) {
	this.id = id;
	this.env = require('./tool/env');

	this.storage = new Storage();
	this.painter = new Painter(dom, this.storage);
	this.handler = new Handler(dom, this.storage, this.painter);

	// 动画控制
	this.animatingShapes = [];
	this.animation = new Animation({
		stage : {
			update : getAnimationUpdater(this)
		}
	});
	this.animation.start();
}
初始化Painter时,传入绘图区域dom、内容仓库实例storage。并立即备份。
// Painter.js
/**
 * 绘图类 (V)
 *
 * @param {HTMLElement} root 绘图区域
 * @param {storage} storage Storage实例
 */
function Painter(root, storage) {
    this.root = root;
    this.storage = storage;
    //......
}
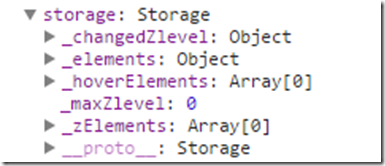
这时的storage还是全空的。
还是好习惯,绘图前清空画布
// Painter.js Painter
root.innerHTML = '';
 this._width = this._getWidth(); // 宽,缓存记录
 this._height = this._getHeight(); // 高,缓存记录
解决获取宽、高的浏览器兼容问题:
Painter.prototype._getHeight = function () {
    var root = this.root;
    var stl = root.currentStyle
                 || document.defaultView.getComputedStyle(root);
    return ((root.clientHeight || parseInt(stl.height, 10))
            - parseInt(stl.paddingTop, 10) // 请原谅我这比较粗暴
            - parseInt(stl.paddingBottom, 10)).toFixed(0) - 0;
};
新建DIV,设置默认属性并拼接
 var domRoot = document.createElement('div');
 this._domRoot = domRoot;
 domRoot.style.position = 'relative';
 domRoot.style.overflow = 'hidden';
 domRoot.style.width = this._width + 'px';
 domRoot.style.height = this._height + 'px';
 root.appendChild(domRoot);
这时看dom。容器中,已经添加了包裹的div:
然后开始初始化缓存dom、画布的容器:
 this._domList = {};       //canvas dom元素,都缓存到这里
 this._ctxList = {};       //canvas 2D context对象,与domList对应
 this._domListBack = {};
 this._ctxListBack = {};

 this._zLevelConfig = {}; // 每个zLevel 的配置,@config clearColor
通过storage获取最大的zlevel
this._maxZlevel = storage.getMaxZlevel(); //最大zlevel,缓存记录
初始化图形加载效果,这边是全空的(参数是空的,方法也是空的),没什么好看
this._loadingEffect = new BaseLoadingEffect({});
 // loadingEffect/Base.js
/**
 * @constructor
 *
 * @param {Object} options 选项
 * @param {color} options.backgroundColor 背景颜色
 * @param {Object} options.textStyle 文字样式,同shape/text.style
 * @param {number=} options.progress 进度参数,部分特效有用
 * @param {Object=} options.effect 特效参数,部分特效有用
 *
 *     textStyle:{
 *         textFont: 'normal 20px Arial' || {textFont}, //文本字体
 *         color: {color}
 *     }
 * }
 */
function Base(options) {
    this.setOptions(options);
}
Base.prototype.setOptions = function (options) {
    this.options = options || {};
};
图形另存为图片方法。很高端的样子,晚点再看吧
this.shapeToImage = this._createShapeToImageProcessor();
Painter.prototype._createShapeToImageProcessor = function () {
    if (vmlCanvasManager) {
        return doNothing;
    }
    var painter = this;
    var canvas = document.createElement('canvas');
    var ctx = canvas.getContext('2d');
    var devicePixelRatio = window.devicePixelRatio || 1;

    return function (id, e, width, height) {
        return painter._shapeToImage(
            id, e, width, height,
            canvas, ctx, devicePixelRatio
        );
    };
};
准备工作做完了,开始创建各层canvas
首先创建背景
this._domList.bg = createDom('bg', 'div', this);
domRoot.appendChild(this._domList.bg);
先看下html dom中的情况吧,背景图层已经添加上去了:
再看看创建dom元素的createDom方法吧,高宽取决于父容器
/**
 * 创建dom
 *
 * @inner
 * @param {string} id dom id 待用
 * @param {string} type dom type,such as canvas, div etc.
 * @param {Painter} painter painter instance
 */
function createDom(id, type, painter) {
 var newDom = document.createElement(type);
 var width = painter._width;
 var height = painter._height;
 // 没append呢,请原谅我这样写,清晰~
 newDom.style.position = 'absolute';
 newDom.style.left = 0;
 newDom.style.top = 0;
 newDom.style.width = width + 'px';
 newDom.style.height = height + 'px';
 newDom.setAttribute('width', width * devicePixelRatio);
 newDom.setAttribute('height', height * devicePixelRatio);
 // id不作为索引用,避免可能造成的重名,定义为私有属性
 newDom.setAttribute('data-zr-dom-id', id);
 return newDom;
}
循环创建各层canvas,vmlCanvasManager是啥,得晚点细究,应该是IE下用的,这边一直为false。
这边_maxZlevel为0,只需要添加zlevel: 0画布就行(同时进行了缓存)。
var canvasElem;
var canvasCtx;
// 实体
for (var i = 0; i <= this._maxZlevel; i++) {
    canvasElem = createDom(i, 'canvas', this);
    domRoot.appendChild(canvasElem);
    this._domList[i] = canvasElem;
    vmlCanvasManager && vmlCanvasManager.initElement(canvasElem);
    this._ctxList[i] = canvasCtx = canvasElem.getContext('2d');
    if (devicePixelRatio != 1) {
        canvasCtx.scale(devicePixelRatio, devicePixelRatio);
    }
}
创建用于高亮的canvas,照样缓存。
canvasElem = createDom('hover', 'canvas', this);
 canvasElem.id = '_zrender_hover_';
 domRoot.appendChild(canvasElem);
 this._domList.hover = canvasElem;
 vmlCanvasManager && vmlCanvasManager.initElement(canvasElem);
 this._domList.hover.onselectstart = returnFalse;
 this._ctxList.hover = canvasCtx = canvasElem.getContext('2d');
 if (devicePixelRatio != 1) {
     canvasCtx.scale(devicePixelRatio, devicePixelRatio);
 }
照例先看html dom吧:
我们来看看创建好的Painter实例

未完,待续:


 浙公网安备 33010602011771号