三维重建instant-ngp环境部署与colmap、ffmpeg的脚本参数使用
一、instant-ngp官方文档地址:
https://github.com/NVlabs/instant-ngp

下载 Instant-NGP-for-RTX-3000-and-4000 并解压(请根据自己显卡型号选择对应的版本)
二、目的:
指导部署instant ngp 环境及脚本用法
三、开始部署:
1 部署 Anaconda :
https://mirrors4.tuna.tsinghua.edu.cn/help/anaconda/
Anaconda 安装包可以到 https://mirrors.tuna.tsinghua.edu.cn/anaconda/archive/ 下载。
Anaconda的环境变量配置:

写本文时,笔者使用的版本是Anaconda3-2022.10-Windows-x86_64.exe,附带python版本正好是3.9
若是其它版本,请使用conda构建3.9版本的python环境,参考命令:
conda create -n ngp python=3.9
conda activate ngp
2 配置python 依赖:
配置pip源:比较常用的国内镜像包括:
(1)阿里云 http://mirrors.aliyun.com/pypi/simple/
(2)豆瓣http://pypi.douban.com/simple/
(3)清华大学 https://pypi.tuna.tsinghua.edu.cn/simple/
(4)中国科学技术大学 http://pypi.mirrors.ustc.edu.cn/simple/
(5)华中科技大学http://pypi.hustunique.com/
windows下,直接在user目录中创建一个pip目录,如:C:\Users\xx\pip,然后新建文件pip.ini,即 %HOMEPATH%\pip\pip.ini,在pip.ini文件中输入以下内容:
[global]
index-url = https://pypi.tuna.tsinghua.edu.cn/simple
[install]
trusted-host = https://pypi.tuna.tsinghua.edu.cn
安装python依赖:
pip install -r requirements.txt
requirements.txt位于Instant-NGP-for-RTX-3000-and-4000目录,里面有python依赖库名称。
3 下载ffmpeg和colmap
进入目录Instant-NGP-for-RTX-3000-and-4000\scripts
执行download_colmap.bat和download_ffmpeg.bat等待下载完成
4 配置colmap的环境变量
path里添加:<!-- colmap所在目录 --> \COLMAP-3.7-windows-no-cuda\lib
还要添加一个名为QT_PLUGIN_PATH的环境变量指向colmap的lib\plugins

5 安装vs2019(本人不清楚不安装会怎么样,因为我一直都有该环境)
略...
四、使用instent-ngp
1 使用单目(单摄像头)手机拍摄某物体视频,请参考colmap文档里描述的拍摄方式(环绕物体拍摄,而不是拍摄位置不变,去旋转被摄物体)。
2 上传视频到目录Instant-NGP-for-RTX-3000-and-4000\data\s2\test.mp4
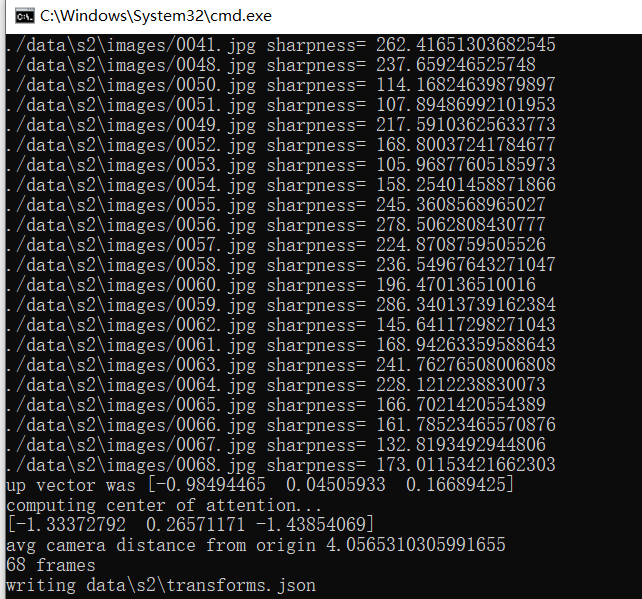
3 在目录Instant-NGP-for-RTX-3000-and-4000中执行以下代码,生成用于三维重建的images和transforms.json等文件
python scripts\colmap2nerf.py --video_in data\s2\test.mp4 --run_colmap --colmap_db data\s2\colmap.db --text data\s2\text_colmap --aabb_scale 16 --out data\s2\transforms.json --colmap_matcher exhaustive --video_fps 10
命令参数解释:
python //调用的程序名称

scripts\colmap2nerf.py //程序所执行脚本

--video_in data\s2\test.mp4 //视频存放位置

--run_colmap //执行colmap

--colmap_db data\s2\colmap.db //colmap存放数据库文件的位置

--text data\s2\text_colmap  //colmap存放所生成模型的位置

--aabb_scale 16 //不知道干嘛的,反正得有,2的n次幂,最大128

--out data\s2\transforms.json //生成transforms.json的位置

--colmap_matcher exhaustive //colmap执行特征匹配feature matching时使用的算法名可选["exhaustive","sequential","spatial","transitive","vocab_tree"]

--video_fps 10 //没看懂是干什么的,反正这个参数可以控制ffmpeg生成图片的数量,越大图片越多,越小图片越少,有人知道可以告诉我

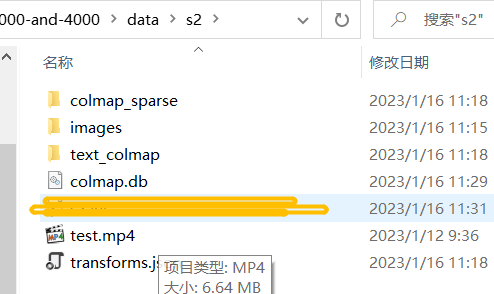
执行完毕后data/s2目录结构如下:

4 运行instent-ngp
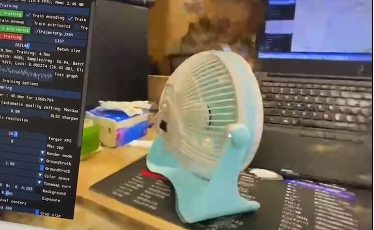
instant-ngp.exe --scene data\s2\test\transforms.json
运行效果截图:


