为Git设置本地代理并启用别名 | windows10 ubuntu
一、http/https代理
1.1 使用本地代理
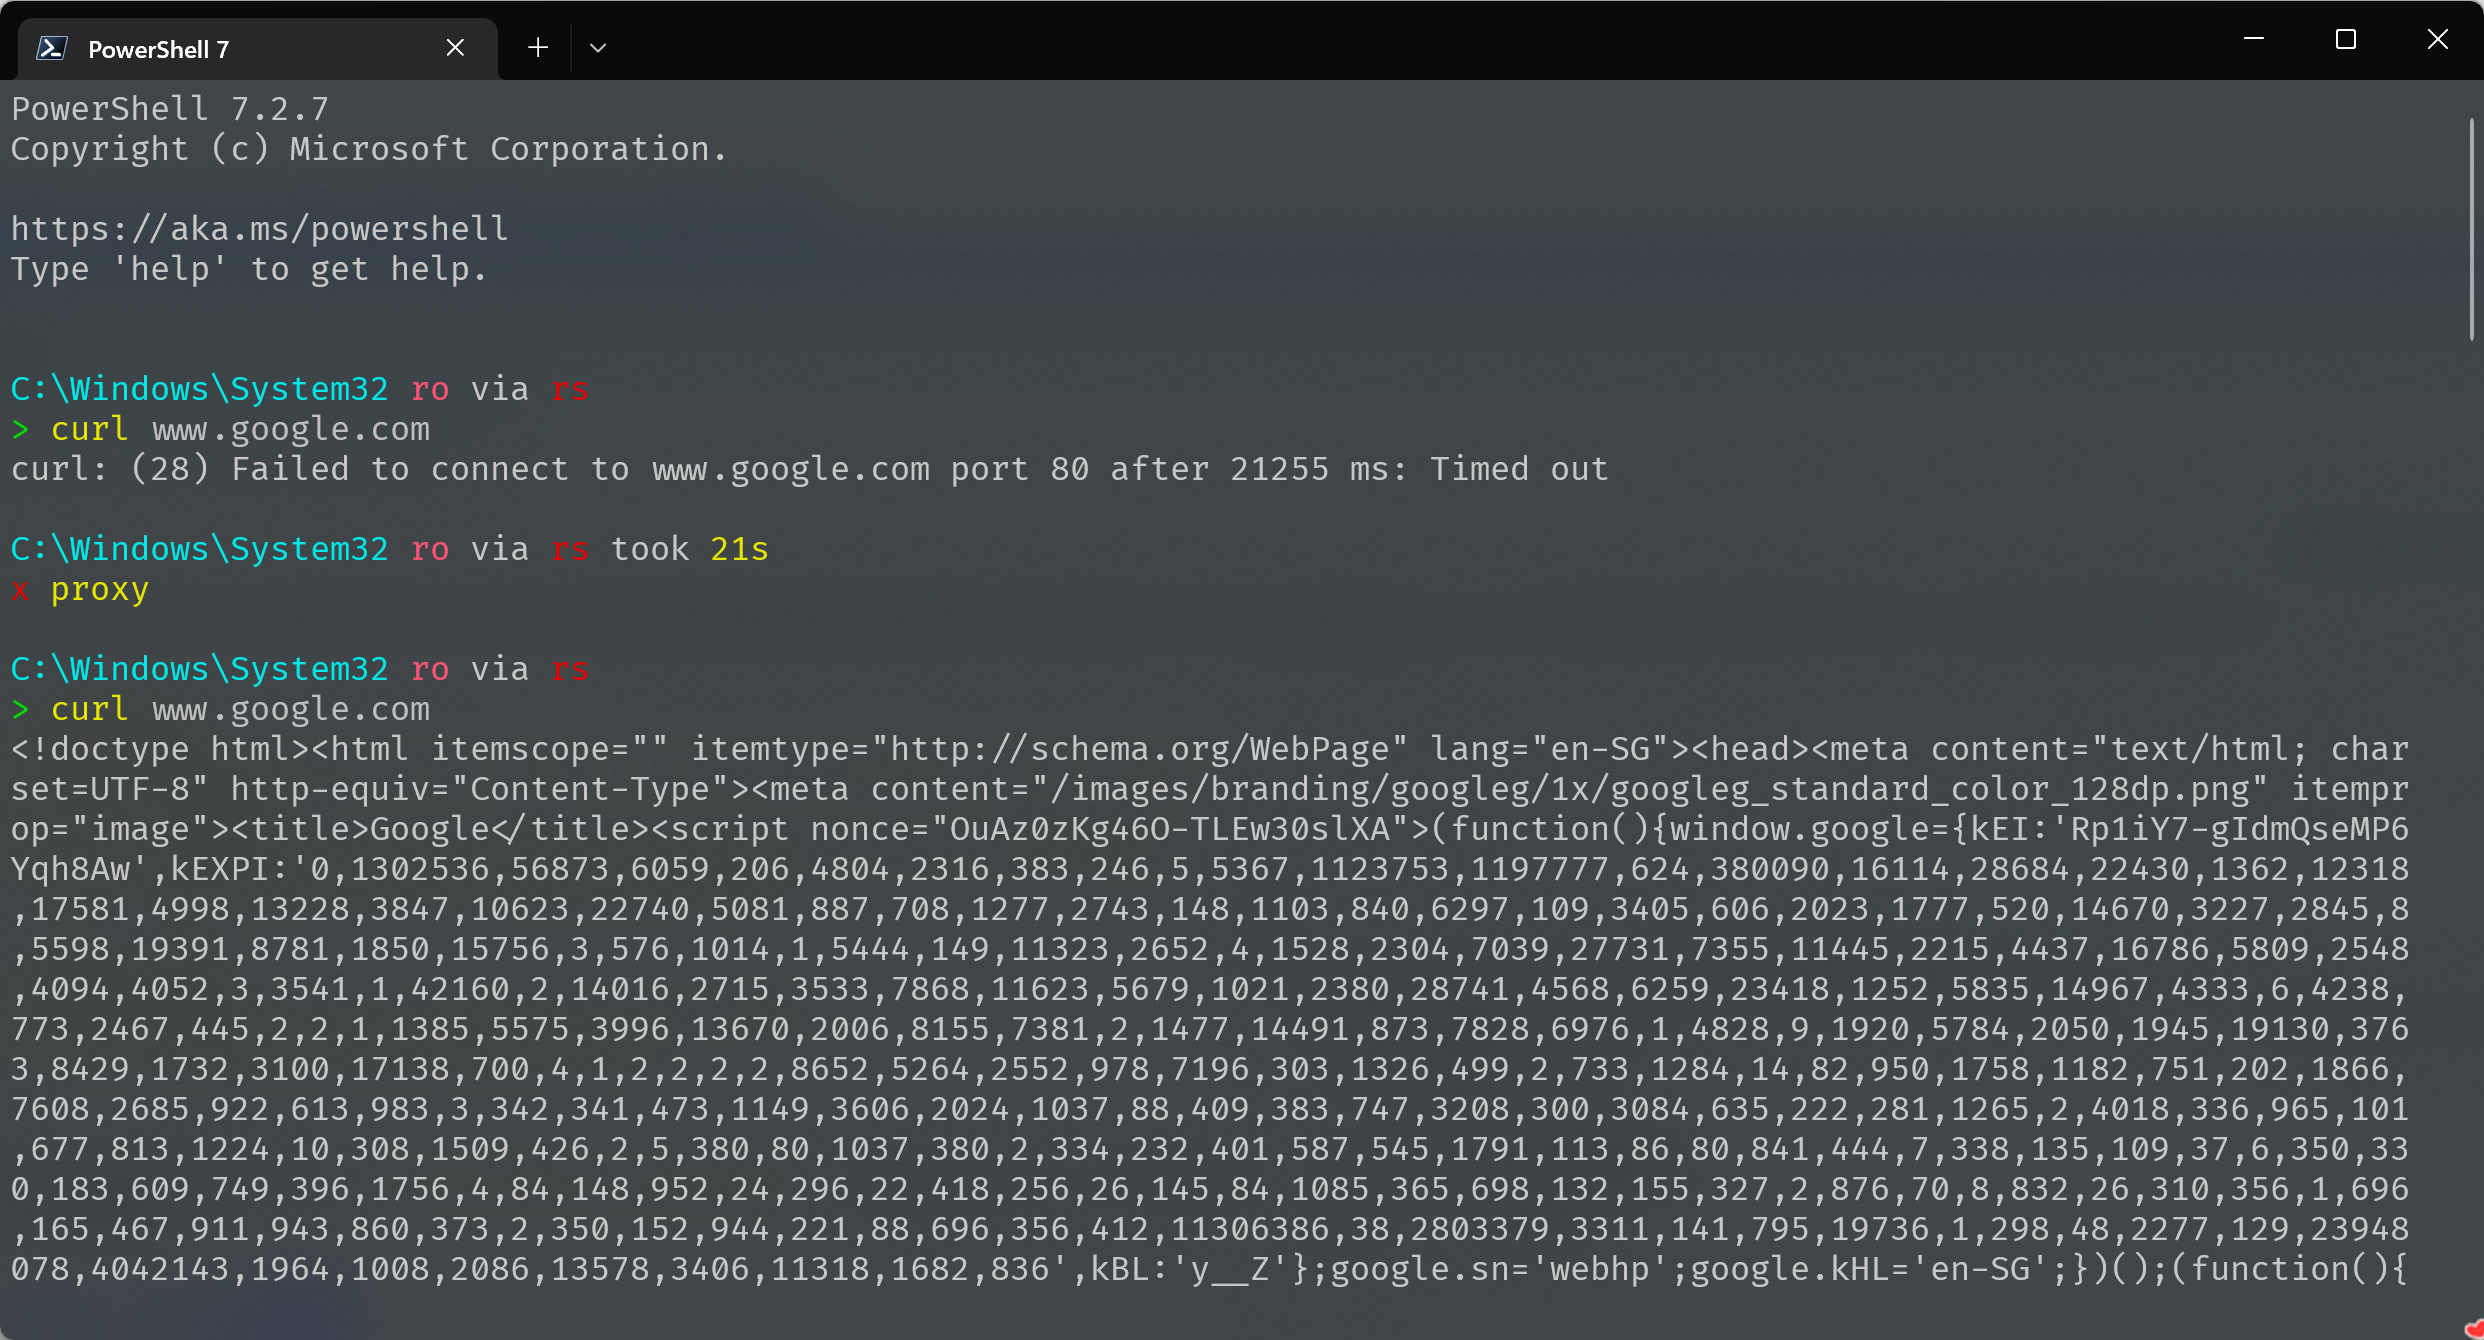
Windows和Ubuntu在终端输入下方对应命令即可成功代理 http 方式的 git clone命令。
记得将8080/1080改成自己代理软件的http/socks5端口。
# 设置 http 代理
git config --global http.proxy "http://127.0.0.1:8080"
git config --global https.proxy "http://127.0.0.1:8080"

# 或者 socks5 代理
git config --global http.proxy "socks5://127.0.0.1:1080"
git config --global https.proxy "socks5://127.0.0.1:1080"

# 取消代理
git config --global --unset http.proxy
git config --global --unset https.proxy

# 查看代理
git config --global --get http.proxy
git config --global --get https.proxy
1.1.1 Windows设置别名
Windows终端建议配合scoop使用。Scoop具体配置见搭建优雅的Windows终端。
以管理员权限打开Windows terminal,输入以下命令用VScode打开配置文件:
code $PROFILE
如果未安装VScode,也可以使用
notepad $PROFILE命令通过记事本打开并编辑配置文件。
在配置文件中按需增加以下内容:
function proxy {
    # 配置系统代理
    $env:HTTP_PROXY="http://127.0.0.1:10809"
    $env:HTTPS_PROXY="http://127.0.0.1:10809"
    # 配置git代理
    git config --global http.proxy socks5://127.0.0.1:10808
    git config --global https.proxy socks5://127.0.0.1:10808
    # 配置scoop代理
    scoop config proxy 127.0.0.1:10809
}
function unproxy {
    # 取消系统代理
    $env:HTTP_PROXY=""
    $env:HTTPS_PROXY=""
    # 取消git代理
    git config --global --unset http.proxy
    git config --global --unset https.proxy
    # 取消scoop代理
    scoop config rm proxy
}
保存后关闭配置文件,输入Set-ExecutionPolicy RemoteSigned,然后关闭Windows terminal再重新打开即可。
以后在Windows终端就可以使用proxy命令启用代理,unproxy命令取消代理。
效果图
1.1.2 Ubuntu设置别名
编辑shell配置文件
# zsh
sudo nano ~/.zshrc

# bash
sudo nano ~/.bashrc
在配置文件末尾加上以下内容:
alias proxygit="git config --global http.proxy 'socks5://127.0.0.1:1089' && git config --global https.proxy 'socks5://127.0.0.1:1089'"
alias unproxygit="git config --global --unset http.proxy && git config --global --unset https.proxy"
或者使用下面的内容,为所有终端应用添加代理:
# 为 curl wget git npm apt 等设置代理
proxy () {
  export ALL_PROXY="socks5://127.0.0.1:1089"
  export all_proxy="socks5://127.0.0.1:1089"
  echo -e "Acquire::http::Proxy \"http://127.0.0.1:8889\";" | sudo tee -a /etc/apt/apt.conf > /dev/null
  echo -e "Acquire::https::Proxy \"http://127.0.0.1:8889\";" | sudo tee -a /etc/apt/apt.conf > /dev/null
  echo -e "\e[32m 设置代理成功,当前IP为: \e[0m"
  curl https://ip.gs
}

# 取消代理
unproxy () {
  unset ALL_PROXY
  unset all_proxy
  sudo sed -i -e '/Acquire::http::Proxy/d' /etc/apt/apt.conf
  sudo sed -i -e '/Acquire::https::Proxy/d' /etc/apt/apt.conf
  echo -e "\e[33m 取消代理成功,当前IP为: \e[0m"
  curl https://ip.gs
}
保存后,启用配置文件
# zsh
source ~/.zshrc

# bash
source ~/.bashrc
以后在Ubuntu的终端里都可以使用proxygit命令启用git代理,unproxygit命令取消git代理。
或者使用proxy命令启用所有终端代理,unproxy命令取消所有终端代理。
1.2 使用FastGit代理
1.2.1 使用 FastGit 替换所有指向 GitHub 的链接
# 使用 FastGit 替换所有指向 GitHub 的链接
git config --global url."https://hub.fastgit.xyz/".insteadOf "https://github.com/"
git config protocol.https.allow always

# 查看git配置信息
git config --global --list

# 取消替换
git config --global --unset url."https://hub.fastgit.xyz/".insteadof
注意:
FastGit不支持超过 2GiB 的仓库的 clone
1.2.2 直接替换git clone的远程地址
# 常规的面向 GitHub 的 clone 命令可能如下:
git clone https://github.com/author/repo

# 使用 FastGit 时,可使用如下命令:
git clone https://hub.fastgit.xyz/author/repo
Release 和源码存档的下载以及SSH 操作、raw均可以使用直接替换远程地址的方法,替换地址如下:
# Release
# 假设下载链接为https://github.com/A/A/releases/download/1.0/1.0.zip
wget https://download.fastgit.org/A/A/releases/download/1.0/1.0.zip

# Codeload
# 假设下载链接为 https://hub.fastgit.xyz/A/A/archive/master.zip
# 或者 https://codeload.github.com/A/A/zip/master
wget https://download.fastgit.org/A/A/archive/master.zip

# SSH
# 假设下载链接为 git@github.com:A/B.git
git clone git@ssh.fastgit.org:A/B.git

# Raw
# 假设下载链接为 https://raw.githubusercontent.com/A/A/master/README.md
wget https://raw.fastgit.org/A/A/master/README.md
二、SSH使用本地代理
2.1 Windows
2.1.1 使用powershell配置
打开powershell,新建配置文件:
New-Item -Path '~\.ssh\config' -ItemType File

# 上一条命令无法创建的,尝试以管理员权限使用这条命令
New-Item -Path 'C:\Users\用户名\.ssh\config' -ItemType File
之后在C:\Users\用户名\.ssh目录下会出现一个config文件
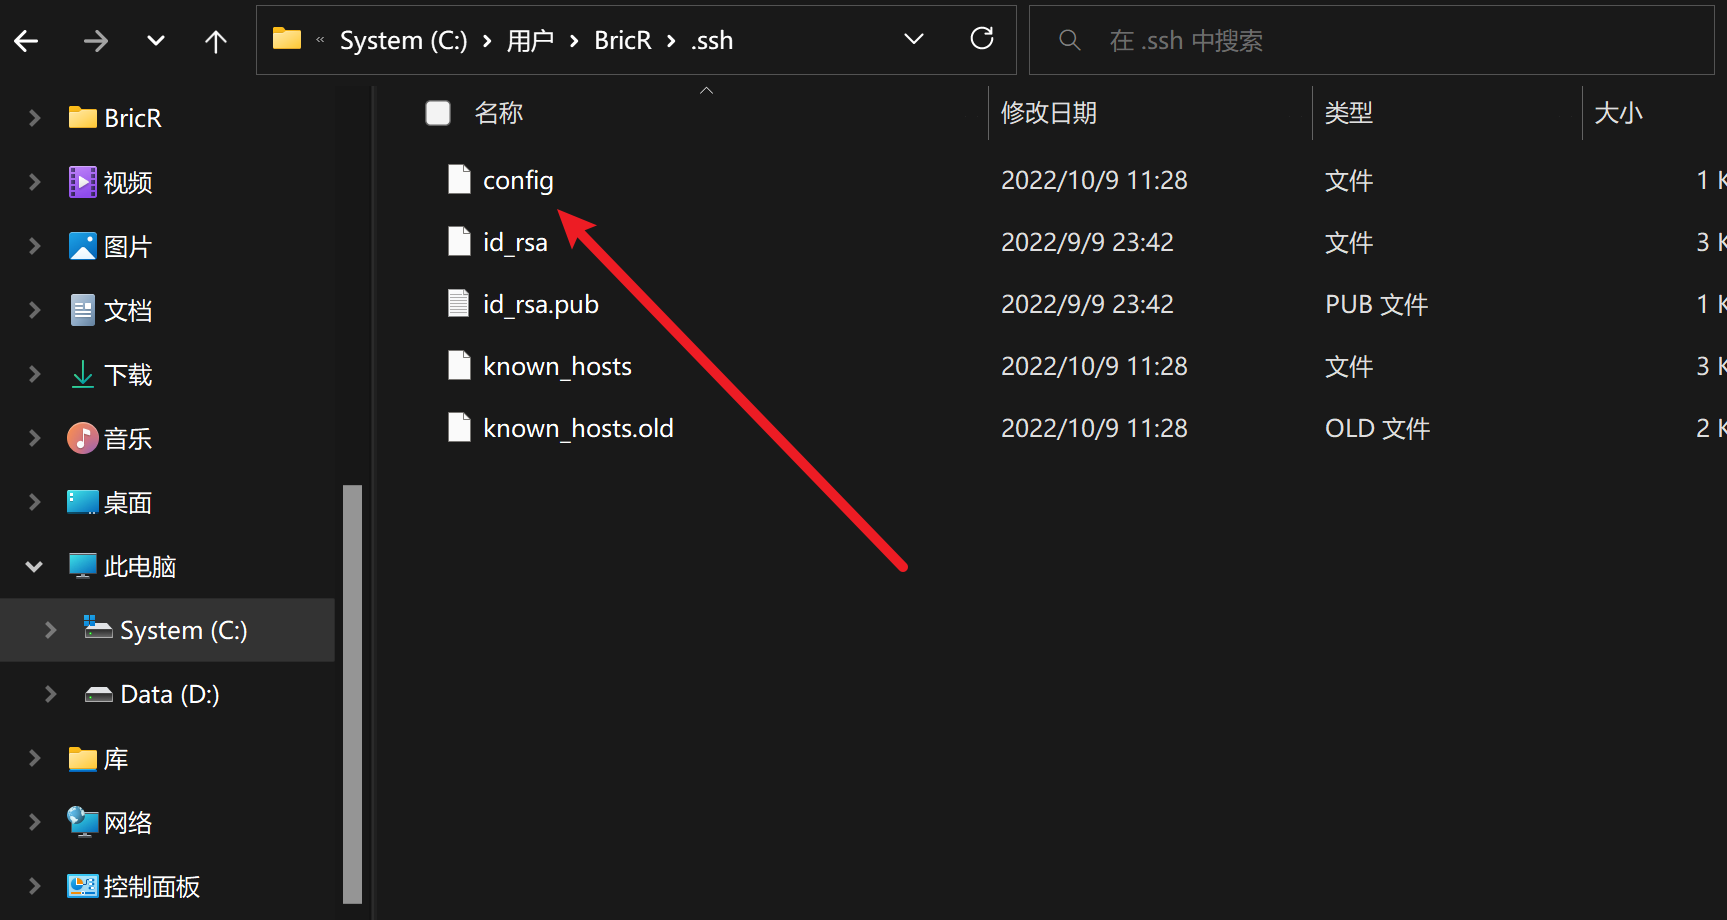
还是在powershell,编辑配置文件:
code C:\Users\用户名\.ssh\config

# 如果没安装VScode,就使用记事本编辑
notepad C:\Users\用户名\.ssh\config
在 config 文件中添加以下内容,记得把10808、10809改成自己本地代理的端口
Host github.com
  User git
  Port 22
  Hostname github.com
  # socks5 代理用这个
  ProxyCommand connect -S 127.0.0.1:10808 -a none %h %p
  # http 代理用下面这个
  # ProxyCommand connect -H 127.0.0.1:10809 -a none %h %p
2.1.2 使用 git bash 配置
打开git bash
touch ~/.ssh/config && nano ~/.ssh/config
如2.1.1,在 config 文件中添加内容。
2.2 Ubuntu
- 安装
ncat
sudo apt install ncat -y
- 编辑配置文件
~/.ssh/config
sudo nano ~/.ssh/config
- 在
~/.ssh/config中加入以下内容:
Host github.com
User git
Hostname github.com
ProxyCommand /usr/bin/ncat --proxy 127.0.0.1:1089 --proxy-type socks5 %h %p
如果本地代理协议是http/socks4,则修改--proxy-type后面的协议即可,例如:
# http协议
ProxyCommand /usr/bin/ncat --proxy 127.0.0.1:1080 --proxy-type http %h %p

# socks4
ProxyCommand /usr/bin/ncat --proxy 127.0.0.1:1080 --proxy-type socks4 %h %p
注意修改
--proxy 127.0.0.1:端口中的端口为本地代理协议的端口
- 使用
ssh -T git@github.com命令测试
$ ssh -T git@github.com
Hi leebri! You've successfully authenticated, but GitHub does not provide shell access.
出现上面的输出,SSH代理就配置成功了(实际输出中里,leebri会变成你自己git的用户名)。

 浙公网安备 33010602011771号