
VUE系列二:vue基础
一、组件嵌套
1. 新建一个组件Users.vue
<template>
  <div class="users">
      <ul>
          <li v-for="user in users">
              {{user}}
          </li>
      </ul>

  </div>
</template>

<script>
export default {
  name: 'users',
  data () {
    return {
      users:["henry", "bucky", "emily"]
    }
  }
}
</script>

<!-- Add "scoped" attribute to limit CSS to this component only -->
<style scoped>

</style>
2. 全局注册组件
2.1. 在main.js里面引入组件Users.vue
// The Vue build version to load with the `import` command
// (runtime-only or standalone) has been set in webpack.base.conf with an alias.
import Vue from 'vue' //导入vue
import App from './App' //导入根组件App.vue
import Users from './components/Users'//导入组件Users.vue

Vue.config.productionTip = false

//全局注册组件Users.vue
Vue.component("users",Users);

/* eslint-disable no-new */
new Vue({ //实例化一个vue对象
  el: '#app', //index.html的根元素app
  components: { App },//注册根组件App.vue才能使用
  template: '<App/>'//VUE模板使用,可以是组件、html标签等
})
2.2. 在根组件App.vue里面使用组件users
// 1. 模板:html结构 有且只有一个根标签
<template>
  <div id="app">
    <HelloWorld/> <!--使用组件HelloWorld  -->
    <users></users><!--使用组件users  -->
  </div>
</template>

//2. 行为:处理逻辑
<script>
//导入组件HelloWorld.vue
import HelloWorld from './components/HelloWorld'

export default {
  name: 'App',//组件App.vue的名字
  components: {
    HelloWorld, //注册组件HelloWorld才能使用
  }
}
</script>

//3. 样式:解决样式
<style>
#app {
  font-family: 'Avenir', Helvetica, Arial, sans-serif;
  -webkit-font-smoothing: antialiased;
  -moz-osx-font-smoothing: grayscale;
  text-align: center;
  color: #2c3e50;
  margin-top: 60px;
}
</style>
3、局部注册组件
3.1. 删除main.js里面注册的全局组件users
3.2. 在根组件app.vue里面局部注册和使用组件
// 1. 模板:html结构 有且只有一个根标签
<template>
  <div id="app">
    <users></users><!--使用组件users  -->
  </div>
</template>

//2. 行为:处理逻辑
<script>
//局部注册组件Users.vue
import Users from './components/Users'//导入组件Users.vue

export default {
  name: 'App',//组件App.vue的名字
  components: {
    "users" : Users //注册组件Users.vue才能使用
  }
}
</script>

//3. 样式:解决样式
<style>
#app {
  font-family: 'Avenir', Helvetica, Arial, sans-serif;
  -webkit-font-smoothing: antialiased;
  -moz-osx-font-smoothing: grayscale;
  text-align: center;
  color: #2c3e50;
  margin-top: 60px;
}
</style>
4、页面呈现效果

二、组件CSS的作用域
1. 分别在在组件App.vue和Users.vue里面定义一个h1的样式
App.vue
// 1. 模板:html结构 有且只有一个根标签
<template>
  <div id="app">
    <h1>App</h1>
    <users></users><!--使用组件users  -->
  </div>
</template>

//2. 行为:处理逻辑
<script>
//局部注册组件Users.vue
import Users from './components/Users'//导入组件Users.vue

export default {
  name: 'App',//组件App.vue的名字
  components: {
    "users" : Users //注册组件Users.vue才能使用
  }
}
</script>

//3. 样式:解决样式
<style>
h1
{
  color:purple;
}
</style>
Users.vue
<template>
  <div class="users">
     <h1>users</h1>

  </div>
</template>

<script>
export default {
  name: 'users',
  data () {
    return {
      users:["henry", "bucky", "emily"]
    }
  }
}
</script>

<!-- Add "scoped" attribute to limit CSS to this component only -->
<style >
h1
{
    color:  green;
}
</style>
查看页面效果可以发现App.vue里面的h1的样式被Users.vue里面的样式给覆盖了
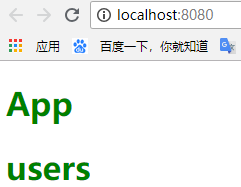
那么我们要他们各自使用自己的h1的样式怎么办呢?
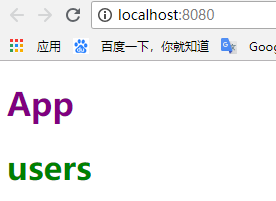
我分别给他们加上scoped就可以了
App.vue的样式:
//3. 样式:解决样式
<style scoped>
h1
{
  color:purple;
}
</style>
Users.vue的样式:
<style scoped>
h1
{
    color:  green;
}
</style>
页面效果:
三、属性传值props(父组件把数据传递给子组件)
把父组件App.vue的数据传递给子组件Users.vue使用
App.vue
// 1. 模板:html结构 有且只有一个根标签
<template>
  <div id="app">
    <h1>App</h1>
    <users v-bind:users="people"></users><!--使用组件users的时候把父组件的数据people传递给它  -->
  </div>
</template>

//2. 行为:处理逻辑
<script>
//局部注册组件Users.vue
import Users from './components/Users'//导入组件Users.vue

export default {
  name: 'App',//组件App.vue的名字
  components: {
    "users" : Users //注册组件Users.vue才能使用
  },
  data () {
    return {
      people:["henry", "bucky", "emily"]
    }
  }
}
</script>

//3. 样式:解决样式
<style scoped>
h1
{
  color:purple;
}
</style>
Users.vue
<template>
  <div class="users">
     <h1>users</h1>
     <ul>
         <!-- 遍历父组件传递过来的users -->
         <li v-for="user in users">
             {{user}}
         </li>
     </ul>

  </div>
</template>

<script>
export default {
  name: 'users',
//   props:["users"],//获取父组件传递过来的users
  props:{
      users:{
          type:Array,
          required:true
      }
  },
  data () {
    return {

    }
  }
}
</script>

<!-- Add "scoped" attribute to limit CSS to this component only -->
<style scoped>
h1
{
    color:  green;
}
</style>
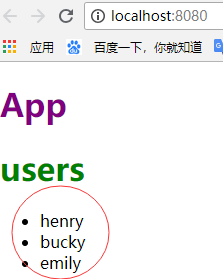
页面效果:
四、事件传值(子组件把数据传递给父组件)
在子组件Users.vue的方法changeTitle里面注册一个事件titleChanged并传递一个参数值:"子向父传值"
<template>
  <div class="users">
     <h1  v-on:click="changeTitle">users</h1>
     <ul >
         <!-- 遍历父组件传递过来的users -->
         <li v-for="user in users">
             {{user}}
         </li>
     </ul>

  </div>
</template>


<!--

传值: string、number、boolean
传引用:Array、Object


-->
<script>
export default {
  name: 'users',
//   props:["users"],//获取父组件传递过来的users
  props:{
      users:{
          type:Array,
          required:true
      }
  },
  data () {
    return {

    }
  },
  methods : {
      changeTitle : function(){
          //注册一个事件titleChanged
          this.$emit("titleChanged","子向父传值");
      }

  }
}
</script>

<!-- Add "scoped" attribute to limit CSS to this component only -->
<style scoped>
h1
{
    width: 1000px;
    height: 100px;
    background-color: aqua;
    color:  green;
}
</style>
在父组件里面实现事件titleChanged
// 1. 模板:html结构 有且只有一个根标签
<template>
  <div id="app">
    <p v-on:titleChanged="updateTitle($event)">App</p>
    {{title}}
    <users v-bind:users="people"></users><!--使用组件users的时候把父组件的数据people传递给它  -->
  </div>
</template>

//2. 行为:处理逻辑
<script>
//局部注册组件Users.vue
import Users from './components/Users'//导入组件Users.vue

export default {
  name: 'App',//组件App.vue的名字
  components: {
    "users" : Users //注册组件Users.vue才能使用
  },
  data () {
    return {
      people:["henry", "bucky", "emily"],
      title : "父组件的"
    }
  },
  methods : {
    updateTitle (msg){
      this.title=msg;
    }
  }
}
</script>

//3. 样式:解决样式
<style scoped>
h1
{
  color:purple;
}
</style>
五、传值和传引用
六、生命周期(钩子函数)
1. 生命周期的作用
1. 在开发过程中定位问题
2. 解决需求问题,即什么需求应该写在生命周期的哪个阶段
2. 生命周期的流程图:

流程图里面的钩子函数说明:
beforeCreate : 实例化vue对象之前做的一些动作,这里有一些事件的初始化,在这里可以做页面的loading
create:在这里vue对象已经实例化完毕,事件也初始化完毕,在这里可以做网络接口数据的请求、结束beforeCreate里面的loading
create之后检查有没有el元素,如果有就继续看有没有template,如果这两个都没有,生命周期就结束了;如果有template就里面是一个组件还是一个html元素
beforeMount:在这个方法之后进行虚拟dom的渲染,注意:此时只是进行虚拟dom的渲染,页面还没显示出来
mounted :执行这个方法之后页面就显示出来了
beforeUpdate:页面进行更新之前要做的事
updated:这个方法执行完成之后页面修改的数据已改变
beforeDestroy:生命周期结束之前
destroyed:生命周期结束
3. 生命周期钩子函数的示例
Users.vue
<template>
  <div class="users">
     <h1  v-on:click="changeTitle">users</h1>
     <ul >
         <!-- 遍历父组件传递过来的users -->
         <li v-for="user in users">
             {{user}}
         </li>
     </ul>

  </div>
</template>


<!--

传值: string、number、boolean
传引用:Array、Object


-->
<script>
export default {
  name: 'users',
//   props:["users"],//获取父组件传递过来的users
  props:{
      users:{
          type:Array,
          required:true
      }
  },
  data () {
    return {

    }
  },
  methods : {
      changeTitle : function(){
          //注册一个事件titleChanged
          this.$emit("titleChanged","子向父传值");
      }

  },
  beforeCreate:function(){
    alert("组件实例化之前执行的函数");
  },
  created:function(){
    alert("组件实例化完毕,但页面还未显示");
  },
  beforeMount:function(){
    alert("组件挂载前,页面仍未展示,但虚拟Dom已经配置");
  },
  mounted:function(){
    alert("组件挂载后,此方法执行后,页面显示");
  },
  beforeUpdate:function(){
    alert("组件更新前,页面仍未更新,但虚拟Dom已经配置");
  },
  updated:function(){
    alert("组件更新,此方法执行后,页面显示");
  },
  beforeDestory:function(){
    alert("组件销毁前");
  },
  destoryed:function(){
    alert("组件销毁");
  }
}
</script>

<!-- Add "scoped" attribute to limit CSS to this component only -->
<style scoped>
h1
{
    width: 1000px;
    height: 100px;
    background-color: aqua;
    color:  green;
}
</style>
七、路由和http
路由
路由和a标签一样实现页面的跳转,和a标签最大的不同是路由的性能更好,原因是a标签点击多次就跳转多次性能很低,而路由的话不管你点击多少次都只跳转一次
要使用路由先安装路由:
安装路由之前要先停止项目:ctrl+c
安装路由的命令:npm install vue-router --save-dev
安装完路由之后启动项目:npm run dev

路由使用示例:
main.js
// The Vue build version to load with the `import` command
// (runtime-only or standalone) has been set in webpack.base.conf with an alias.
import Vue from 'vue' //导入vue
import VueRouter from 'vue-router' //引入路由
import App from './App' //导入根组件App.vue
import Users from './components/Users'//导入组件Users.vue
import Home from './components/Home'//导入组件Users.vue

Vue.config.productionTip = false
//引入路由后使用路由
Vue.use(VueRouter)
//配置路由
const router = new VueRouter(
  {
    routes : [
      //配置路由跳转到Home这个组件
      {path:"/",component:Home},
      //配置路由跳转到Users.vue这个组件
      {path:"/Users",component:Users}
    ],
    //去掉地址栏的"/#/"
    mode : "history"
  }
)


/* eslint-disable no-new */
new Vue({ //实例化一个vue对象
  router,//使用路由
  el: '#app', //index.html的根元素app
  components: { App },//注册根组件App.vue才能使用
  template: '<App/>'//VUE模板使用,可以是组件、html标签等
})
新建一个Home.vue
<template>
  <div class="home">
      <h1 >home</h1>
     <ul >
         <!-- 遍历父组件传递过来的users -->
         <li v-for="user in users">
             {{user}}
         </li>
     </ul>

  </div>
</template>


<!--

传值: string、number、boolean
传引用:Array、Object


-->
<script>
export default {
  name: 'home',
  data () {
    return {
      users:["henry", "bucky", "emily"]
    }
  }
}
</script>

<!-- Add "scoped" attribute to limit CSS to this component only -->
<style scoped>
h1
{
    width: 1000px;
    height: 100px;
    background-color: aqua;
    color:  green;
}
</style>
Users.vue
<template>
  <div class="users">
     <h1 >users</h1>

  </div>
</template>


<!--

传值: string、number、boolean
传引用:Array、Object


-->
<script>
export default {
  name: 'users',
  data () {
    return {

    }
  }
}
</script>

<!-- Add "scoped" attribute to limit CSS to this component only -->
<style scoped>
h1
{
    width: 1000px;
    height: 100px;
    background-color: aqua;
    color:  green;
}
</style>
在根组件App.vue里面使用路由
// 1. 模板:html结构 有且只有一个根标签
<template>
  <div id="app">
     <!-- 使用路由实现跳转 注意:to里面写的是路由的名字 -->
     <ul>
       <li><router-link to="/">home</router-link></li>
       <li><router-link to="/Users">Users</router-link></li>
     </ul>
     <!-- 进入首页默认加载的路由 -->
    <router-view></router-view>
  </div>
</template>

//2. 行为:处理逻辑
<script>


export default {
  name: 'App',//组件App.vue的名字
  data () {
    return {

    }
  }
}
</script>

//3. 样式:解决样式
<style scoped>
h1
{
  color:purple;
}
</style>
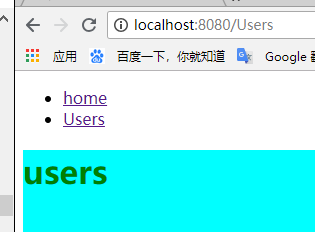
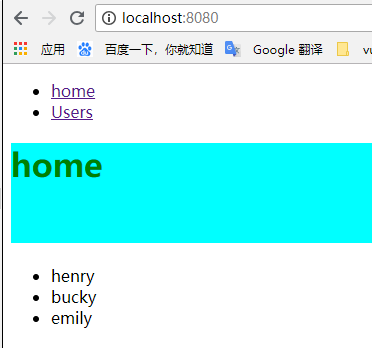
页面效果:
首页
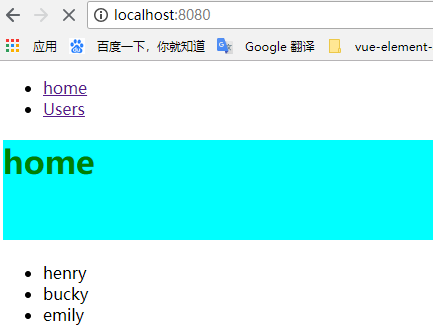
点击Users跳转到Users组件
点击home跳转到Home组件
使用http
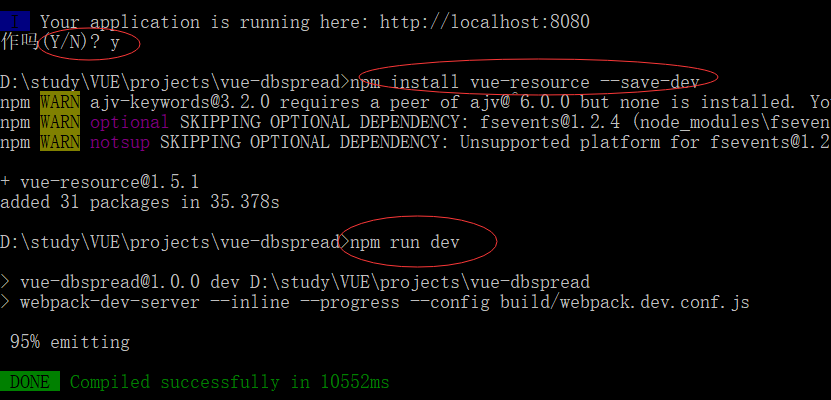
要使用http要先安装vue-resource
安装路由之前要先停止项目:ctrl+c
安装路由的命令:npm install vue-resource --save-dev
安装完路由之后启动项目:npm run dev
http使用示例:
在main.js里面引入vue-resource就可以在任何组件中使用了http了
// The Vue build version to load with the `import` command
// (runtime-only or standalone) has been set in webpack.base.conf with an alias.
import Vue from 'vue' //导入vue
import VueRouter from 'vue-router' //引入路由
import VueResource from 'vue-resource' //引入vue-resource
import App from './App' //导入根组件App.vue
import Users from './components/Users'//导入组件Users.vue
import Home from './components/Home'//导入组件Users.vue

Vue.config.productionTip = false
//引入路由后使用路由,这样就可以在任何组件中使用路由了
Vue.use(VueRouter)
//引入vue-resource后使用vue-resource,这样就可以在任何组件中使用http了
Vue.use(VueResource)
//配置路由
const router = new VueRouter(
  {
    routes : [
      //配置路由跳转到Home这个组件
      {path:"/",component:Home},
      //配置路由跳转到Users.vue这个组件
      {path:"/Users",component:Users}
    ],
    //去掉地址栏的"/#/"
    mode : "history"
  }
)


/* eslint-disable no-new */
new Vue({ //实例化一个vue对象
  router,//使用路由
  el: '#app', //index.html的根元素app
  components: { App },//注册根组件App.vue才能使用
  template: '<App/>'//VUE模板使用,可以是组件、html标签等
})
在Home.vue组件中发送http请求
<template>
  <div class="home">
      <h1 >home</h1>
     <ul >
         <!-- 遍历父组件传递过来的users -->
         <li v-for="user in users">
             {{user}}
         </li>
     </ul>

  </div>
</template>


<!--

传值: string、number、boolean
传引用:Array、Object


-->
<script>
export default {
  name: 'home',
  data () {
    return {
      users:["henry", "bucky", "emily"]
    }
  },
  created(){
    this.$http.get("http://jsonplaceholder.typicode.com/users")
        .then((data) => {
          console.log(data);
        //   this.users = data.body;
        })
  }
}
</script>

<!-- Add "scoped" attribute to limit CSS to this component only -->
<style scoped>
h1
{
    width: 1000px;
    height: 100px;
    background-color: aqua;
    color:  green;
}
</style>
请求结果:


 浙公网安备 33010602011771号