

树莓派与深度学习:目标检测
创建日期: 2020-07-04 17:07:18
上一篇实现了树莓派4B上的深度学习环境搭建和测试:
这一篇试试在其上运行深度学习目标检测模型进行推理的效果,主要是基于TensorFlow目标检测API,并从该项目的一个子页面下载训练好的模型和权重,直接进行目标检测的推理过程。步骤如下:
1.下载谷歌tensorflow目标检测API项目
git clone https://github.com/tensorflow/models.git
\2. 下载已训练的模型并解压至指定目录
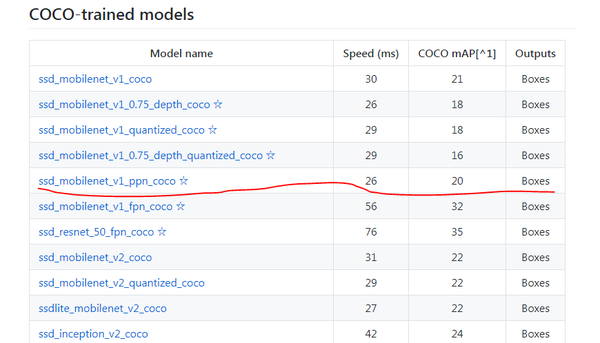
这里我们选用一个速度最快的前提下,mAP最高的模型:SSD_MobileNet_V1_ppn_coco在COCO上预训练好的模型,其速度为26ms,mAP为20。
cd models/research/object_detection/models
wget download.tensorflow.org/models/object_detection/ssd_mobilenet_v1_ppn_shared_box_predictor_300x300_coco14_sync_2018_07_03.tar.gz
tar -xzvf ssd_mobilenet_v1_ppn_shared_box_predictor_300x300_coco14_sync_2018_07_03.tar.gz
\3. 下载并编译安装protobuf
Protocol Buffers (简称protobuf)是一种轻便高效的结构化数据存储格式,可以用于结构化数据串行化,或者说序列化。它很适合做数据存储或数据交换格式。可用于通讯协议、数据存储等领域的语言无关、平台无关、可扩展的序列化结构数据格式。目前提供了 C++、Java、Python 三种语言的 API,对提高运行效率很有帮助。
# 在/home下创建安装目录Mysoftware
cd ~ && mkdir Mysoftware
cd Mysoftware
#下载安装包并解压
wget https://github.com/protocolbuffers/protobuf/releases/download/v3.11.2/protobuf-all-3.11.2.tar.gz
tar -xf  protobuf-all-3.11.2.tar.gz
# 编译安装过程:
cd protobuf-3.11.2
./configure
make
make check
其中,make耗时较长(约半小时);make check也耗时约半小时,用来检查编译是否正确(应该可以跳过),没问题的话输出结果如下图:
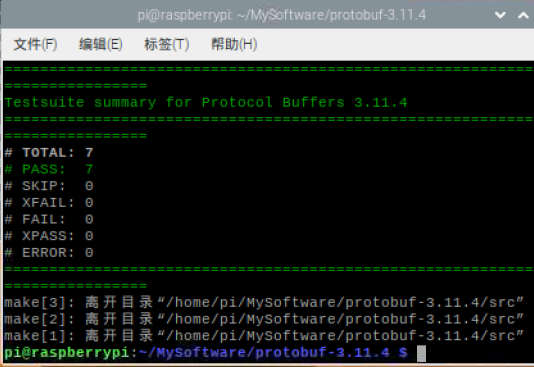
编译check完成
然后执行安装并刷新:
sudo make install
sudo ldconfig
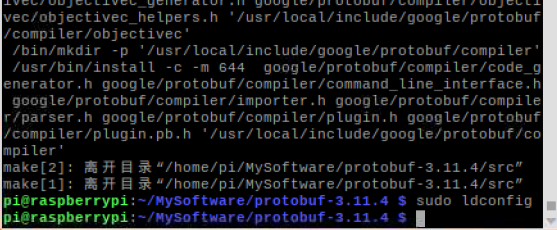
protobuf 安装完成
\4. 为了使protobuf可以让python调用,还需要执行:
cd models/research
protoc object_detection/protos/*.proto --python_out=.
执行完之后,models/research/object_detection/protos 路径下的每个'.proto'文件会对应生成一个以‘_pb2.py’的文件(大约共30个)。
\5. 在cd /home/pi/Documents/models/research/object_detection/models目录下创建目标检测主文件'main.py’,内容如下:
import numpy as np
import os
import sys
import tarfile
import tensorflow as tf
import cv2
import time
from collections import defaultdict

sys.path.append("../..")

from object_detection.utils import label_map_util
from object_detection.utils import visualization_utils as vis_util

# 第2步下载的模型文件夹名称
MODEL_NAME = 'ssd_mobilenet_v1_ppn_shared_box_predictor_300x300_coco14_sync_2018_07_03'
PATH_TO_CKPT = MODEL_NAME + '/frozen_inference_graph.pb'
model_path = "./{}/model.ckpt".format(MODEL_NAME)

# 对应的标签路径
PATH_TO_LABELS = os.path.join('../data', 'mscoco_label_map.pbtxt')

NUM_CLASSES = 90
print("Start object detecting!!!")
detection_graph = tf.Graph()
with detection_graph.as_default():
    od_graph_def = tf.GraphDef()
with tf.gfile.GFile(PATH_TO_CKPT, 'rb') as fid:
    serialized_graph = fid.read()
    od_graph_def.ParseFromString(serialized_graph)
    tf.import_graph_def(od_graph_def, name='')

label_map = label_map_util.load_labelmap(PATH_TO_LABELS)

categories = label_map_util.convert_label_map_to_categories(label_map, max_num_classes=NUM_CLASSES, use_display_name=True)
category_index = label_map_util.create_category_index(categories)

cap = cv2.VideoCapture(0)
with detection_graph.as_default():
    with tf.Session(graph=detection_graph) as sess:
        writer = tf.summary.FileWriter("logs/", sess.graph)
        sess.run(tf.global_variables_initializer())

        loader = tf.train.import_meta_graph(model_path + '.meta')
        loader.restore(sess, model_path)
        while(1):
            start = time.time()
            ret, frame = cap.read()
            if cv2.waitKey(1) & 0xFF == ord('q'):
                break
            image_np =cv2.flip(frame,-1,dst=None) #我的摄像头倒放着的,因此旋转了108度,自行调整

            image_np_expanded = np.expand_dims(image_np, axis=0)
            image_tensor = detection_graph.get_tensor_by_name('image_tensor:0')
            boxes = detection_graph.get_tensor_by_name('detection_boxes:0')
            scores = detection_graph.get_tensor_by_name('detection_scores:0')
            classes = detection_graph.get_tensor_by_name('detection_classes:0')
            num_detections = detection_graph.get_tensor_by_name('num_detections:0')

            (boxes, scores, classes, num_detections) = sess.run(
                [boxes, scores, classes, num_detections],
                feed_dict={image_tensor: image_np_expanded})

            vis_util.visualize_boxes_and_labels_on_image_array(
                image_np, np.squeeze(boxes),
                np.squeeze(classes).astype(np.int32),
                np.squeeze(scores),
                category_index,
                use_normalized_coordinates=True,
                line_thickness=6)
            end = time.time()
            print('One frame detect take time(s):' ,end - start)

            cv2.imshow("capture", image_np)
            cv2.waitKey(1)
cap.release()
cv2.destroyAllWindows()
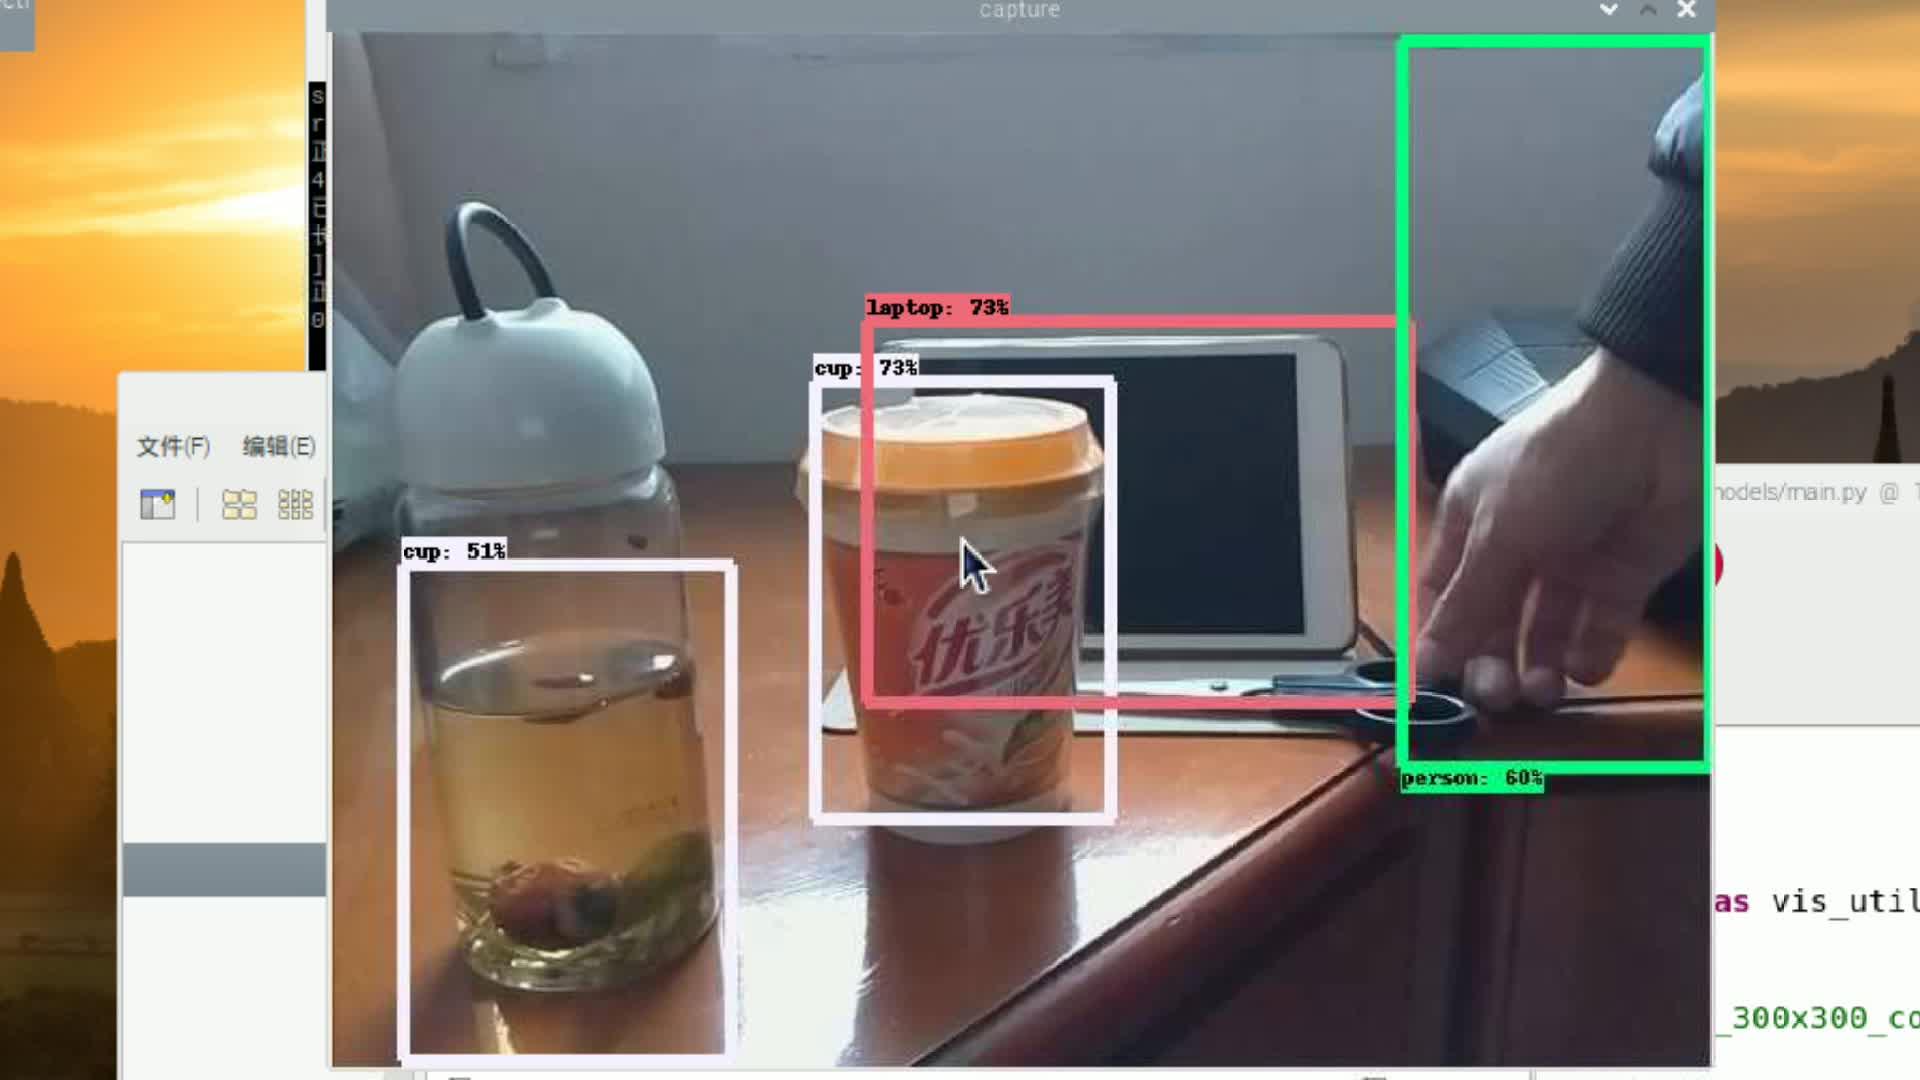
执行: python3 main.py ,能看到检测结果窗口如下(我是用手机VNCViewer录屏得到的)
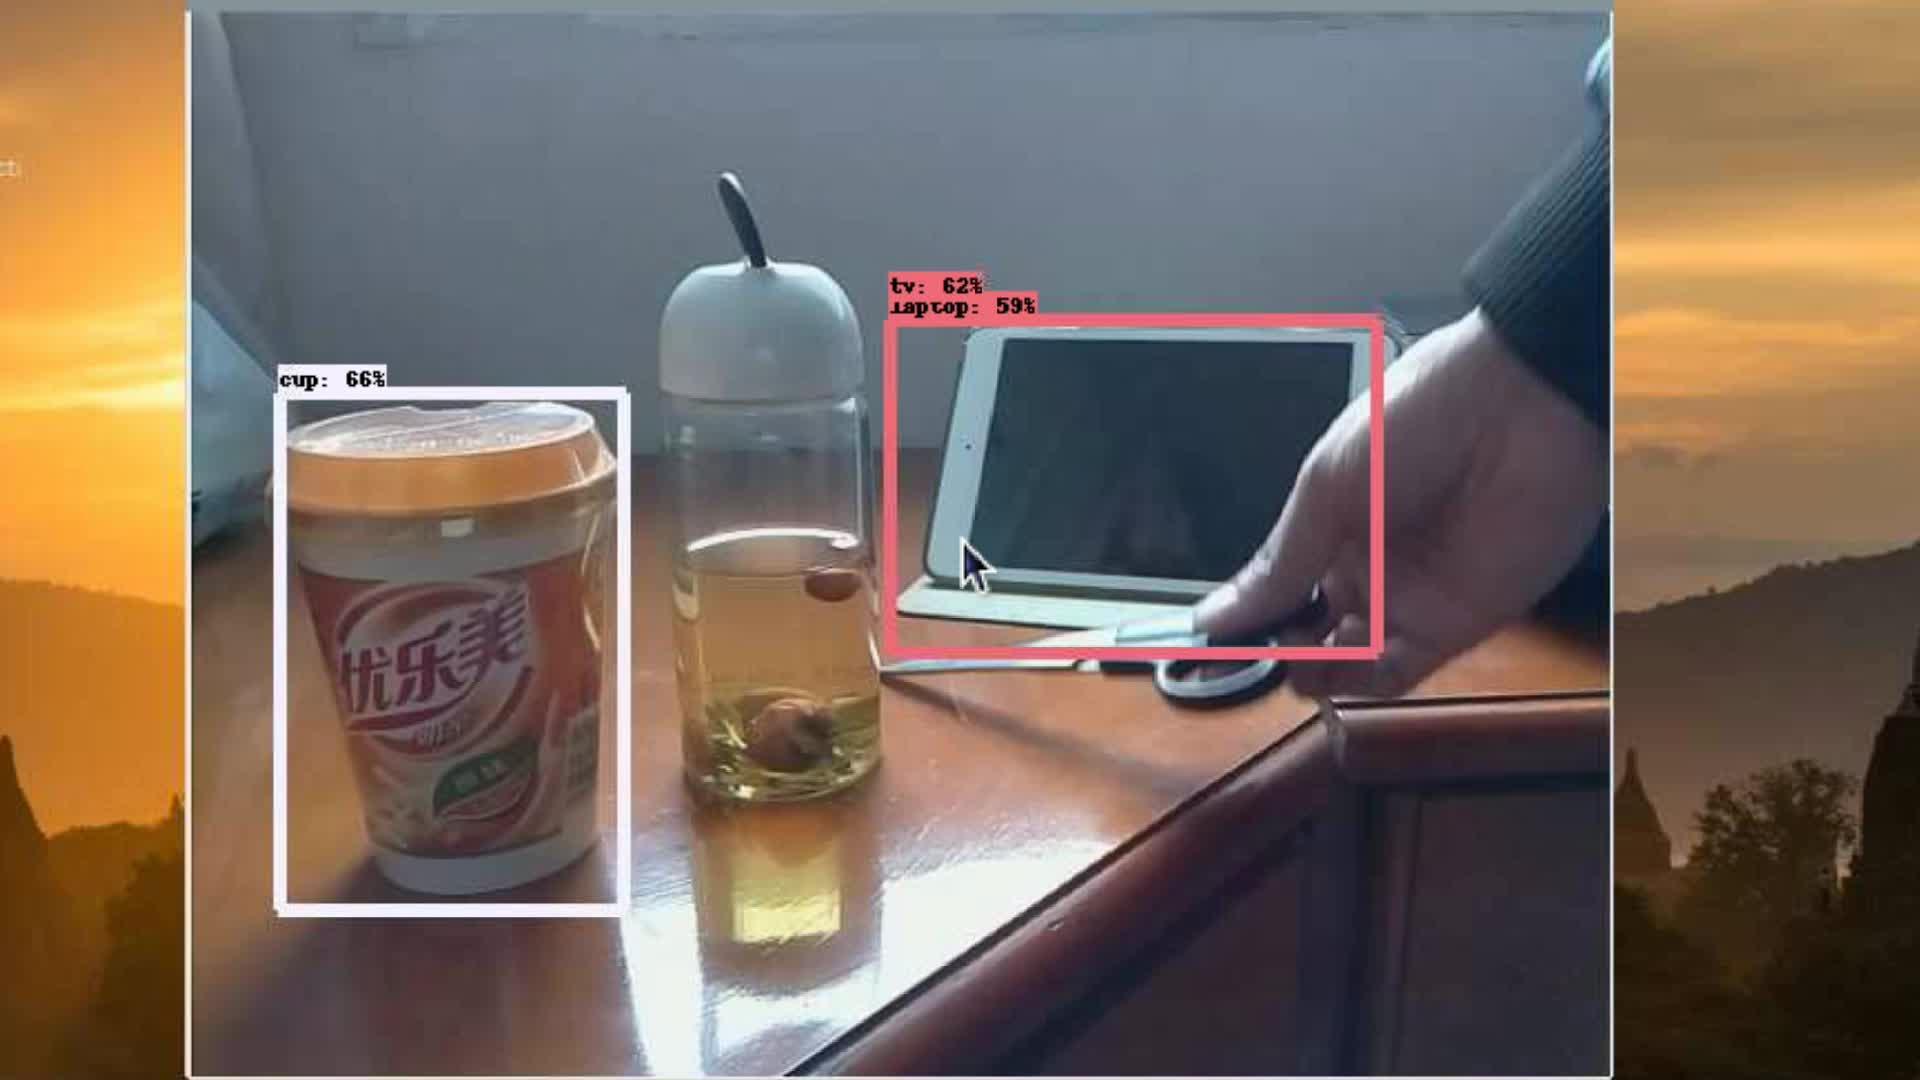
模型ssd_mobilenet_v1_ppn_coco的检测结果(速度约0.4s一张):
另外也做了第一个模型ssd_mobilenet_v1_coco的实验(速度约0.46秒一张),效果如下:
总结:
相比之下,第一次试验的模型速度确实快一点点儿,两个都准确率不高,person类的检测敏感度相对其它类要好很多。远处物体/小目标的检测效果较差。
原因应该是现实场景和COCO数据集还是有一定差距,而且摄像头的成像质量也不高。条件允许的话,迁移学习可以尝试。自己标点数据在预训练的基础上微调,效果提升会很明显。
另一方面,检测速度还可以通过模型量化压缩来进一步提高。TensorRT可以尝试一下。照目前这个目标检测的速度,语义分割模型可能难以实现。
参考文献:
