vue动态组件的笨方法实现
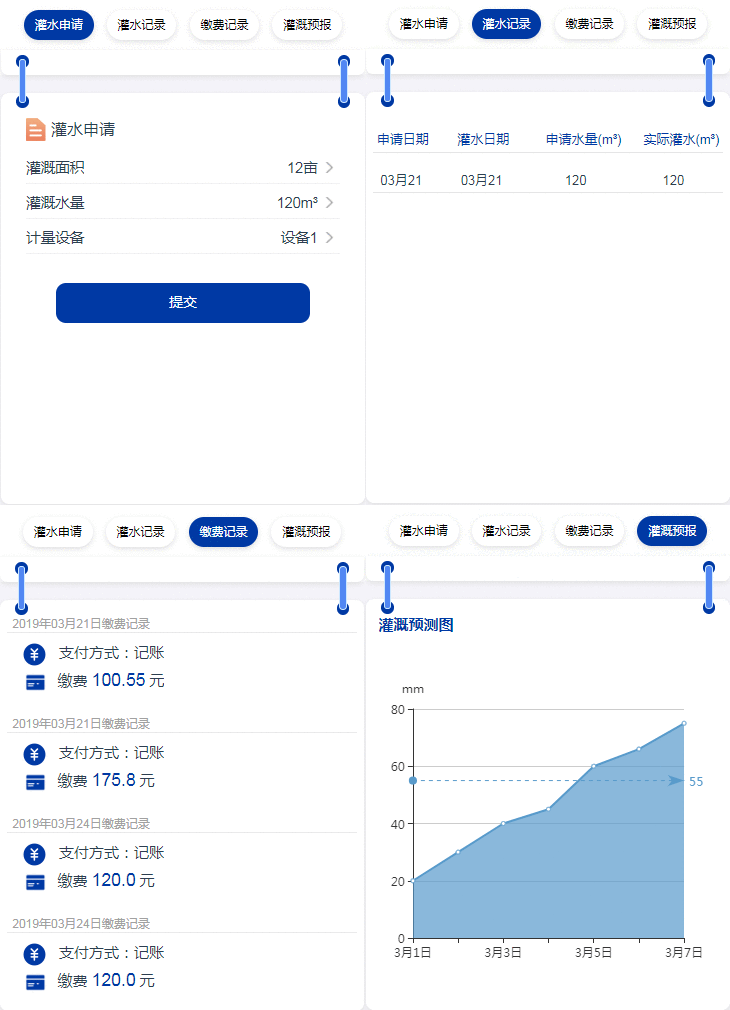
根据设计文档,移动端项目的主页内要有四个按钮,点击按钮后在下方的信息显示区域内显示相关内容。
使用vue提供的动态组件来实现,同时笨方法来实现按钮同步改变颜色样式。下面先上示意图再上代码:
1、效果示意图:

2、涉及到的代码:
template内的代码:
 1    <div class="contentButton">
 2       <button v-bind:class="{'contentButtonActive':isApply}" @click="swithContentApply('ContentApply')">灌水申请</button>
 3       <button v-bind:class="{'contentButtonActive':isRecord}" @click="swithContentRecord('ContentRecord')">灌水记录</button>
 4       <button v-bind:class="{'contentButtonActive':isPayment}" @click="swithContentPayment('ContentPayment')">缴费记录</button>
 5       <button v-bind:class="{'contentButtonActive':isPrediction}" @click="swithContentPrediction('ContentPrediction')">灌溉预报</button>
 6     </div>
 7
 8     <div class="contentInfo">
 9       <div class="infoStyle">
10         <keep-alive>
11           <component :is="contentComponent">
12           </component>
13         </keep-alive>
14       </div>
15     </div>
script代码:
 1 import ContentApply from './contentPages/ContentApply' /* 灌水申请 */
 2 import ContentRecord from './contentPages/ContentRecord' /* 灌水记录 */
 3 import ContentPayment from './contentPages/ContentPayment' /* 缴费记录 */
 4 import ContentPrediction from './contentPages/ContentPrediction' /* 灌溉预报 */
 5
 6 export default {
 7   name: 'HomeContent',
 8   components: { /* 将子组件引入 */
 9     ContentApply,
10     ContentRecord,
11     ContentPayment,
12     ContentPrediction
13   },
14   data () {
15     return {
16       contentComponent: 'ContentApply', /* 动态组件默认显示ContentApply */
17       isApply: true, /* 第一个按钮改变样式,突出选中 */
18       isRecord: false,
19       isPayment: false,
20       isPrediction: false
21     }
22   },
23   methods: {
24     swithContentApply (index) {
25       this.contentComponent = index  /* 改变当前动态组件显示子组件 */
26       this.isApply = true  /* 按钮的样式切换 */
27       this.isRecord = false
28       this.isPayment = false
29       this.isPrediction = false
30     },
31     swithContentRecord (index) {
32       this.contentComponent = index
33       this.isApply = false
34       this.isRecord = true
35       this.isPayment = false
36       this.isPrediction = false
37     },
38     swithContentPayment (index) {
39       this.contentComponent = index
40       this.isApply = false
41       this.isRecord = false
42       this.isPayment = true
43       this.isPrediction = false
44     },
45     swithContentPrediction (index) {
46       this.contentComponent = index
47       this.isApply = false
48       this.isRecord = false
49       this.isPayment = false
50       this.isPrediction = true
51     }
52   }
53 }
style代码就不贴了,根据实际进行修改。
动态组件<component :is="contentComponent">通过改变contentComponent的值来实现显示不同子组件,contentComponent在data中定义了一个默认子组件名字,子组件的切换通过switchContentApply()/switchContentRecord()/switchContentPayment()/switchContentPrediction()四个方法通过改变contentComponent值来实现,按钮的样式跟随内容的改变是通过v-bind:class来实现的,这里使用了简单的方法通过对isAppley等四个值进行true或false赋值来实现动态加载名为“contentButtonActive”的样式。
通过在<component :is="contentComponent">外加入<keep-alive>来实现保存子组件的渲染状态,这样切换子组件后不会回收之前的渲染结果,不过我后期去掉了这个标签,因为涉及要求子组件的数据会实时更新,所以干脆去掉这个标签,每次都获取数据,也不知道这个操作会不会带来什么副作用……


