
SpringBoot
SpringBoot
B站:狂神说Java-->https://www.bilibili.com/video/BV1PE411i7CV?p=1
微服务阶段
javase: OOP
mysql:持久化
html+css+js+jquery+框架
javaweb:可以独立开发MVC3 层架构的网站了,比较原始
ssm框架:简化了我们的开发流程,配置也开始较为复杂;
打包方式:war:tomcat运行
spring再简化--->SpringBoot,微服务架构!
打包方式:SpringBoot - jar:内嵌tomcat;
服务越来越多: springcloud;
学习路线

1、介绍SpringBoot
什么是SpringBoot
Spring是一个开源框架,2003年兴起的一个轻量级的Java开发框架,作者: Rod Johnson。
Spring是为了解决企业级应用开发的复杂性而创建的,简化开发。
Spring是如何简化Java开发的
为了降低Java开发的复杂性,Spring采用 了以下4种关键策略:
1、基于POJO的轻量级和最小侵入性编程;
2、通过I0C,依赖注入(DI) 和面向接口实现松耦合;
3、基于切面(AOP)和惯例进行声明式编程;
4、通过切面和模版减少样式代码;
记住:约定大于配置
2、第一个SpringBoot程序
到底多么简单
- jdk1.8
- maven 3.6.1
- springboot:最新版
- IDEA
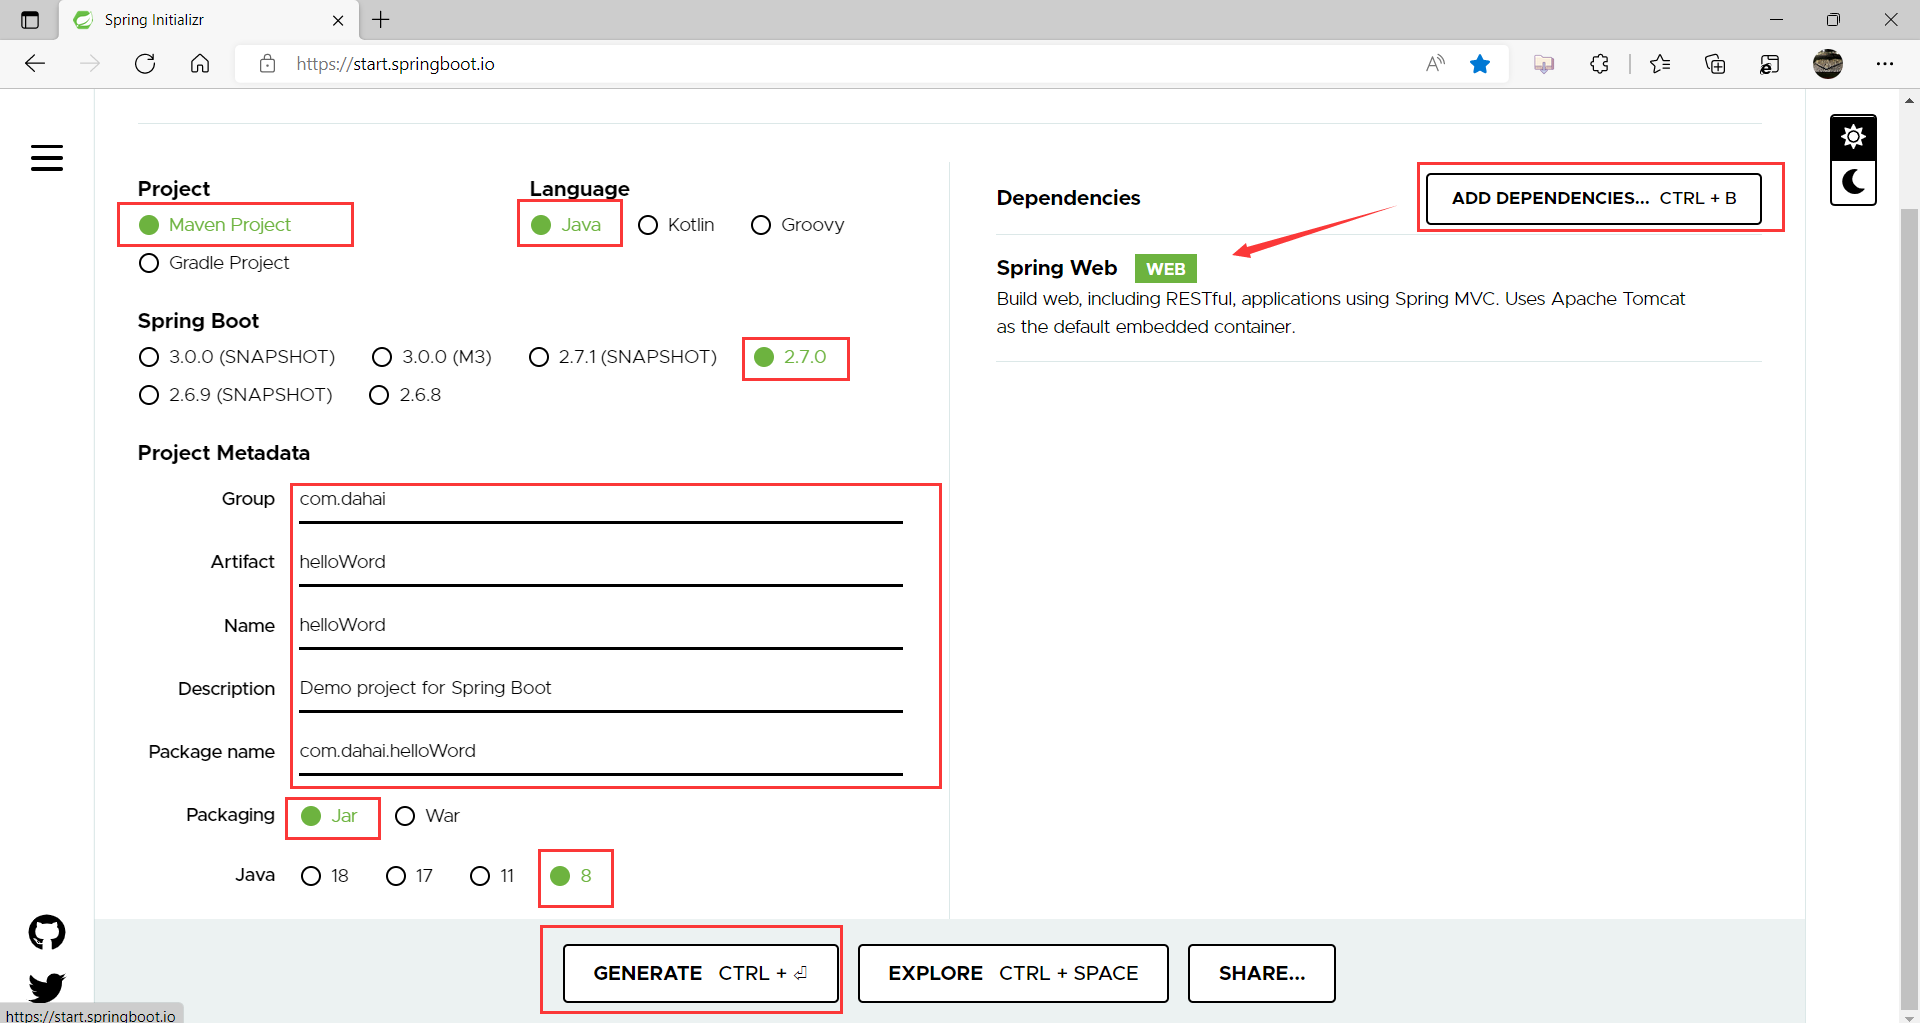
官方:提供了一个快速生成的网站!
- 可以在官网直接下载后,导入idea开发
- 官网Spring Initializr:https://start.springboot.io/
- 直接使用idea创建一个springboot项目
- 一般的开发直接在idea创建即可
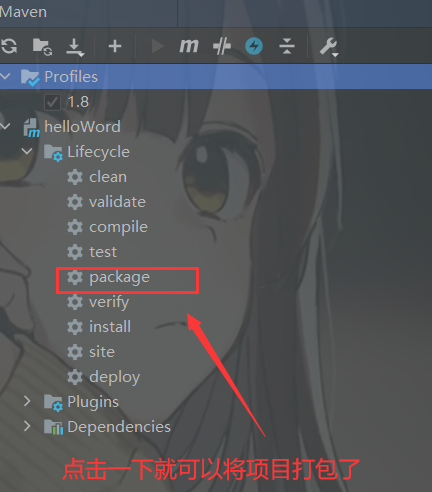
官网Spring Initializr搭建一个springboot的HelloWord项目
点击绿色运行按钮即可运行程序
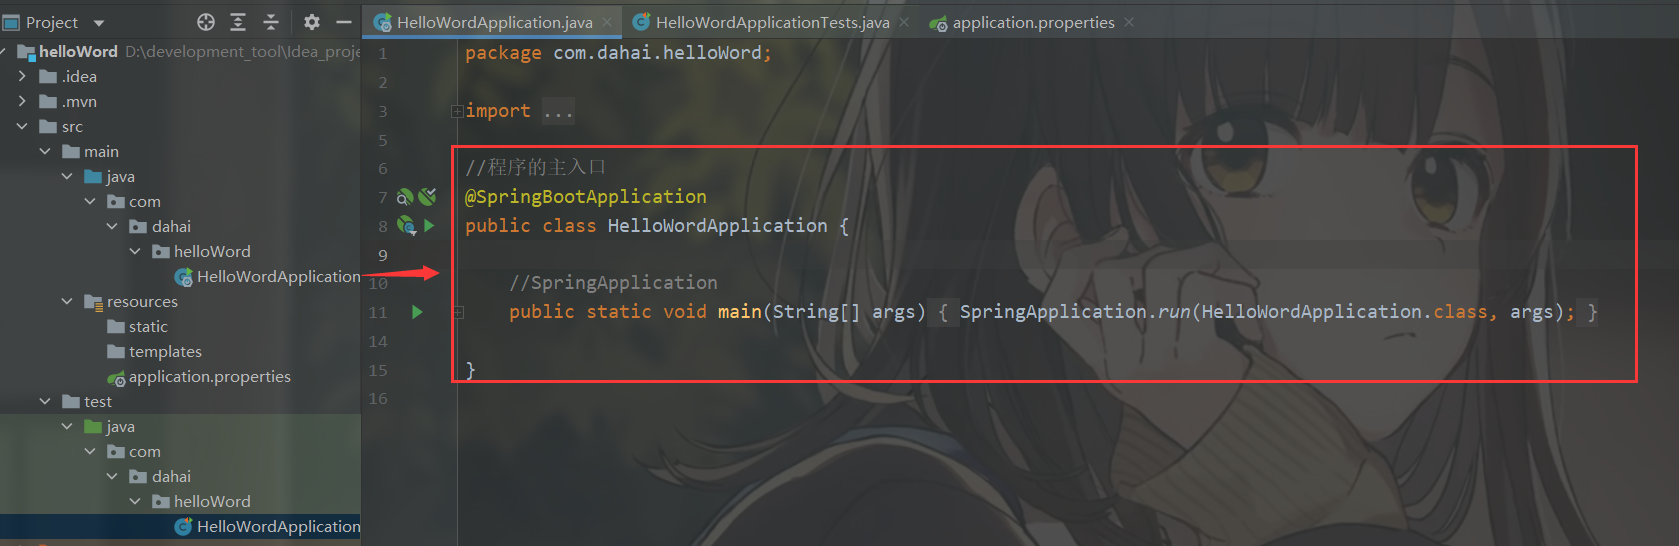
可以看到Tomcat已经打开8080端口

到此一个完整的spring项目框架已经搭建好了。
写一个打印输出接口
必须在同级目录下建包
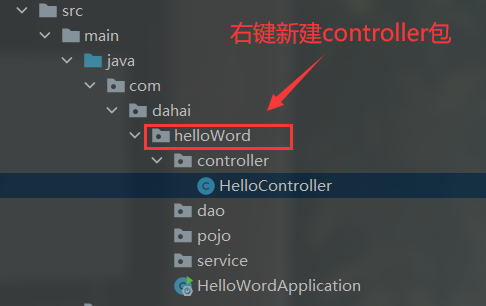
HelloController类
package com.dahai.helloWord.controller; import org.springframework.web.bind.annotation.RequestMapping; import org.springframework.web.bind.annotation.RestController; @RestController public class HelloController { @RequestMapping("/hello") public String hello(){ //调用业务,接收前端参数 return "hello,World"; } }
运行后,直接访问:localhost:8080/hello
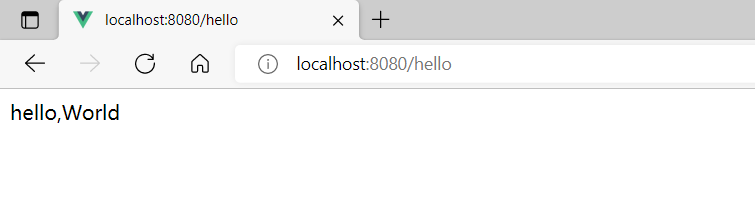
我们可以发现我们没有配置任何文件,这就是springboot的核心机制:自动装配
使用idea创建Springboot项目
新建项目New Project
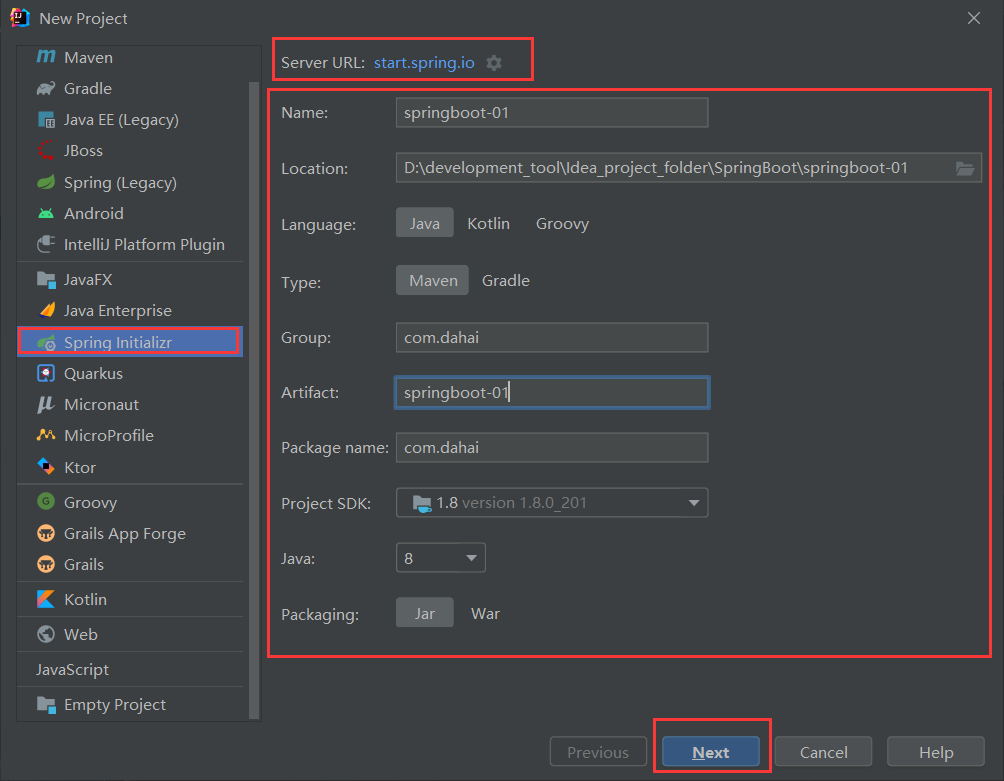
Next后
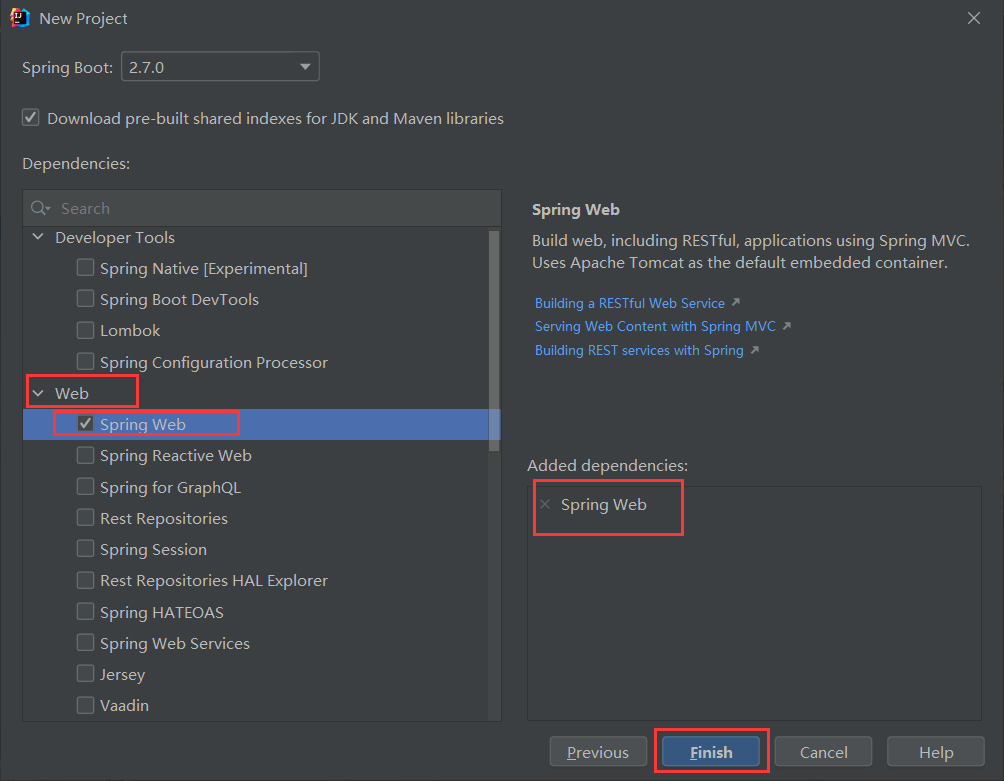
待idea下载完依赖就OK了
tips
在application.properties更改项目端口号
#更改项目的端口号 server.port=8081
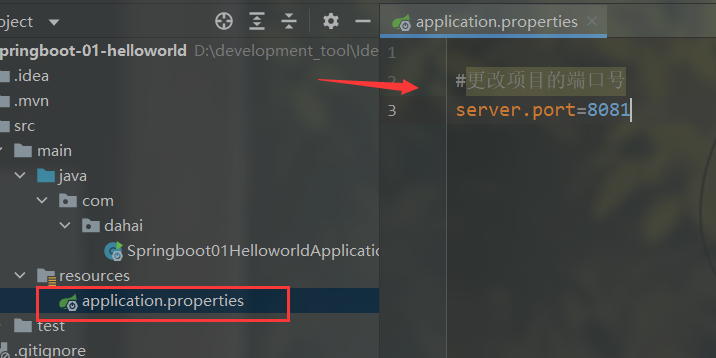
这样就更改项目发布的端口号了(默认是8080)
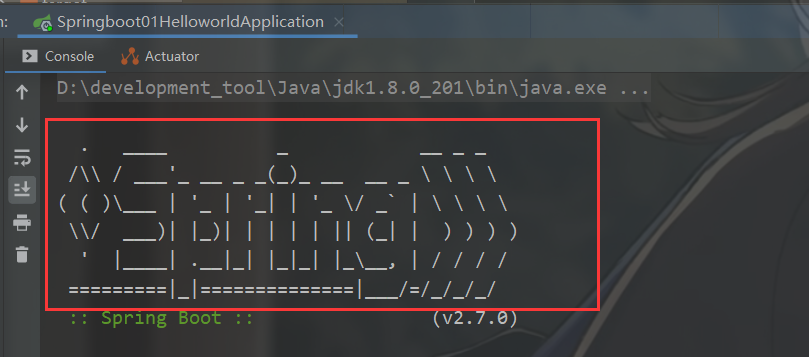
修改springboot-banner
生成ASCII的在线地址
- 输入文字生成ASCII:patorjk.com/software/ta…
- 搜索关键字获得ASCII:www.bootschool.net/ascii-art
- 通过图片生成ASCII: www.degraeve.com/img2txt.php
这就是springboot-banner(图标的样子)
在resource目录下新建txt文本
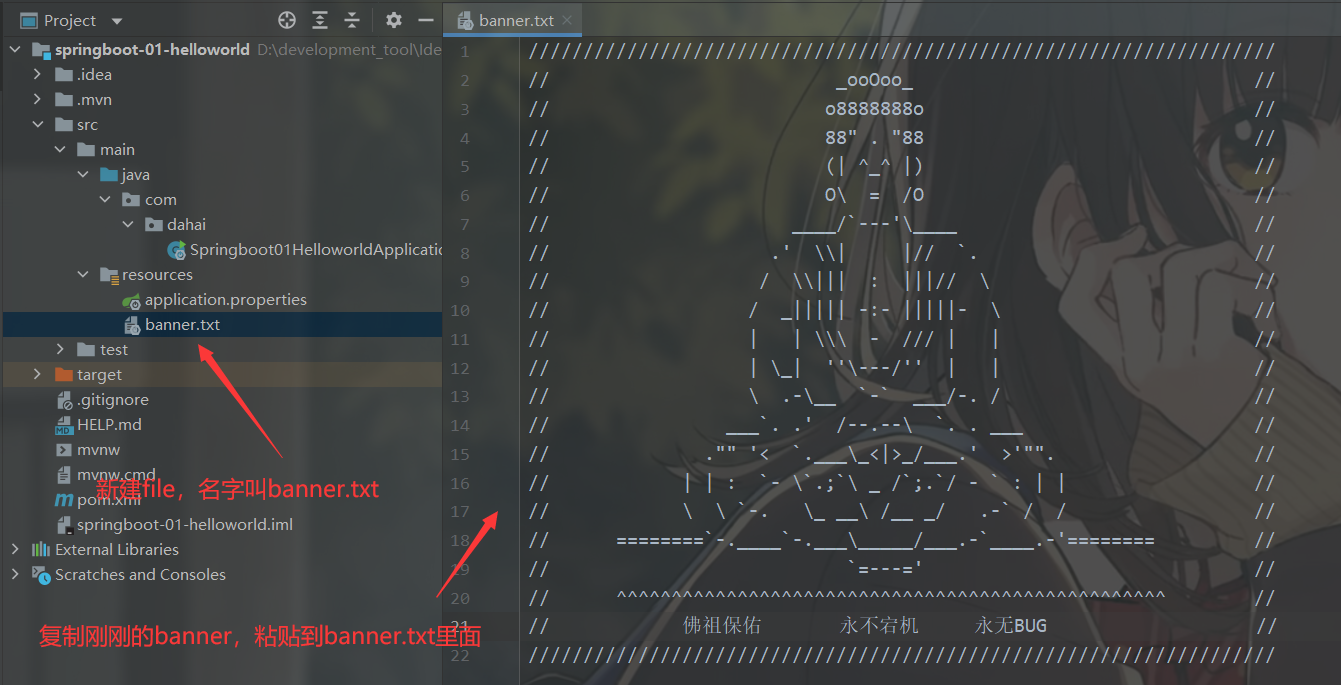
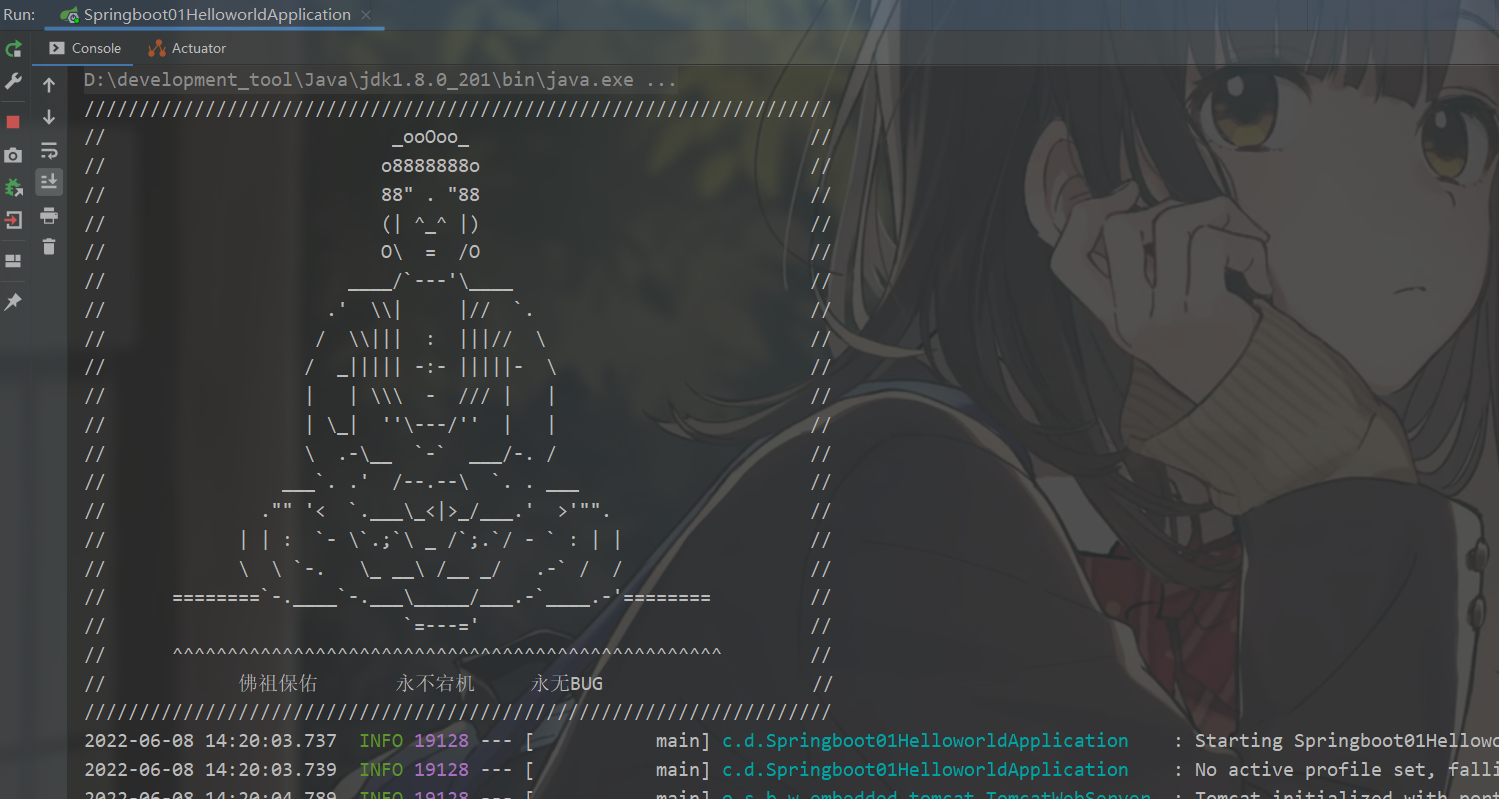
再次运行就OK了
3、原理初探
自动装配:
pom.xml
- spring-boot-dependencies:核心依赖在父程中
- 我们在写或者引入一些SPringboot依赖的时候,不需要指定版本,就因为有这些版本仓库
启动器
<dependency> <groupId>org.springframework.boot</groupId> <artifactId>spring-boot-starter-web</artifactId> </dependency>
- 启动器:说白了就是Springboot的启动场景;
- 比如spring- bdot-starter-web,他就会帮我们自动导入web环境所有的依赖!
- springboot会将所有的功能场景,都变成一个个的启动器
- 我们要使用什么功能,就只需要找到对应的启动器就可以了
主程序
package com.dahai; import org.springframework.boot.SpringApplication; import org.springframework.boot.autoconfigure.SpringBootApplication; //@SpringBootApplication :标注这个类是一个springboot的应用 @SpringBootApplication public class Springboot01HelloworldApplication { //将springboot应用启动 public static void main(String[] args) { SpringApplication.run(Springboot01HelloworldApplication.class, args); } }
-
注解
-
@SpringBootConfiguration:springboot的配置
@Documented:spring配置类
@Configuration:说明这也是一个spring的组件
-
@EnableAutoConfiguration:自动配置
@AutoConfigurationPackage:自动配置包
@Import({Registrar.class}):导入选择器,
包注册。
-
(待完善)
4、SpringBoot配置
配置文件
SpringBoot使用一个全局的配置文件,配置文件名称是固定的
-
application.properties
-
语法结构: key=value
server.port=8081
-
-
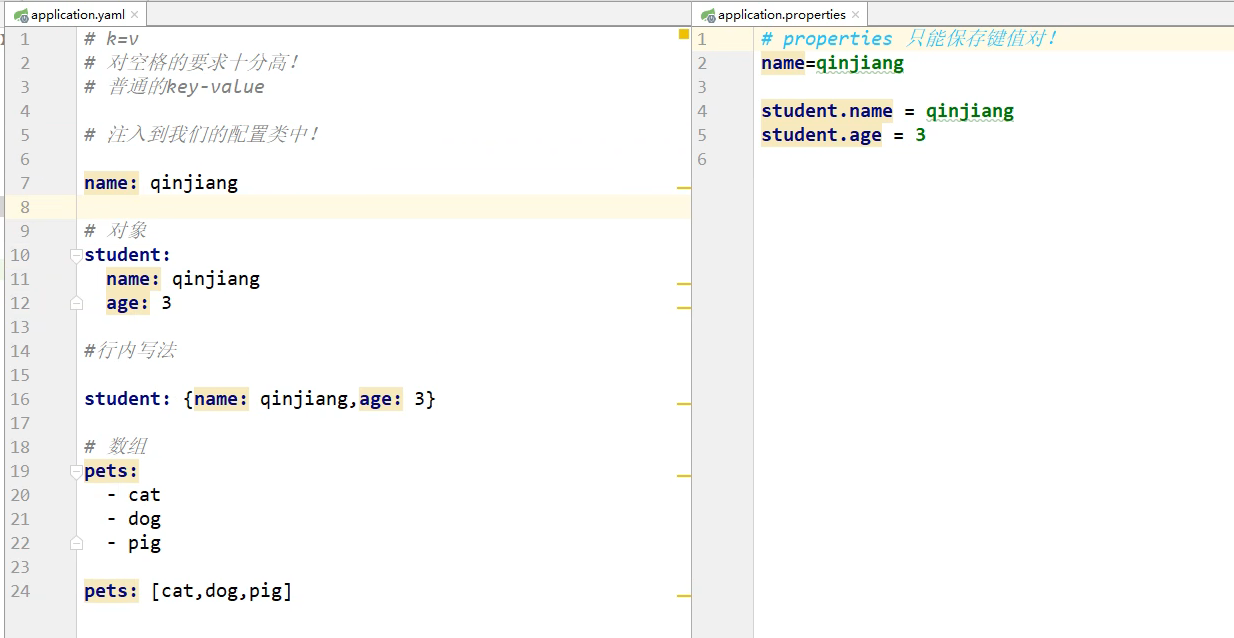
application.yml
-
语法结构: key:空格value
server: port: 8081
-
配置文件的作用:修改SpringBoot自动配置的默认值,因为SpringBoot在底层都给我们自动配置好了;
yaml概述
YAML是 "YAML Ain't a Markup Language" (YAML不是一种标记语言)的递归缩写。在开发的这种语言时,YAML 的意思其实是:"Yet Another Markup Language"(仍是一种标记语言)
这种语言以数据作为中心,而不是以标记语言为重点!
标记语言
以前的配置文件,大多数都是使用xml来配置;比如一个简单的端口配置,我们来对比下yaml和xml
传统xml配置:
<server> <port>8081<port> </server>
yaml配置:
server: prot: 8080
yaml基础语法
说明:语法要求严格!
1、空格不能省略
2、以缩进来控制层级关系,只要是左边对齐的一列数据都是同一个层级的。
3、属性和值的大小写都是十分敏感的。
字面量:普通的值 [ 数字,布尔值,字符串 ]
字面量直接写在后面就可以 , 字符串默认不用加上双引号或者单引号;
k: v
注意:
-
“ ” 双引号,不会转义字符串里面的特殊字符 , 特殊字符会作为本身想表示的意思;
比如 :name: "kuang \n shen" 输出 :kuang 换行 shen
-
'' 单引号,会转义特殊字符 , 特殊字符最终会变成和普通字符一样输出
比如 :name: ‘kuang \n shen’ 输出 :kuang \n shen
注解方式给实体类赋值
用以前的spring注解方式给实体类赋值
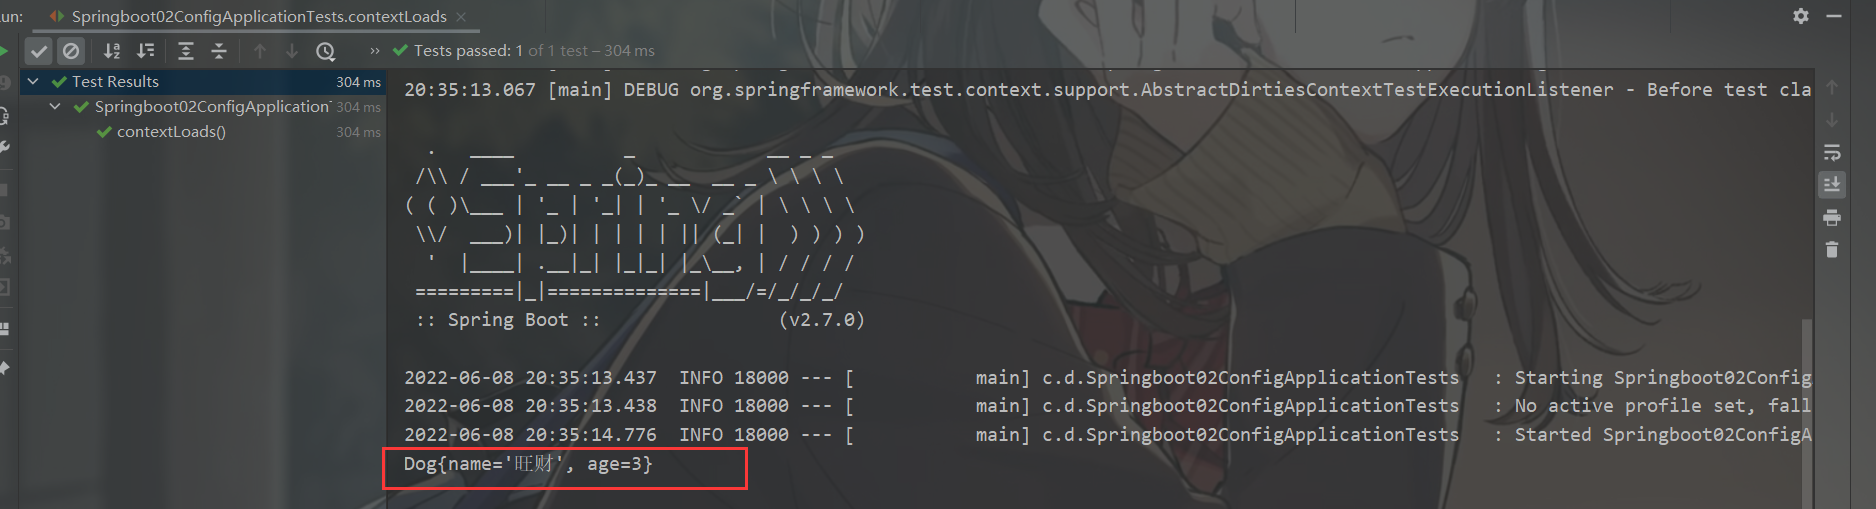
package com.dahai.pojo; import org.springframework.beans.factory.annotation.Value; import org.springframework.stereotype.Component; //把下面的内容添加到spring的组件中 @Component public class Dog { @Value("旺财") private String name; @Value("3") private Integer age; ...无参 ...有参 ...get ...set ...toString }
用Springboot专门的测试类测试
package com.dahai; import com.dahai.pojo.Dog; import org.junit.jupiter.api.Test; import org.springframework.beans.factory.annotation.Autowired; import org.springframework.boot.test.context.SpringBootTest; @SpringBootTest class Springboot02ConfigApplicationTests { @Autowired private Dog dog; @Test void contextLoads() { System.out.println(dog); } }
运行结果
yaml可以直接给实体类赋值
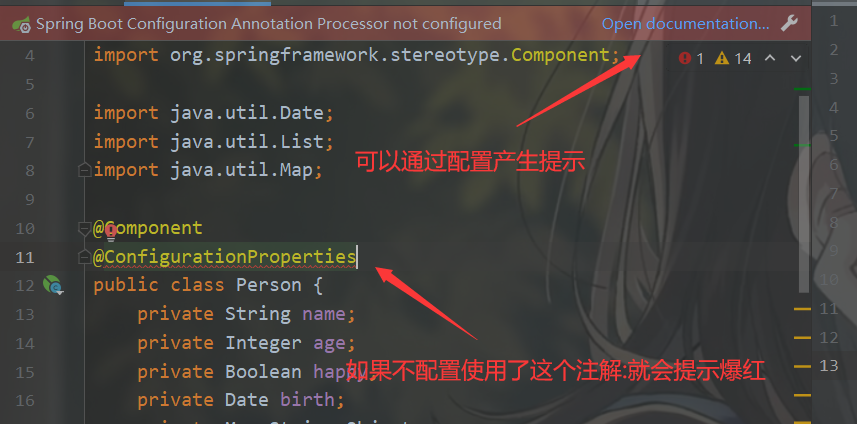
爆红导入这个依赖
<dependency> <groupId>org.springframework.boot</groupId> <artifactId>spring-boot-configuration-processor</artifactId> <optional>true</optional> </dependency>
Person类
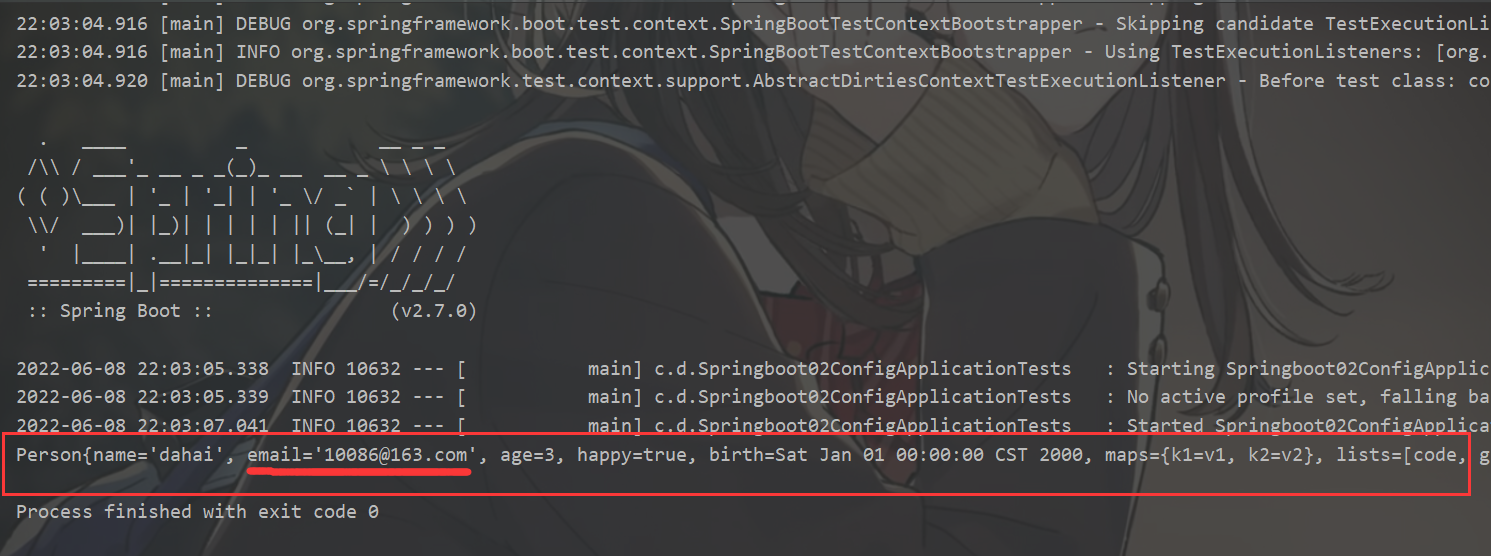
package com.dahai.pojo; import java.util.Date; import java.util.List; import java.util.Map; @Component //加上下面这行就可以和application.yaml的person连接起来了 @ConfigurationProperties(prefix = "person") public class Person { private String name; private Integer age; private Boolean happy; private Date birth; private Map<String,Object> maps; private List<Object> lists; private Dog dog; ...无参 ...有参 ...get ...set ...toString }
application.yaml
person: name: dahai age: 3 happy: true birth: 2000/01/01 maps: {k1: v1,k2: v2} lists: - code - girl - music dog: name: 旺财 age: 3
测试类
package com.dahai; import com.dahai.pojo.Dog; import com.dahai.pojo.Person; import org.junit.jupiter.api.Test; import org.springframework.beans.factory.annotation.Autowired; import org.springframework.boot.test.context.SpringBootTest; @SpringBootTest class Springboot02ConfigApplicationTests { @Autowired private Person person; @Test void contextLoads() { System.out.println(person); } }
运行结果

properties给实体类赋值
application.properties给实体类赋值
检查File Encodings
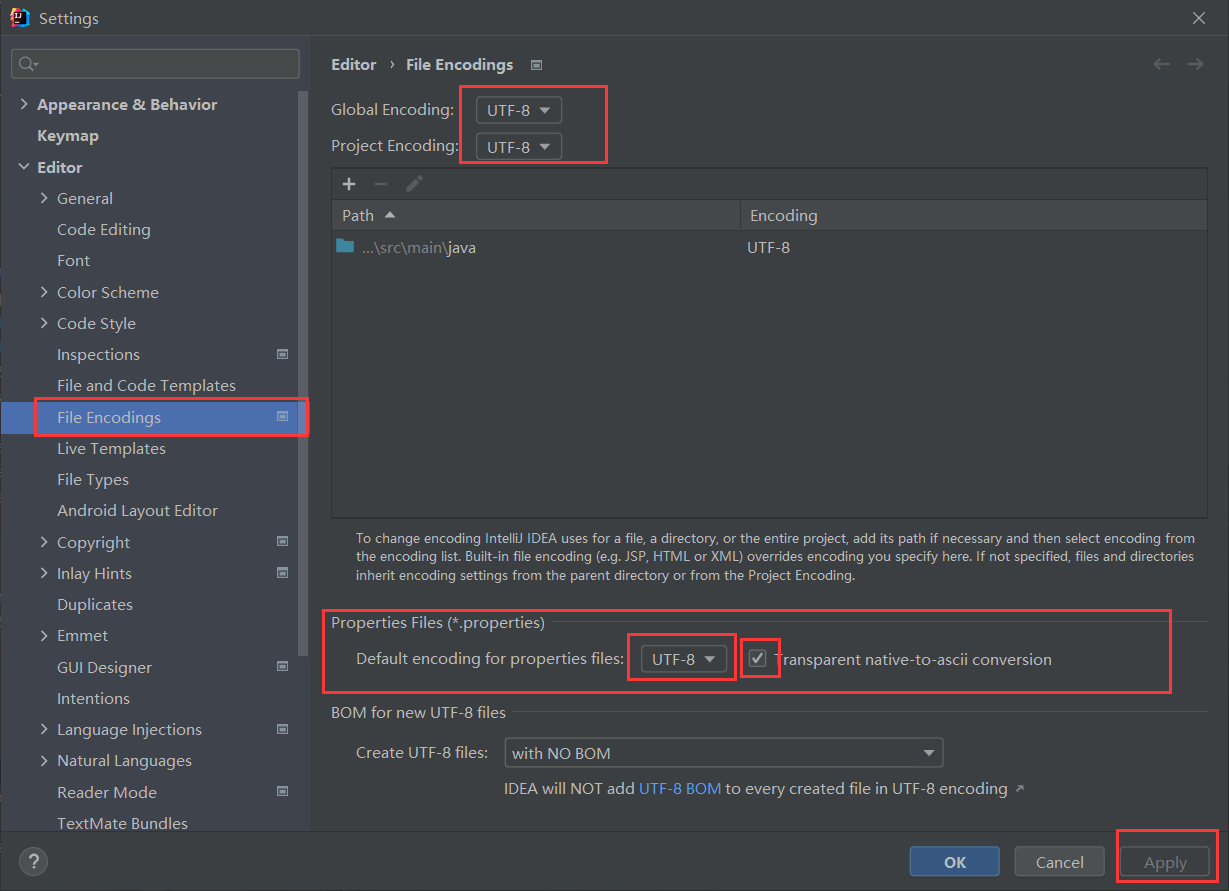
application.properties
name=dahai
Person类
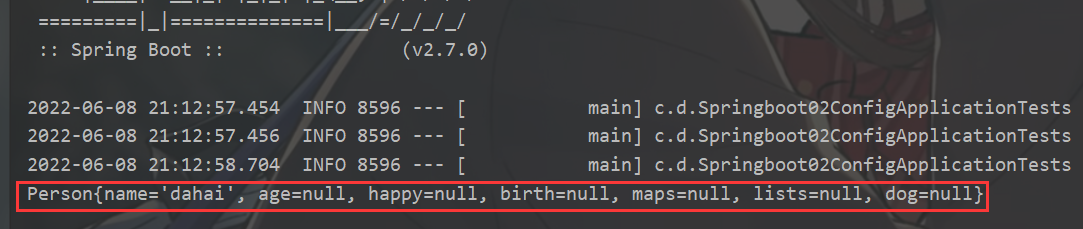
package com.dahai.pojo; import java.util.Date; import java.util.List; import java.util.Map; @Component //加载指定的配置文件 @PropertySource(value = "classpath:application.properties") public class Person { //通过SPEL表达式取出配置文件的值 @Value("${name}") private String name; private Integer age; private Boolean happy; private Date birth; private Map<String,Object> maps; private List<Object> lists; private Dog dog; ...无参 ...有参 ...get ...set ...toString }
测试类
package com.dahai; import com.dahai.pojo.Dog; import com.dahai.pojo.Person; import org.junit.jupiter.api.Test; import org.springframework.beans.factory.annotation.Autowired; import org.springframework.boot.test.context.SpringBootTest; @SpringBootTest class Springboot02ConfigApplicationTests { @Autowired private Person person; @Test void contextLoads() { System.out.println(person); } }
运行结果
总之:还是推荐使用yaml给实体类赋值
松散绑定
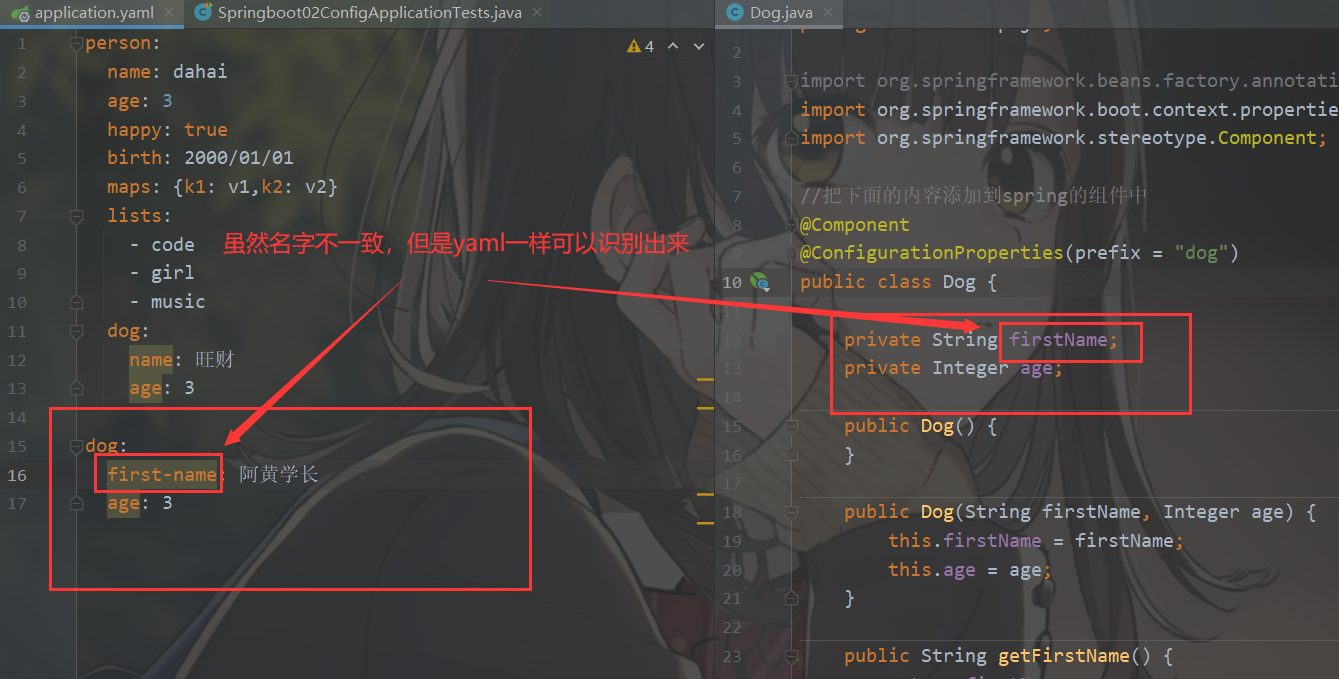
运行结果

JSR303校验
数据校验要导入下面这个包
<dependency> <groupId>org.springframework.boot</groupId> <artifactId>spring-boot-starter-validation</artifactId> </dependency>
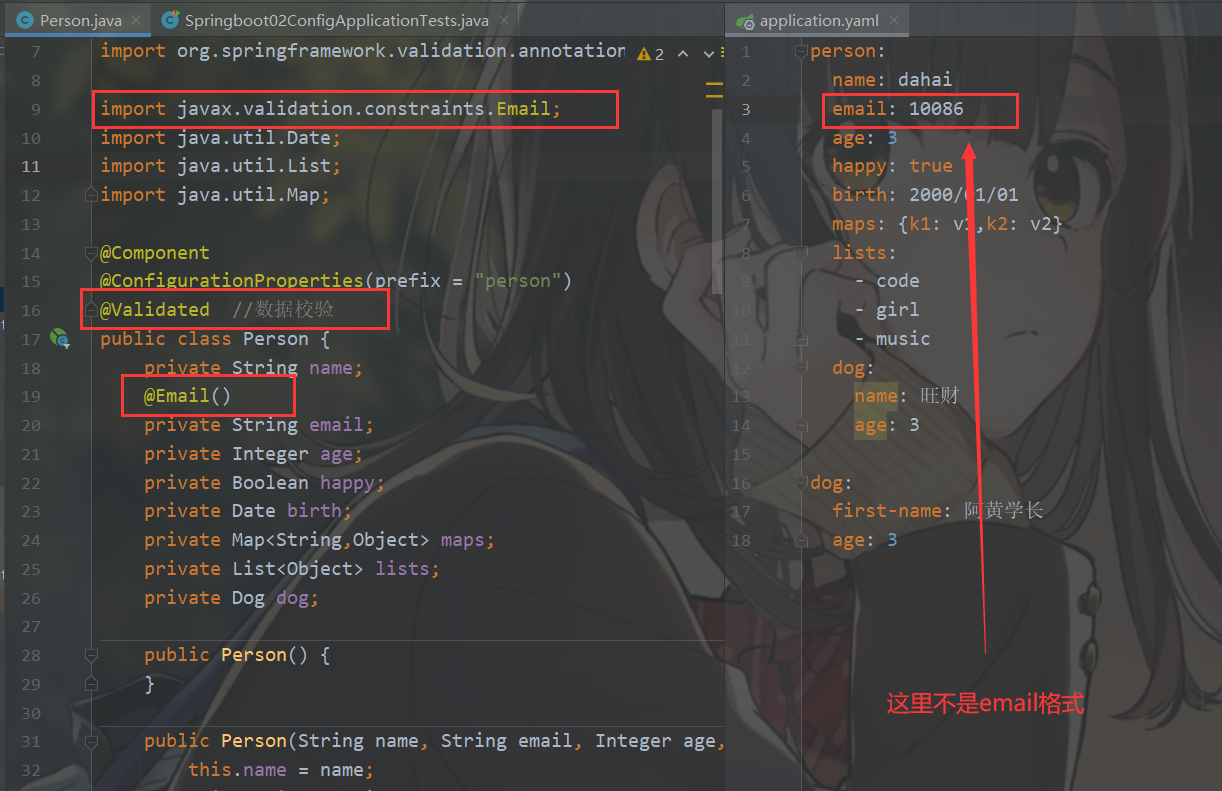
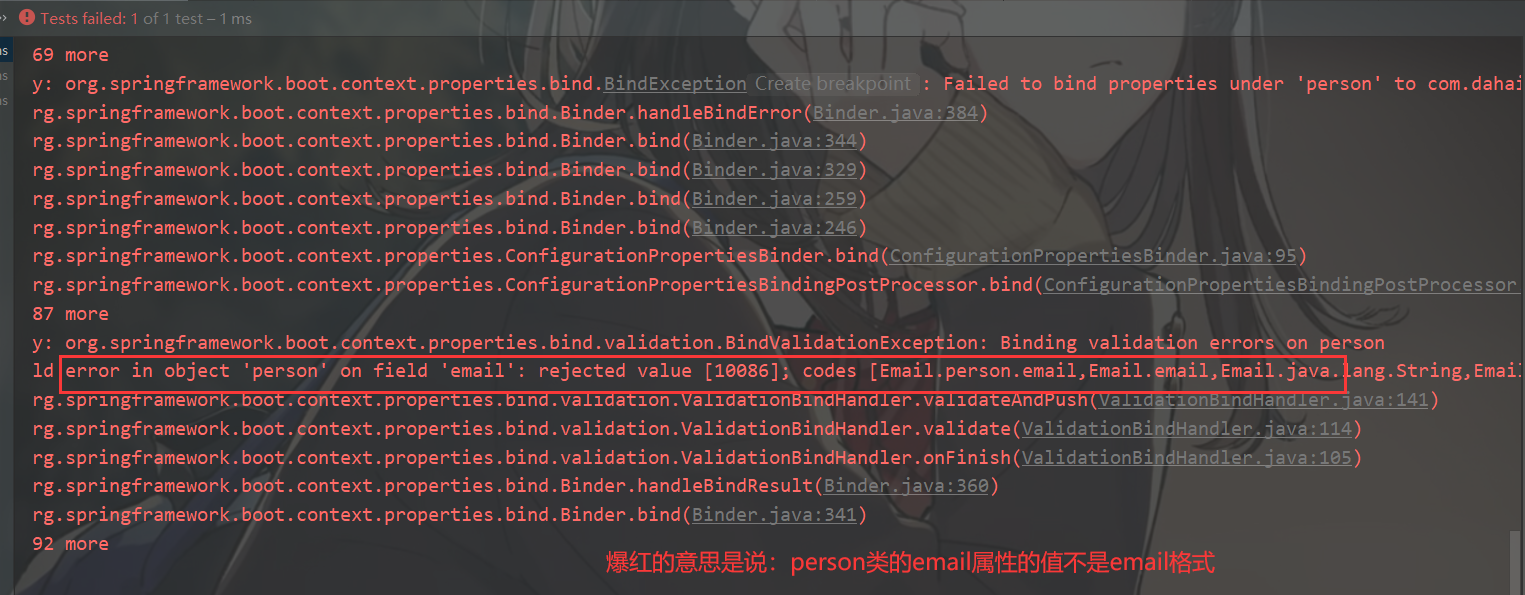
运行之后,爆红
将email填写为正确的邮箱格式后
message表示如果邮箱输入格式不正确后,打印的一句话。
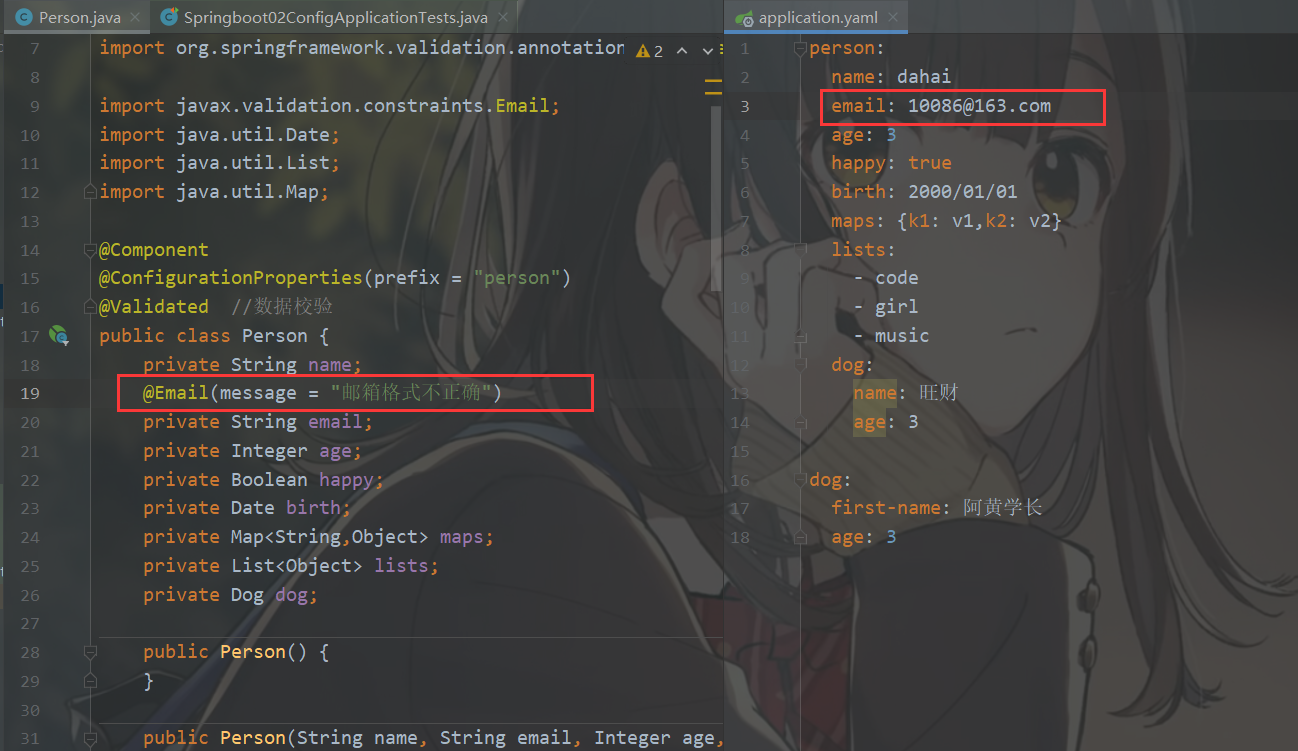
运行之后,正确输出toString
JSR-303数据校验参考博客:https://blog.csdn.net/qq_42681138/article/details/122731958
多环境切换
application.yaml优先级
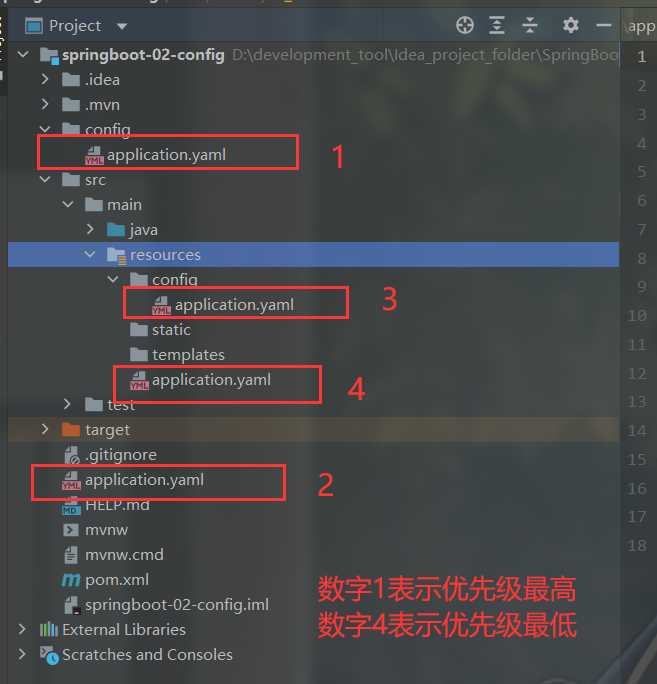
官方文档:

说明可以配置多套环境,那么怎么切换环境呢?下面开始解决多环境如何切换问题
application.yaml
配置多套环境
server: port: 8081 # 使用dev环境 spring: profiles: active: dev # 用---(三个-)分隔环境 --- server: port: 8082 # dev环境 spring: profiles: dev --- server: port: 8083 # test环境 spring: profiles: test
自动配置原理再理解
(待完善...)
5、SpringBoot Web开发
jar:webapp !
自动装配
springboot到底帮我们配置了什么?我们能不能进行修改?能修改哪些东西?能不能扩展?
- xxxxAutoConfiguraion..向容器中自动配置组件
- xxxxProperties:自动配置类, 装配配置文件中自定义的一些内容!
要解决的问题:
- 导入静态资源...
- 首页
- jsp,模板引擎Thymeleaf
- 装配扩展SpringMVC
- 增删改查
- 拦截器
- 国际化!
1、导入静态资源
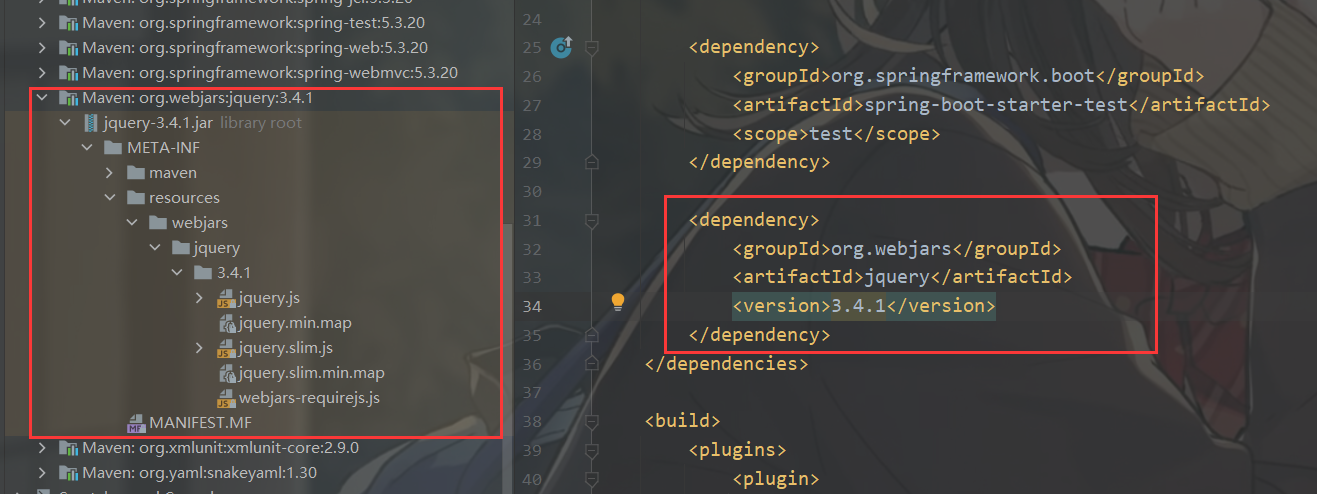
maven的方式引入jQuery(静态资源)
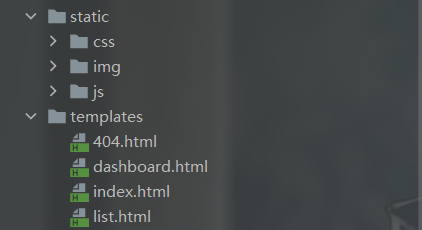
resourse目录下的包引入静态资源

总结:
1、在springboot,我们可以使用以下方式处理静态资源
- webjars
localhost:8080/webjars/ - public, static, /**, resources
localhost:8080/
2、优先级: resources>static(默认)>public
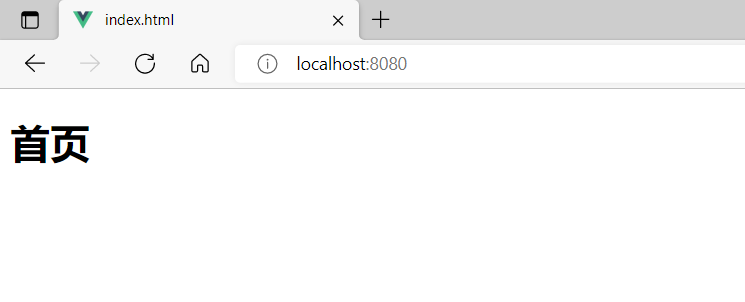
2、定制首页(index.html)
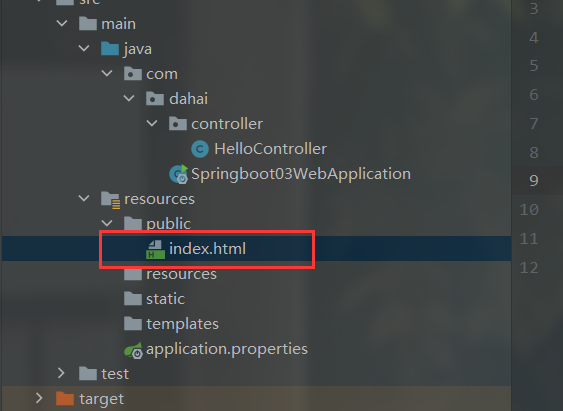
index.html
<!DOCTYPE html> <html lang="en"> <head> <meta charset="UTF-8"> <title>index.html</title> </head> <body> <h1>首页</h1> </body> </html>
运行结果
3、thymeleat模板引擎
前端交给我们的页面,是html页面。如果是我们以前开发,我们需要把他们转成jsp页面,jsp好处就是当我们查出一些数据转发到JSP页面以后,我们可以用jsp轻松实现数据的显示,及交互等。
jsp支持非常强大的功能,包括能写Java代码,但是呢,我们现在的这种情况,SpringBoot这个项目首先是以jar的方式,不是war,像第二,我们用的还是嵌入式的Tomcat,所以呢,他现在默认是不支持jsp的。
那不支持jsp,如果我们直接用纯静态页面的方式,那给我们开发会带来非常大的麻烦,那怎么办呢?
SpringBoot推荐你可以来使用模板引擎:
模板引擎,我们其实大家听到很多,其实jsp就是一个模板引擎,还有用的比较多的freemarker,包括SpringBoot给我们推荐的Thymeleaf,模板引擎有非常多,但再多的模板引擎,他们的思想都是一样的。
3.1、引入thymeleat模板引擎
1、Thymeleaf 官网: https://www.thymeleaf.org/
2、Thymeleaf 在Github的主页: https://github.com/thymeleaf/thymeleaf
3、Spring官方文档: "https://docs.spring.io/spring-boot/docs/2.1.6.RELEASE/reference/htmlsingle/#using-boot-starter",找到我们对应的版本
pom.xml
<!--thymeleaf模板--> <dependency> <groupId>org.thymeleaf</groupId> <artifactId>thymeleaf-spring5</artifactId> </dependency> <dependency> <groupId>org.thymeleaf.extras</groupId> <artifactId>thymeleaf-extras-java8time</artifactId> </dependency>
3.2、访问templates包下的html文件
注意:templates包下的html文件只能通过controller层去跳转访问
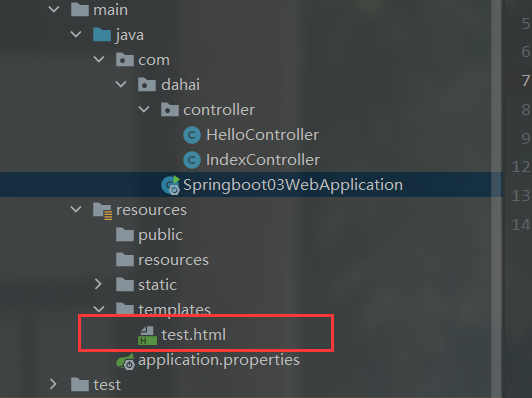
test.html
<!DOCTYPE html> <html lang="en"> <head> <meta charset="UTF-8"> <title>Title</title> </head> <body> <h1>test页面</h1> </body> </html>
TestController类
package com.dahai.controller; import org.springframework.stereotype.Controller; import org.springframework.web.bind.annotation.RequestMapping; //在templates目录下的所有页面,只能通过controller来跳转! //这个需要模板引/整的支持! @Controller public class TestController { @RequestMapping("/test") public String index(){ return "test"; } }
运行结果
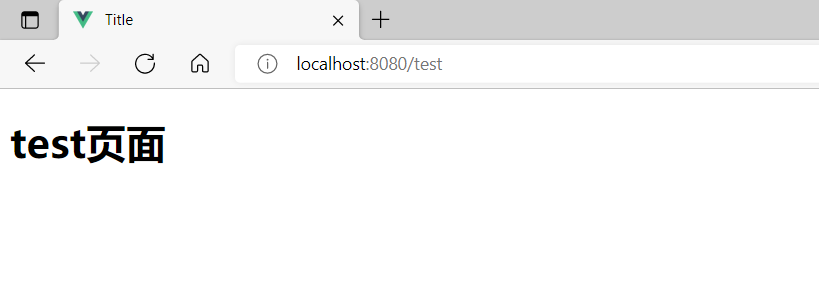
结论:只要需要使用thymeleaf,只需要导入对应的依赖就可以了!我们将html放在我们的templates目录下即可
使用thymeleaf接管htmL元素
头文件
<html xmlns:th="http://www.thymeleaf.org">
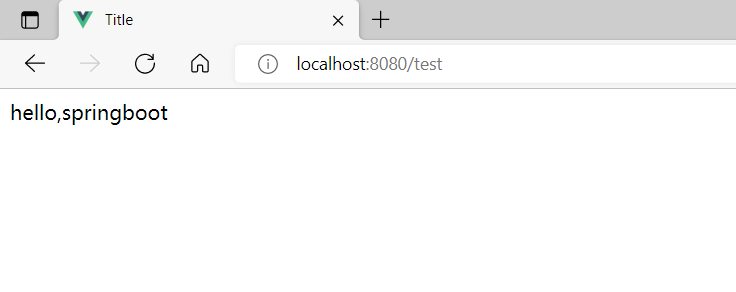
TestController类
package com.dahai.controller; import org.springframework.stereotype.Controller; import org.springframework.ui.Model; import org.springframework.web.bind.annotation.RequestMapping; //在templates目录下的所有页面,只能通过controller来跳转! //这个需要模板引/整的支持! @Controller public class TestController { @RequestMapping("/test") public String test(Model model){ model.addAttribute("msg","hello,springboot"); return "test"; } }
test.html
<!DOCTYPE html> <html lang="en" xmlns:th="http://www.thymeleaf.org"> <head> <meta charset="UTF-8"> <title>Title</title> </head> <body> <!--所有的htmL元素都可以被thymeleaf替换接管: th: 元素名--> <div th:text="${msg}"></div> </body> </html>
运行结果
3.3、thymeleaf语法
例子:
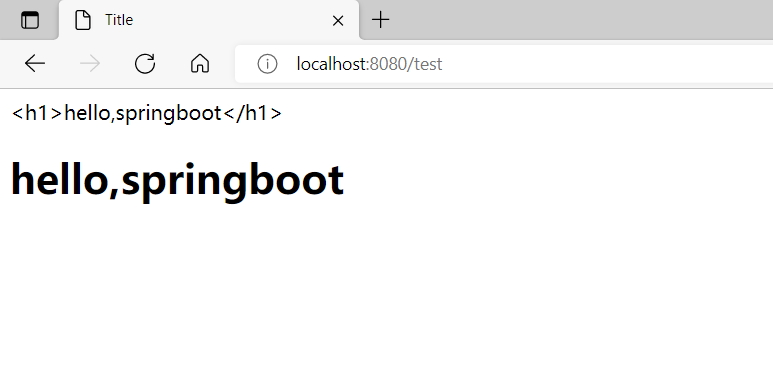
package com.dahai.controller; import org.springframework.stereotype.Controller; import org.springframework.ui.Model; import org.springframework.web.bind.annotation.RequestMapping; //在templates目录下的所有页面,只能通过controller来跳转! //这个需要模板引/整的支持! @Controller public class IndexController { @RequestMapping("/test") public String test(Model model){ model.addAttribute("msg","<h1>hello,springboot</h1>"); return "test"; } }
<!DOCTYPE html> <html lang="en" xmlns:th="http://www.thymeleaf.org"> <head> <meta charset="UTF-8"> <title>Title</title> </head> <body> <!--所有的htmL元素都可以被thymeleaf替换接管: th: 元素名--> <div th:text="${msg}"></div> <!--不被转义--> <div th:utext="${msg}"></div> </body> </html>
运行结果
IndexController类
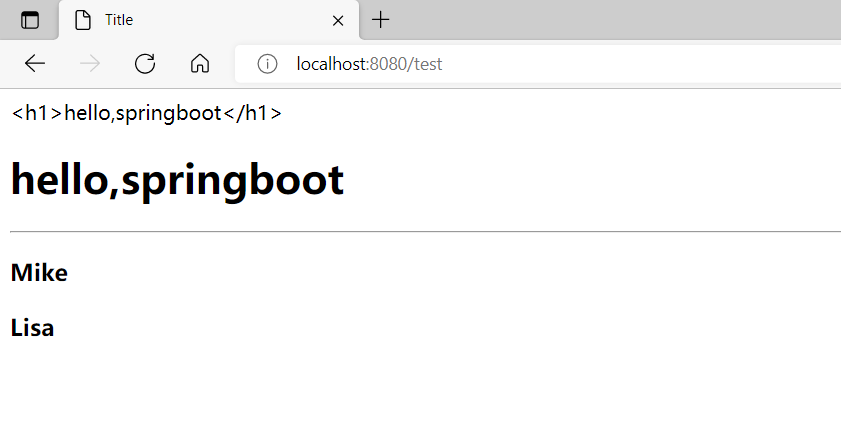
package com.dahai.controller; import org.springframework.stereotype.Controller; import org.springframework.ui.Model; import org.springframework.web.bind.annotation.RequestMapping; import java.util.ArrayList; import java.util.Arrays; //在templates目录下的所有页面,只能通过controller来跳转! //这个需要模板引/整的支持! @Controller public class IndexController { @RequestMapping("/test") public String test(Model model){ model.addAttribute("msg","<h1>hello,springboot</h1>"); //存一个集合 model.addAttribute("users", Arrays.asList("Mike","Lisa")); return "test"; } }
index.html
<!DOCTYPE html> <html lang="en" xmlns:th="http://www.thymeleaf.org"> <head> <meta charset="UTF-8"> <title>Title</title> </head> <body> <!--所有的htmL元素都可以被thymeleaf替换接管: th: 元素名--> <div th:text="${msg}"></div> <!--不被转义--> <div th:utext="${msg}"></div> <hr> <!--遍历list集合--> <h3 th:each="user:${users}" th:text="${user}"></h3> </body> </html>
运行结果
3.4、MVC配置原理
自定义视图解析器
package com.dahai.config; import org.springframework.context.annotation.Bean; import org.springframework.context.annotation.Configuration; import org.springframework.web.servlet.View; import org.springframework.web.servlet.ViewResolver; import org.springframework.web.servlet.config.annotation.WebMvcConfigurer; import java.util.Locale; //扩展 springMvc @Configuration public class MyMvcConfig implements WebMvcConfigurer { //ViewResolver实现了视图解析器接口的类,我们就可以把它看做视图解析器 @Bean public ViewResolver myViewResolver(){ return new MyViewResolver(); } //自定义了一个自的视图解析MyViewResolver public static class MyViewResolver implements ViewResolver { @Override public View resolveViewName(String viewName, Locale locale) throws Exception { return null; } } }
视图跳转
package com.dahai.config; import org.springframework.context.annotation.Configuration; import org.springframework.web.servlet.config.annotation.ViewControllerRegistry; import org.springframework.web.servlet.config.annotation.WebMvcConfigurer; //如果我们要去扩展springmvc, 官方建议我们这样去做! @Configuration //@EnableWebMvc //这玩意就是入了一个类: DelegatingWebMvcConfiguration: 从容器中获取所有的webmvcconfig; public class MyMvcConfig implements WebMvcConfigurer { //视图跳转 @Override public void addViewControllers(ViewControllerRegistry registry) { registry.addViewController("/mike").setViewName("/test"); } }
访问localhost://8080/mike----(跳转到)---->localhost://8080/test
6、员工管理系统
6.1、准备工作
导入静态资源
编写实体类
部门
package com.dahai.pojo; import lombok.AllArgsConstructor; import lombok.Data; import lombok.NoArgsConstructor; //部门表 @Data @AllArgsConstructor @NoArgsConstructor public class Department { private Integer id; private String departmentName; }
员工
package com.dahai.pojo; import lombok.AllArgsConstructor; import lombok.Data; import lombok.NoArgsConstructor; import javax.swing.*; import java.util.Date; //员工表 @Data @NoArgsConstructor public class Employee { private Integer id; private String lastName; private String email; private Integer gender; //0:女 1:男 private Department department; private Date birth; public Employee(Integer id, String lastName, String email, Integer gender, Department department) { this.id = id; this.lastName = lastName; this.email = email; this.gender = gender; this.department = department; //默认的创建日期! this.birth = new Date(); } }
编写dao层
部门dao
package com.dahai.dao; import com.dahai.pojo.Department; import org.springframework.stereotype.Repository; import java.util.Collection; import java.util.HashMap; import java.util.Map; //部门dao @Repository public class DepartmentDao { //模拟数据库的数据 private static Map<Integer, Department> departments = null; static { departments = new HashMap<Integer, Department>(); //创建一个部门表 departments.put(101,new Department(101,"教学部")); departments.put(102,new Department(102,"市场部")); departments.put(103,new Department(103,"教研部")); departments.put(104,new Department(104,"运营部")); departments.put(105,new Department(105,"后勤部")); } //获得所有部门信息 public Collection<Department> getDepartments(){ return departments.values(); } //通过id得到部门 public Department getDepartmentById(Integer id){ return departments.get(id); } }
员工dao
package com.dahai.dao; import com.dahai.pojo.Department; import com.dahai.pojo.Employee; import org.apache.coyote.OutputBuffer; import org.springframework.beans.factory.annotation.Autowired; import org.springframework.stereotype.Repository; import java.util.Collection; import java.util.Collections; import java.util.HashMap; import java.util.Map; //员工dao @Repository public class EmployeeDao { //模拟数据库的数据 private static Map<Integer, Employee> employees = null; //员工有所属的部门 @Autowired private DepartmentDao departmentDao; static { employees = new HashMap<Integer, Employee>(); //创建一个部门表 employees.put(1001,new Employee(1001,"AA","10086@163.com",1,new Department(101,"教学部"))); employees.put(1002,new Employee(1002,"BB","10087@163.com",0,new Department(102,"市场部"))); employees.put(1003,new Employee(1003,"CC","10088@163.com",1,new Department(103,"教研部"))); employees.put(1004,new Employee(1004,"DD","10089@163.com",0,new Department(104,"运营部"))); employees.put(1005,new Employee(1005,"EE","10090@163.com",1,new Department(105,"后勤部"))); } //主键自增 private static Integer ininId = 1006; //增加一个员工 public void addEmployee(Employee employee){ if (employee.getId()==null){ employee.setId(ininId++); } employee.setDepartment(departmentDao.getDepartmentById(employee.getDepartment().getId())); employees.put(employee.getId(),employee); } //查询全部员工 public Collection<Employee> getAllEmployee(){ return employees.values(); } //通过id查询员工 public Employee getEmployeeById(Integer id){ return employees.get(id); } //通过id删除员工 public void deleteEmployee(Integer id){ employees.remove(id); } }
6.2、首页控制
编写config层
自定义视图解析器进行页面跳转
package com.dahai.config; import org.springframework.context.annotation.Configuration; import org.springframework.web.servlet.config.annotation.ViewControllerRegistry; import org.springframework.web.servlet.config.annotation.WebMvcConfigurer; @Configuration public class MyMvcConfig implements WebMvcConfigurer { @Override public void addViewControllers(ViewControllerRegistry registry) { registry.addViewController("/").setViewName("index"); registry.addViewController("/index.html").setViewName("index"); } }
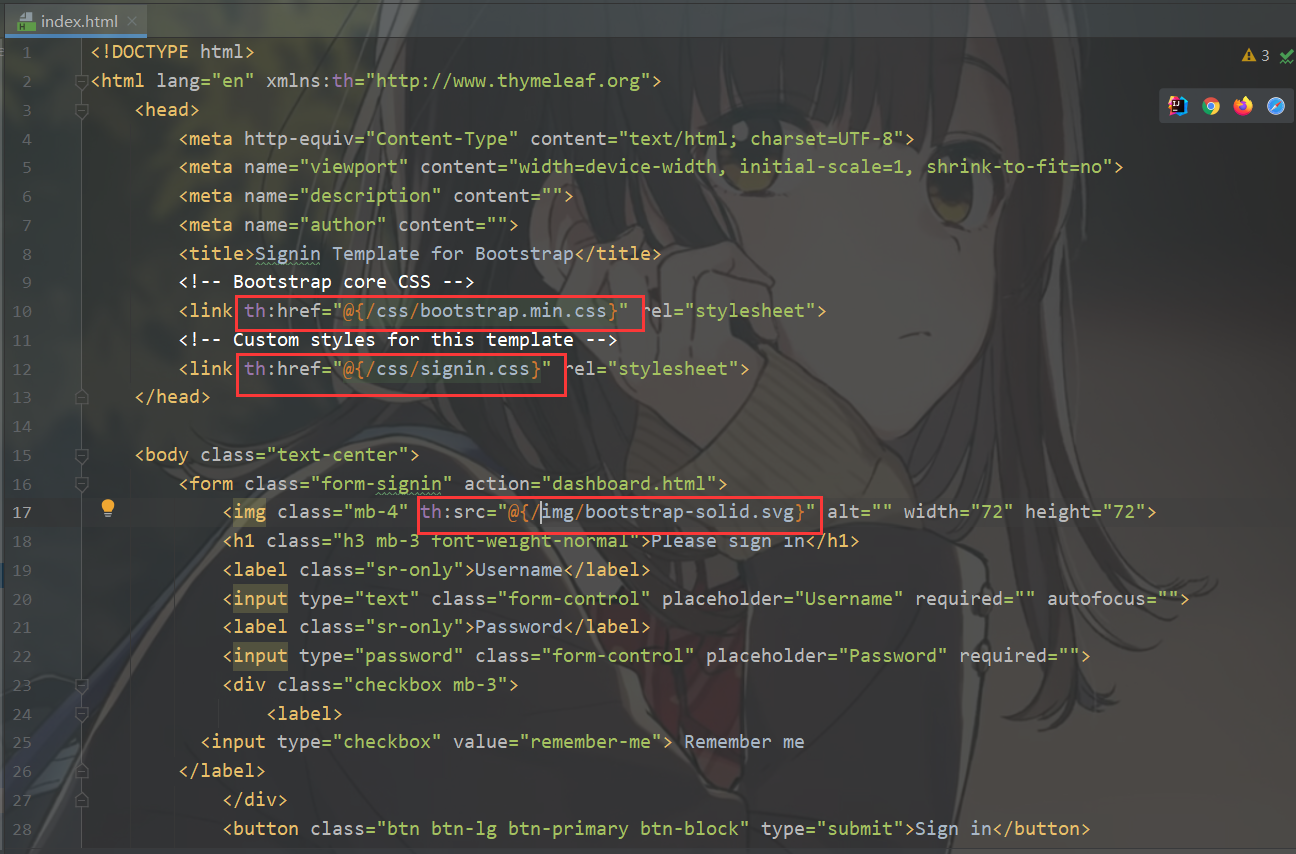
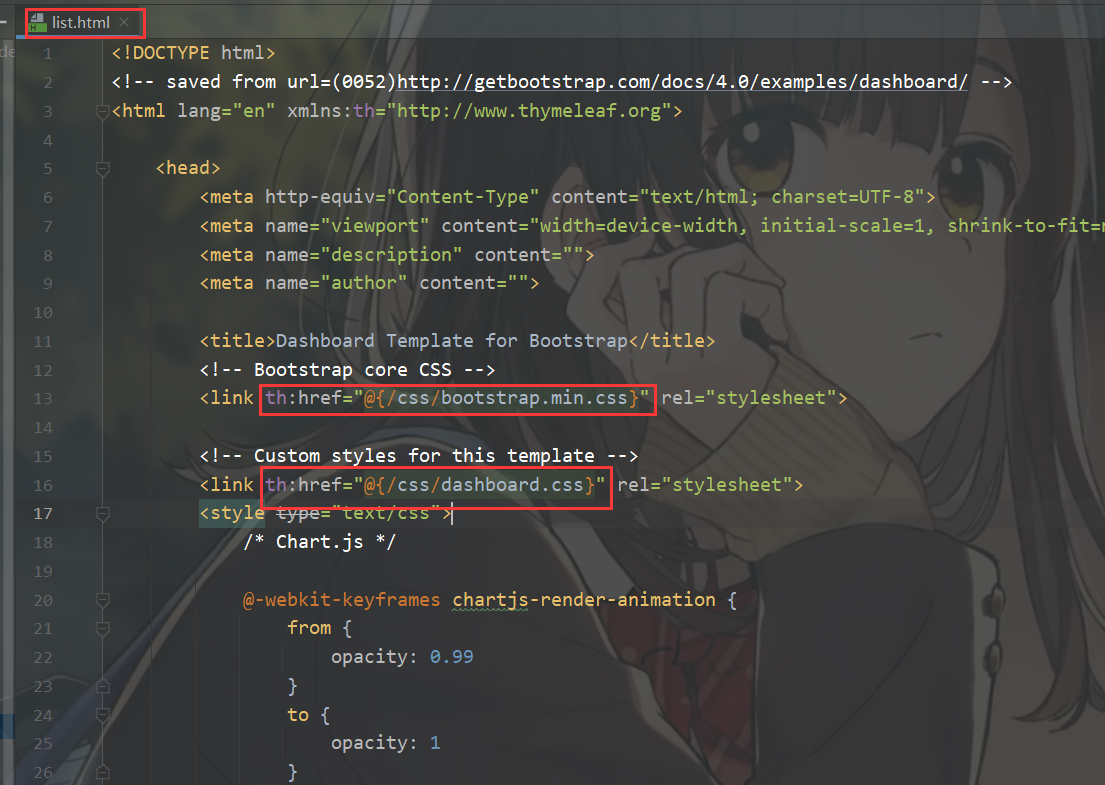
因为引入了thymeleaf,所以要把thymeleaf的头文件加上去
<html xmlns:th="http://www.thymeleaf.org">
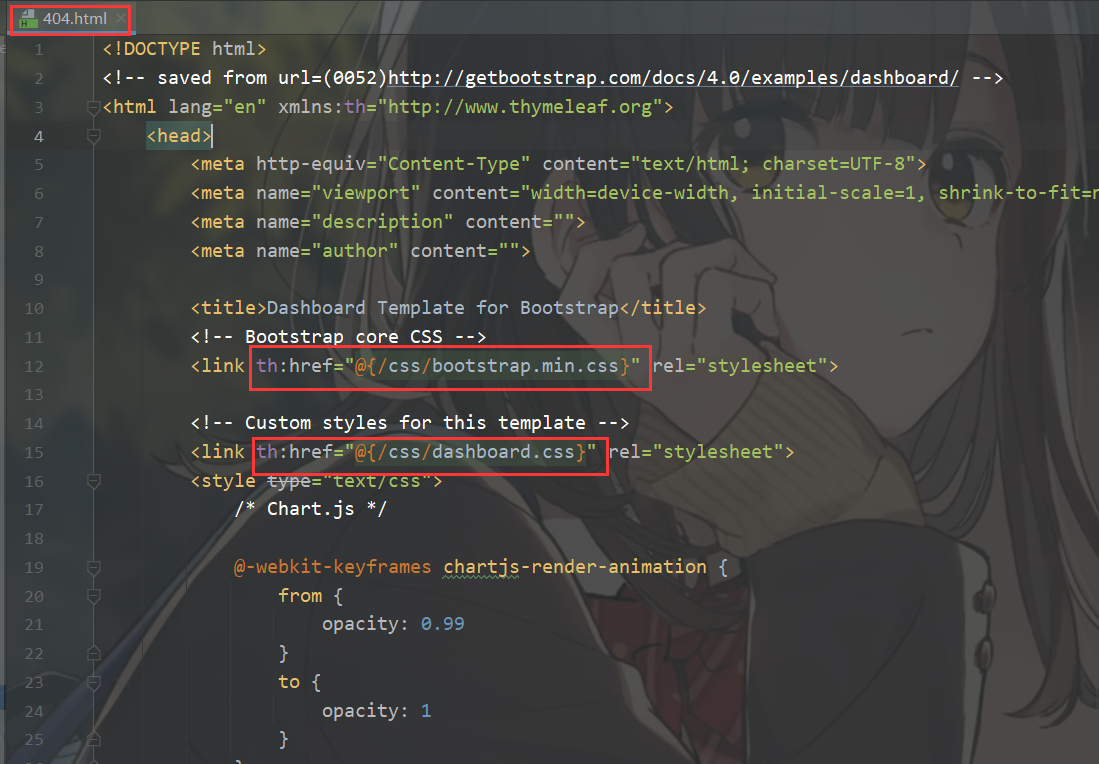
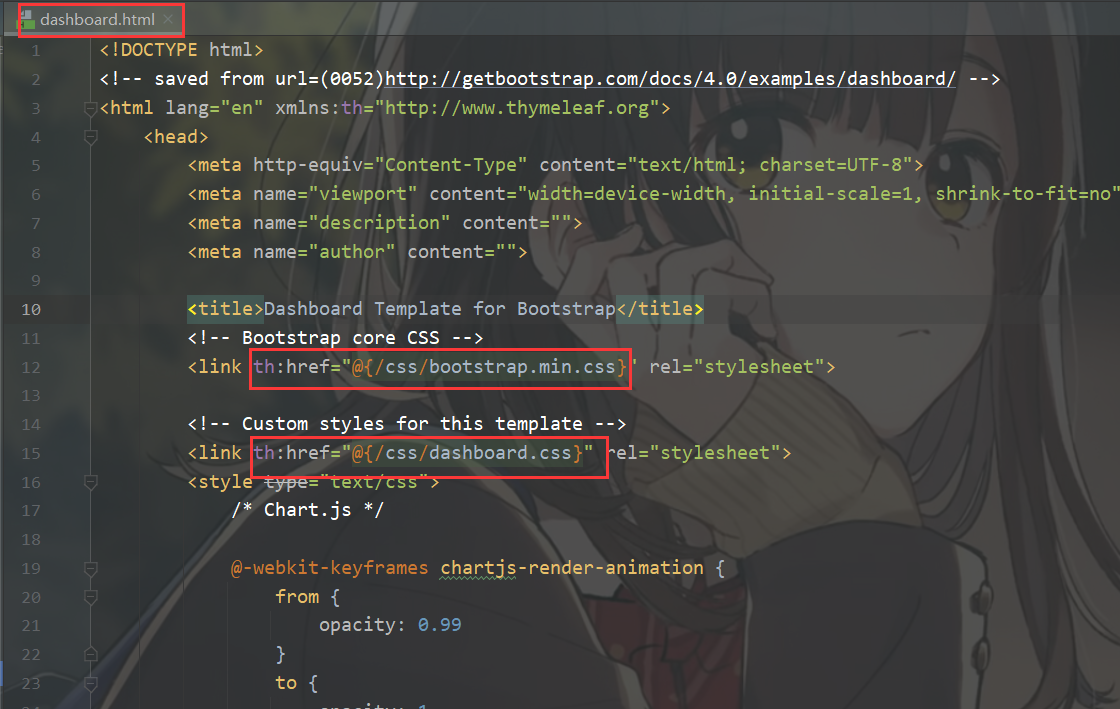
然后把引入静态资源的地址修改成thymeleaf的语法格式
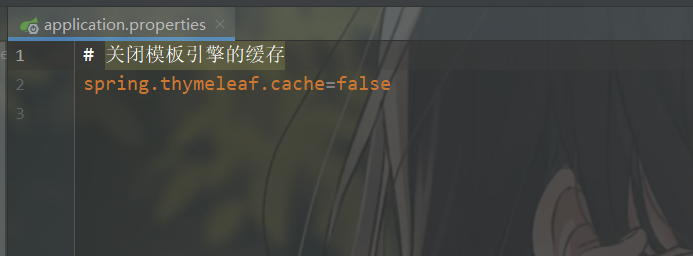
然后关闭模板引擎的缓存(防止thymeleaf没有生效)
# 关闭模板引擎的缓存 spring.thymeleaf.cache=false
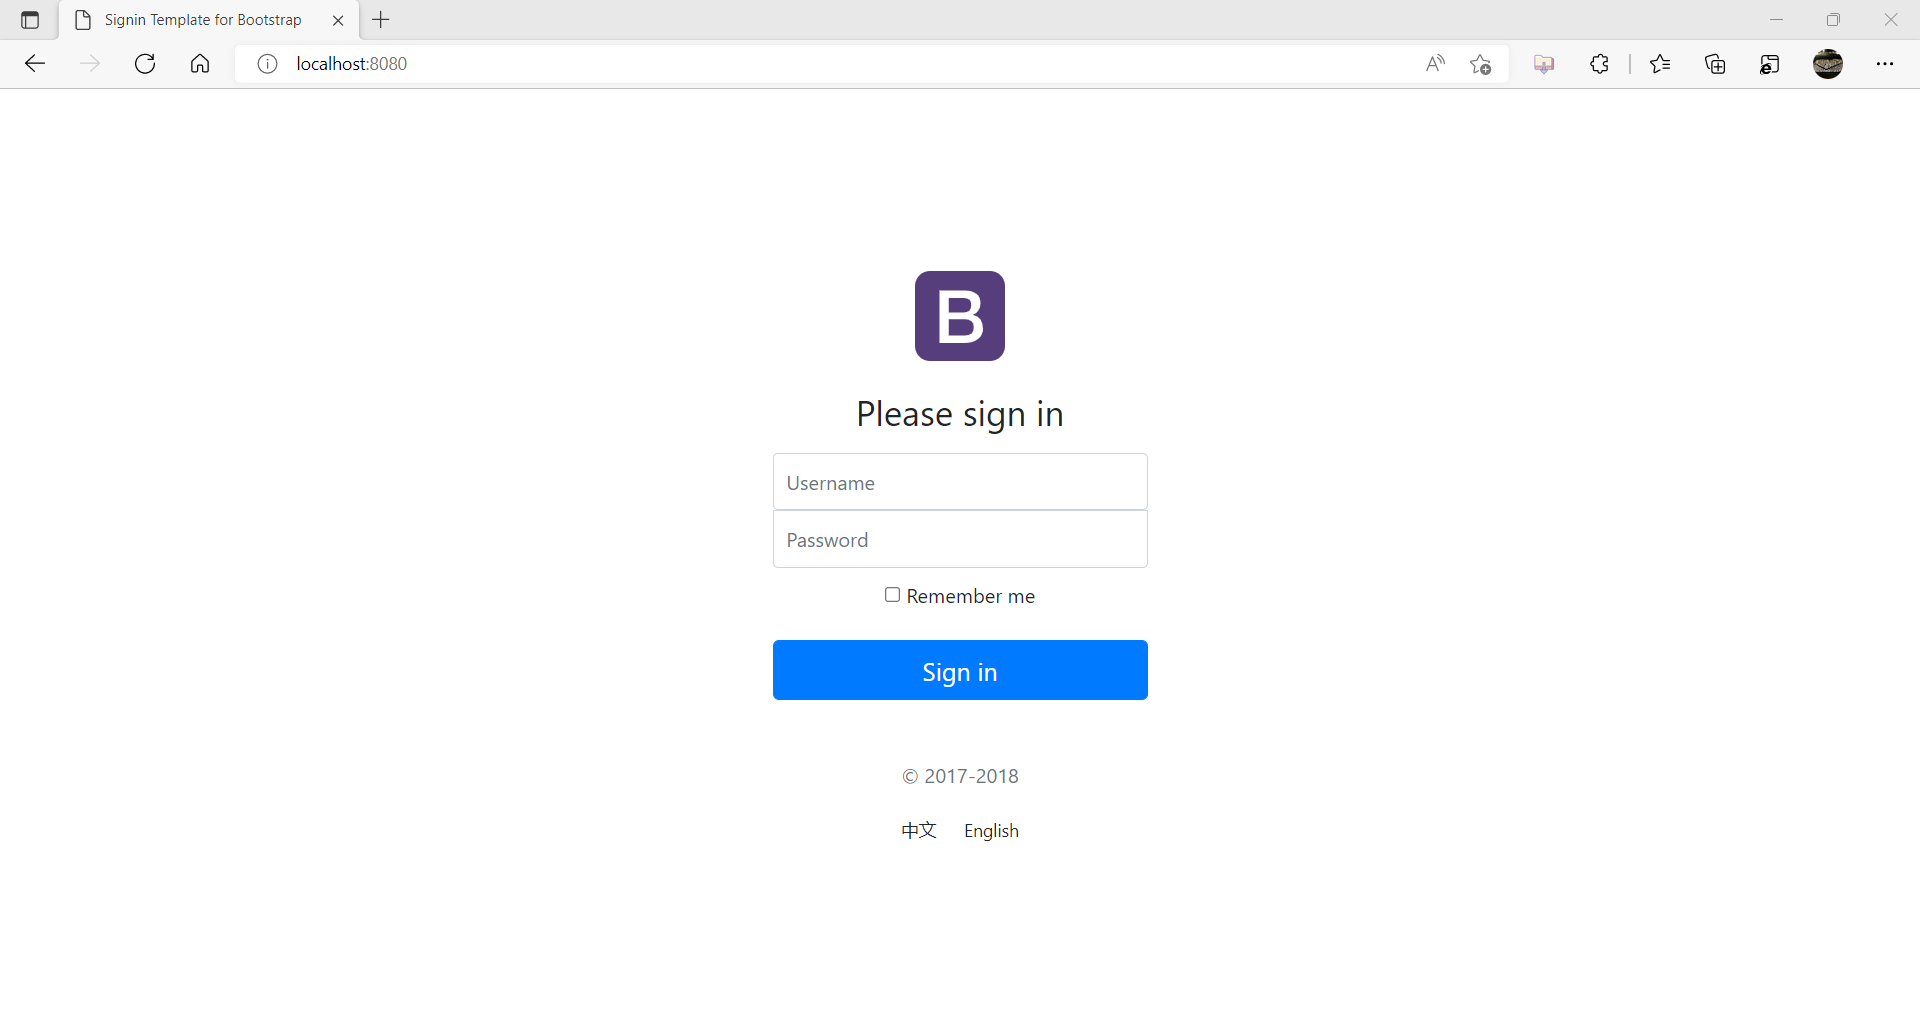
运行结果
然后继续修改404.html
修改dashboard.html
修改list.html
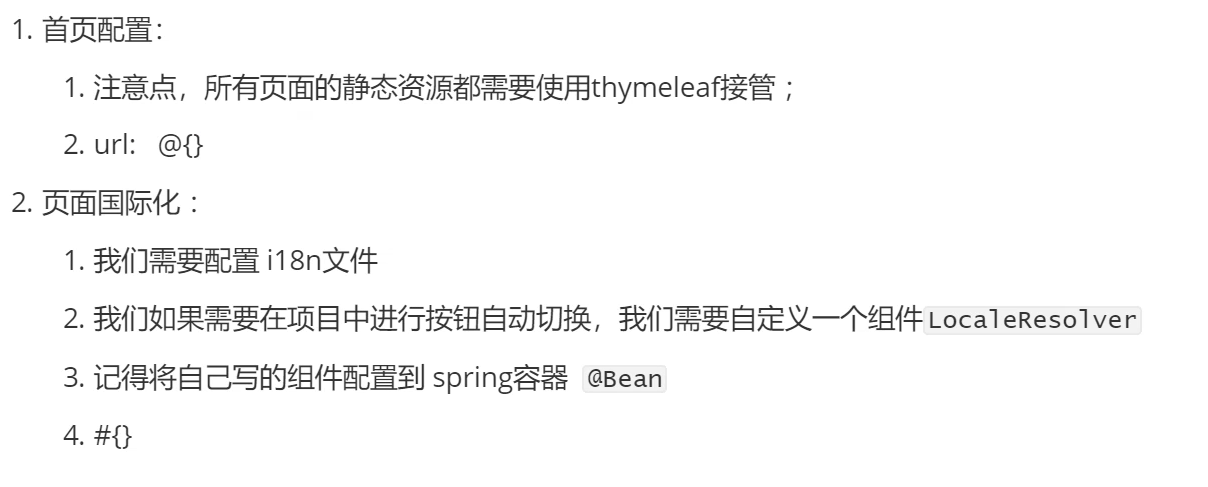
6.3、国际化
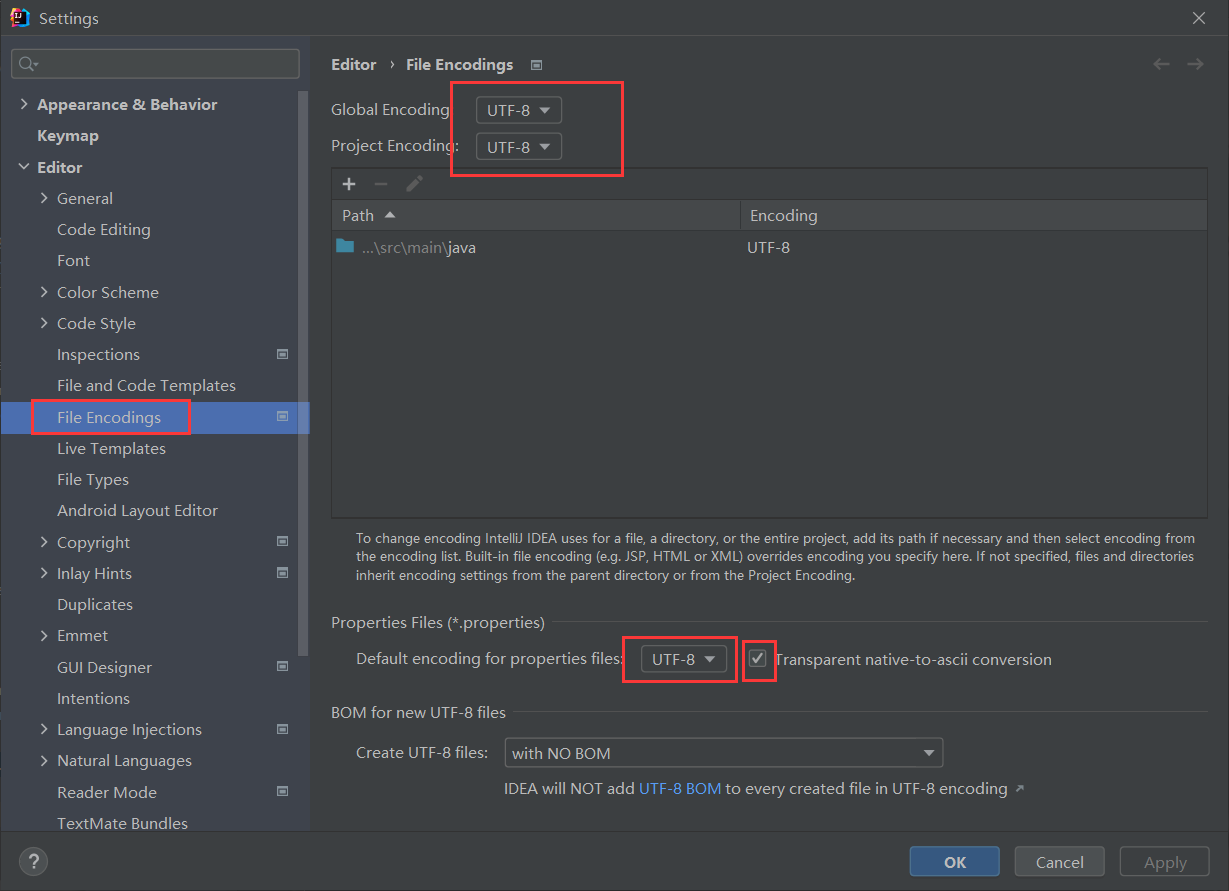
检查字符编码properties
检查自己的File Encodings字符编码是否为UTF-8
中英文语言切换实现步骤
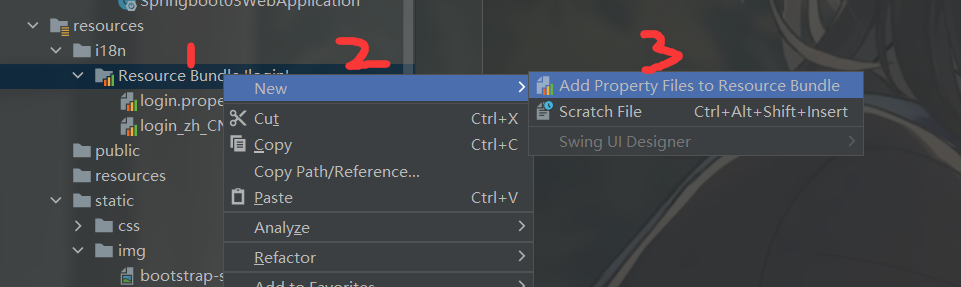
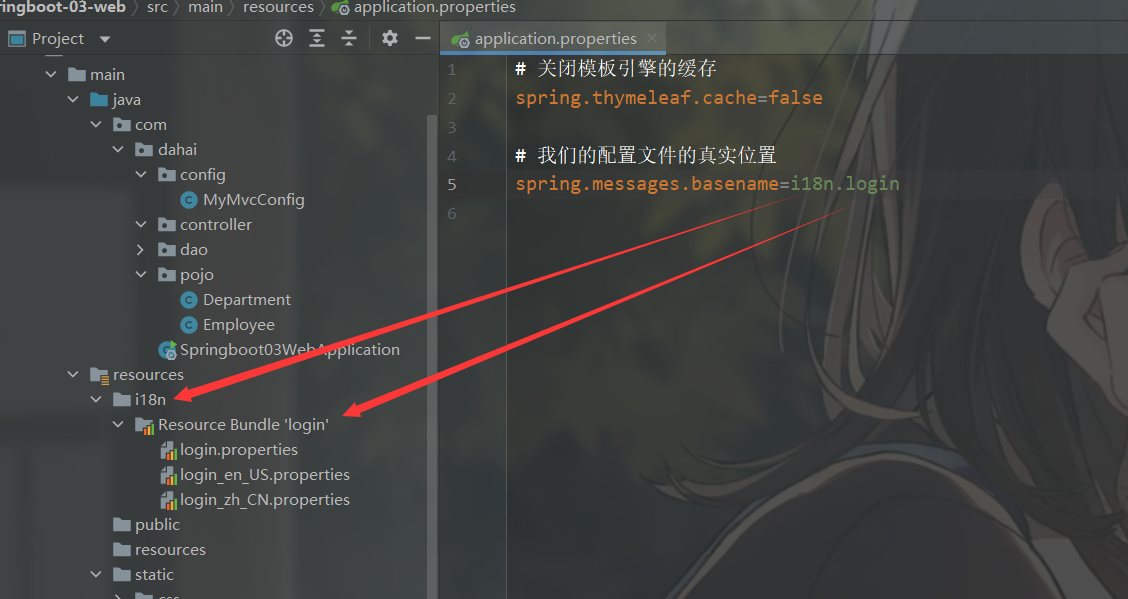
resources目录下新建一个包(i18n)
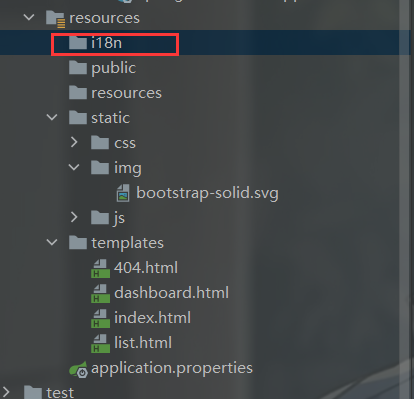
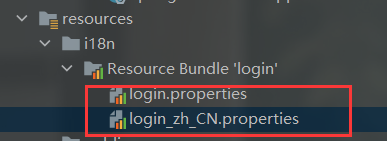
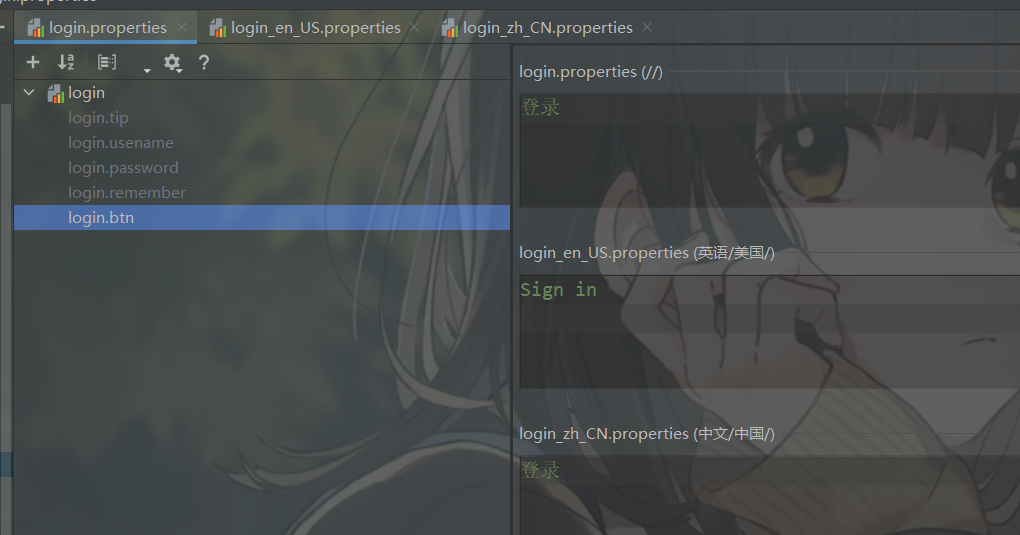
在i18n目录下新建两个properties
- login.properties
- login_zh_CN.properties
然后右键
点击OK

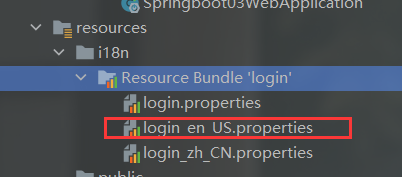
点击OK
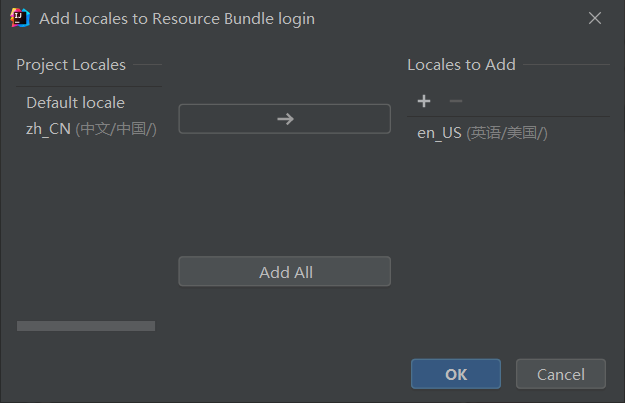
发现多了一个en_US的配置文件
idea的可视化界面。则需要安装一个Resource Bundle Editor的插件。
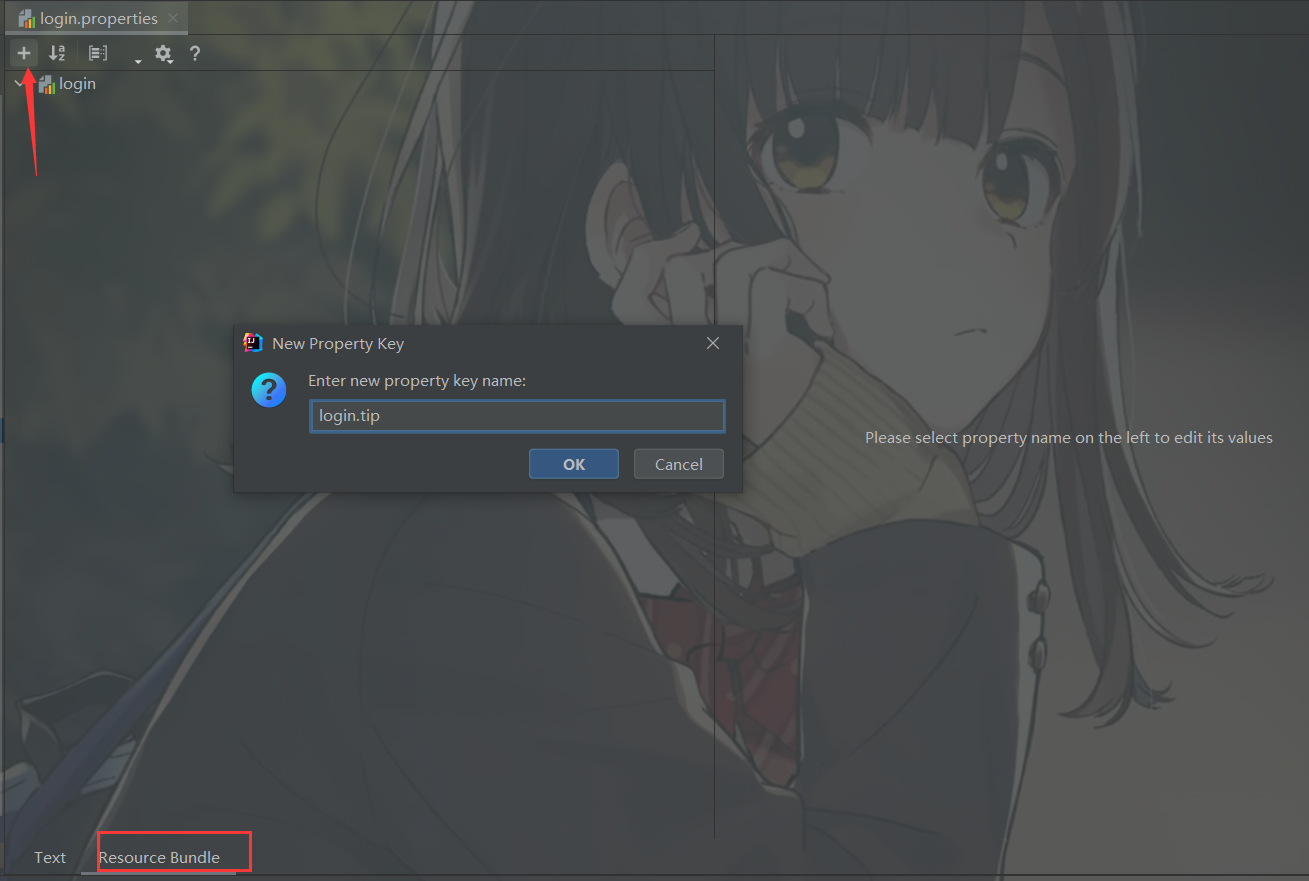
用可视化编辑

配置完毕
在application.properties绑定配置文件
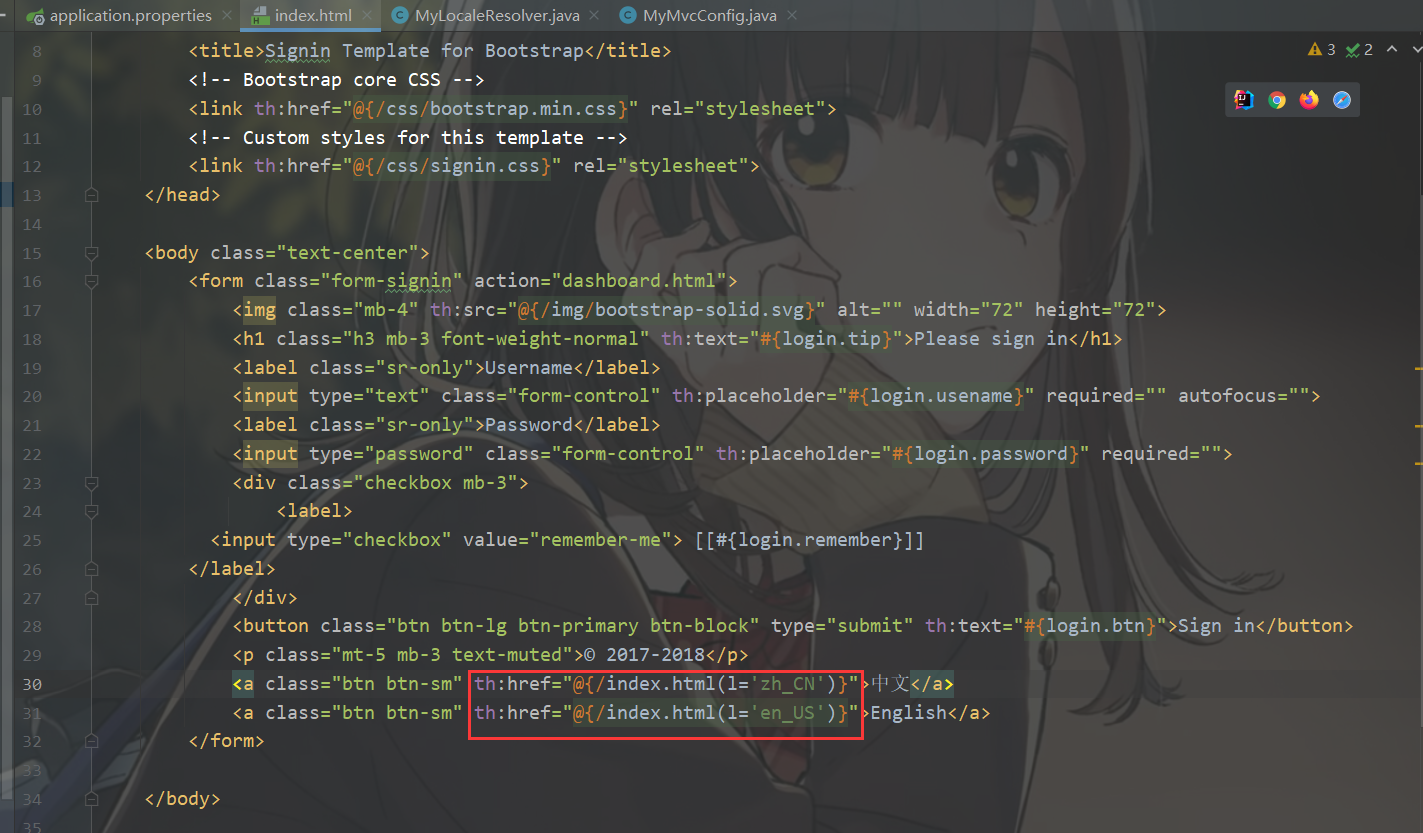
继续修改thymeleaf语法
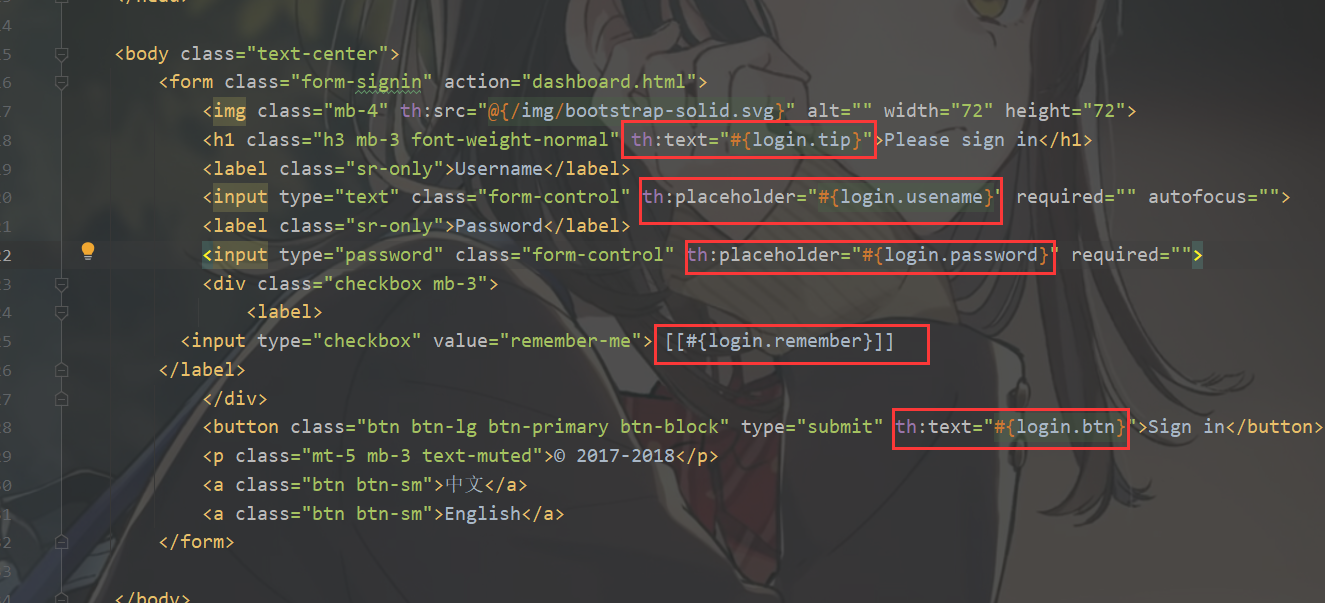
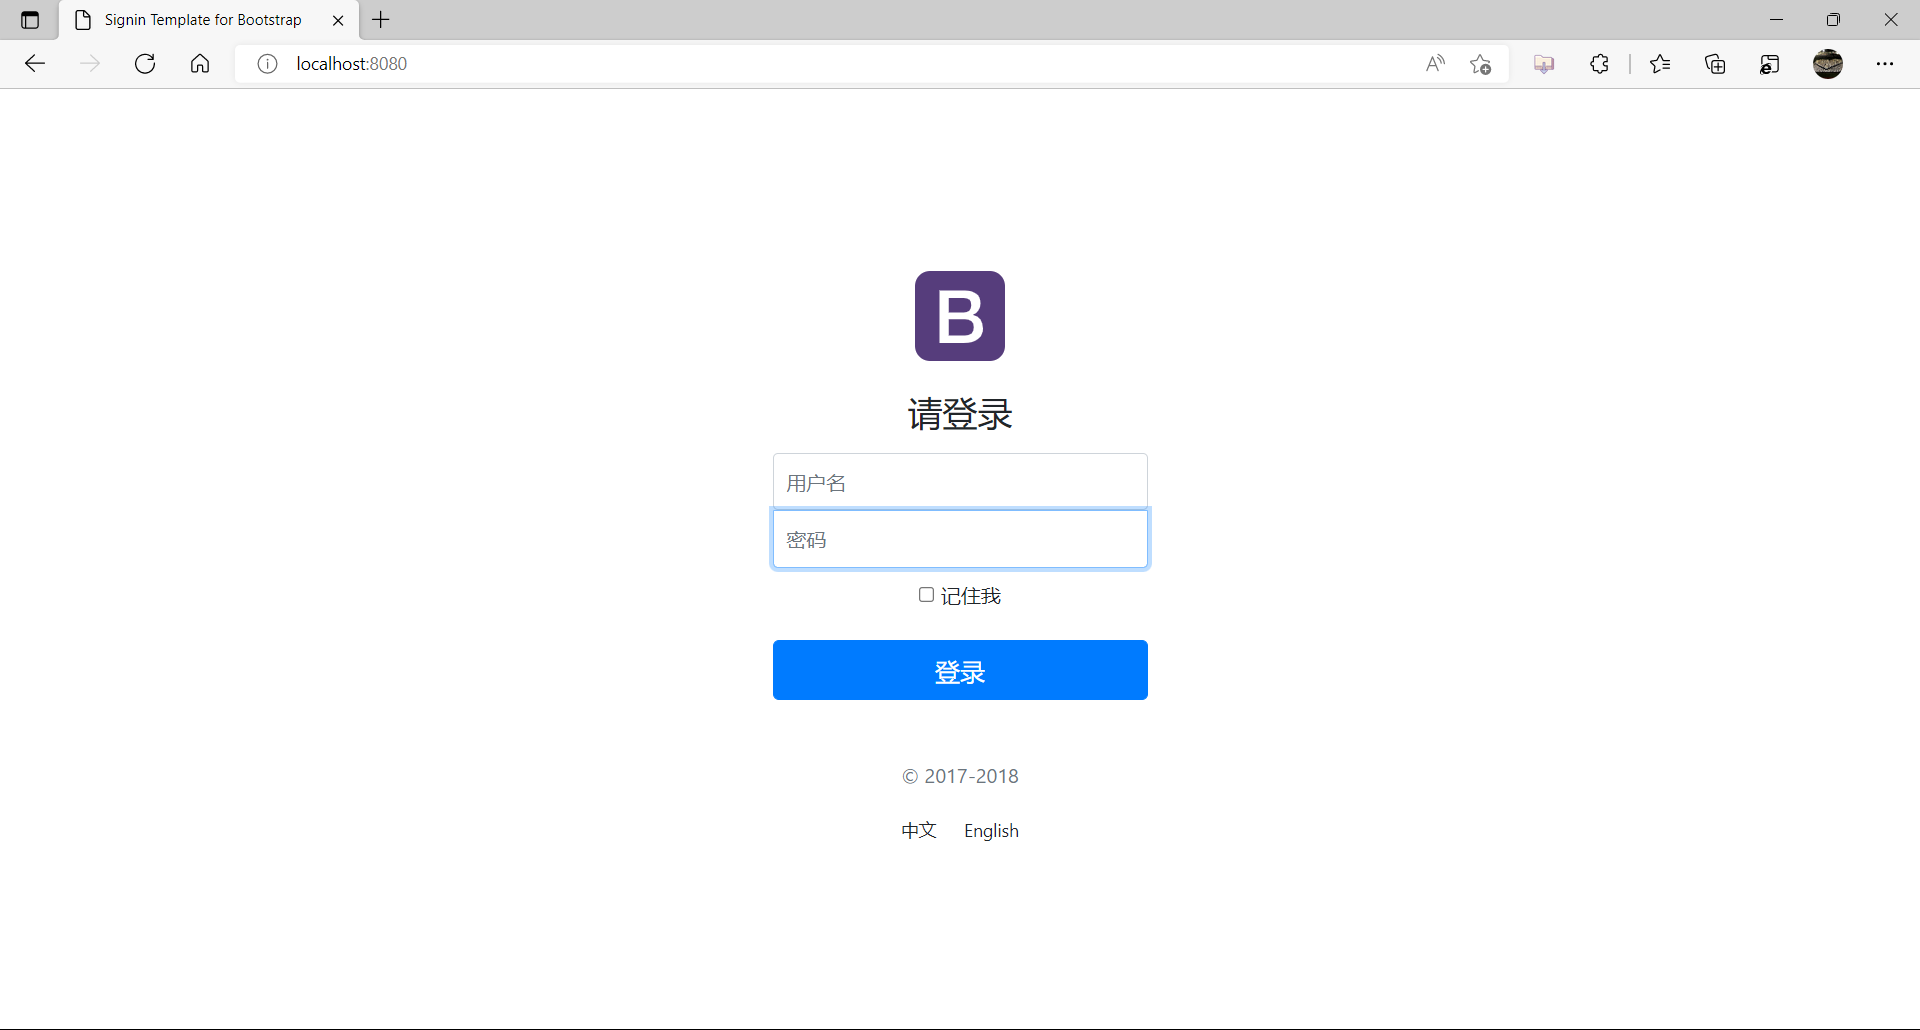
运行后变成中文
给a链接添加地址
在config包下新建一个国际化解析器的类
自己写一个国际化解析器类
package com.dahai.config; import org.springframework.util.StringUtils; import org.springframework.web.servlet.LocaleResolver; import javax.servlet.http.HttpServletRequest; import javax.servlet.http.HttpServletResponse; import java.util.Locale; public class MyLocaleResolver implements LocaleResolver { //解析请求 @Override public Locale resolveLocale(HttpServletRequest request) { String language = request.getParameter("l"); Locale locale = Locale.getDefault(); // 如果没有获取到就使用系统默认的 //如果请求链接不为空 // if (!StringUtils.isEmpty(language)){ if (StringUtils.hasLength(language)){ //分割请求参数 String[] split = language.split("_"); //国家,地区 locale = new Locale(split[0],split[1]); } return locale; } @Override public void setLocale(HttpServletRequest httpServletRequest, HttpServletResponse httpServletResponse, Locale locale) { } }
将MyLocaleResolver(国际化解析器)放在Bean里面
package com.dahai.config; import org.springframework.context.annotation.Bean; import org.springframework.context.annotation.Configuration; import org.springframework.web.servlet.LocaleResolver; import org.springframework.web.servlet.config.annotation.ViewControllerRegistry; import org.springframework.web.servlet.config.annotation.WebMvcConfigurer; @Configuration public class MyMvcConfig implements WebMvcConfigurer { @Override public void addViewControllers(ViewControllerRegistry registry) { registry.addViewController("/").setViewName("index"); registry.addViewController("/index.html").setViewName("index"); registry.addViewController("/main.html").setViewName("dashboard"); } //自定义的国际化组件就生效了 @Bean public LocaleResolver localeResolver(){ return new MyLocaleResolver(); } }
这样中英文就可以互相切换了
总结·
6.4、登录功能实现
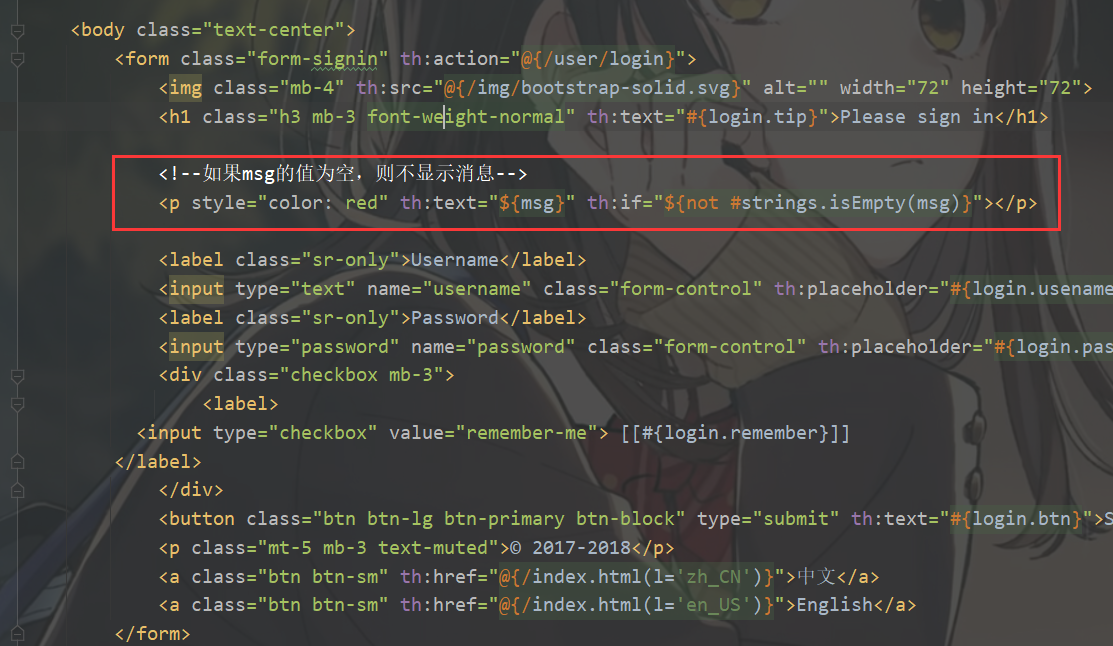
编写controller层的登录控制类
LoginController(登录控制)
package com.dahai.controller; import org.springframework.stereotype.Controller; import org.springframework.ui.Model; import org.springframework.util.StringUtils; import org.springframework.web.bind.annotation.RequestMapping; import org.springframework.web.bind.annotation.RequestParam; import org.springframework.web.bind.annotation.ResponseBody; @Controller public class LoginController { @RequestMapping("/user/login") public String login(@RequestParam("username") String username, @RequestParam("password") String password, Model model){ //具体的业务 if(StringUtils.hasLength(username)&&"123456".equals(password)){ return "redirect:/main.html"; }else { //告诉用户你登录失败了 model.addAttribute("msg","用户名或者密码错误!"); return "index"; } } }
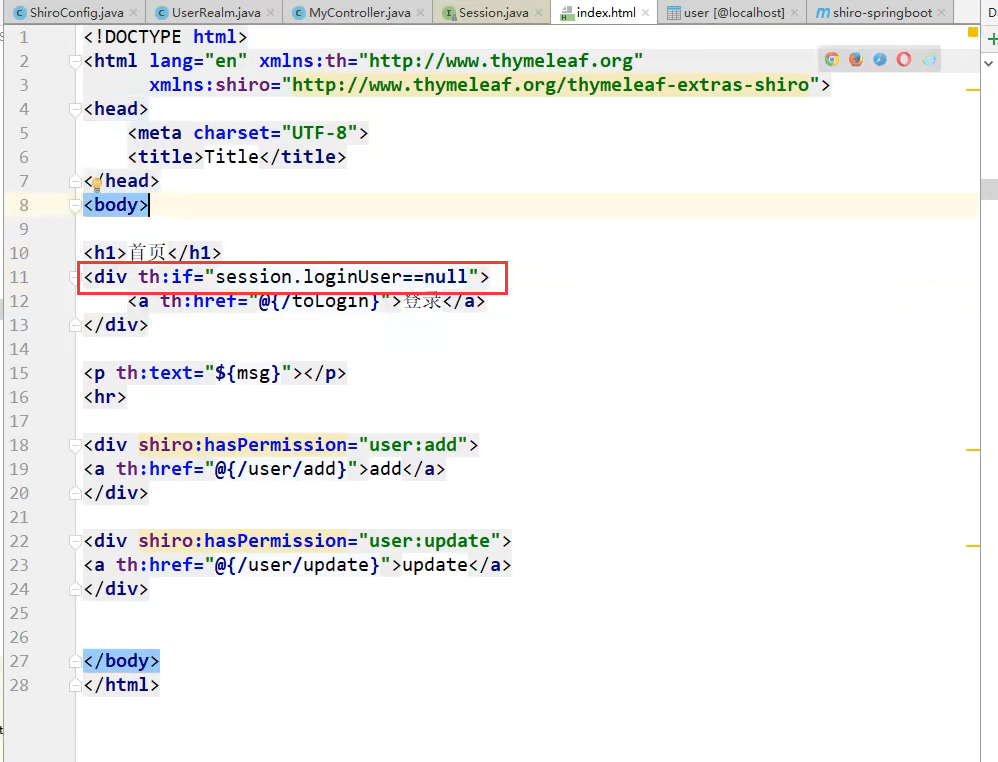
index.html
登录拦截器
用户必须输入账号密码才能进入main.html,不允许在地址栏输入http://localhost:8080/main.html直接进入主界面,这就需要用拦截器进行拦截操作
解决的办法就是在session里面存登录的用户,session里面有这个用户才让你进入main.html
自定义一个拦截器
package com.dahai.config; import org.springframework.web.servlet.HandlerInterceptor; import org.springframework.web.servlet.ModelAndView; import javax.servlet.http.HttpServletRequest; import javax.servlet.http.HttpServletResponse; //自定义一个拦截器 public class LoginHandlerInterceptor implements HandlerInterceptor { @Override public boolean preHandle(HttpServletRequest request, HttpServletResponse response, Object handler) throws Exception { //登陆成功之后,应该有用户的session; Object loginUser = request.getSession().getAttribute("loginUser"); if (loginUser==null){ request.setAttribute("msg","没有权限,请先登录"); request.getRequestDispatcher("/index.html").forward(request,response); return false; }else { return true; } } }
在视图解析器里面配置
package com.dahai.config; import org.springframework.context.annotation.Bean; import org.springframework.context.annotation.Configuration; import org.springframework.web.servlet.LocaleResolver; import org.springframework.web.servlet.config.annotation.InterceptorRegistry; import org.springframework.web.servlet.config.annotation.ViewControllerRegistry; import org.springframework.web.servlet.config.annotation.WebMvcConfigurer; @Configuration public class MyMvcConfig implements WebMvcConfigurer { @Override public void addViewControllers(ViewControllerRegistry registry) { registry.addViewController("/").setViewName("index"); registry.addViewController("/index.html").setViewName("index"); registry.addViewController("/main.html").setViewName("dashboard"); } //自定义的国际化组件就生效了 @Bean public LocaleResolver localeResolver(){ return new MyLocaleResolver(); } //配置拦截器 //addPathPatterns("/**")拦截所有请求 //excludePathPatterns("/index.html","/"......)除了这些请求不拦截 @Override public void addInterceptors(InterceptorRegistry registry) { registry.addInterceptor(new LoginHandlerInterceptor()) .addPathPatterns("/**") .excludePathPatterns("/index.html","/","/user/login","/css/**","/js/**","/img/**"); } }
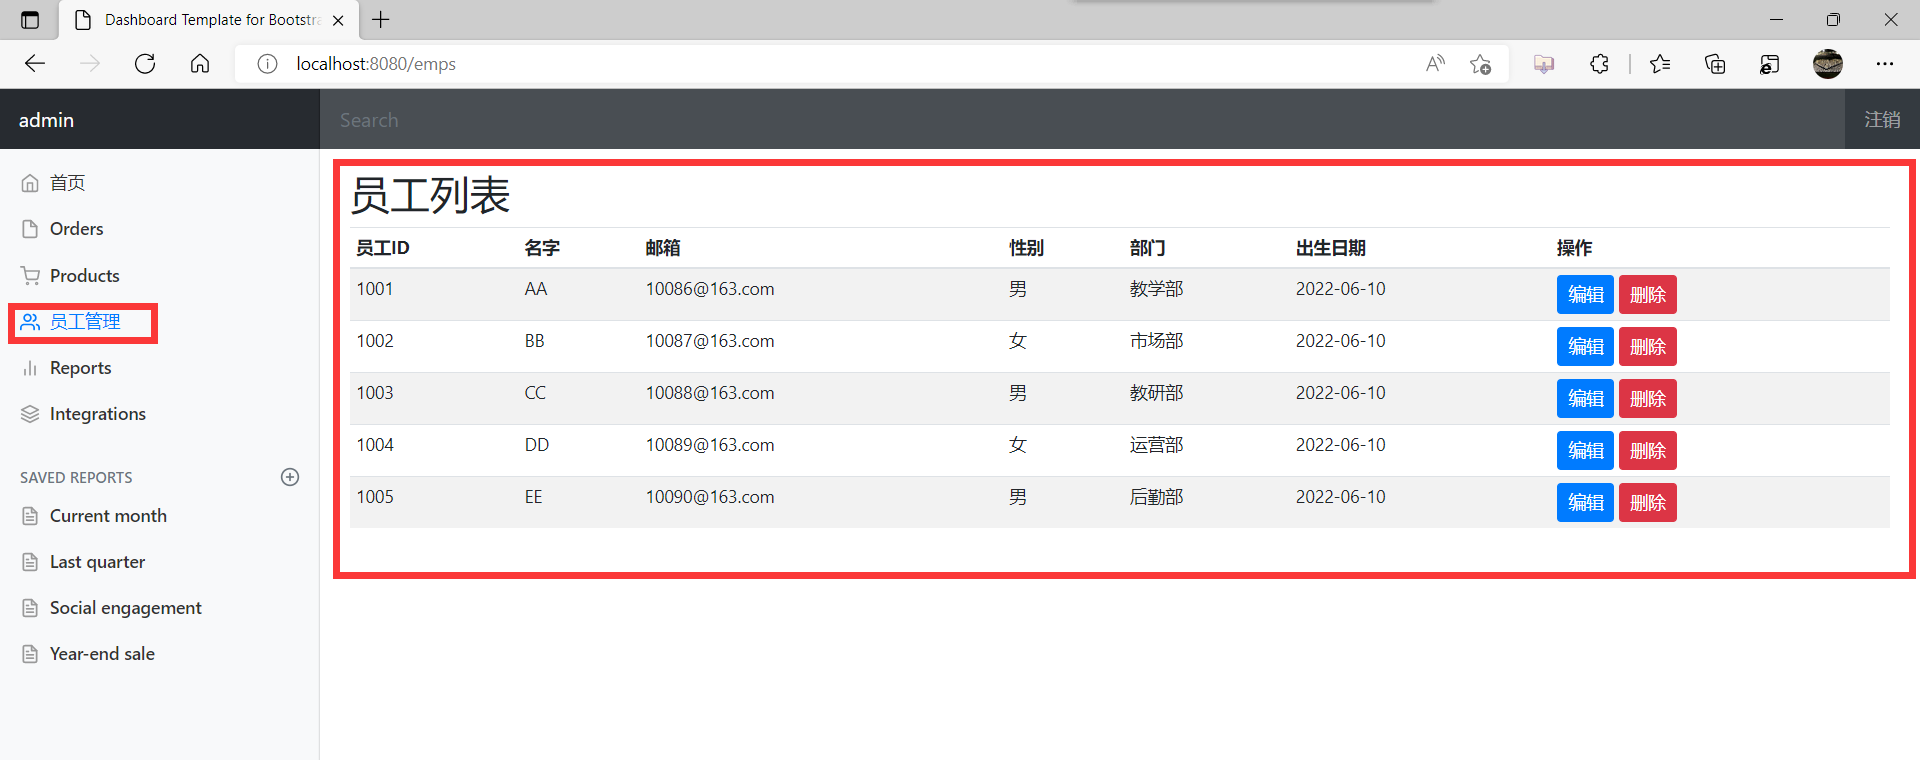
6.5、员工列表展示
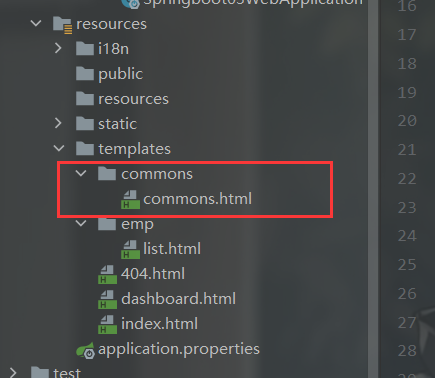
提取公共页面
新建一个commons.html,用来存放公共页部分
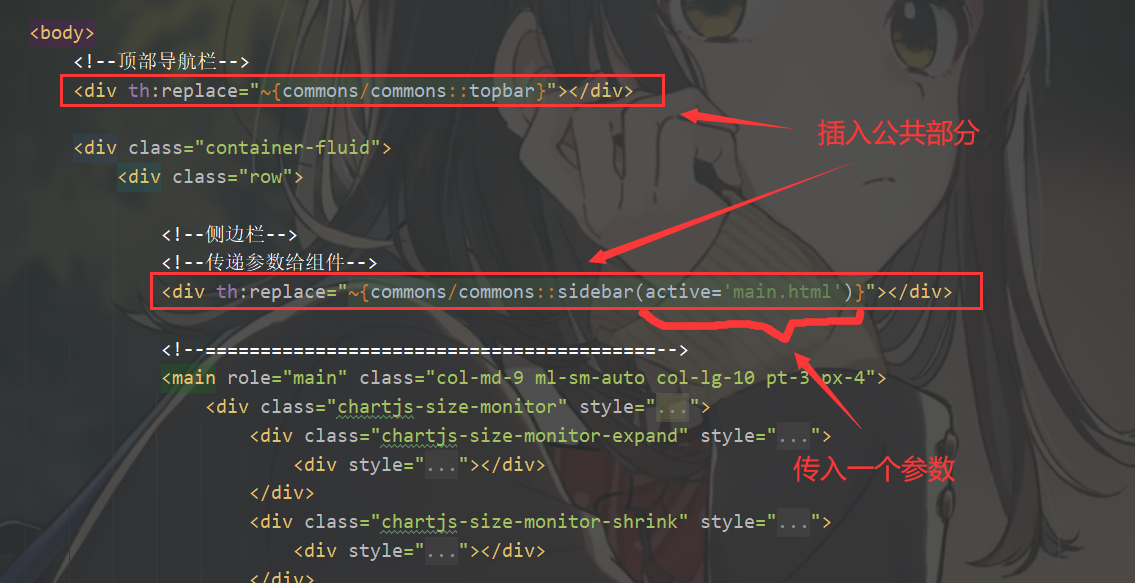
<!--提取公共部分--> th:fragment="自定义名字"

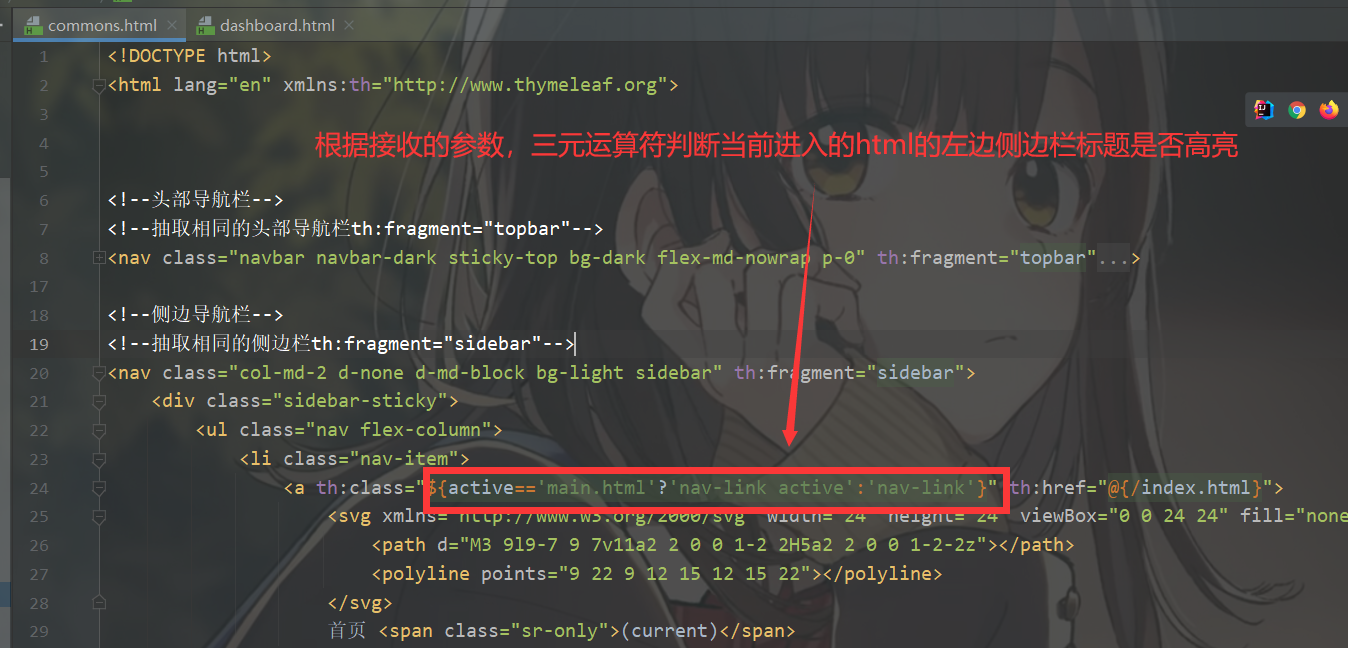
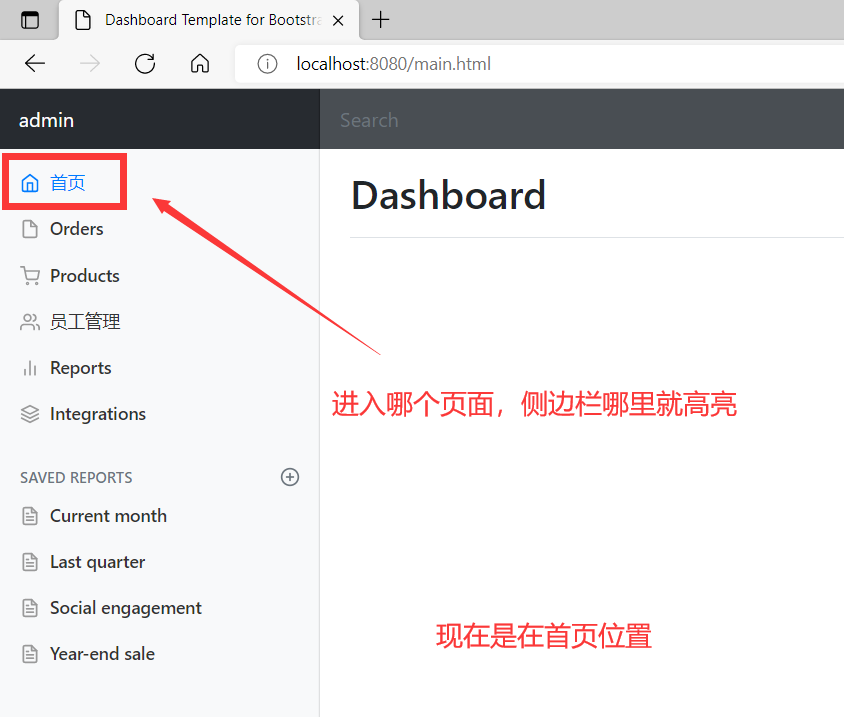
<!--插入公共部分--> <div th:replace="~{哪个页面(不用写.html)::提取的自定义的名字}"></div> <!--(active='main.html')表示传入一个参数,后面三元运算符判断用的-->
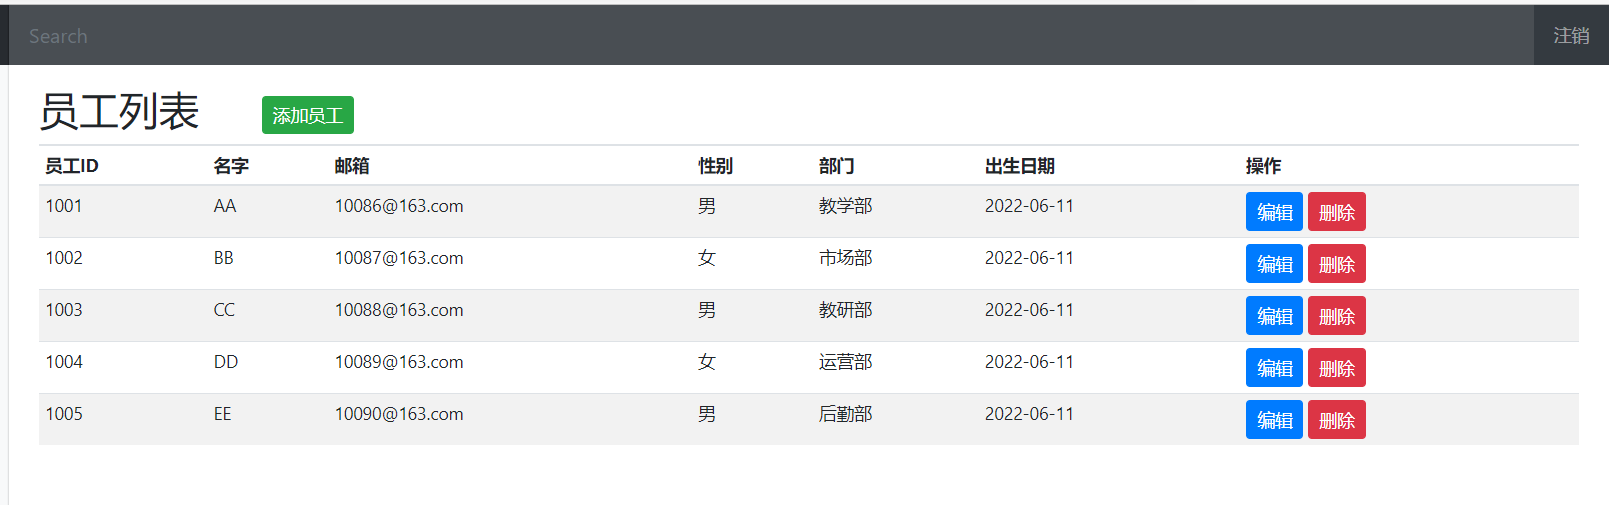
修改list.html页面
<!--插入相同的顶部栏th:insert="~{从哪个页面抽取的::抽取的那个侧边栏的名字}"--> <div th:replace="~{commons/commons::topbar}"></div> <div class="container-fluid"> <div class="row"> <!--插入相同的侧边栏th:insert="~{从哪个页面抽取的::抽取的那个侧边栏的名字}"--> <div th:replace="~{commons/commons::sidebar(active='list.html')}"></div> <main role="main" class="col-md-9 ml-sm-auto col-lg-10 pt-3 px-4"> <h2>员工列表</h2> <div class="table-responsive"> <table class="table table-striped table-sm"> <thead> <tr> <th>员工ID</th> <th>名字</th> <th>邮箱</th> <th>性别</th> <th>部门</th> <th>出生日期</th> <th>操作</th> </tr> </thead> <tbody> <tr th:each="emp:${emps}"> <td th:text="${emp.getId()}"></td> <!--也可以像下面这样写--> <td>[[${emp.getLastName()}]]</td> <td th:text="${emp.getEmail()}"></td> <td th:text="${emp.getGender()==0?'女':'男'}"></td> <td th:text="${emp.getDepartment.getDepartmentName()}"></td> <!-- <td th:text="${#dates.format(emp.getBirth(),'yyyy-MM-dd HH:mm:ss')}"></td>--> <td th:text="${#dates.format(emp.getBirth(),'yyyy-MM-dd')}"></td> <td> <button class="btn btn-sm btn-primary">编辑</button> <button class="btn btn-sm btn-danger">删除</button> </td> </tr> </tbody> </table> </div> </main> </div> </div>
查看结果
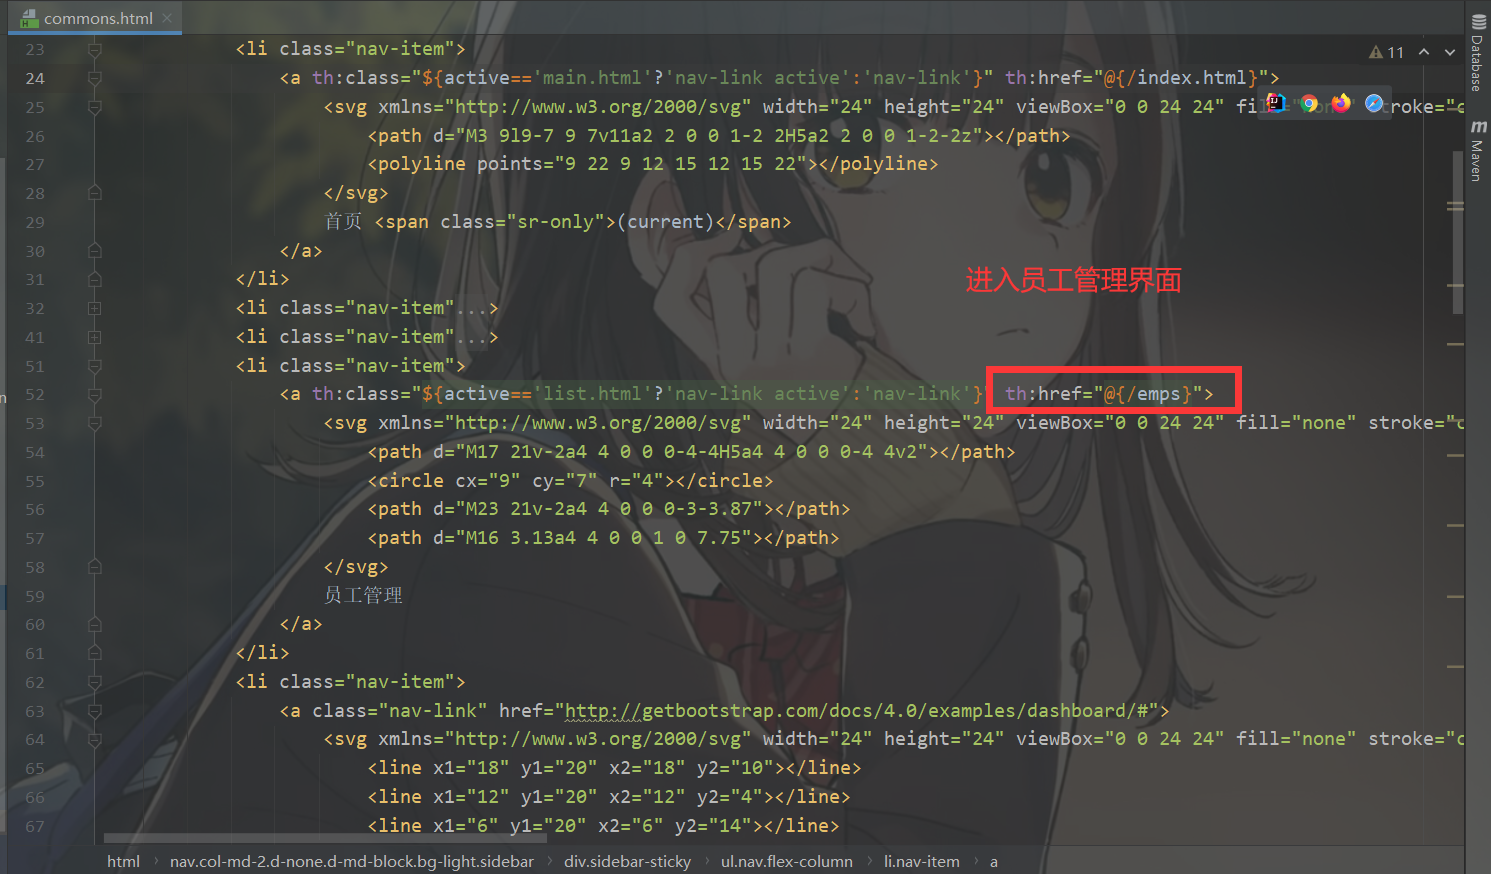
6.6.添加员工
进入员工管理界面
<a th:class="${active=='list.html'?'nav-link active':'nav-link'}" th:href="@{/emps}"> <svg xmlns="http://www.w3.org/2000/svg" width="24" height="24" viewBox="0 0 24 24" fill="none" stroke="currentColor" stroke-width="2" stroke-linecap="round" stroke-linejoin="round" class="feather feather-users"> <path d="M17 21v-2a4 4 0 0 0-4-4H5a4 4 0 0 0-4 4v2"></path> <circle cx="9" cy="7" r="4"></circle> <path d="M23 21v-2a4 4 0 0 0-3-3.87"></path> <path d="M16 3.13a4 4 0 0 1 0 7.75"></path> </svg> 员工管理 </a>
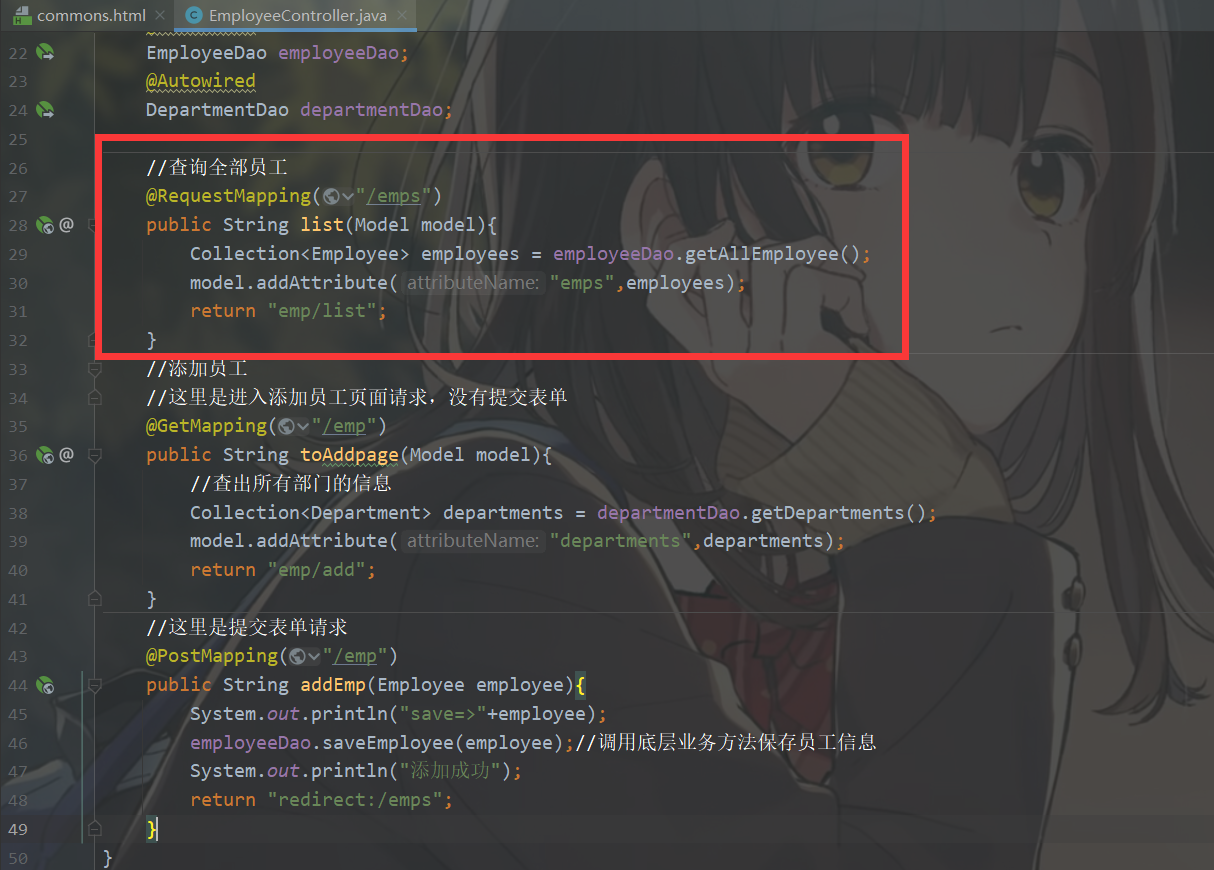
查询所有员工信息并展示到前端
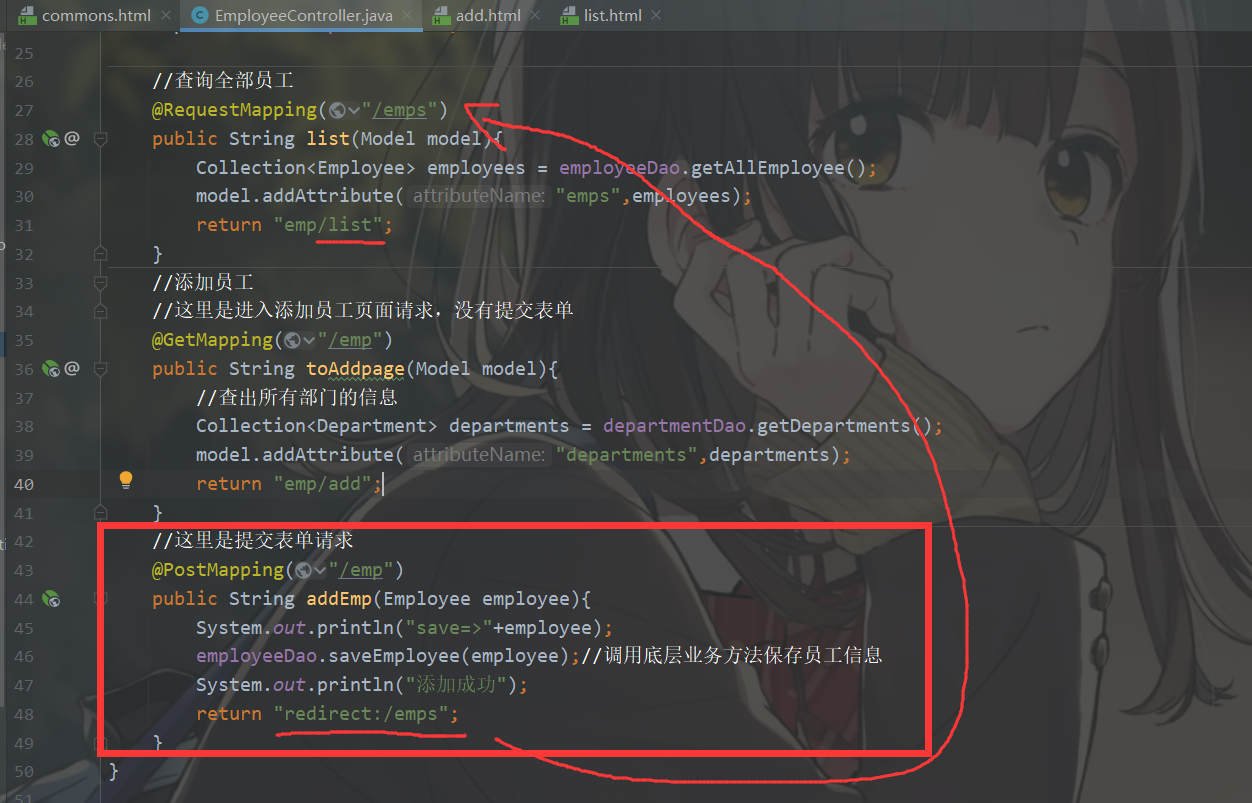
//查询全部员工 @RequestMapping("/emps") public String list(Model model){ Collection<Employee> employees = employeeDao.getAllEmployee(); model.addAttribute("emps",employees); return "emp/list"; }
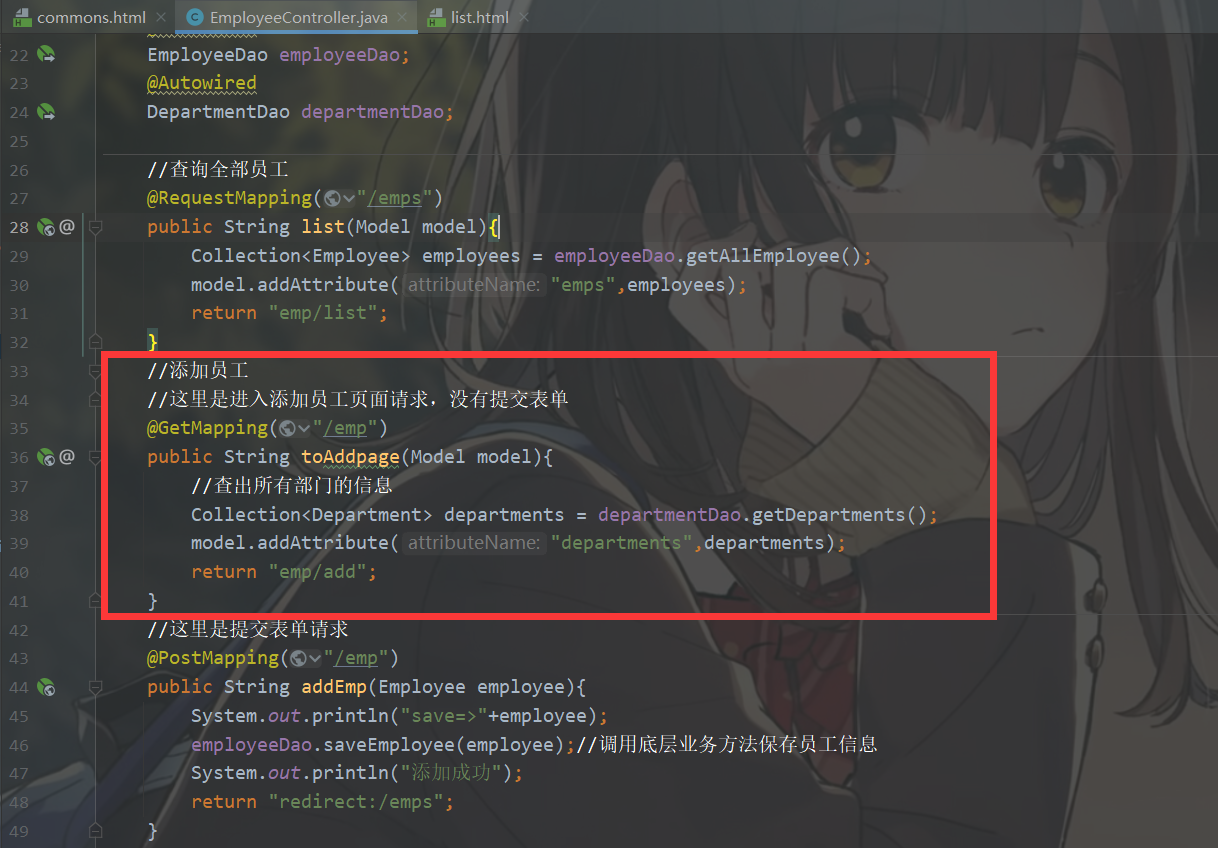
点击添加员工链接
<h2>员工列表<a style="margin-left: 50px" class="btn btn-sm btn-success" th:href="@{/emp}">添加员工</a></h2> <div class="table-responsive"> <table class="table table-striped table-sm"> <thead> <tr> <th>员工ID</th> <th>名字</th> <th>邮箱</th> <th>性别</th> <th>部门</th> <th>出生日期</th> <th>操作</th> </tr> </thead> <tbody> <tr th:each="emp:${emps}"> <td th:text="${emp.getId()}"></td> <!--也可以像下面这样写--> <td>[[${emp.getLastName()}]]</td> <td th:text="${emp.getEmail()}"></td> <td th:text="${emp.getGender()==0?'女':'男'}"></td> <td th:text="${emp.getDepartment.getDepartmentName()}"></td> <!-- <td th:text="${#dates.format(emp.getBirth(),'yyyy-MM-dd HH:mm:ss')}"></td>--> <td th:text="${#dates.format(emp.getBirth(),'yyyy-MM-dd')}"></td> <td> <button class="btn btn-sm btn-primary">编辑</button> <button class="btn btn-sm btn-danger">删除</button> </td> </tr> </tbody> </table> </div>

//添加员工 //这里是进入添加员工页面请求,没有提交表单 @GetMapping("/emp") public String toAddpage(Model model){ //查出所有部门的信息 Collection<Department> departments = departmentDao.getDepartments(); model.addAttribute("departments",departments); return "emp/add"; }
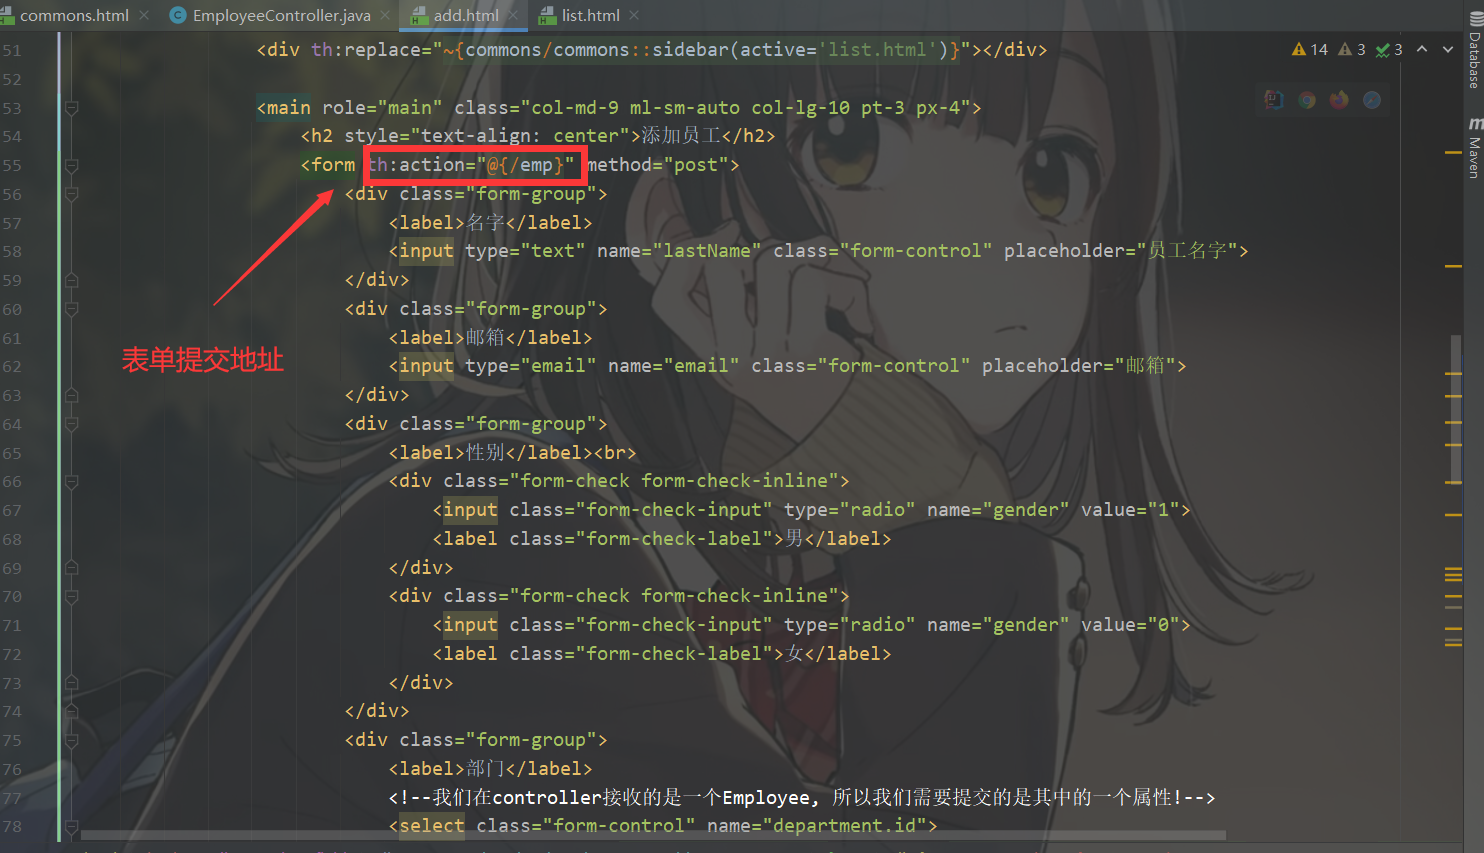
<h2 style="text-align: center">添加员工</h2> <form th:action="@{/emp}" method="post"> <div class="form-group"> <label>名字</label> <input type="text" name="lastName" class="form-control" placeholder="员工名字"> </div> <div class="form-group"> <label>邮箱</label> <input type="email" name="email" class="form-control" placeholder="邮箱"> </div> <div class="form-group"> <label>性别</label><br> <div class="form-check form-check-inline"> <input class="form-check-input" type="radio" name="gender" value="1"> <label class="form-check-label">男</label> </div> <div class="form-check form-check-inline"> <input class="form-check-input" type="radio" name="gender" value="0"> <label class="form-check-label">女</label> </div> </div> <div class="form-group"> <label>部门</label> <!--我们在controller接收的是一个Employee, 所以我们需要提交的是其中的一个属性!--> <select class="form-control" name="department.id"> <option th:each="dept:${departments}" th:text="${dept.getDepartmentName()}" th:value="${dept.getId()}"></option> </select> </div> <div class="form-group"> <label>出生日期</label> <input type="text" name="birth" class="form-control" placeholder="出生日期"> </div> <button type="submit" class="btn btn-primary">添加</button> </form>
提交表单
//这里是提交表单请求 @PostMapping("/emp") public String addEmp(Employee employee){ System.out.println("save=>"+employee); employeeDao.saveEmployee(employee);//调用底层业务方法保存员工信息 System.out.println("添加成功"); return "redirect:/emps"; }
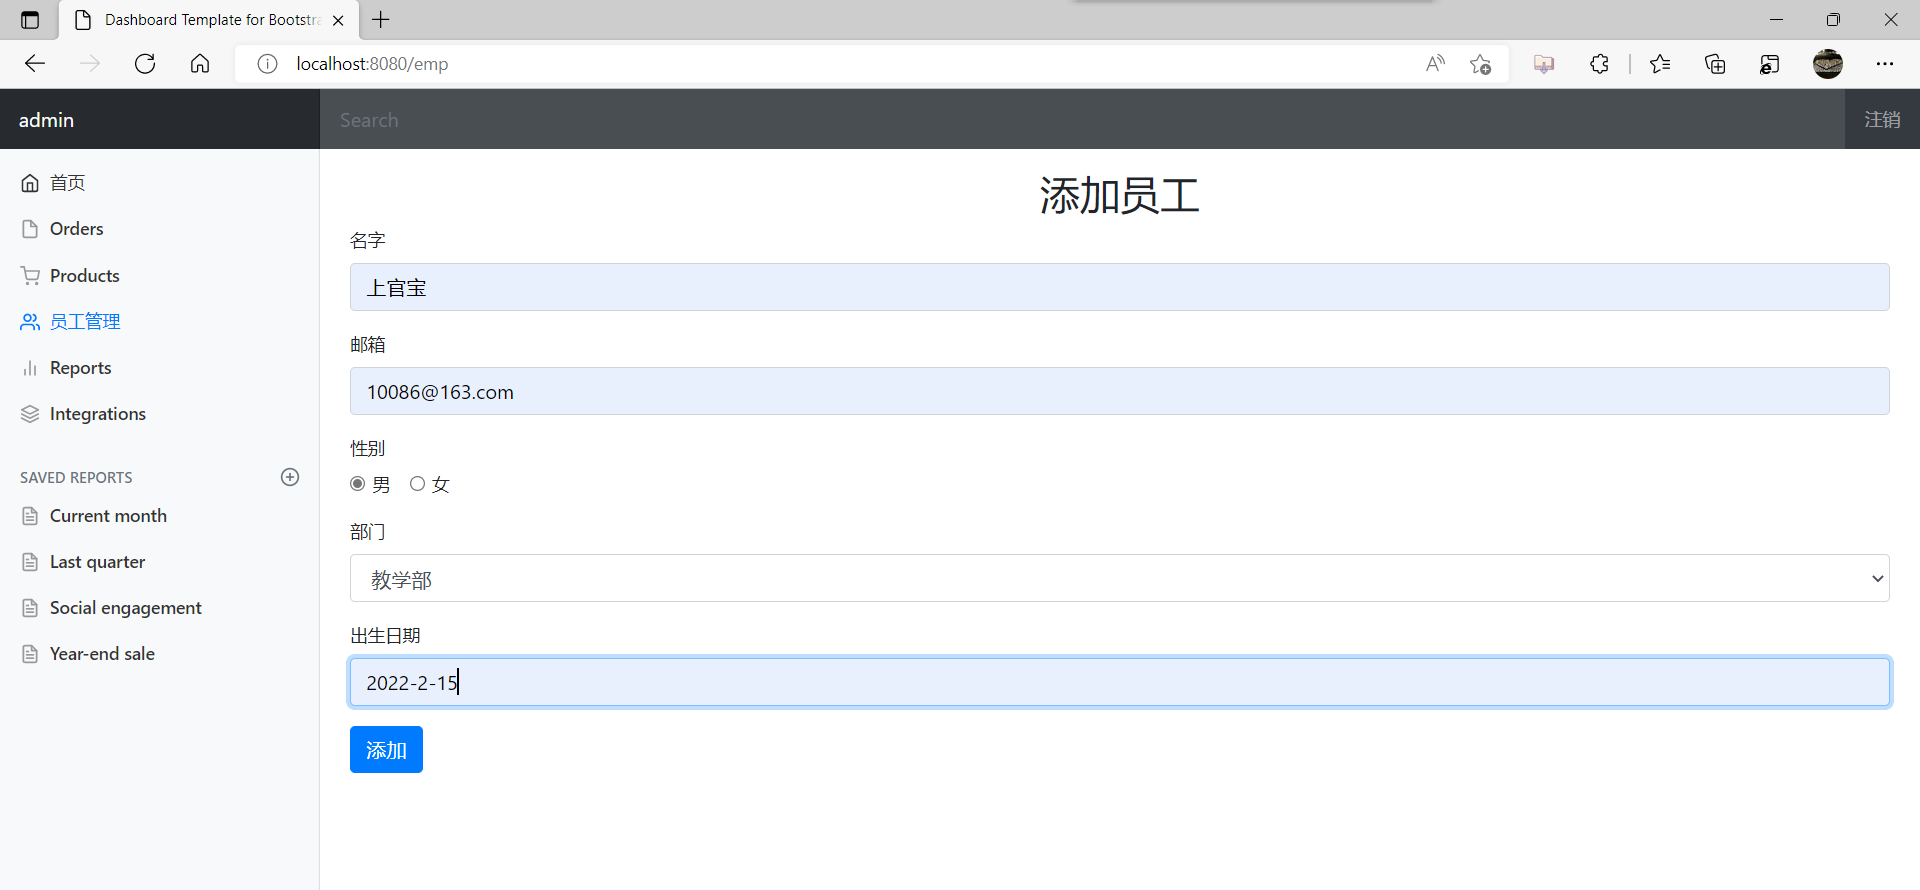
测试运行结果
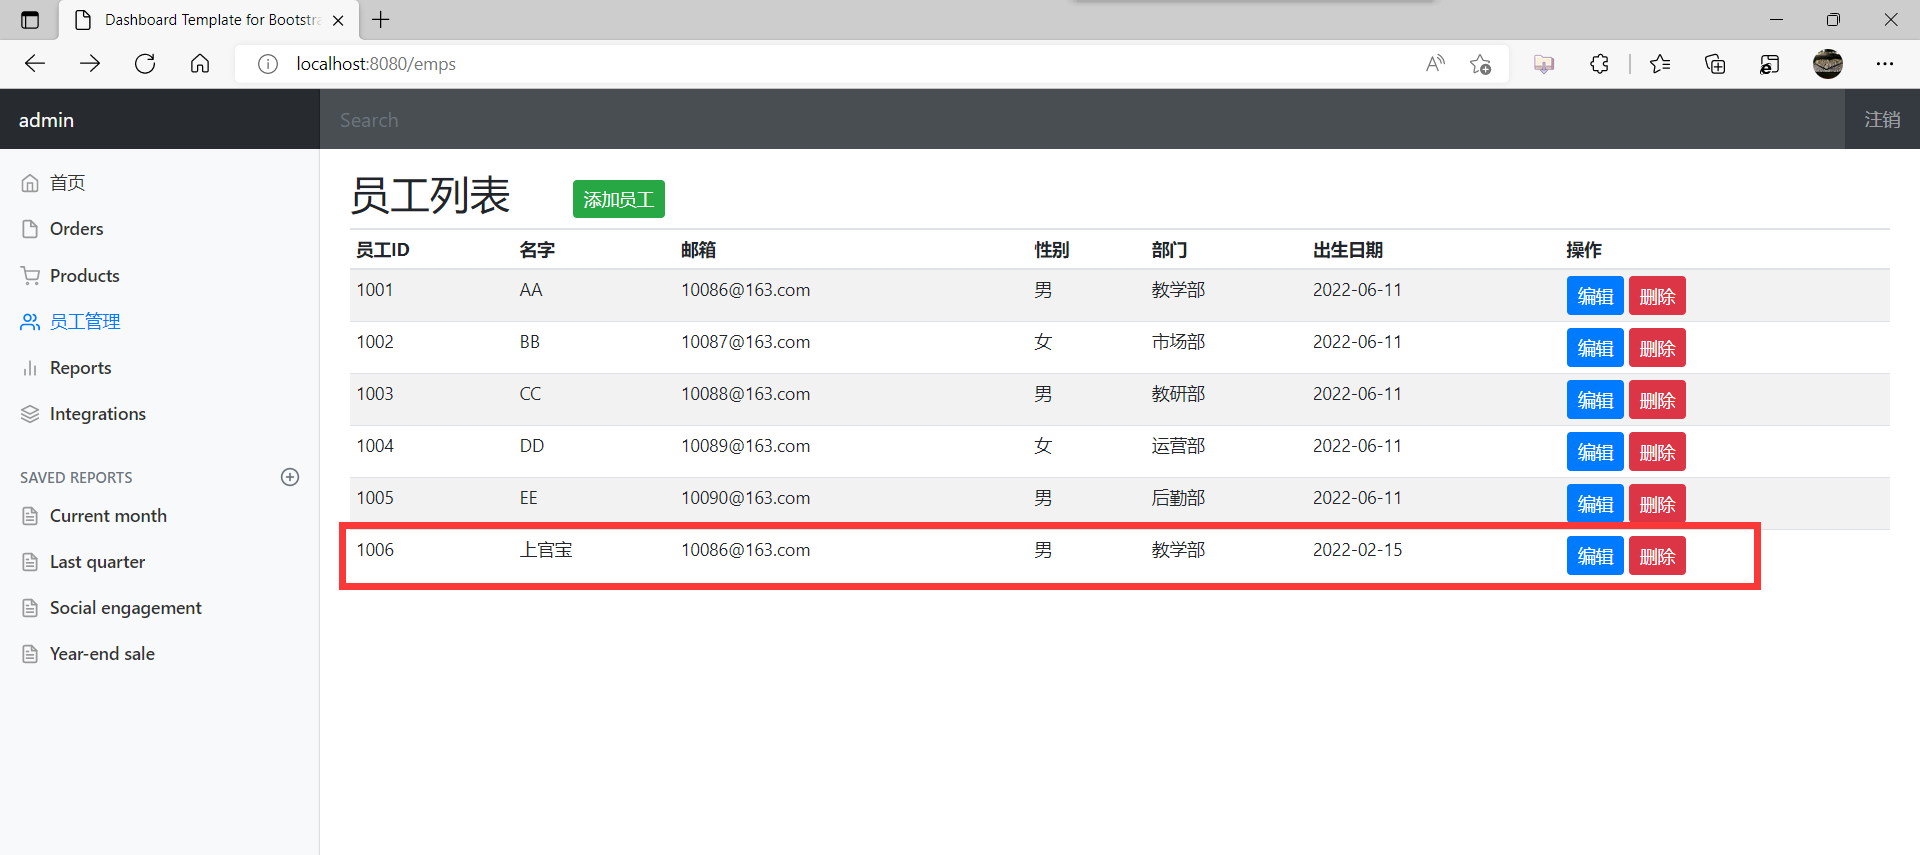
添加提交后会重定向到list.html列表
6.7、修改员工信息
进入编辑员工信息页面
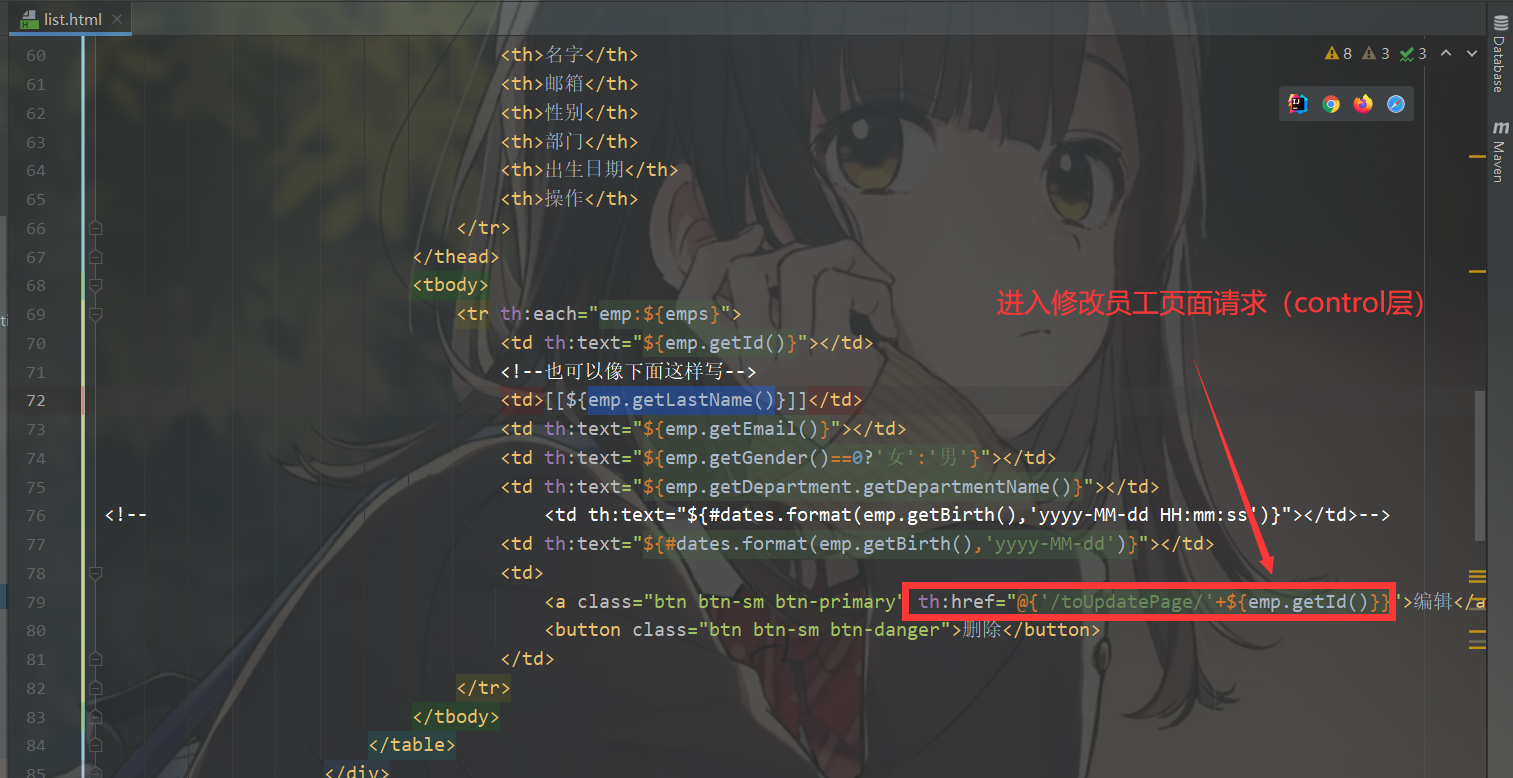
<a class="btn btn-sm btn-primary" th:href="@{'/toUpdatePage/'+${emp.getId()}}">编辑</a>
去修改员工页面的请求
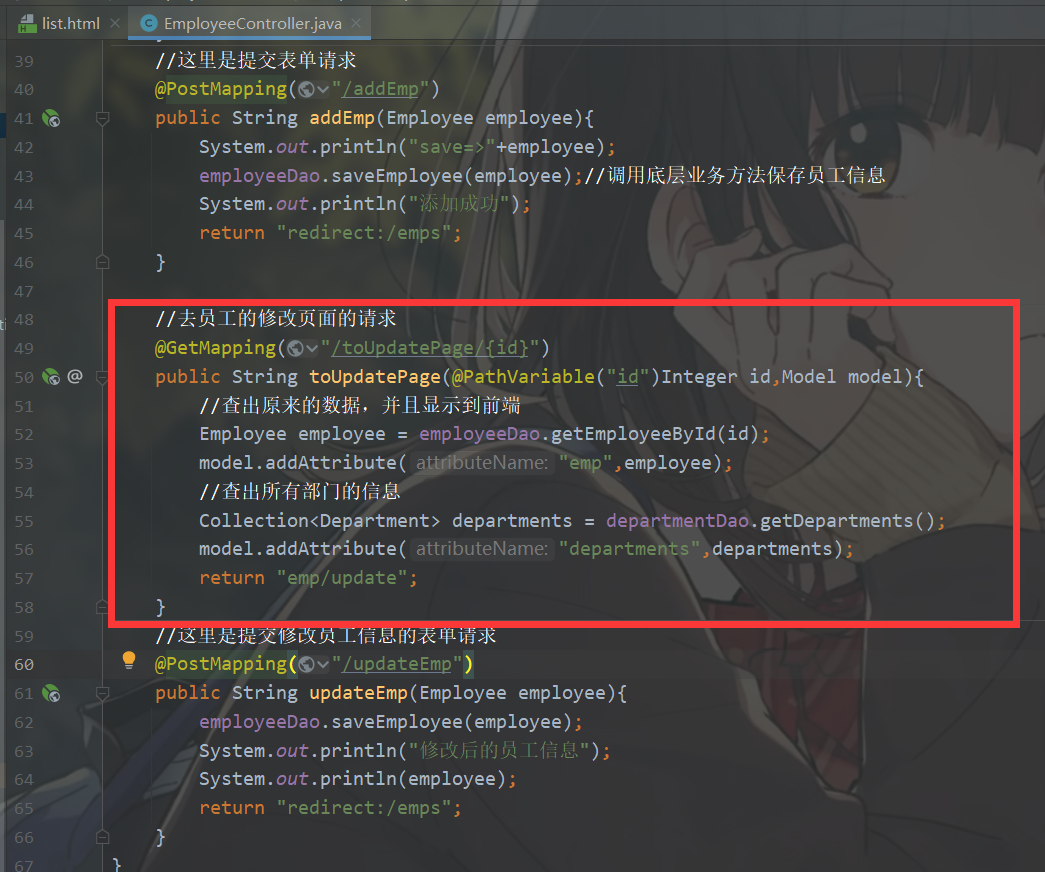
//去员工的修改页面的请求 @GetMapping("/toUpdatePage/{id}") public String toUpdatePage(@PathVariable("id")Integer id,Model model){ //查出原来的数据,并且显示到前端 Employee employee = employeeDao.getEmployeeById(id); model.addAttribute("emp",employee); //查出所有部门的信息 Collection<Department> departments = departmentDao.getDepartments(); model.addAttribute("departments",departments); return "emp/update"; }
提交修改员工信息表单
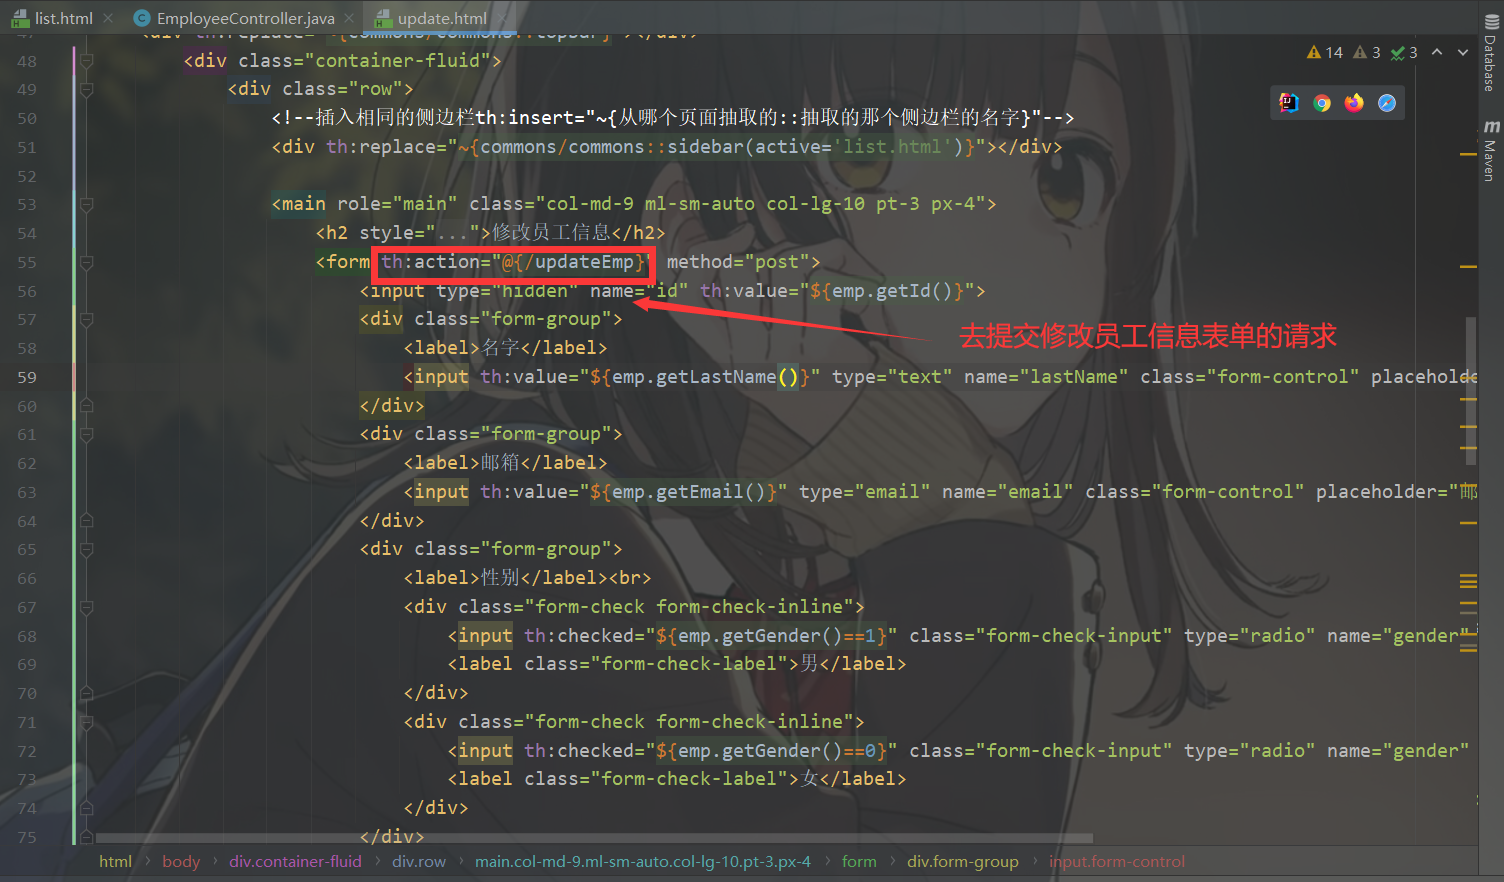
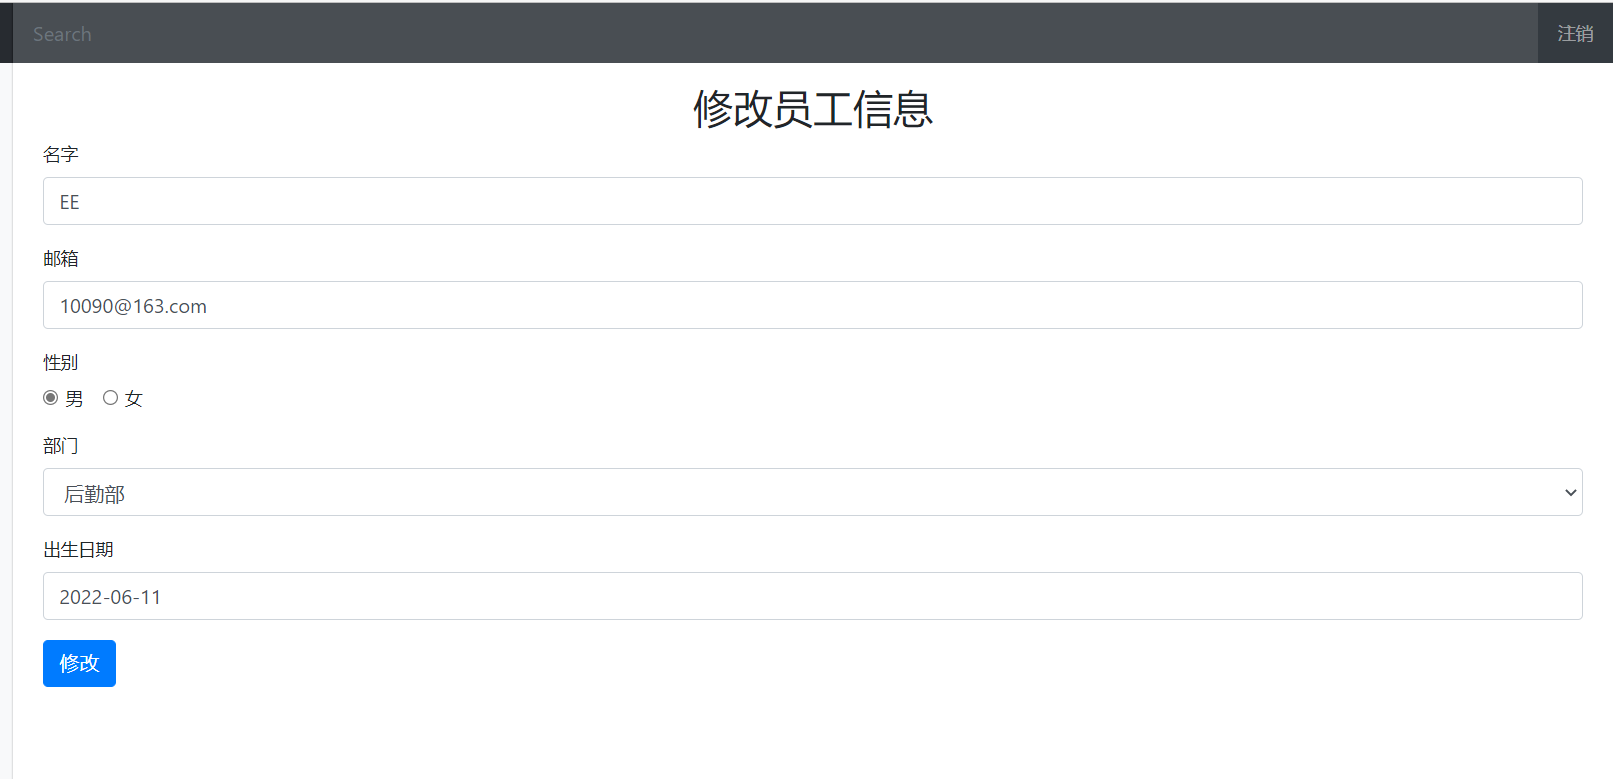
<h2 style="text-align: center">修改员工信息</h2> <form th:action="@{/updateEmp}" method="post"> <input type="hidden" name="id" th:value="${emp.getId()}"> <div class="form-group"> <label>名字</label> <input th:value="${emp.getLastName()}" type="text" name="lastName" class="form-control" placeholder="员工名字"> </div> <div class="form-group"> <label>邮箱</label> <input th:value="${emp.getEmail()}" type="email" name="email" class="form-control" placeholder="邮箱"> </div> <div class="form-group"> <label>性别</label><br> <div class="form-check form-check-inline"> <input th:checked="${emp.getGender()==1}" class="form-check-input" type="radio" name="gender" value="1"> <label class="form-check-label">男</label> </div> <div class="form-check form-check-inline"> <input th:checked="${emp.getGender()==0}" class="form-check-input" type="radio" name="gender" value="0"> <label class="form-check-label">女</label> </div> </div> <div class="form-group"> <label>部门</label> <!--我们在controller接收的是一个Employee, 所以我们需要提交的是其中的一个属性!--> <select class="form-control" name="department.id"> <option th:selected="${emp.getDepartment().getId()==dept.getId()}" th:each="dept:${departments}" th:text="${dept.getDepartmentName()}" th:value="${dept.getId()}"></option> </select> </div> <div class="form-group"> <label>出生日期</label> <input th:value="${#dates.format(emp.getBirth(),'yyyy-MM-dd')}" type="text" name="birth" class="form-control" placeholder="出生日期"> </div> <button type="submit" class="btn btn-primary">修改</button> </form>
提交员工信息表单请求
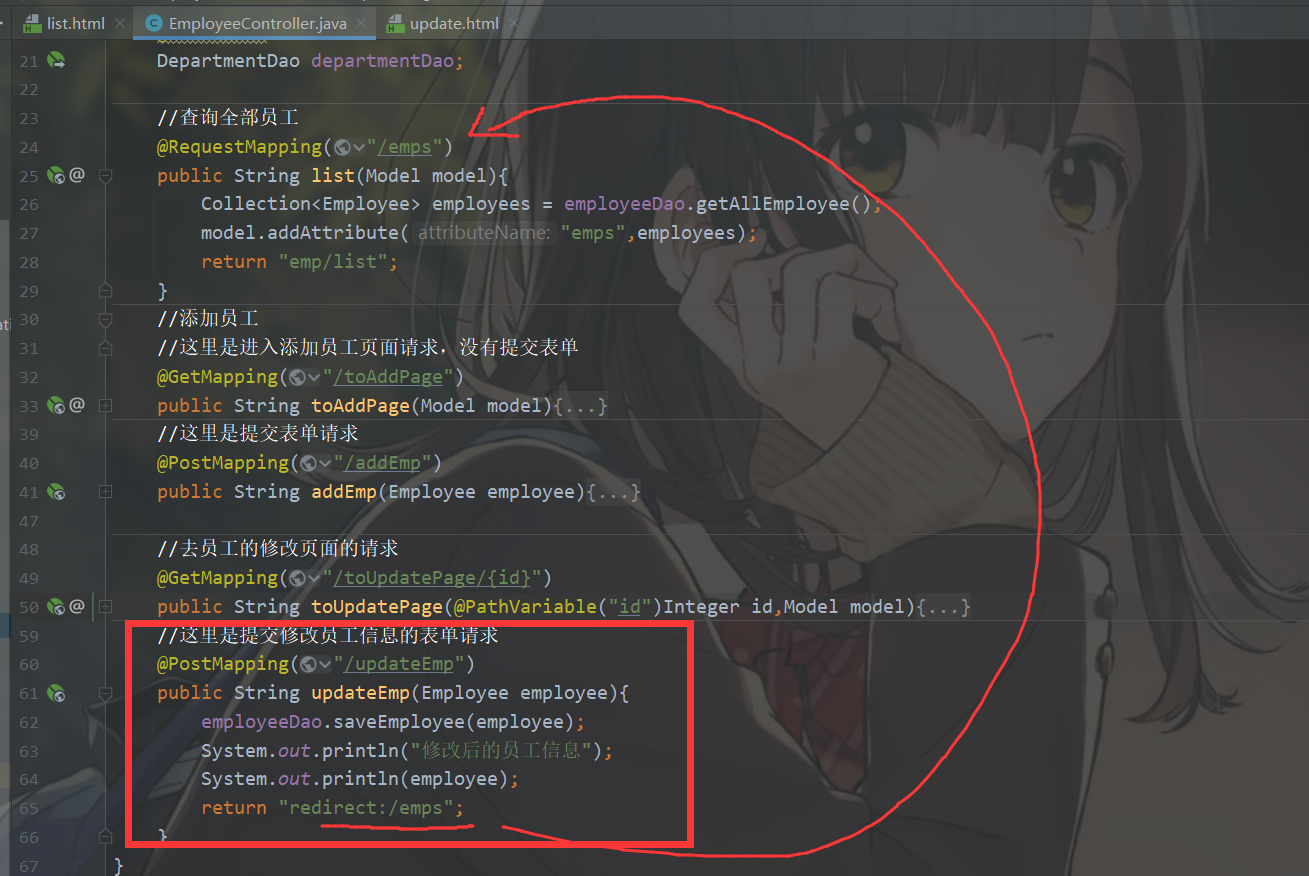
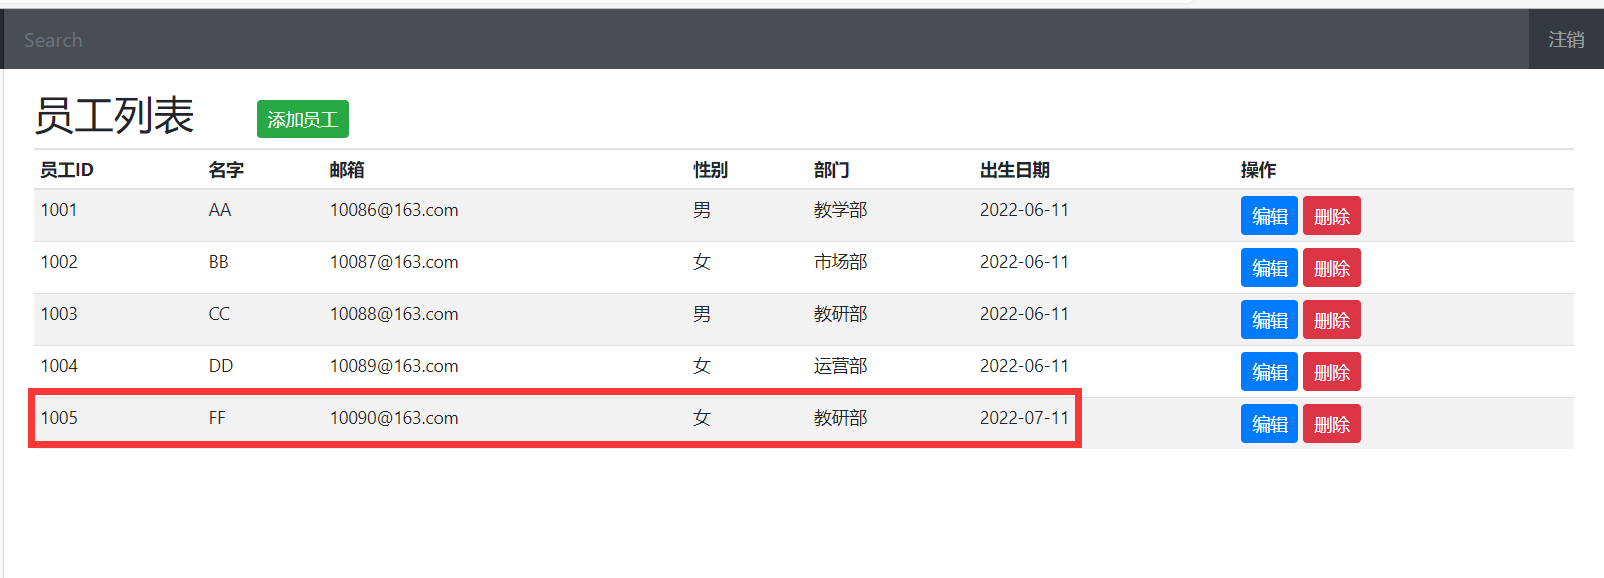
//这里是提交修改员工信息的表单请求 @PostMapping("/updateEmp") public String updateEmp(Employee employee){ employeeDao.saveEmployee(employee); System.out.println("修改后的员工信息"); System.out.println(employee); return "redirect:/emps"; }
修改前
选择修改名字叫“EE”的员工信息
提交修改后
6.8、删除员工及404
进入删除员工的请求
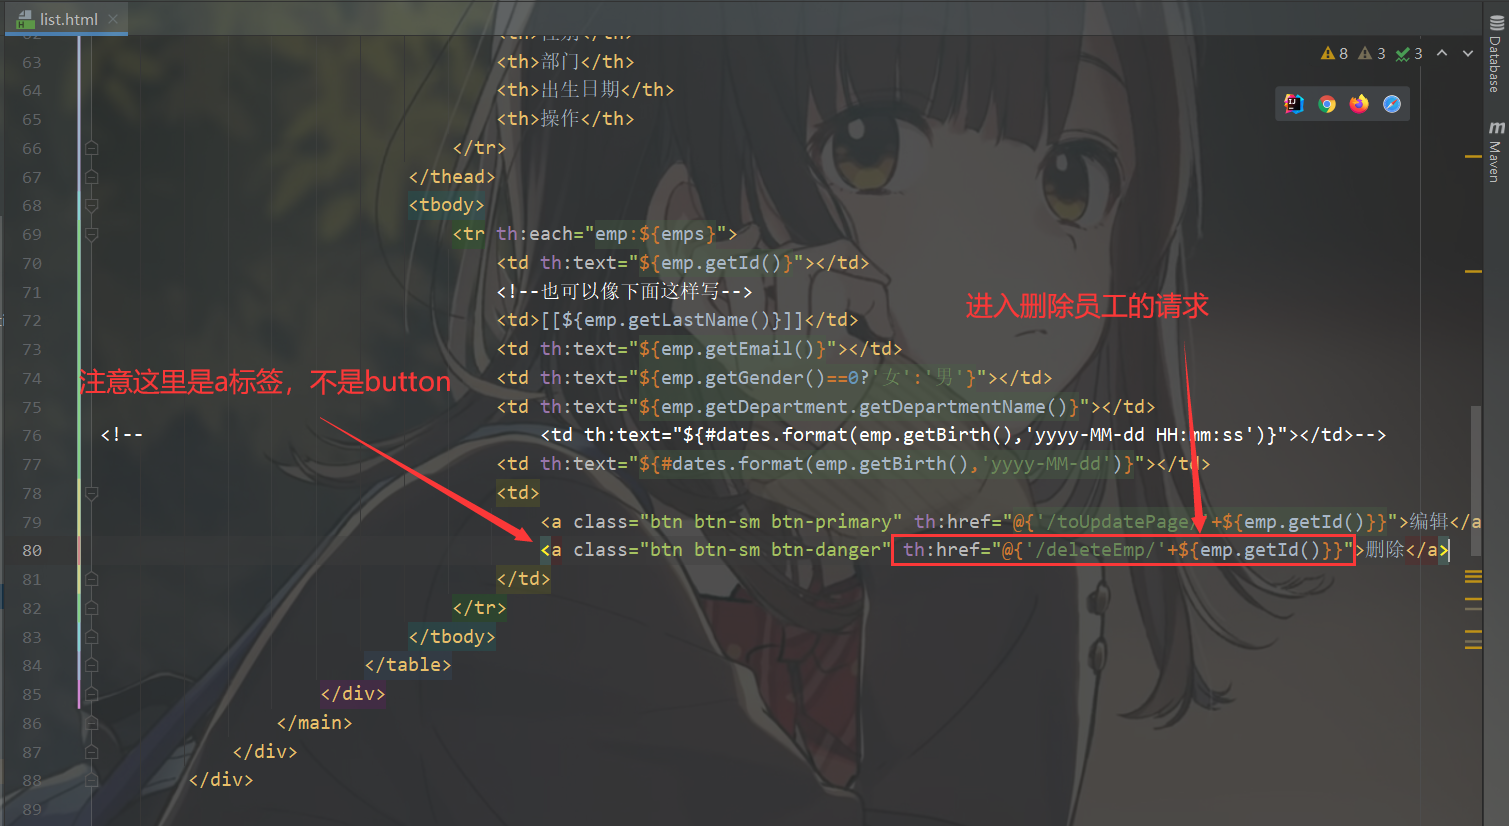
<a class="btn btn-sm btn-danger" th:href="@{'/deleteEmp/'+${emp.getId()}}">删除</a>
提交删除请求

//这里是删除员工信息的请求 @GetMapping("/deleteEmp/{id}") public String deleteEmp(@PathVariable("id")Integer id){ employeeDao.deleteEmployeeById(id); return "redirect:/emps"; }
到此增删改查搞定
404
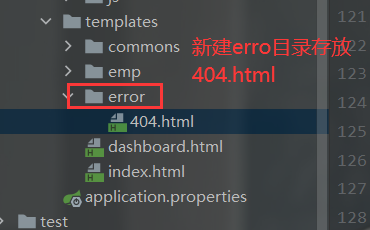
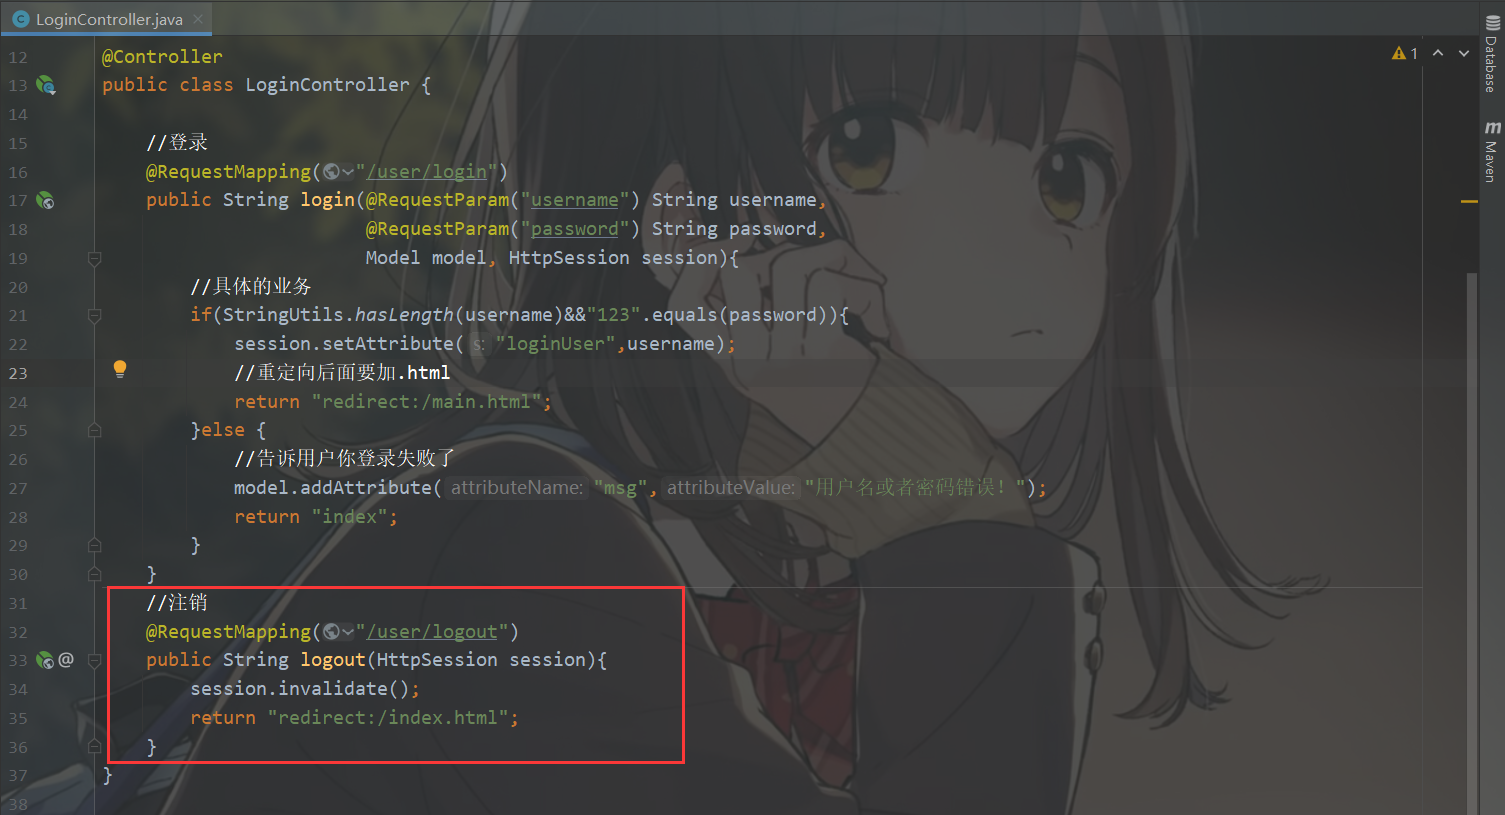
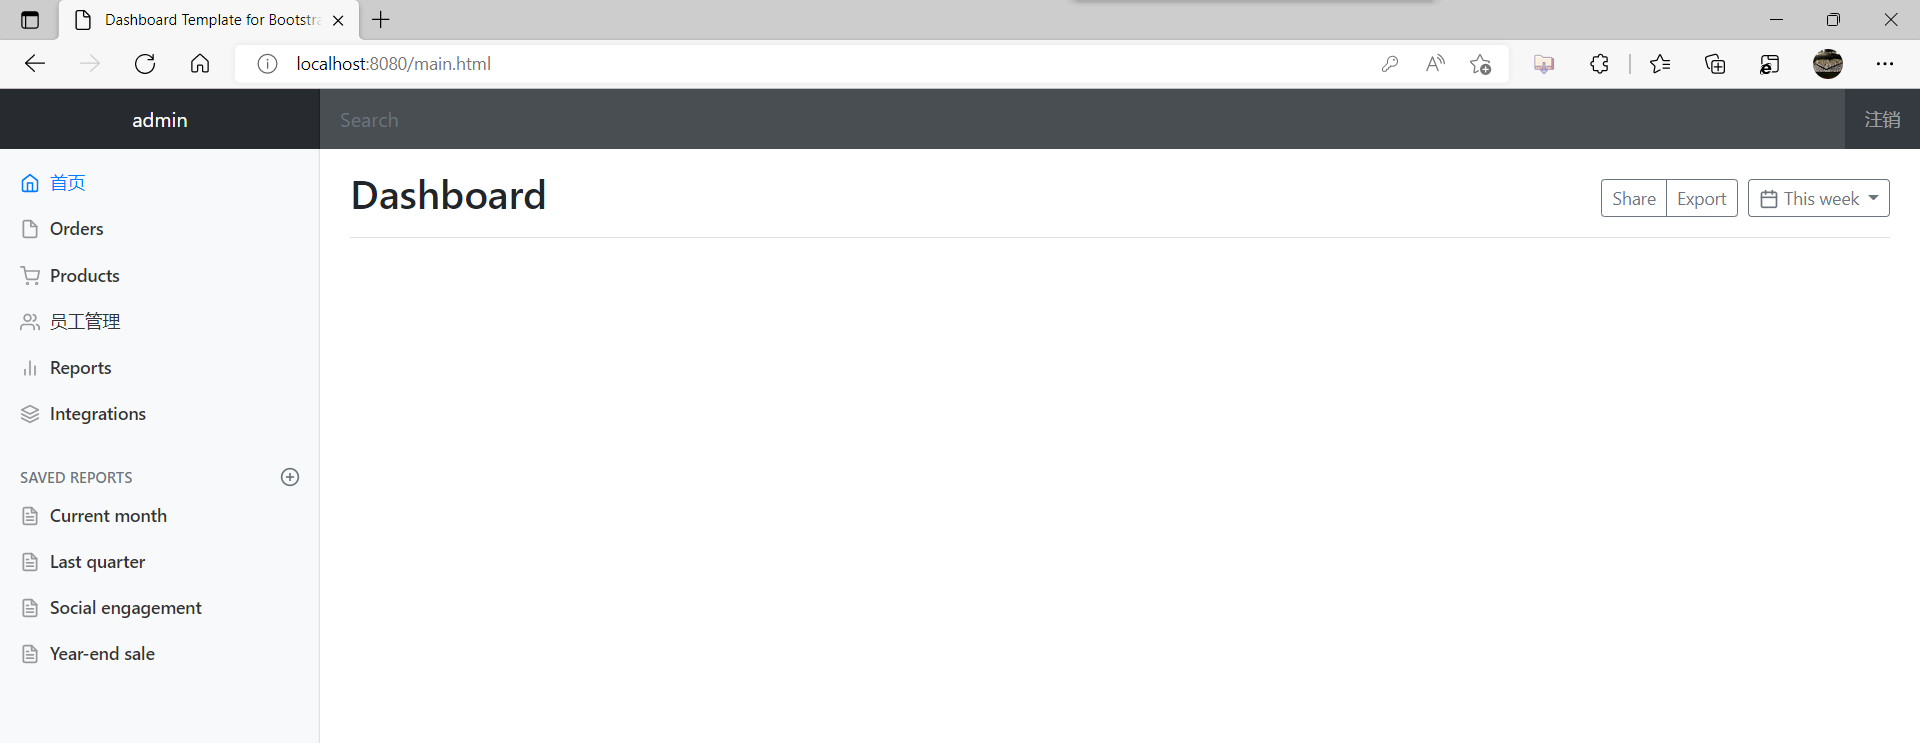
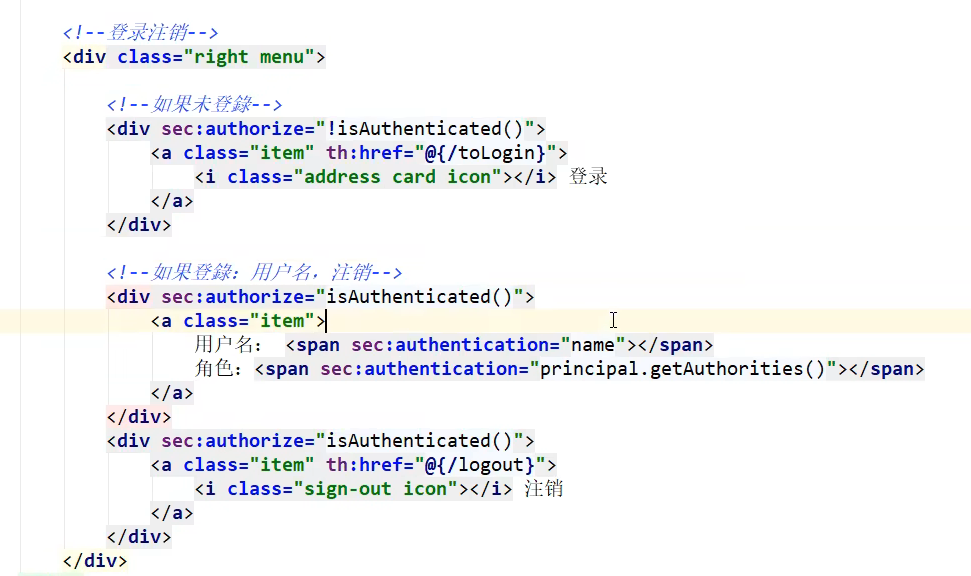
6.9、登录用户注销功能
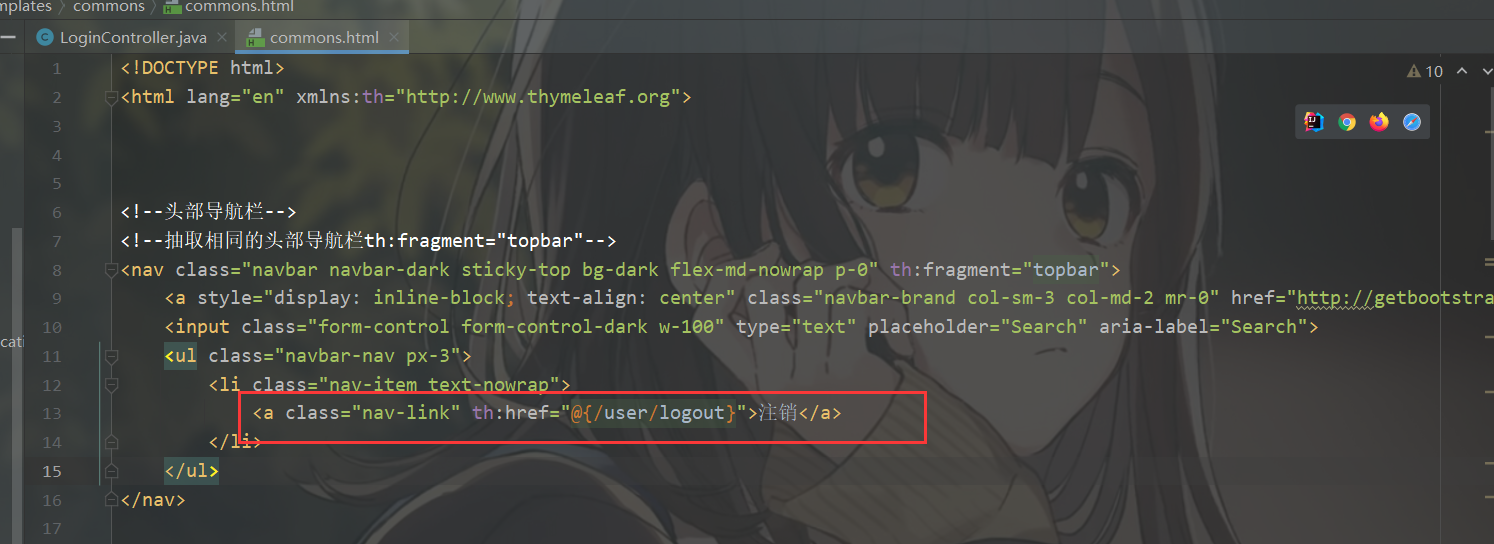
<ul class="navbar-nav px-3"> <li class="nav-item text-nowrap"> <a class="nav-link" th:href="@{/user/logout}">注销</a> </li> </ul>
controller层编写从session中移除用户
7、前端
前端模板:别人写好的,我们拿来改成自己需要的
- bootstrap后台模板
- 模板之家
- X-admin
前端框架:组件,自己手动组合拼接!
- Bootstrap,Layui,stemantic-ui
- element ui,Mint UI,WeUI
- iView UI,vant UI,Flutter
ElementUI
layui
8、整合JDBC
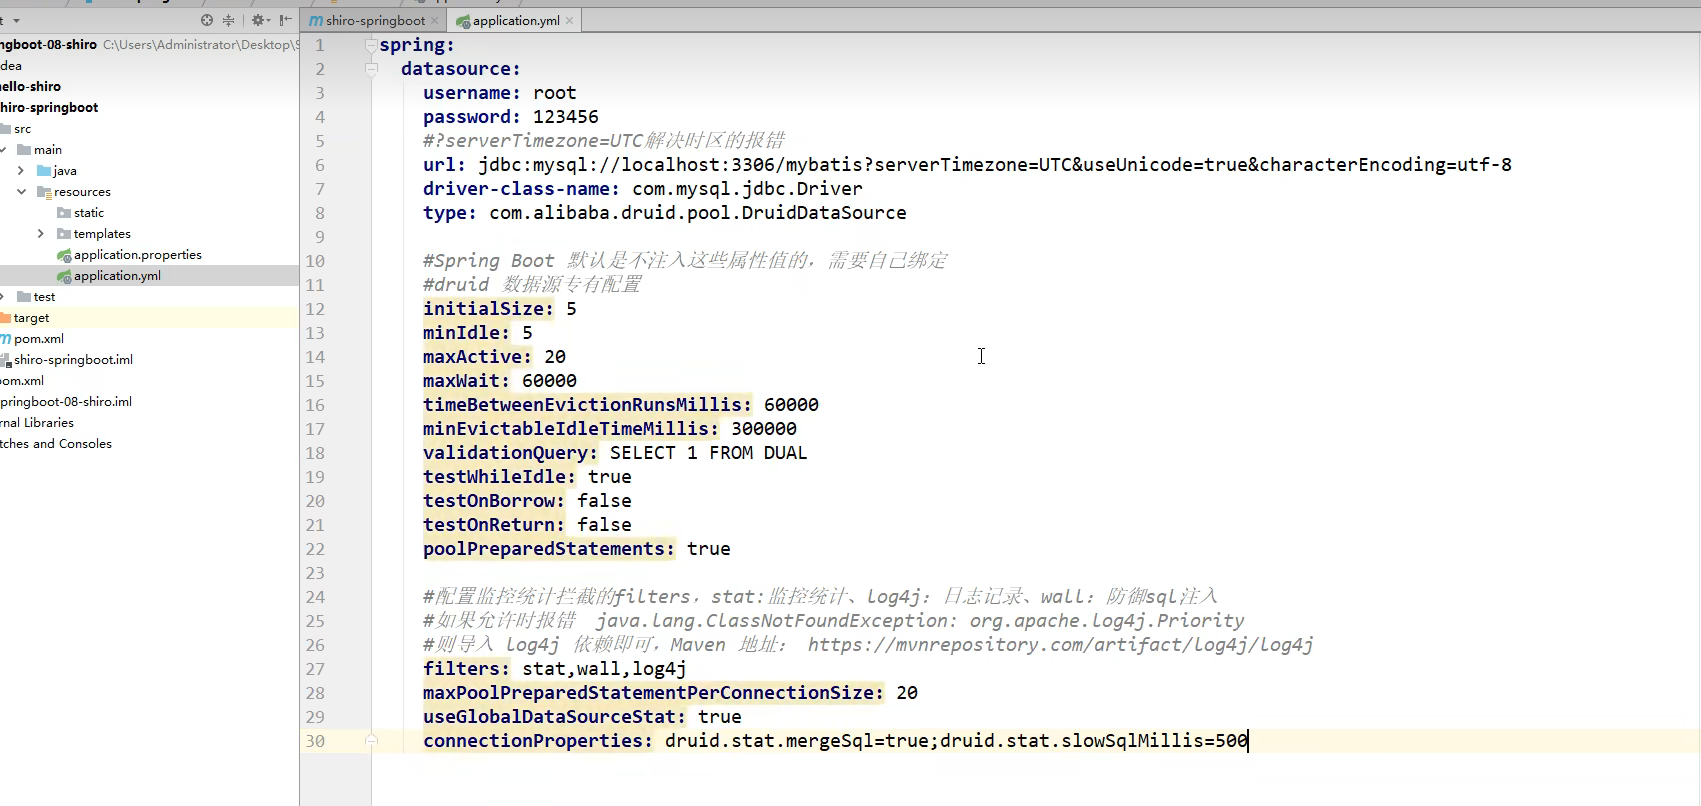
yaml配置jdbc数据源
spring: datasource: username: root password: 123456 # jdbc:mysql://localhost:3306/mybatis?useSSL=true&useUnicode=true&characterEncoding=UTF-8 # 假如报时区问题是因为安装MySQL的时候没有在my.ini里面设置时区 url: jdbc:mysql://localhost:3306/mybatis?useUnicode=true&characterEncoding=UTF-8 driver-class-name: com.mysql.cj.jdbc.Driver
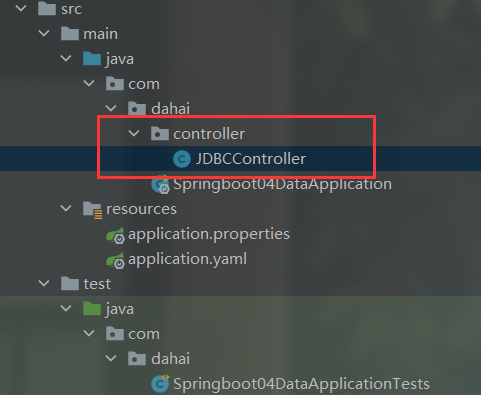
JDBCController类
package com.dahai.controller; import org.springframework.beans.factory.annotation.Autowired; import org.springframework.jdbc.core.JdbcTemplate; import org.springframework.web.bind.annotation.GetMapping; import org.springframework.web.bind.annotation.PathVariable; import org.springframework.web.bind.annotation.RestController; import java.util.List; import java.util.Map; @RestController public class JDBCController { @Autowired JdbcTemplate jdbcTemplate; //查询数据库所有的数据并且显示到前端 //没有实体类,数据库中的东西,怎么获取? Map @GetMapping("/userList") public List<Map<String,Object>> userList(){ String sql = "select * from user"; List<Map<String, Object>> list_maps = jdbcTemplate.queryForList(sql); return list_maps; } //添加用户 @GetMapping("/addUser") public String addUser(){ String sql = "insert into user(id,name,pwd) values (8,'小明','123456')"; jdbcTemplate.update(sql); return "addUser-ok"; } //修改用户 @GetMapping("/updateUser/{id}") public String updateUser(@PathVariable("id") int id){ String sql = "update user set name=?,pwd=? where id="+id; //封装 Object[] objects = new Object[2]; objects[0] = "小明2"; objects[1] = "123"; jdbcTemplate.update(sql,objects); return "updateUser-ok"; } //删除用户 @GetMapping("/deleteUser/{id}") public String deleteUser(@PathVariable("id")int id){ String sql = "delete from user where id = ?"; jdbcTemplate.update(sql,id); return "deleteUser-ok"; } }
9、DruidDataSource数据源
-
Spring Boot 2.0以上默认使用Hikari 数据源,可以说Hikari 与Driud都是当前Java Web上最优秀的数据源,我们来重点介绍Spring Boot如何集成Druid数据源,如何实现数据库监控。
-
HikariDataSource号称Java WEB当前速度最快的数据源,相比于传统的C3PO、DBCP、 Tomcat,jdbc等连接池更加优秀;
Druid后台登录配置
package com.dahai.config; import com.alibaba.druid.pool.DruidDataSource; import com.alibaba.druid.support.http.StatViewServlet; import com.alibaba.druid.support.http.WebStatFilter; import org.apache.catalina.filters.WebdavFixFilter; import org.springframework.boot.context.properties.ConfigurationProperties; import org.springframework.boot.web.servlet.FilterRegistrationBean; import org.springframework.boot.web.servlet.ServletRegistrationBean; import org.springframework.context.annotation.Bean; import org.springframework.context.annotation.Configuration; import javax.sql.DataSource; import java.util.HashMap; import java.util.Map; @Configuration public class DruidConfig { @ConfigurationProperties(prefix = "spring.datasource") @Bean public DataSource druidDataSource(){ return new DruidDataSource(); } //后台监控:web.xml 注册ServletRegistrationBean,用@Bean解决 //因为SpringBoot 内置了servlet容器, 所以没有web.xmL ,替代方法: ServletRegistrationBean @Bean public ServletRegistrationBean statViewServlet(){ ServletRegistrationBean<StatViewServlet> bean = new ServletRegistrationBean<>(new StatViewServlet(), "/druid/*"); //后台需要有人登陆,账号密码配置 HashMap<String, String> initParameters = new HashMap<>(); //增加配置 //initParameters.put("key","value"); initParameters.put("loginUsername","admin");//注意这里的参数名字loginUsername是只能这样写,不能写成别的 initParameters.put("loginPassword","123");//loginPassword同上 //允许谁可以访问 initParameters.put("allow","");//如果这里的value为空,表示所有人可以访问,一般value设置为空就可以了 //initParameters.put("allow","localhost");//这里的value为localhost,表示只有本机可以访问 //禁止谁可以访问 //initParameters.put("dahai","192.168.11.123");//表示禁止192.168.11.123这个ip地址访问 bean.setInitParameters(initParameters);//设置初始化参数 return bean; } //springboot注册一个filter(过滤器) @Bean public FilterRegistrationBean webStatFilter(){ FilterRegistrationBean bean = new FilterRegistrationBean(); bean.setFilter(new WebStatFilter()); //可以过滤哪些请求呢? Map<String,String> initParameters = new HashMap<>(); //这些东西不进行统计~ initParameters.put("exclusions","*.js,*.css,/druid/*"); bean.setInitParameters(initParameters); return bean; } }
运行
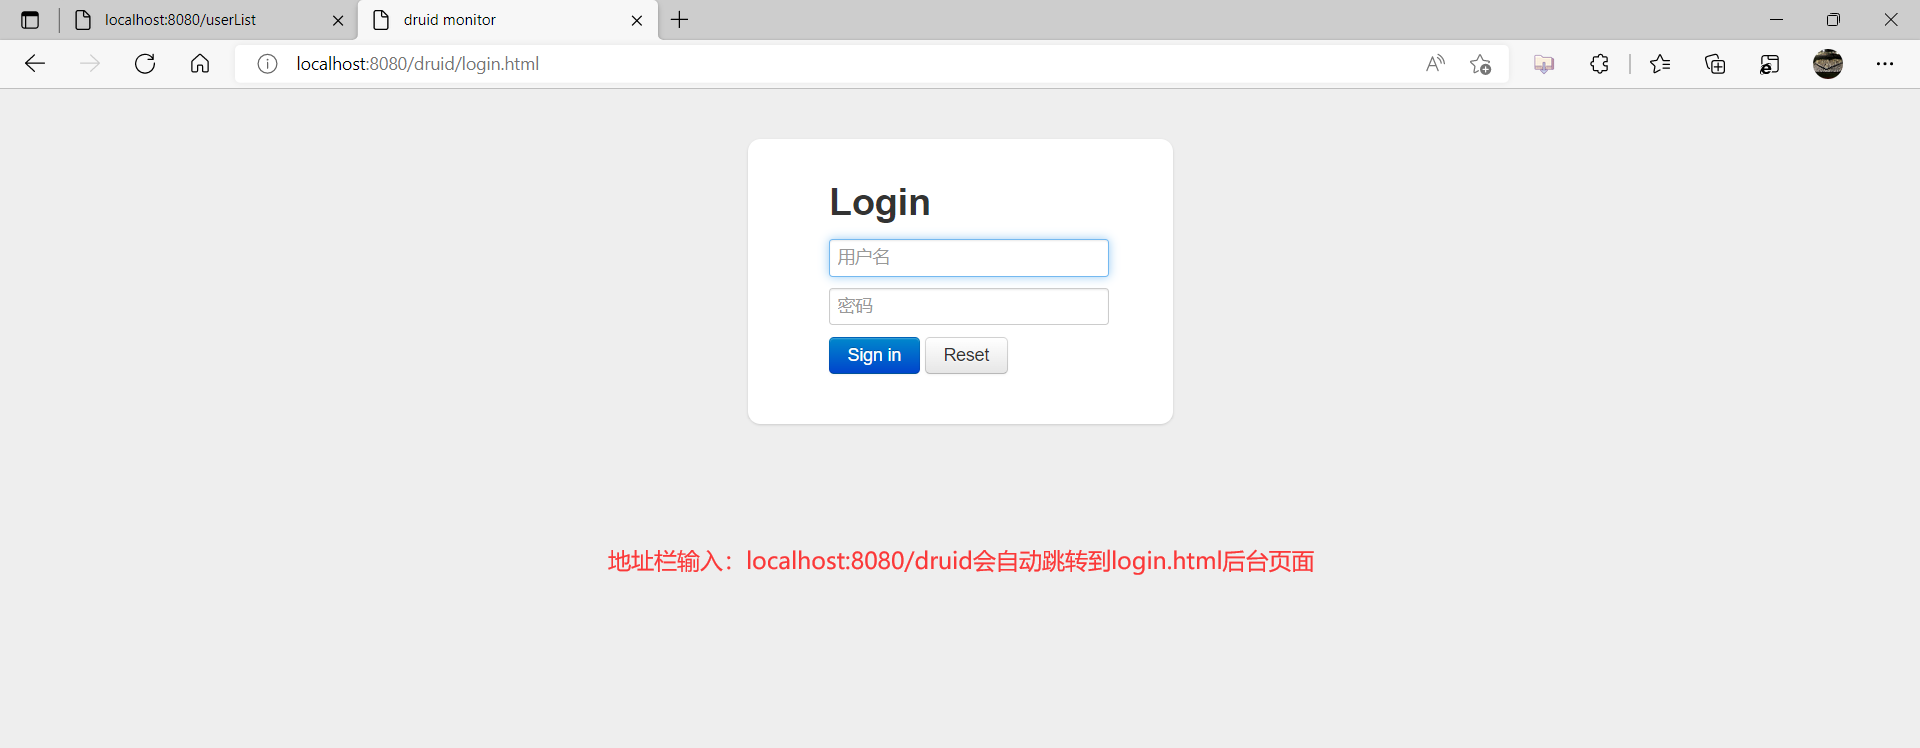
输入账号和密码
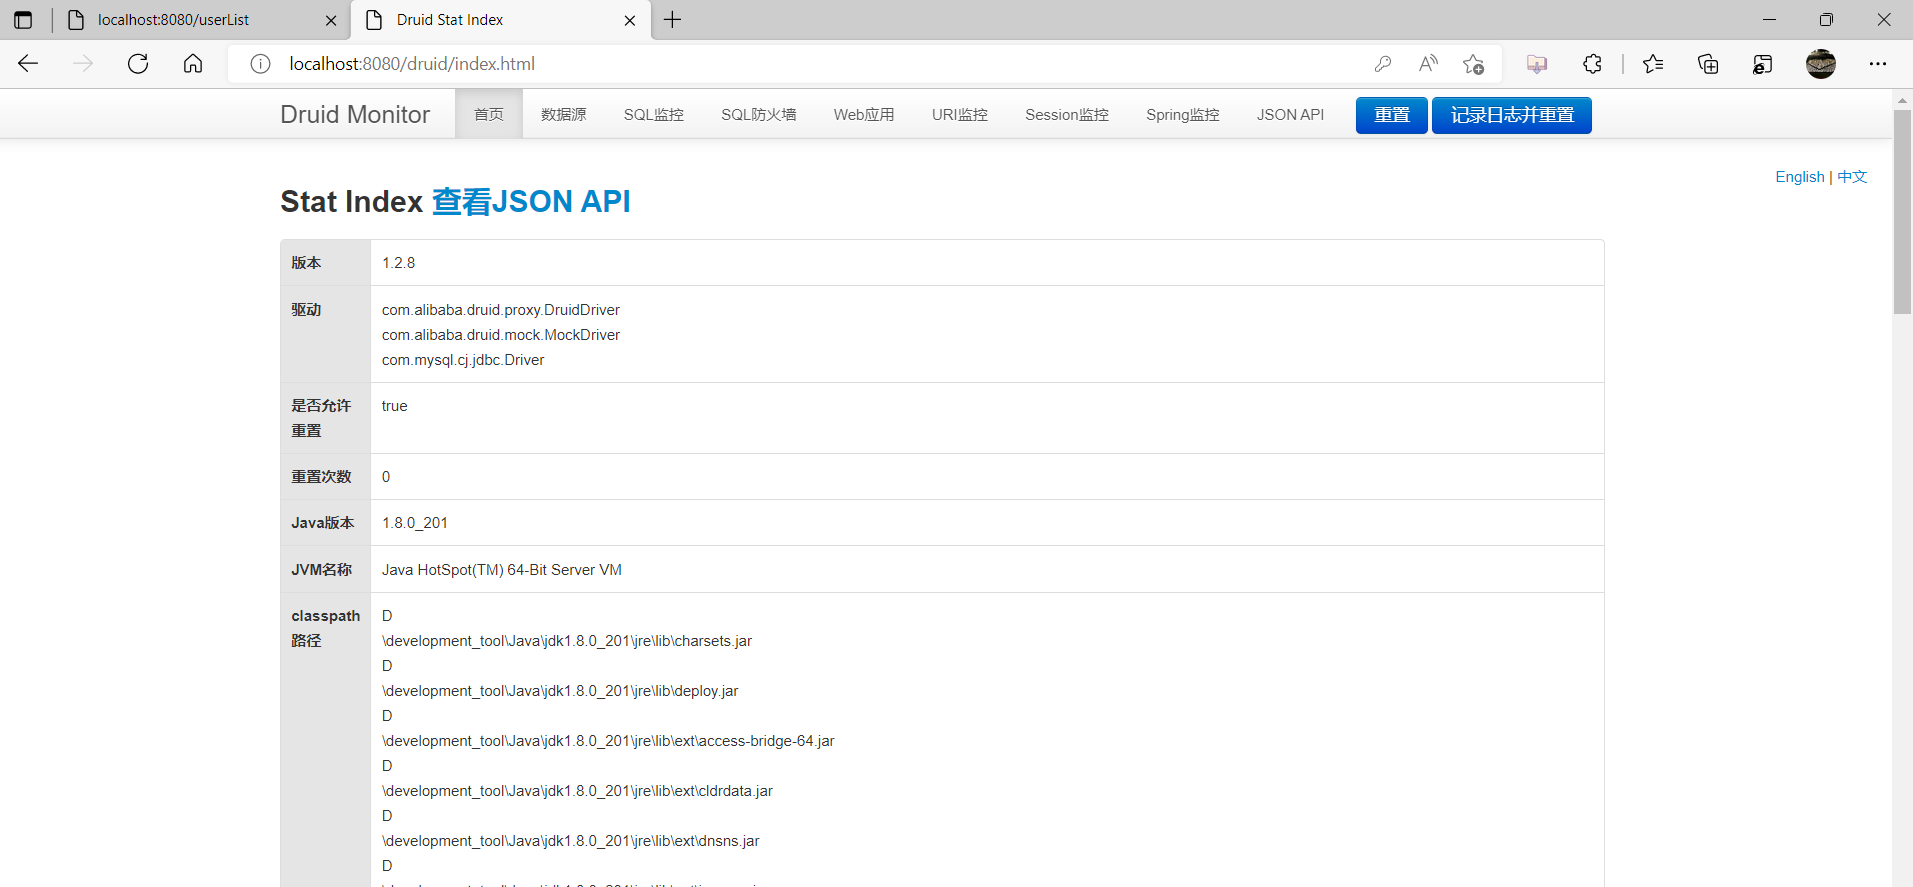
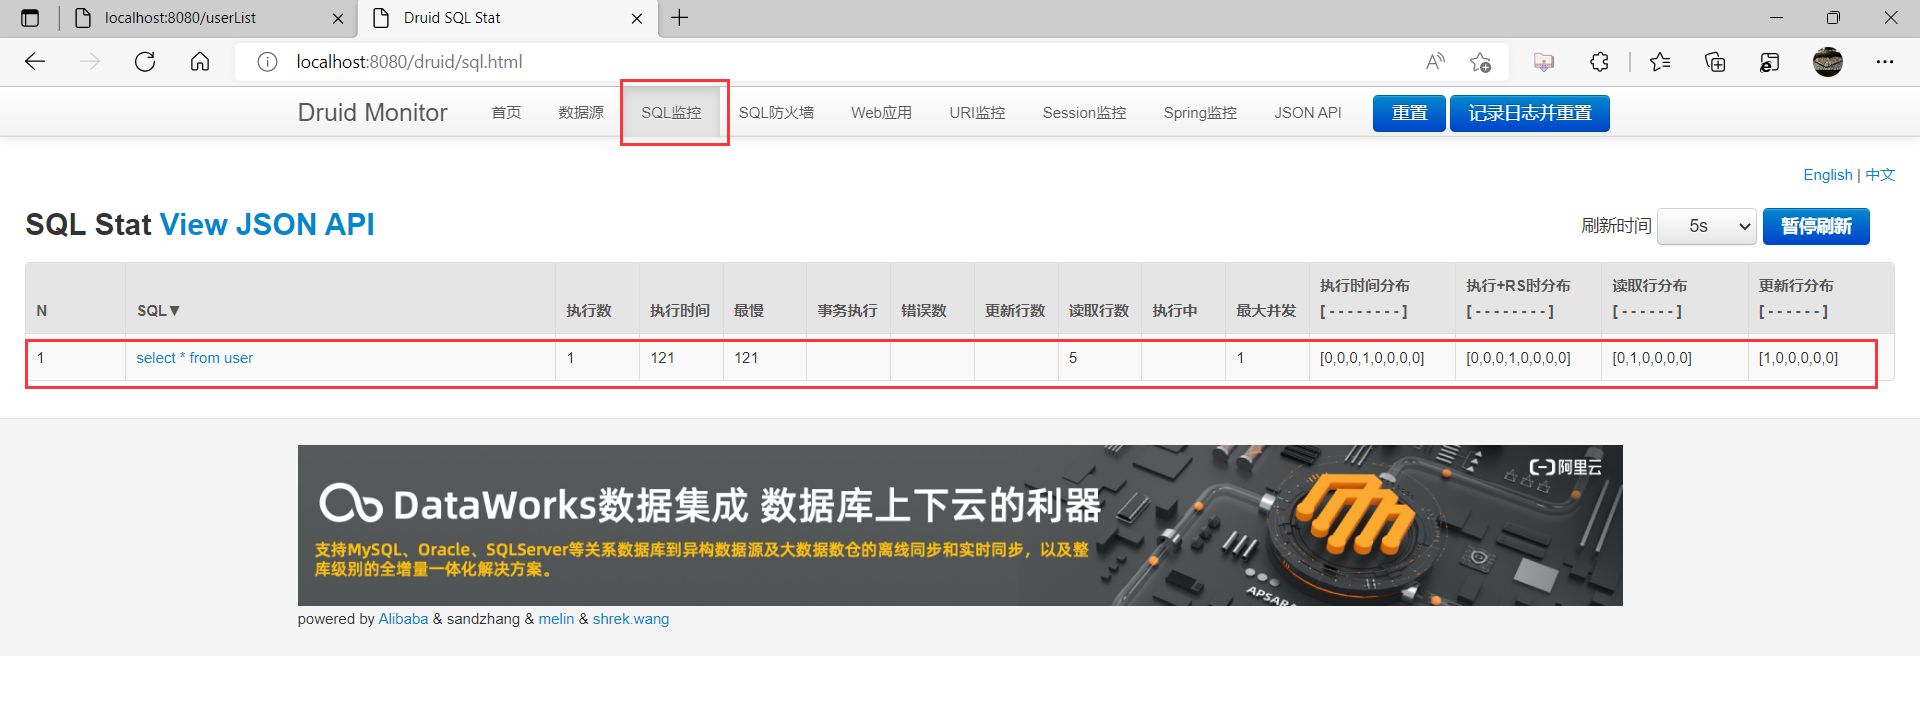
在另一个页面去访问http://localhost:8080/userList
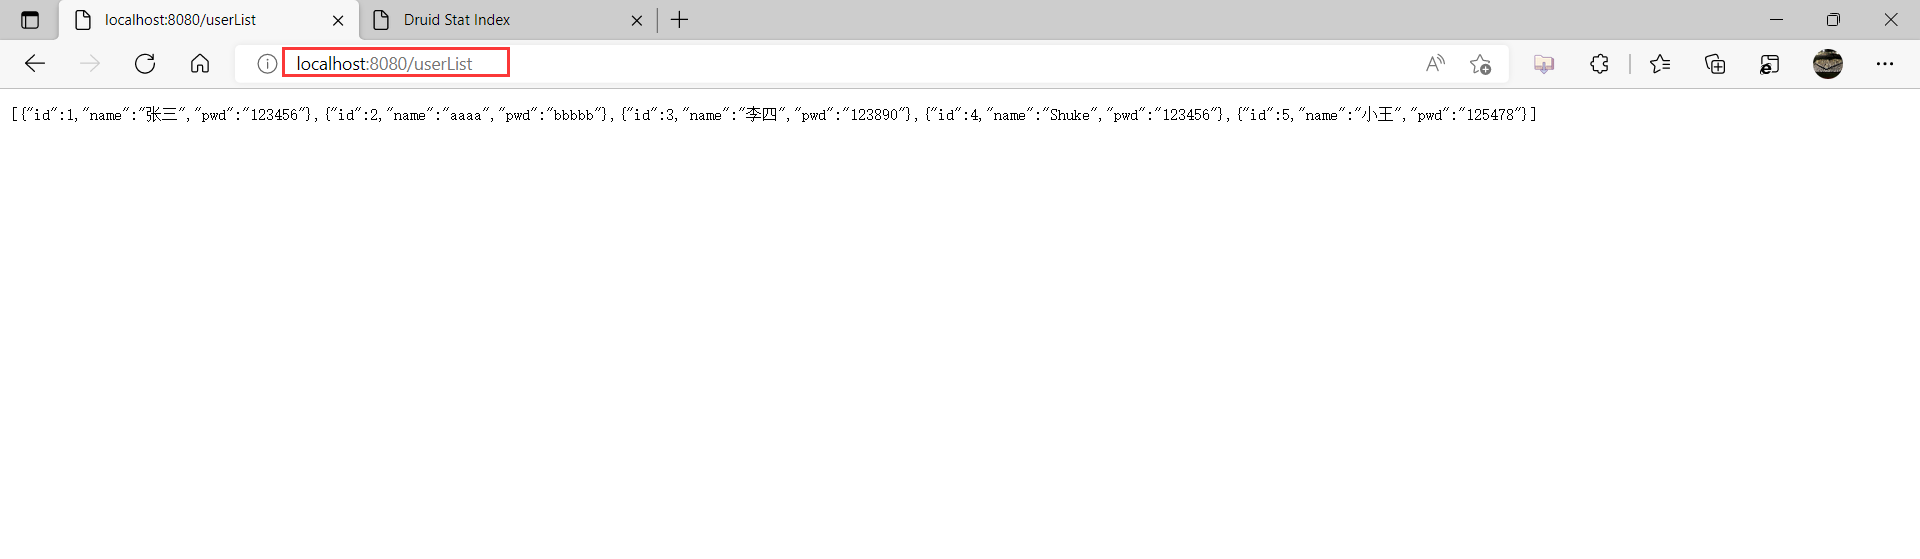
可以在后台的SQL监控页面看到刚刚执行的sql语句
配置log4j的tips
因为Druid是支持log4j的

如果出现下面这样,是因为没有在resource下面配置log4j.properties
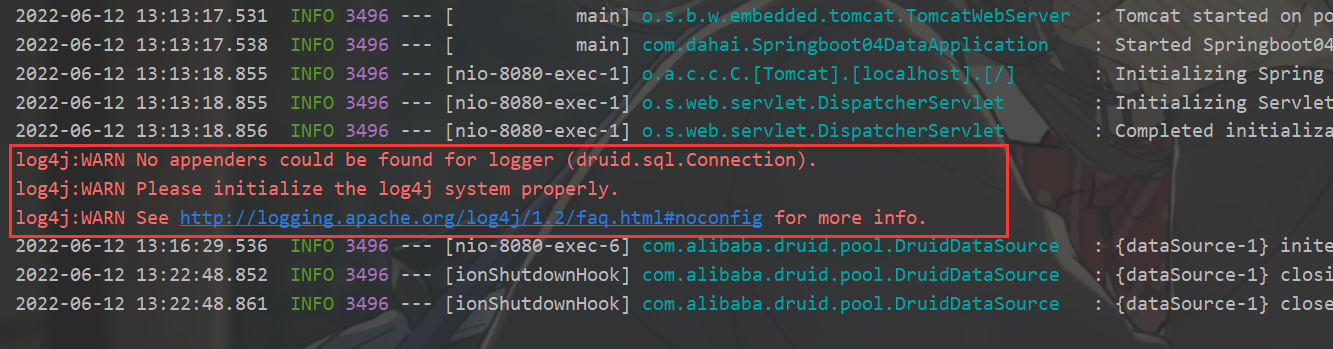
- 这个问题可选择忽略,也可以选择解决,下面是解决方案
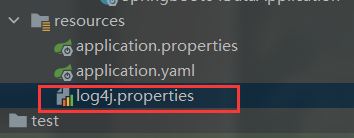
log4j.properties
#将等级为DEBUG的日志信息输出到console和file这两个目的地,console和file的定义在下面的代码 log4j.rootLogger=DEBUG,console,file #控制台输出的相关设置 log4j.appender.console = org.apache.log4j.ConsoleAppender log4j.appender.console.Target = System.out log4j.appender.console.Threshold=DEBUG log4j.appender.console.layout = org.apache.log4j.PatternLayout log4j.appender.console.layout.ConversionPattern=[%c]-%m%n #文件输出的相关设置 log4j.appender.file = org.apache.log4j.RollingFileAppender log4j.appender.file.File=./log/logFile.log log4j.appender.file.MaxFileSize=10mb log4j.appender.file.Threshold=DEBUG log4j.appender.file.layout=org.apache.log4j.PatternLayout log4j.appender.file.layout.ConversionPattern=[%p][%d{yy-MM-dd}][%c]%m%n #日志输出级别 log4j.logger.org.mybatis=DEBUG log4j.logger.java.sql=DEBUG log4j.logger.java.sql.Statement=DEBUG log4j.logger.java.sql.ResultSet=DEBUG log4j.logger.java.sql.PreparedStatement=DEBUG
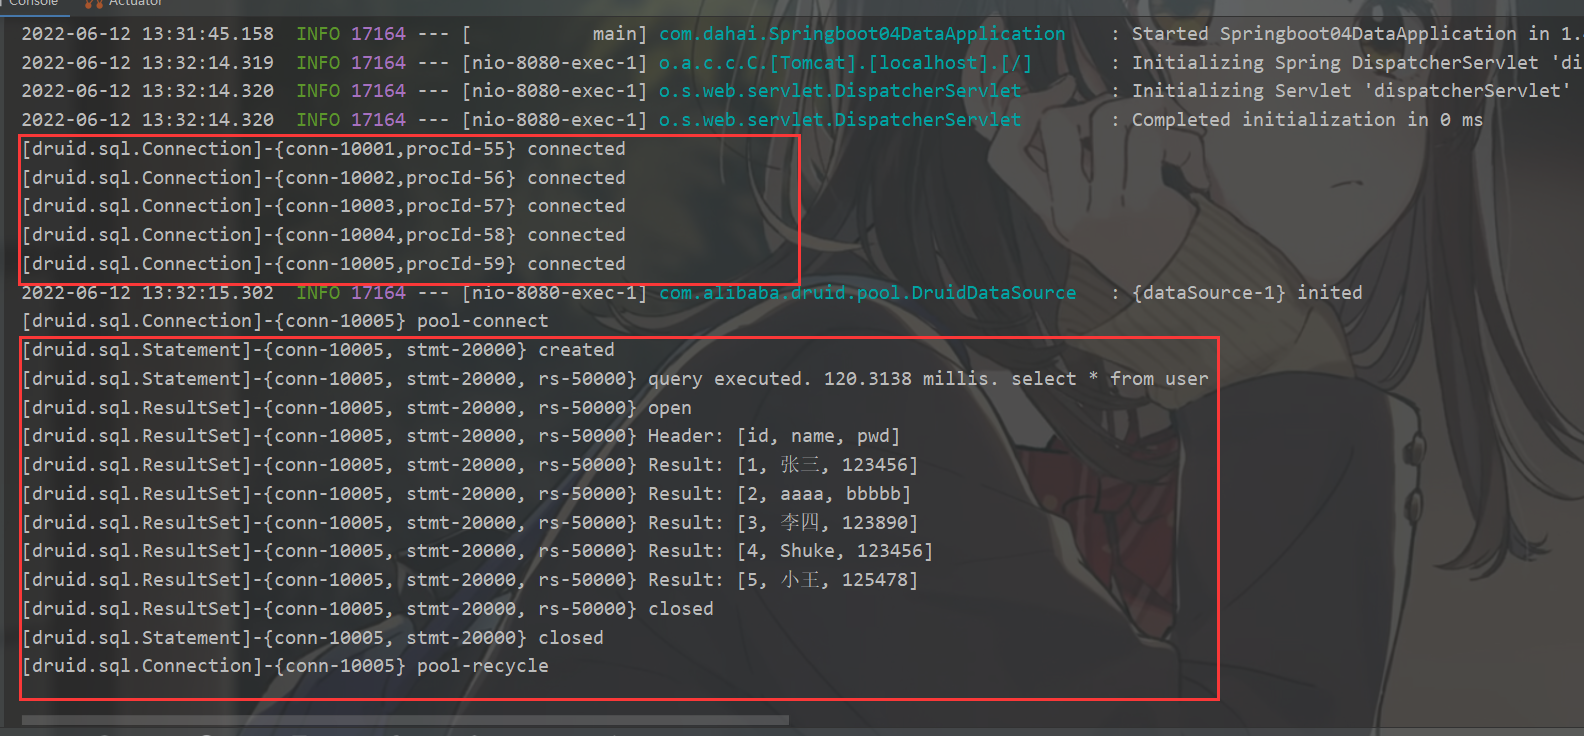
再次运行发现没有错误
10、整合Mybatis
前期工作
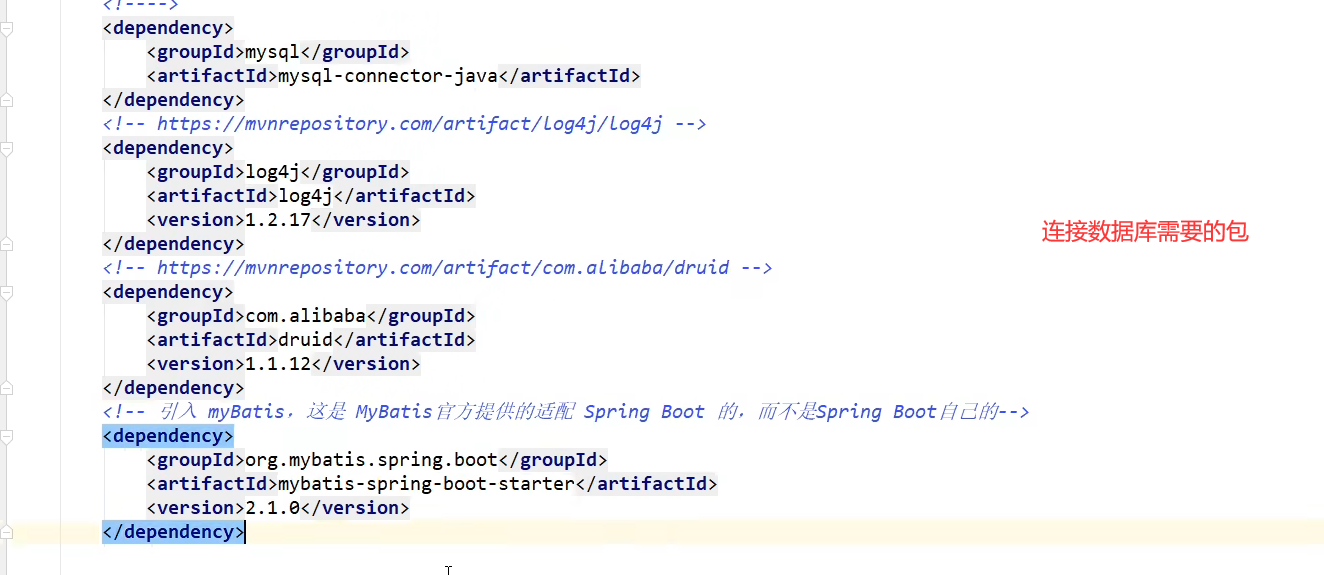
整合包
- mybatis-spring-boot-starter
去maven仓库找mybatis-spring-boot-starter
<!--mybatis-spring-boot-starter 整合--> <dependency> <groupId>org.mybatis.spring.boot</groupId> <artifactId>mybatis-spring-boot-starter</artifactId> <version>2.2.2</version> </dependency>
这次用application.properties来配置数据源(用yaml的方式也是一样的)
spring.datasource.username=root spring.datasource.password=123456 spring.datasource.url=jdbc:mysql://localhost:3306/mybatis?useUnicode=true&characterEncoding=UTF-8 spring.datasource.driver-class-name=com.mysql.cj.jdbc.Driver
测试类
package com.dahai; import org.junit.jupiter.api.Test; import org.springframework.beans.factory.annotation.Autowired; import org.springframework.boot.test.context.SpringBootTest; import javax.sql.DataSource; import java.sql.SQLException; @SpringBootTest class Springboot05MybatisApplicationTests { @Autowired DataSource dataSource; @Test void contextLoads() throws SQLException { System.out.println(dataSource.getClass()); System.out.println(dataSource.getConnection()); } }
成功输出
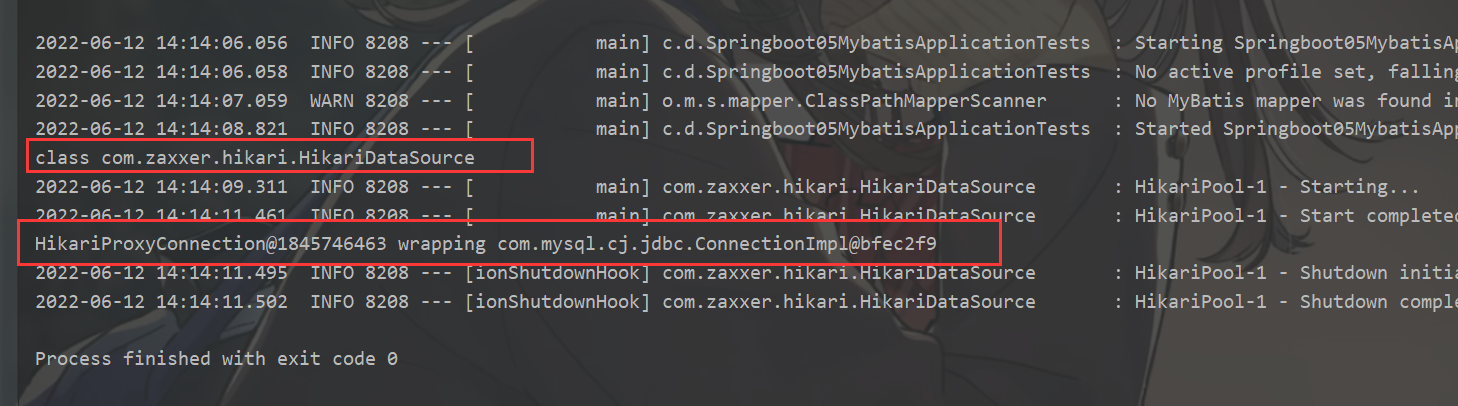
说明连接数据库是没问题了,可以开始后面的工作
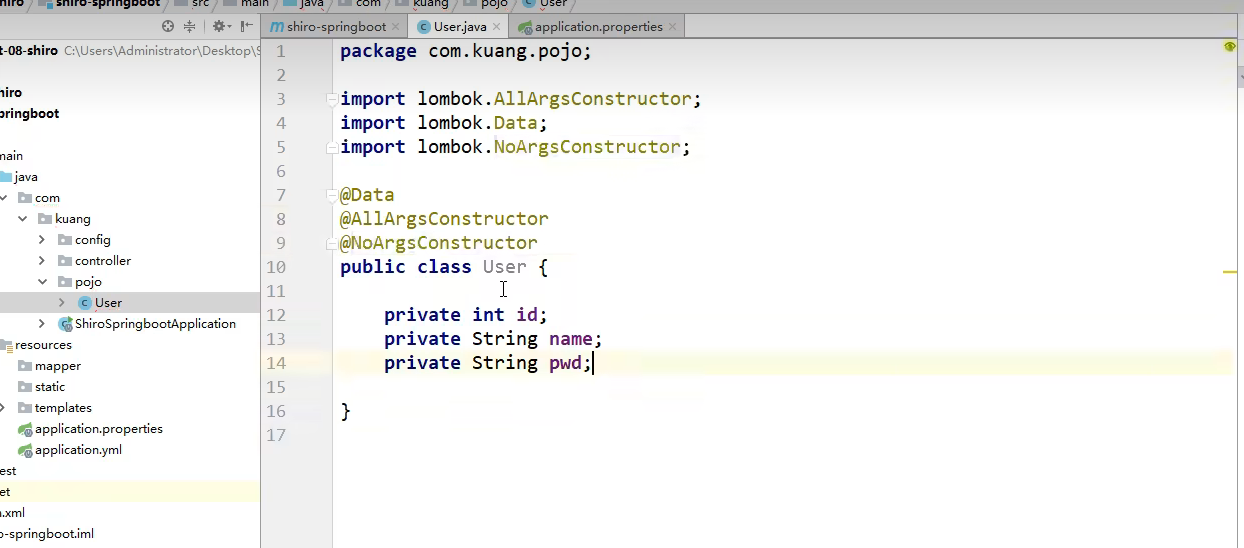
pojo
User类
package com.dahai.pojo; import lombok.AllArgsConstructor; import lombok.Data; import lombok.NoArgsConstructor; @Data @AllArgsConstructor @NoArgsConstructor public class User { private int id; private String name; private String pwd; }
mapper
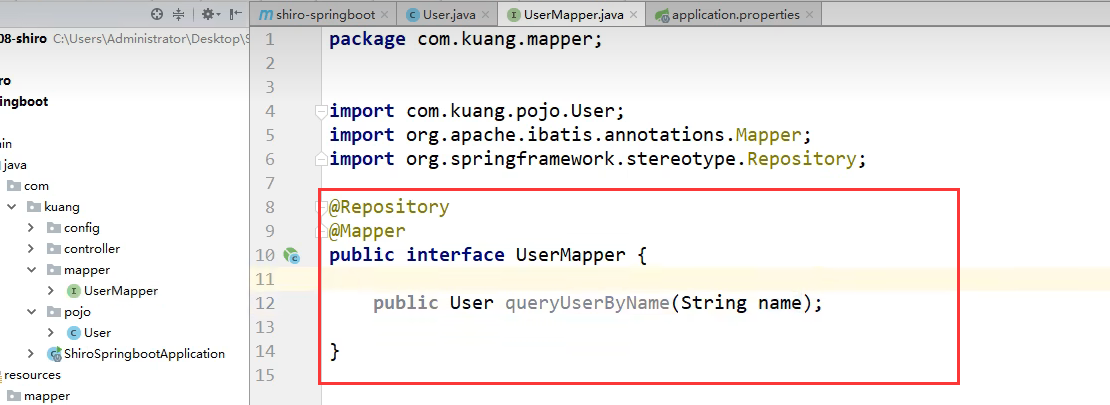
UserMapper类
package com.dahai.mapper; import com.dahai.pojo.User; import org.apache.ibatis.annotations.Mapper; import org.springframework.stereotype.Repository; import java.util.List; // 这个注解表示了这是一个 mybatis 的 mapper 类 @Mapper @Repository public interface UserMapper { List<User> queryUserList(); User queryUserById(int id); int addUser(User user); int updateUser(User user); int deleteUser(int id); }
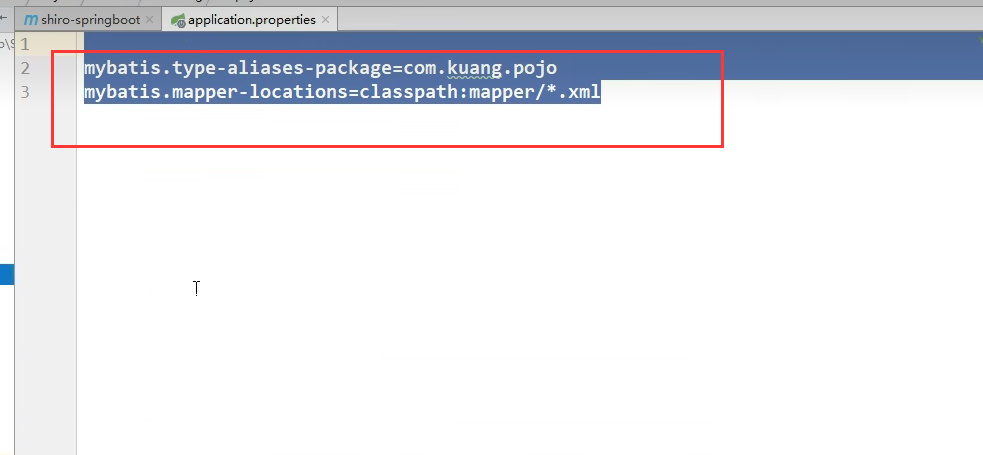
application.properties
spring.datasource.username=root spring.datasource.password=123456 spring.datasource.url=jdbc:mysql://localhost:3306/mybatis?useUnicode=true&characterEncoding=UTF-8 spring.datasource.driver-class-name=com.mysql.cj.jdbc.Driver # 整合mybatis mybatis.type-aliases-package=com.dahai.pojo mybatis.mapper-locations=classpath:mybatis/mapper/*.xml
mapper.xml
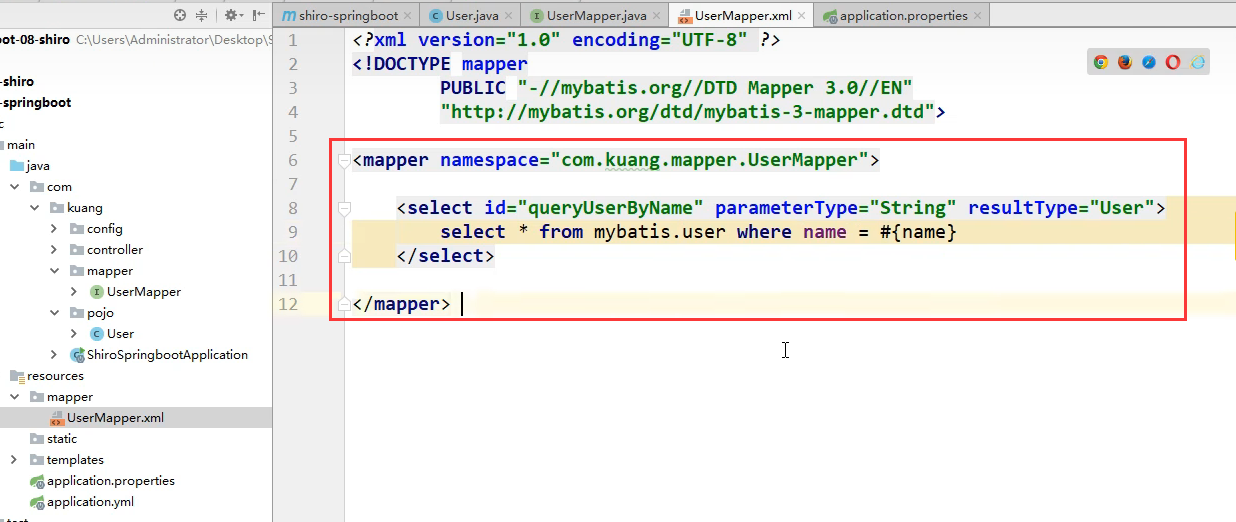
<?xml version="1.0" encoding="UTF-8" ?> <!DOCTYPE mapper PUBLIC "-//mybatis.org//DTD Mapper 3.0//EN" "http://mybatis.org/dtd/mybatis-3-mapper.dtd"> <mapper namespace="com.dahai.mapper.UserMapper"> <select id="queryUserList" resultType="User"> select * from mybatis.user; </select> <select id="queryUserById" resultType="User"> select * from mybatis.user where id = #{id}; </select> <insert id="addUser" parameterType="User"> insert into mybatis.user (id, name, pwd) values (#{id},#{name},#{pwd}); </insert> <update id="updateUser" parameterType="User"> update mybatis.user set name=#{name},pwd = #{pwd} where id = #{id}; </update> <delete id="deleteUser" parameterType="int"> delete from mybatis.user where id = #{id} </delete> </mapper>
controller
package com.dahai.controller; import com.dahai.mapper.UserMapper; import com.dahai.pojo.User; import org.springframework.beans.factory.annotation.Autowired; import org.springframework.web.bind.annotation.GetMapping; import org.springframework.web.bind.annotation.RestController; import java.util.List; @RestController public class UserController { @Autowired private UserMapper userMapper; @GetMapping("/queryUserList") public List<User> queryUserList() { List<User> userList = userMapper.queryUserList(); for (User user : userList) { System.out.println(user); } return userList; } //添加一个用户 @GetMapping("/addUser") public String addUser() { userMapper.addUser(new User(7,"阿毛","123456")); return "ok"; } //修改一个用户 @GetMapping("/updateUser") public String updateUser() { userMapper.updateUser(new User(7,"阿毛","123456")); return "ok"; } @GetMapping("/deleteUser") public String deleteUser() { userMapper.deleteUser(7); return "ok"; } }
11、SpringSecurity(安全)
在web开发中,安全第一位!
- 过滤器
- 拦截器
功能性需求:否
做网站:安全应该在什么时候考虑?设计之初!
市面上的安全框架
- shiro
- SpringSecurity
springboot官网:https://spring.io/projects/spring-security
摘要:
Spring Security is a powerful and highly customizable authentication and access-controlframework.
翻译:Spring Security是一个功能强大且高度可定制的身份验证和访问控制框架。
1、演示
创建一个普通的springboot的空项目
pom.xml文件需要引入的依赖
<?xml version="1.0" encoding="UTF-8"?> <project xmlns="http://maven.apache.org/POM/4.0.0" xmlns:xsi="http://www.w3.org/2001/XMLSchema-instance" xsi:schemaLocation="http://maven.apache.org/POM/4.0.0 https://maven.apache.org/xsd/maven-4.0.0.xsd"> <modelVersion>4.0.0</modelVersion> <parent> <groupId>org.springframework.boot</groupId> <artifactId>spring-boot-starter-parent</artifactId> <version>2.7.0</version> <relativePath/> <!-- lookup parent from repository --> </parent> <groupId>com.dahai</groupId> <artifactId>springboot-06-security</artifactId> <version>0.0.1-SNAPSHOT</version> <name>springboot-06-security</name> <description>springboot-06-security</description> <properties> <java.version>1.8</java.version> </properties> <dependencies> <!--spring-boot-starter-security--> <dependency> <groupId>org.springframework.boot</groupId> <artifactId>spring-boot-starter-security</artifactId> </dependency> <dependency> <groupId>org.springframework.boot</groupId> <artifactId>spring-boot-starter-web</artifactId> </dependency> <dependency> <groupId>org.springframework.boot</groupId> <artifactId>spring-boot-starter-test</artifactId> <scope>test</scope> </dependency> <!--thymeleaf模板,都是基于thymeleaf3.x开发的--> <dependency> <groupId>org.thymeleaf</groupId> <artifactId>thymeleaf-spring5</artifactId> </dependency> <dependency> <groupId>org.thymeleaf.extras</groupId> <artifactId>thymeleaf-extras-java8time</artifactId> </dependency> </dependencies> <build> <plugins> <plugin> <groupId>org.springframework.boot</groupId> <artifactId>spring-boot-maven-plugin</artifactId> </plugin> </plugins> </build> </project>
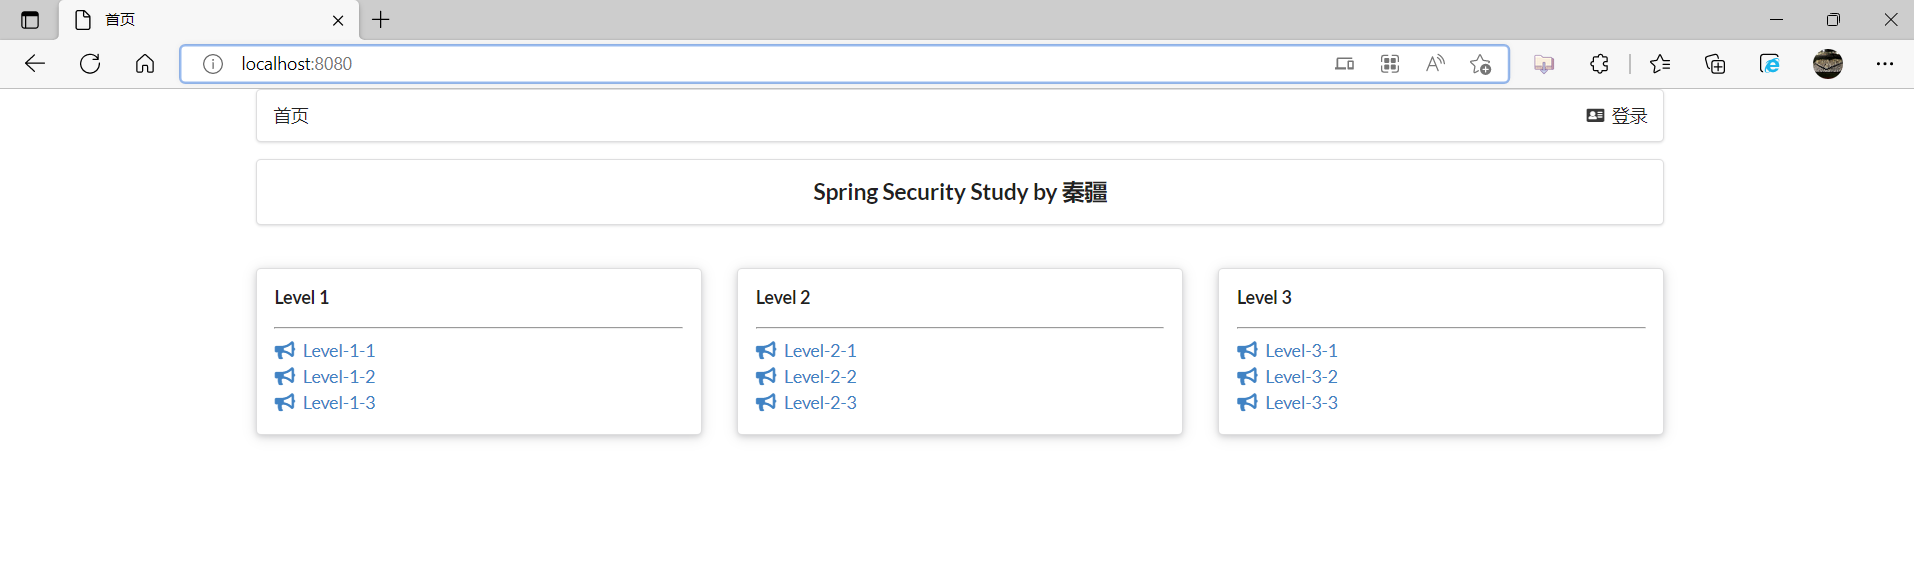
RouterController(页面跳转)
package com.dahai.controller; import org.springframework.stereotype.Controller; import org.springframework.web.bind.annotation.PathVariable; import org.springframework.web.bind.annotation.RequestMapping; @Controller public class RouterController { @RequestMapping({"/","/index"}) public String index(){ return "index"; } @RequestMapping("/toLogin") public String toLogin(){ return "views/login"; } @RequestMapping("/level1/{id}") public String level1(@PathVariable("id") int id){ return "views/level1/"+id; } @RequestMapping("/level2/{id}") public String level2(@PathVariable("id") int id){ return "views/level2/"+id; } @RequestMapping("/level3/{id}") public String level3(@PathVariable("id") int id){ return "views/level3/"+id; } }
浏览器访问:http://localhost:8080/
记住几个类:
- WebSecurityConfigurerAdapter:自定义Security策略
- AuthenticationManagerBuilder:自定义认证策略
- @EnableWebSecurity:开启WebSecurity模式,@Enablexxxx开启某个功能
Spring Security的两个主要目标是“认证"和"授权”(访问控制)
- “认证”(Authentication)
- "授权”(Authorization)
这个概念是通用的,而不是只在Spring Security中存在。
2、权限代码演示
从内存读取数据
固定的骨架
@EnableWebSecurity public class SecurityConfig extends WebSecurityConfigurerAdapter { @Override protected void configure(HttpSecurity http) throws Exception { super.configure(http); } }
在config包新建SecurityConfig类
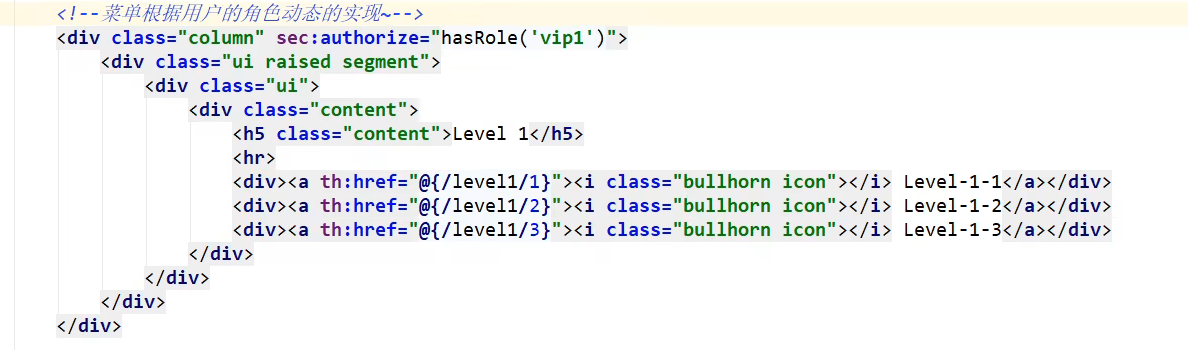
package com.dahai.config; import org.springframework.security.config.annotation.web.builders.HttpSecurity; import org.springframework.security.config.annotation.web.configuration.EnableWebSecurity; import org.springframework.security.config.annotation.web.configuration.WebSecurityConfigurerAdapter; //:AOP:类似拦截器 @EnableWebSecurity public class SecurityConfig extends WebSecurityConfigurerAdapter { @Override protected void configure(HttpSecurity http) throws Exception { //首页所有人可以访问,但是功能页只有对应有权限的人才能访问 //authorizeRequests 认证请求 http.authorizeRequests() .antMatchers("/").permitAll() // vip1用户只能访问/level1/** .antMatchers("/level1/**").hasRole("vip1") // vip2用户只能访问/level2/** .antMatchers("/level2/**").hasRole("vip2") // vip3用户只能访问/level3/** .antMatchers("/level3/**").hasRole("vip3"); // 没有权限默认会到登录页面,需要开启登录的页面 http.formLogin(); } }
再次访问level1页面
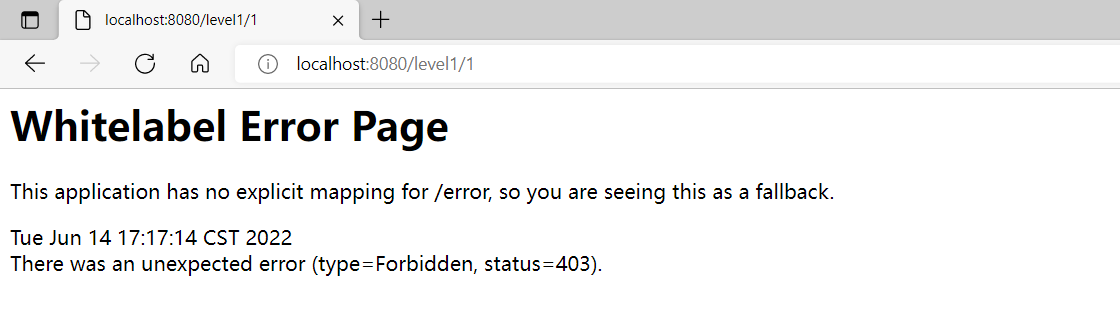
报403错误,表示权限不足
给不同的角色分配不同的权限
认证和授权
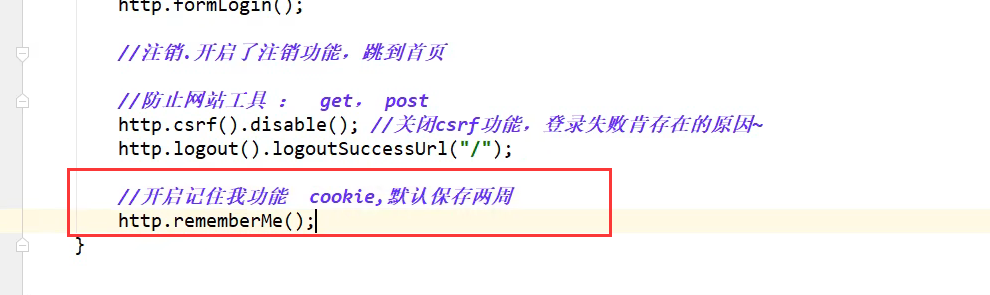
package com.dahai.config; import org.springframework.security.config.annotation.authentication.builders.AuthenticationManagerBuilder; import org.springframework.security.config.annotation.web.builders.HttpSecurity; import org.springframework.security.config.annotation.web.configuration.EnableWebSecurity; import org.springframework.security.config.annotation.web.configuration.WebSecurityConfigurerAdapter; import org.springframework.security.crypto.bcrypt.BCryptPasswordEncoder; //:AOP:类似拦截器 @EnableWebSecurity public class SecurityConfig extends WebSecurityConfigurerAdapter { //授权 @Override protected void configure(HttpSecurity http) throws Exception { //首页所有人可以访问,但是功能页只有对应有权限的人才能访问 //authorizeRequests 认证请求 http.authorizeRequests() .antMatchers("/").permitAll() // vip1用户只能访问/level1/** .antMatchers("/level1/**").hasRole("vip1") // vip2用户只能访问/level2/** .antMatchers("/level2/**").hasRole("vip2") // vip3用户只能访问/level3/** .antMatchers("/level3/**").hasRole("vip3"); // 没有权限默认会到登录页面,需要开启登录的页面 http.formLogin(); //注销 http.logout().logoutSuccessUrl("/"); } //认证,springboot 2.1.x之前 可以直接使用 //2.1.x之后 密码编码:passwordEncoder //在Spring Secutiry 5.0+新增了很多的加密方法~ @Override protected void configure(AuthenticationManagerBuilder auth) throws Exception { // auth.jdbcAuthentication() 从数据库里面拿数据 // auth.inMemoryAuthentication() 从内存里面拿数据 // 这些数据正常应该从数据库中读,这里方便理解就从内存中读 auth.inMemoryAuthentication().passwordEncoder(new BCryptPasswordEncoder()) .withUser("admin").password(new BCryptPasswordEncoder().encode("123456")).roles("vip2","vip3") .and() .withUser("root").password(new BCryptPasswordEncoder().encode("123456")).roles("vip1","vip2","vip3") .and() .withUser("guest").password(new BCryptPasswordEncoder().encode("123456")).roles("vip1"); } }
从数据库中读
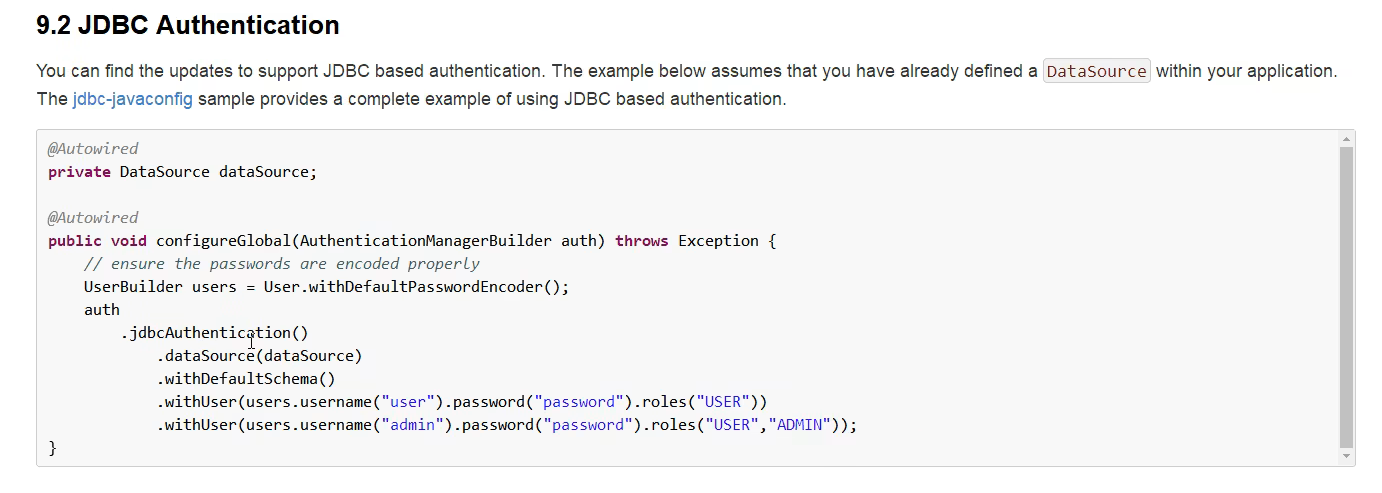
引入一个包


记住我功能
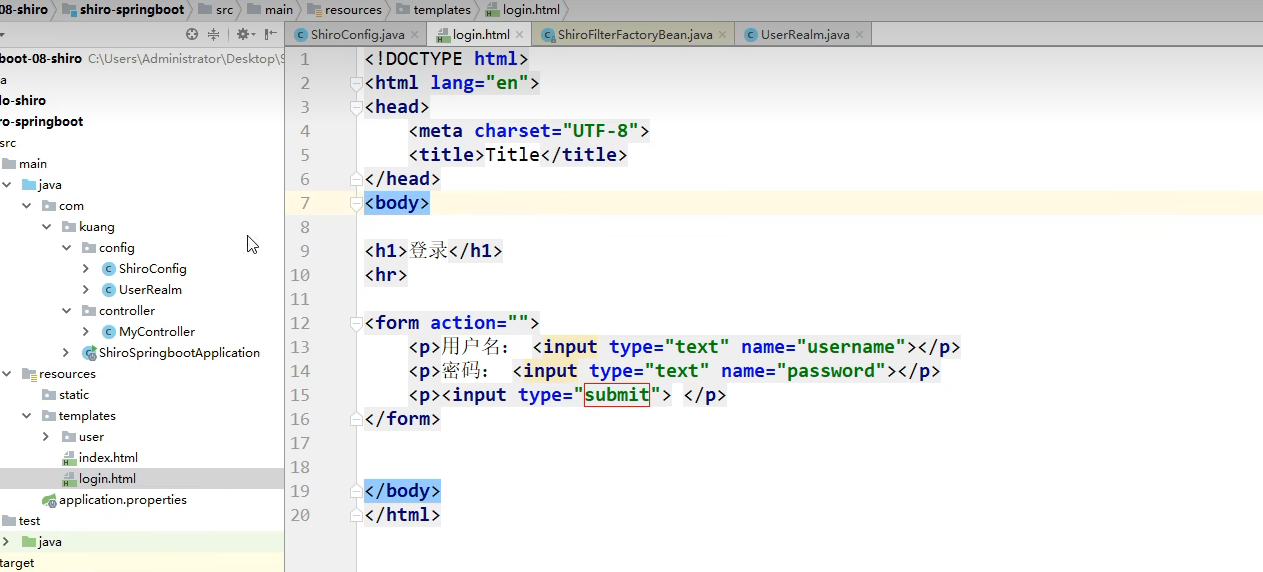
进入自己写的登录页面

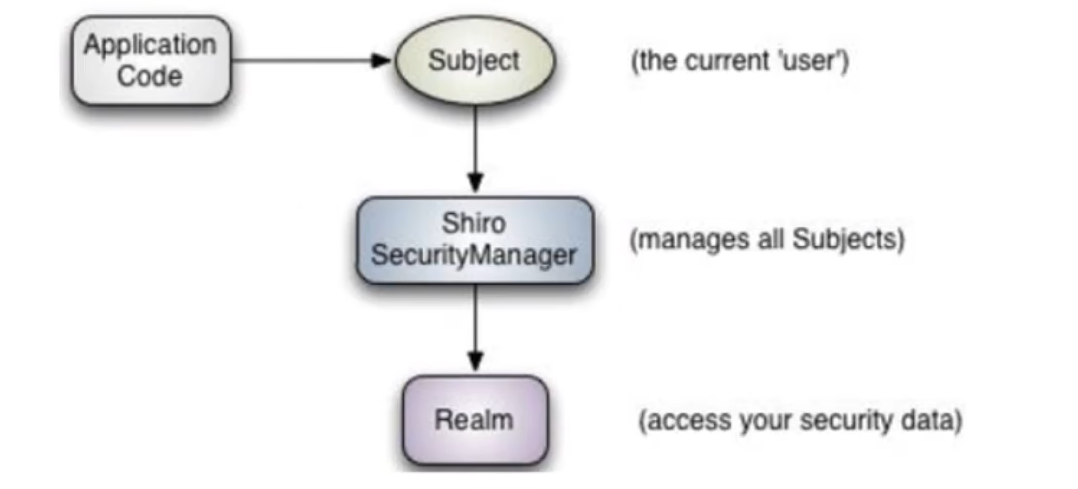
12、Shiro
shiro架构
1、导入依赖
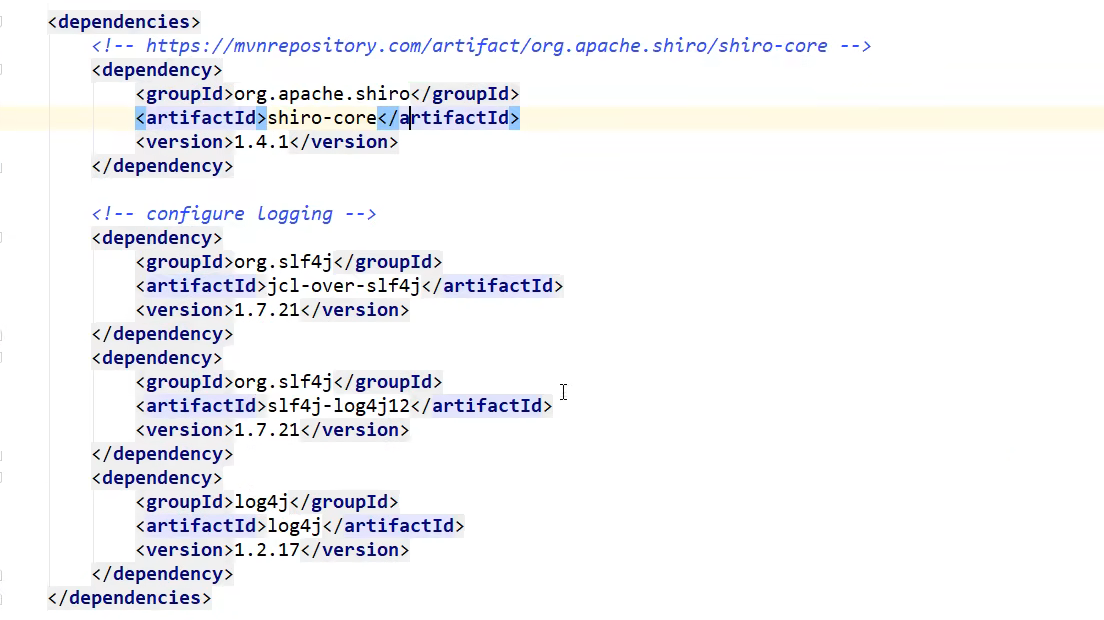
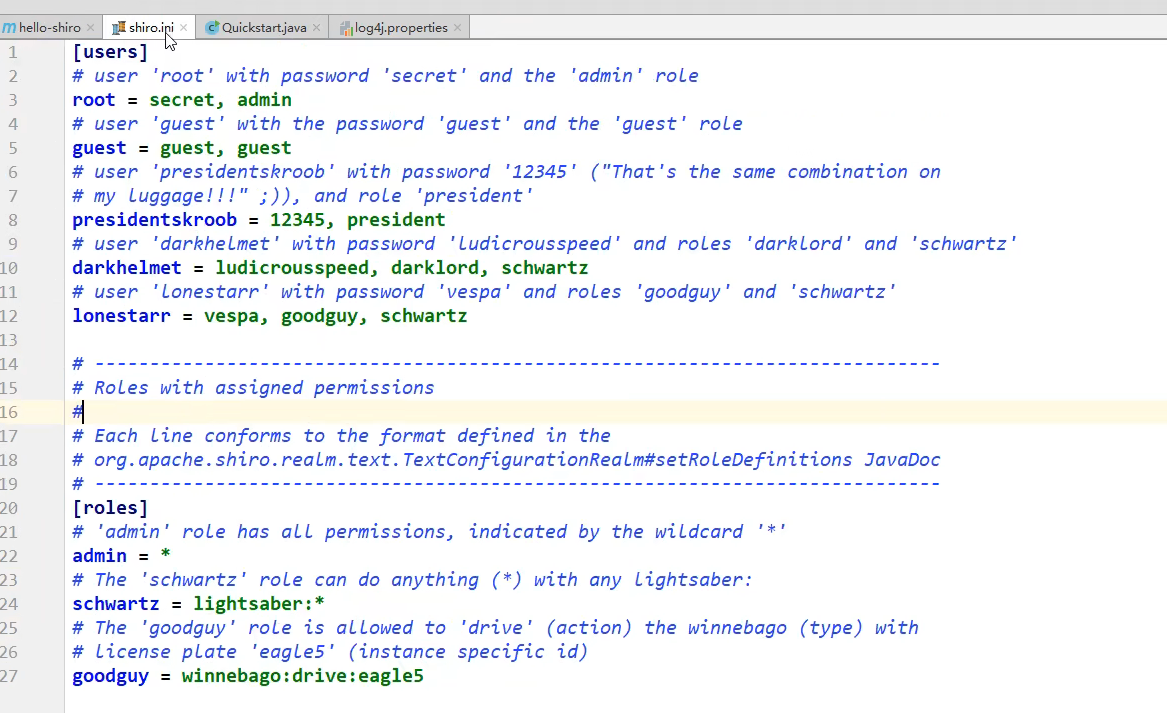
2、配置文件
3、HelloWorld
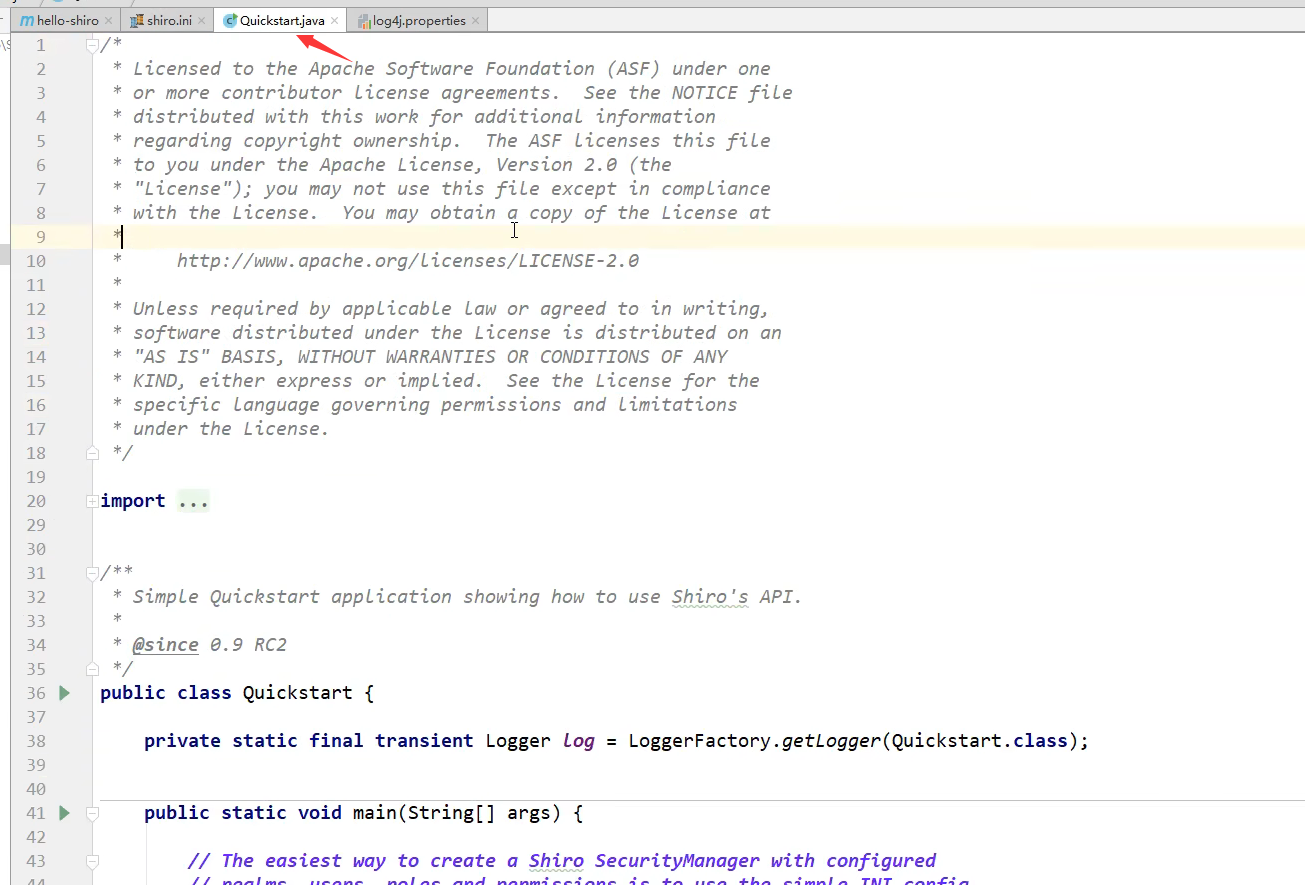
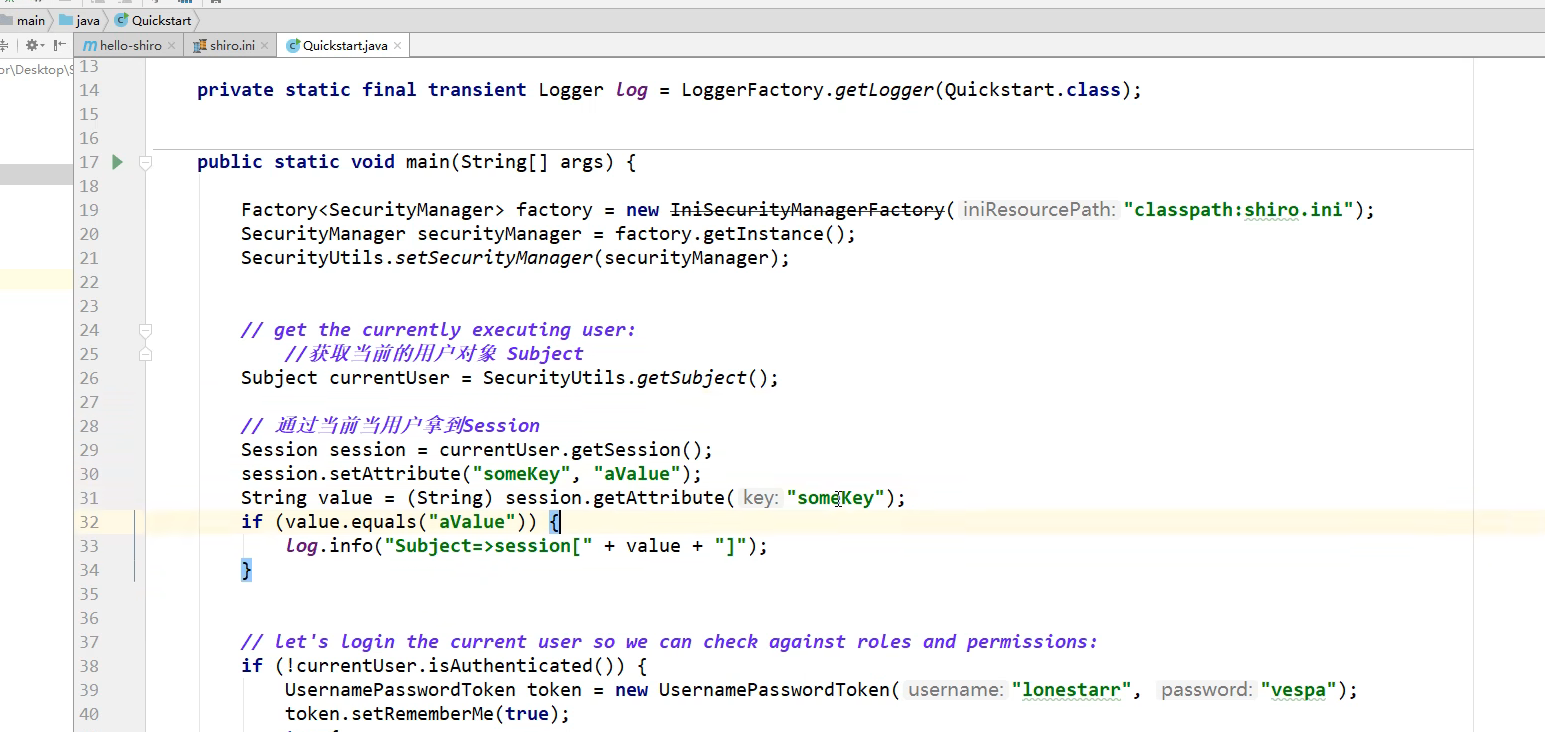
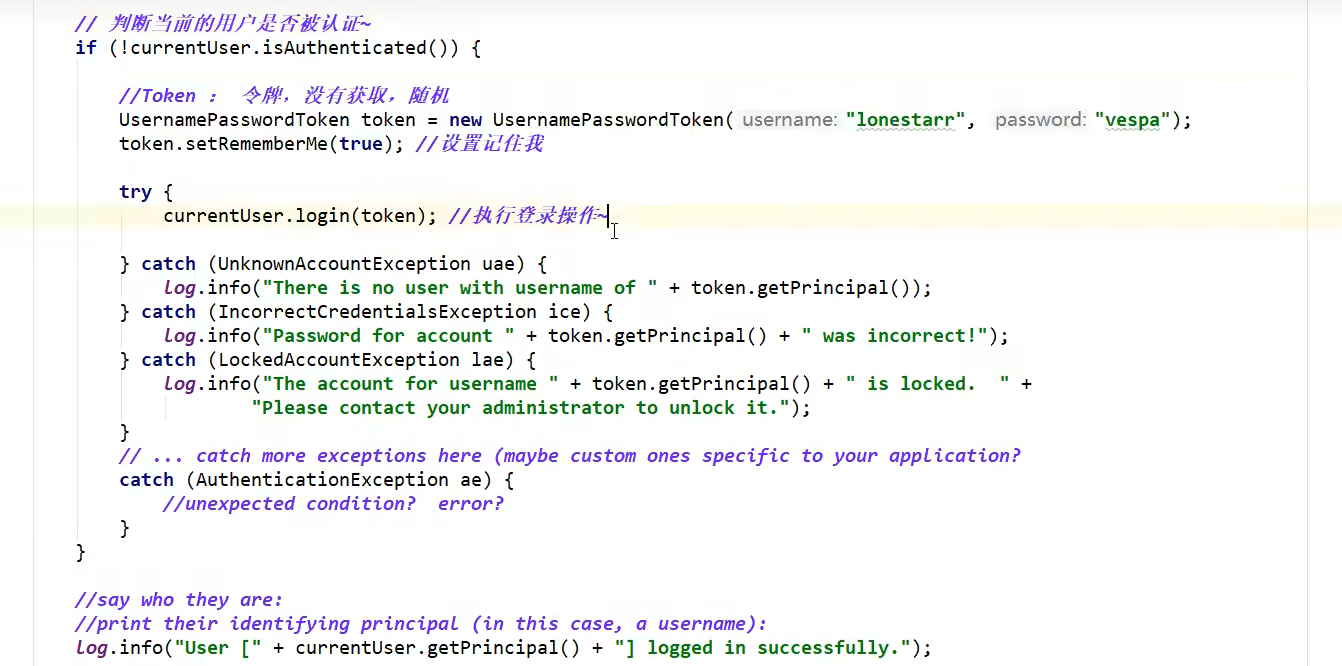
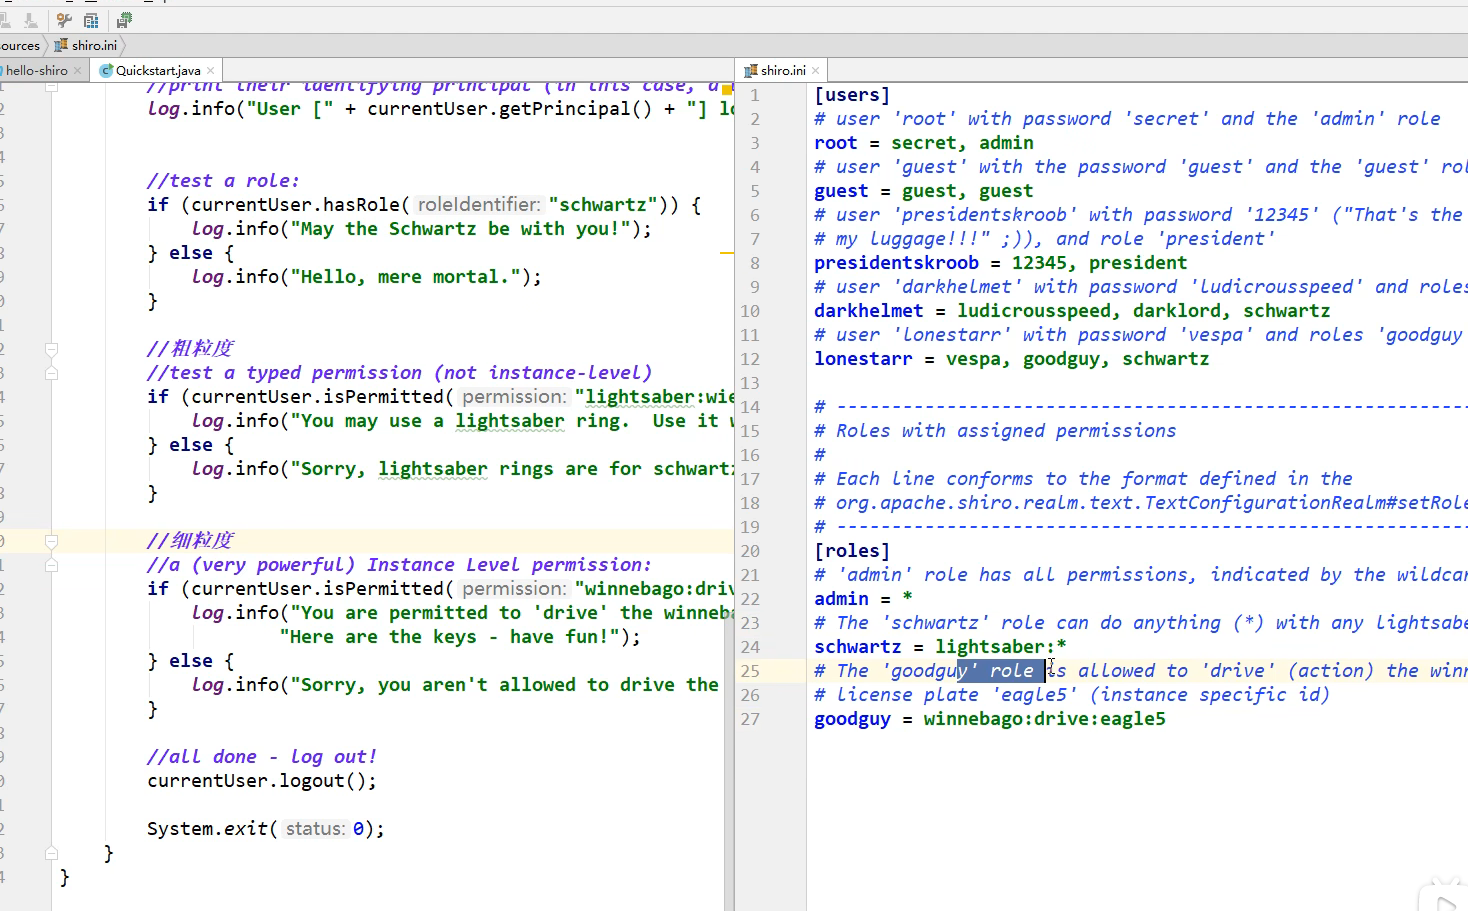
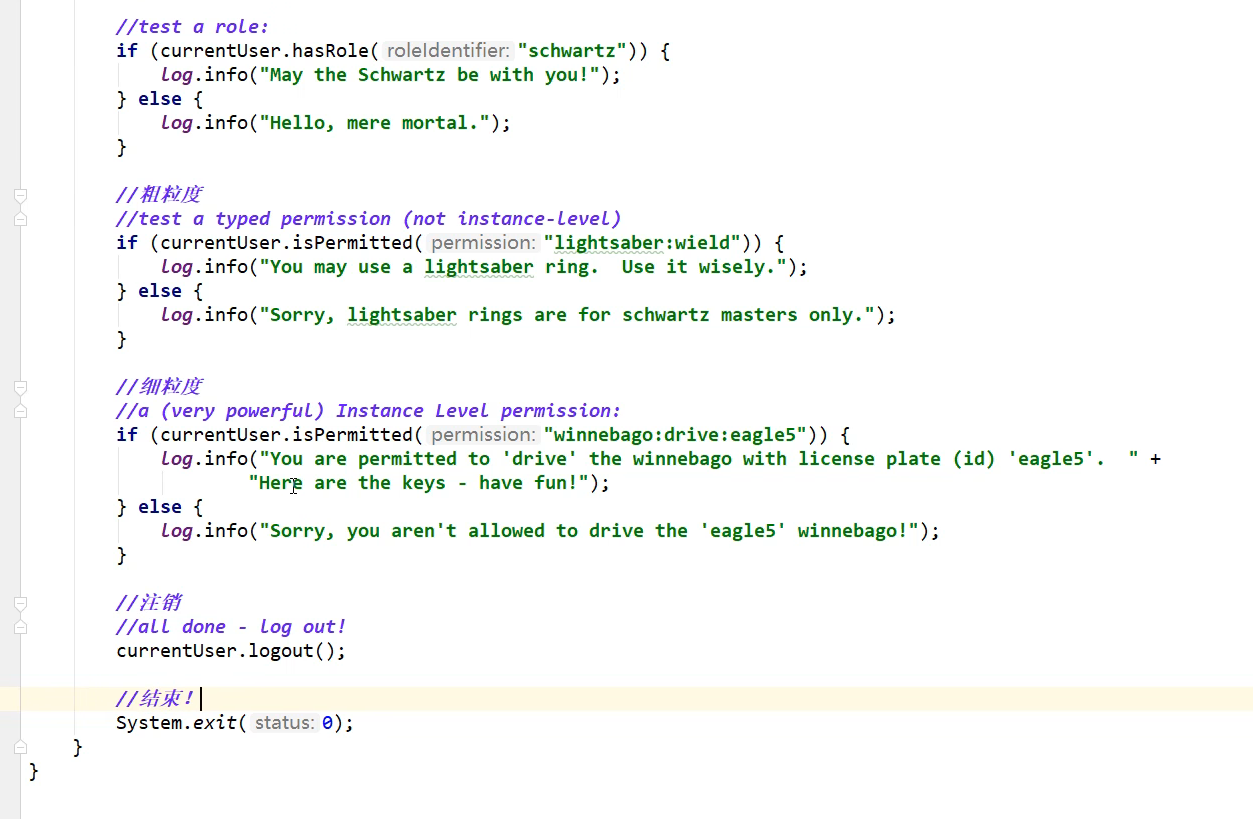
解析官方测试案例
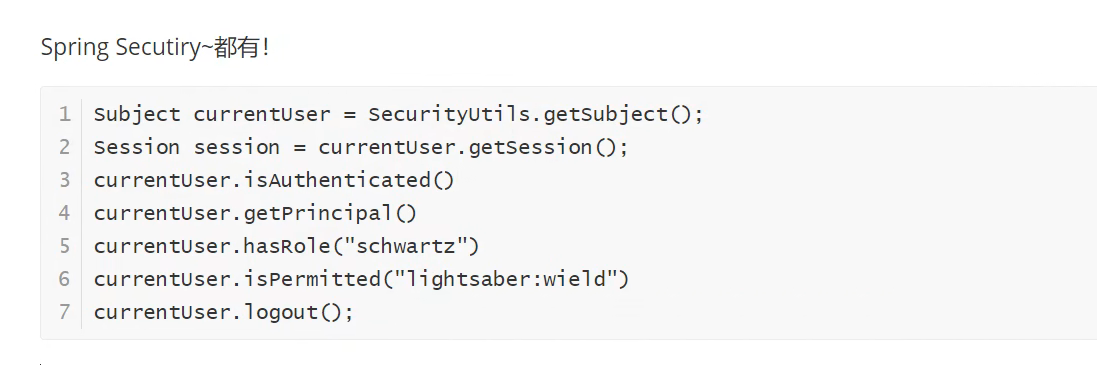
shiro整合springboot
先把环境搭建好
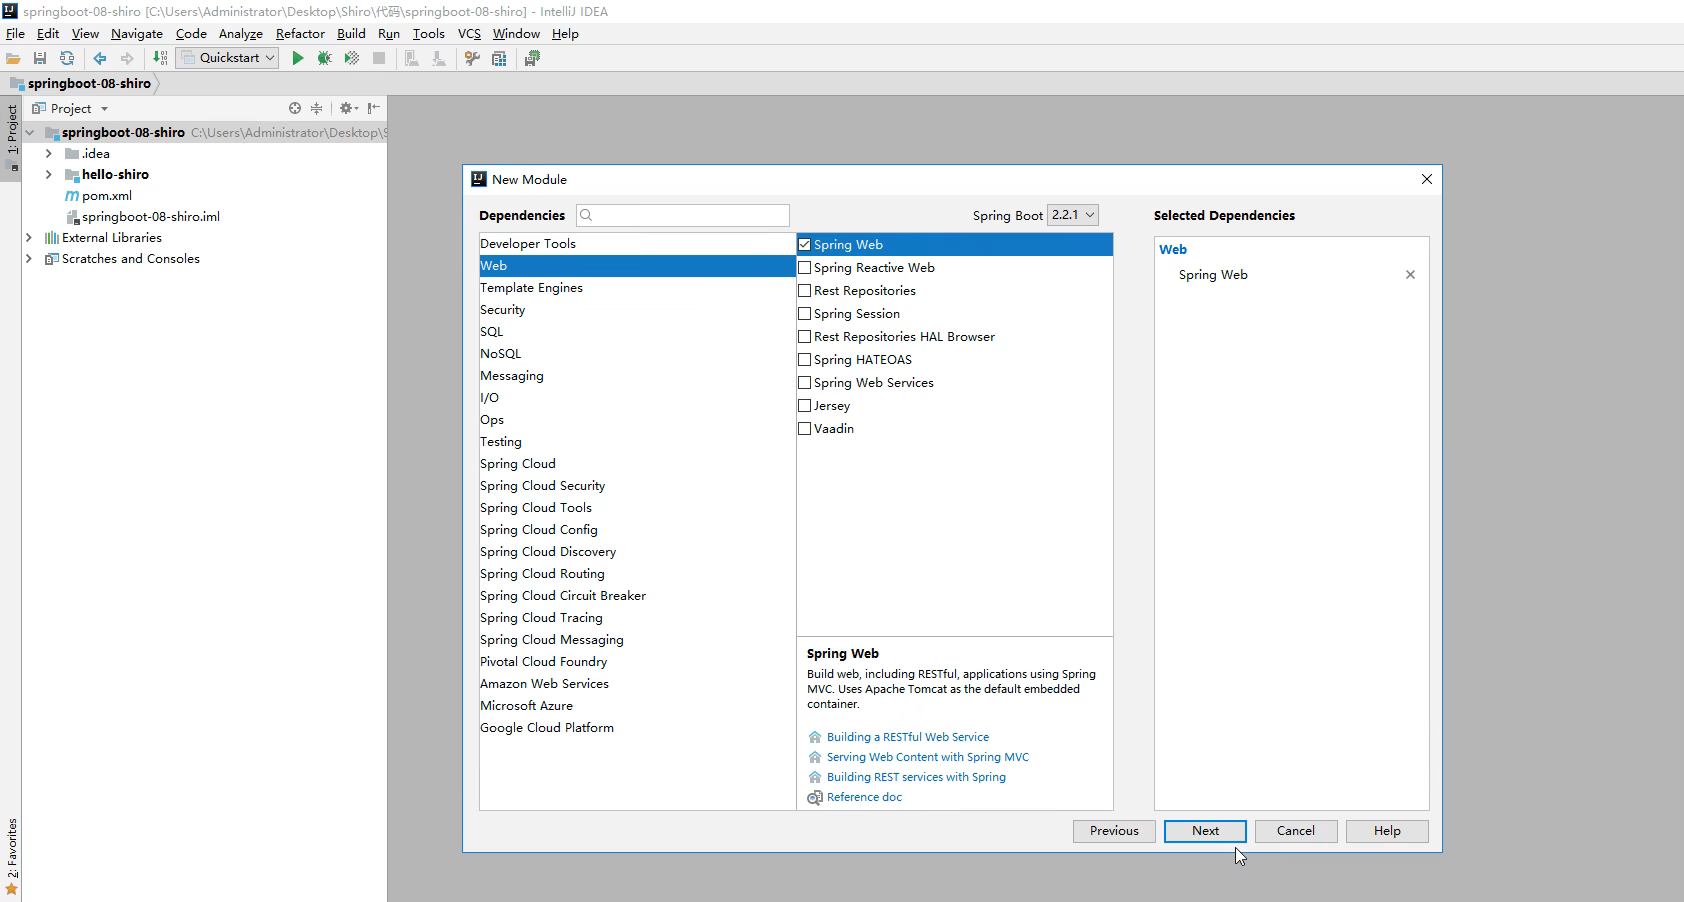
新建一个module
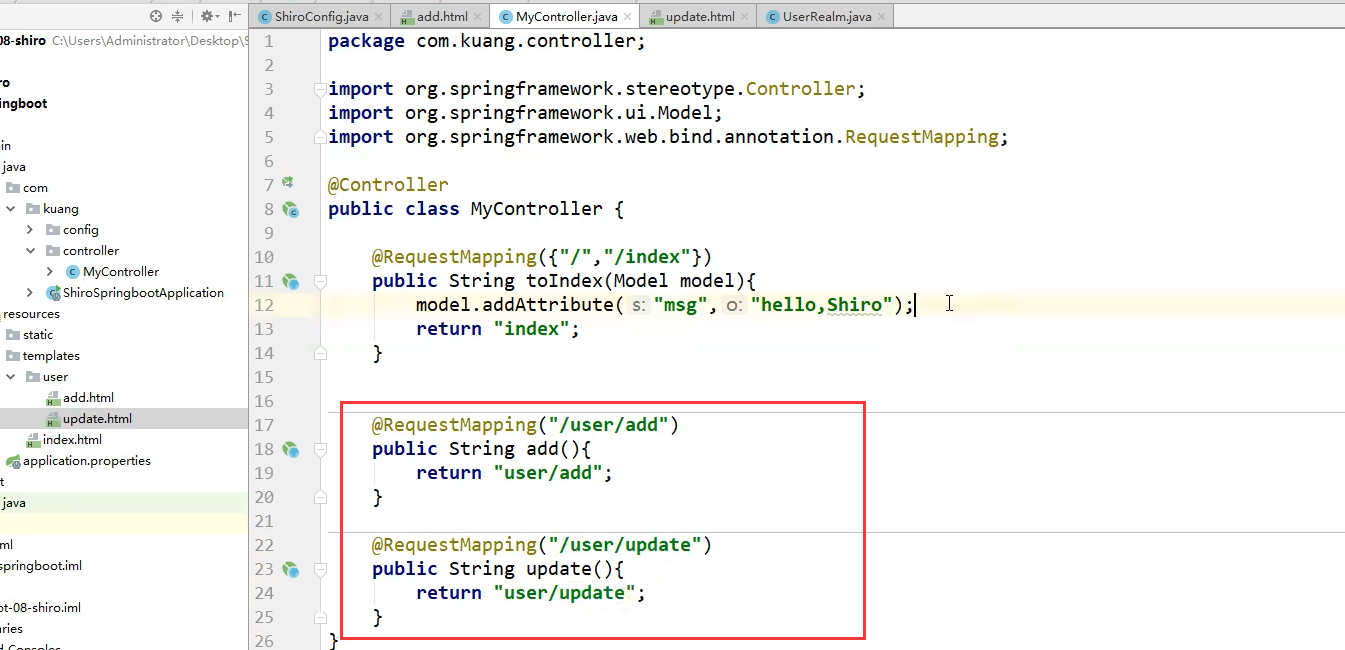
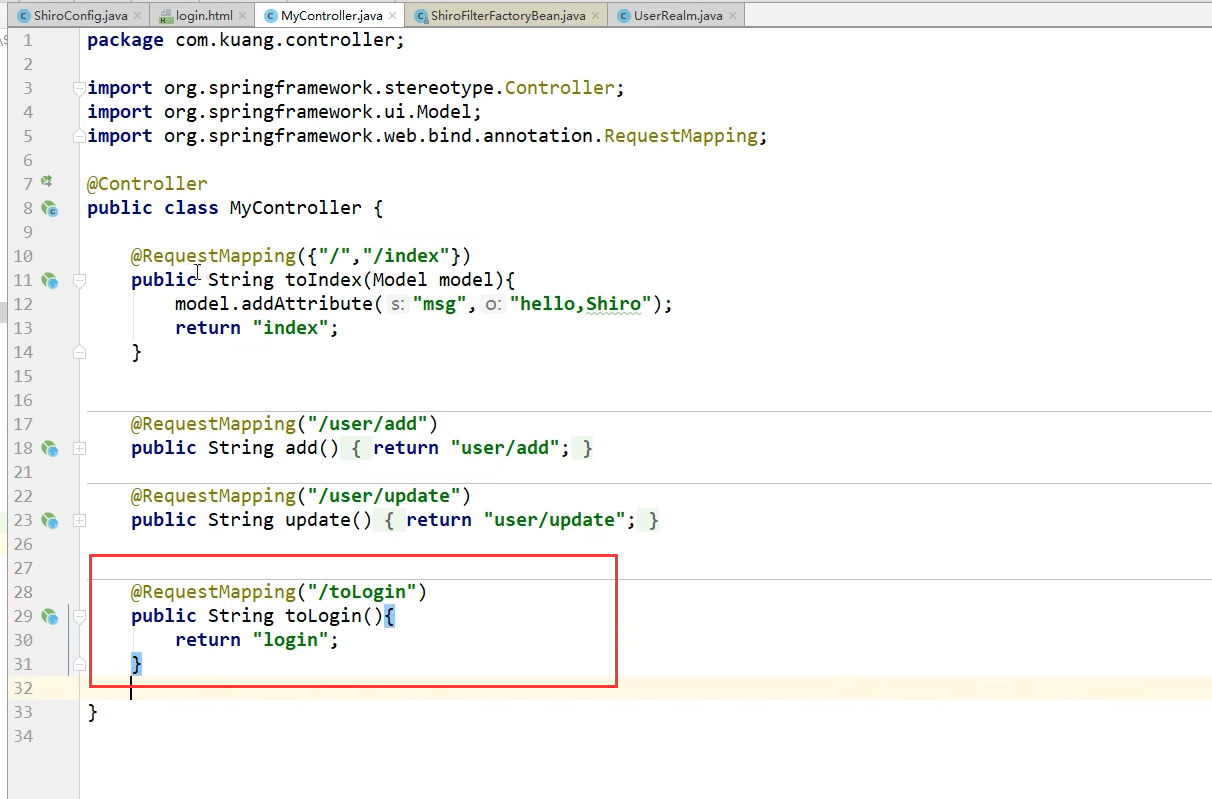
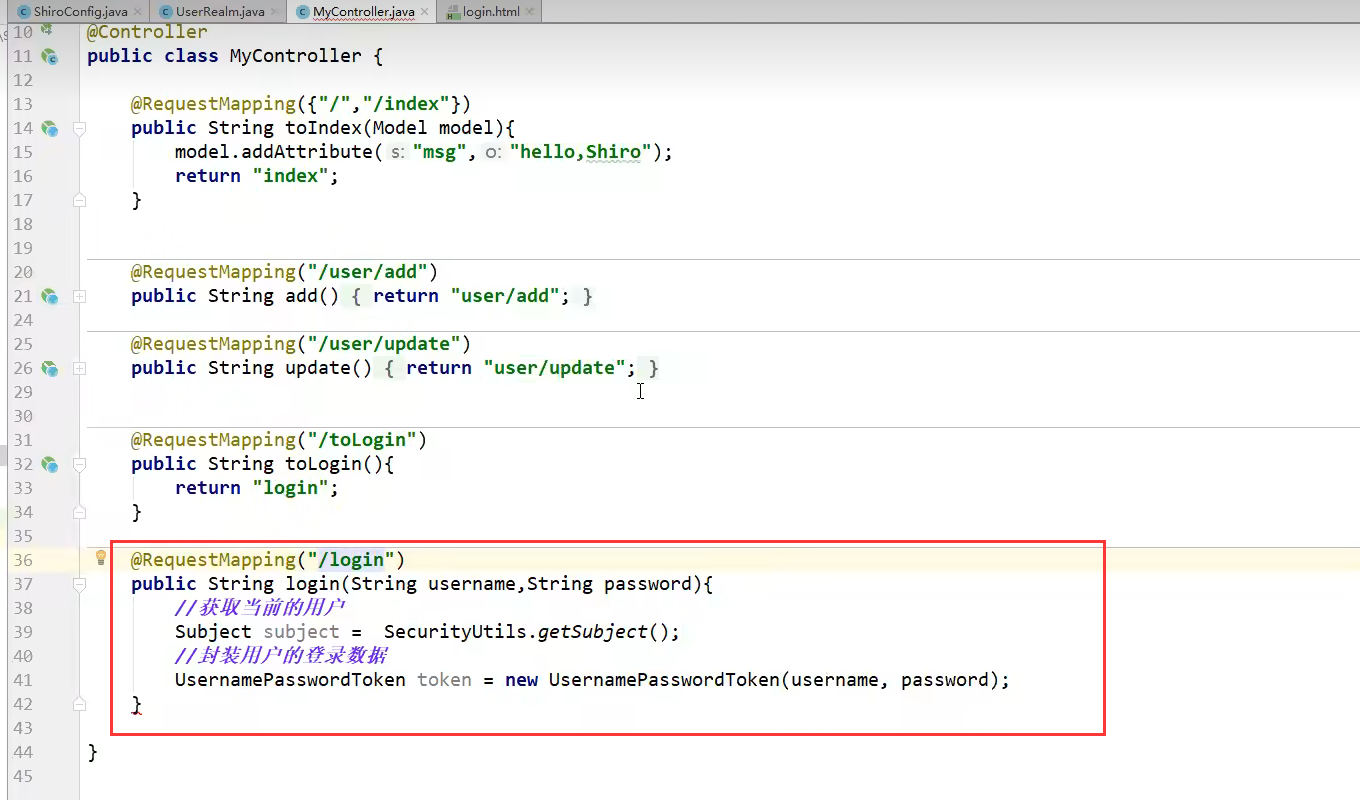
controller层
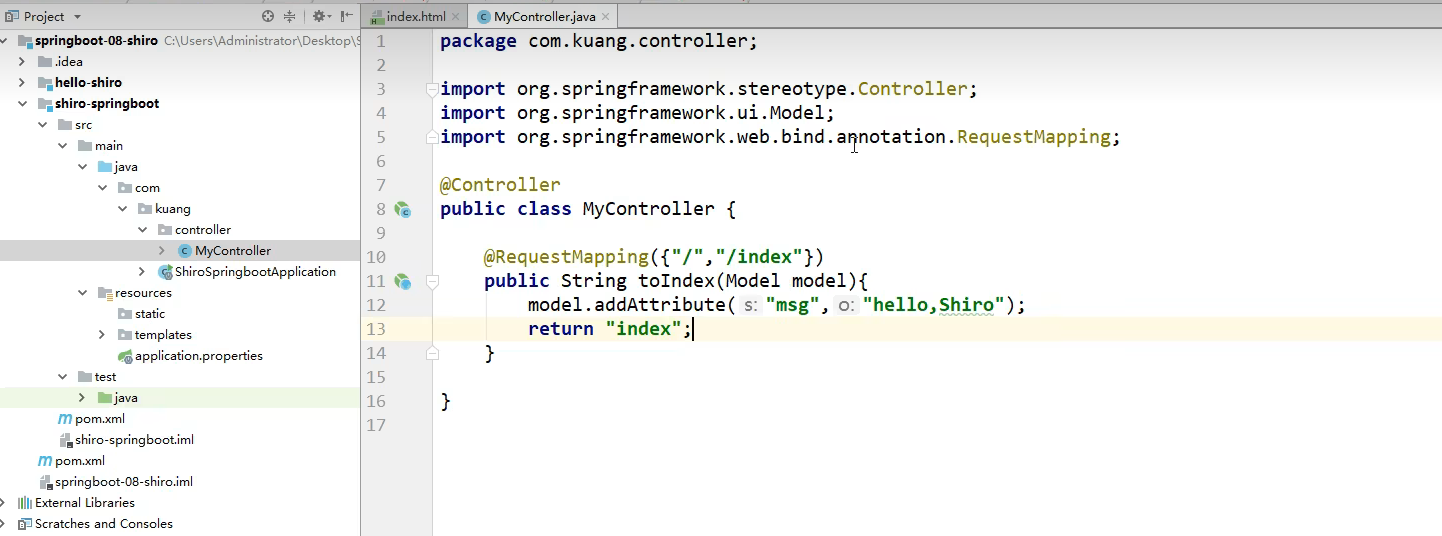
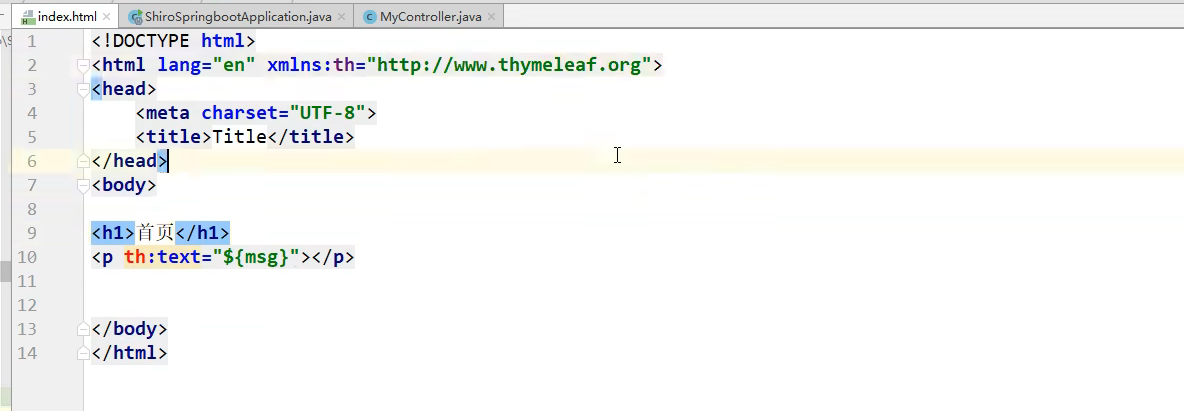
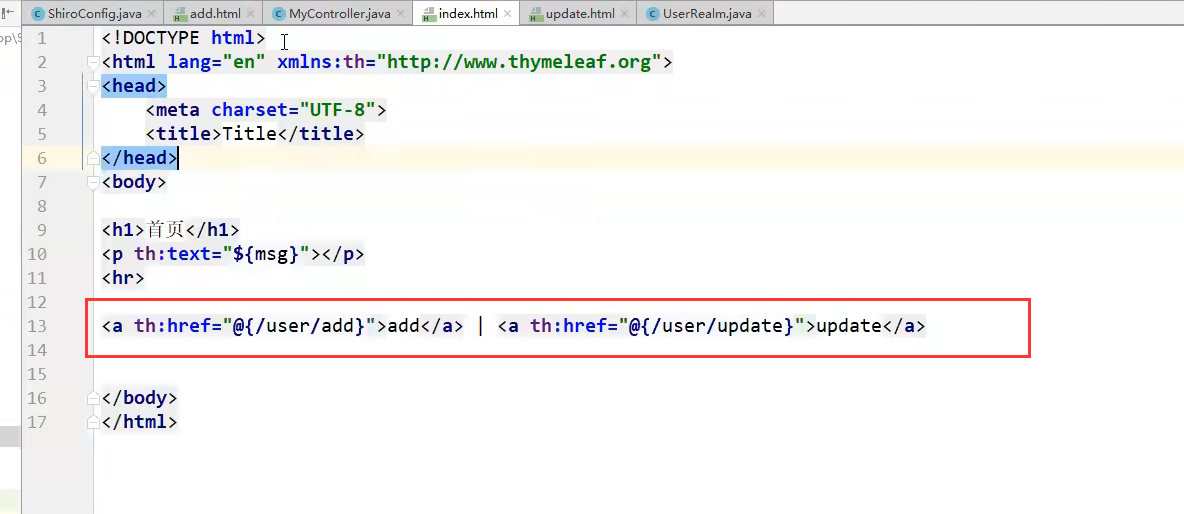
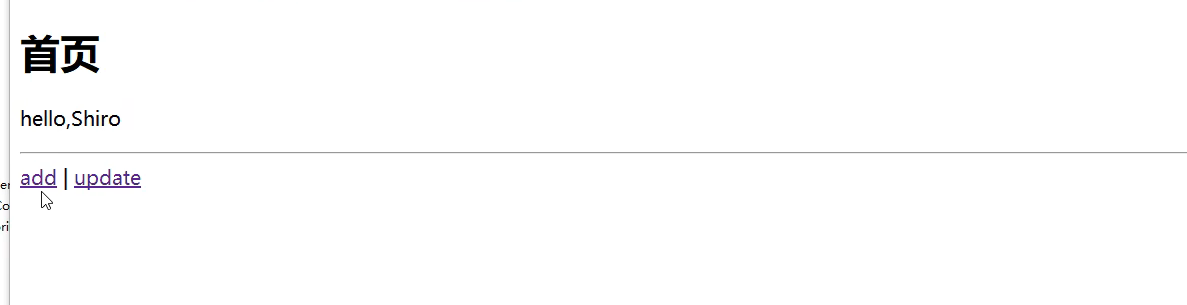
index页面
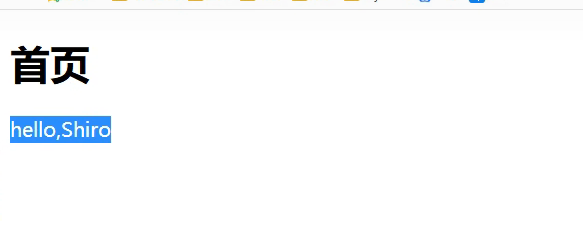
运行结果
整合开始
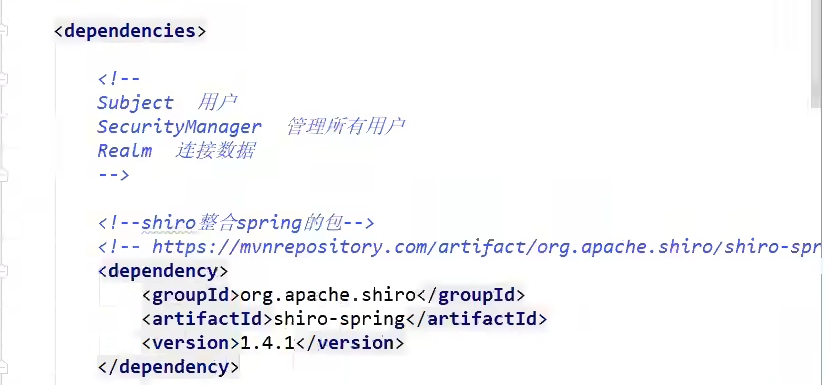
引入一个shiro整合spring的整合包(依赖)

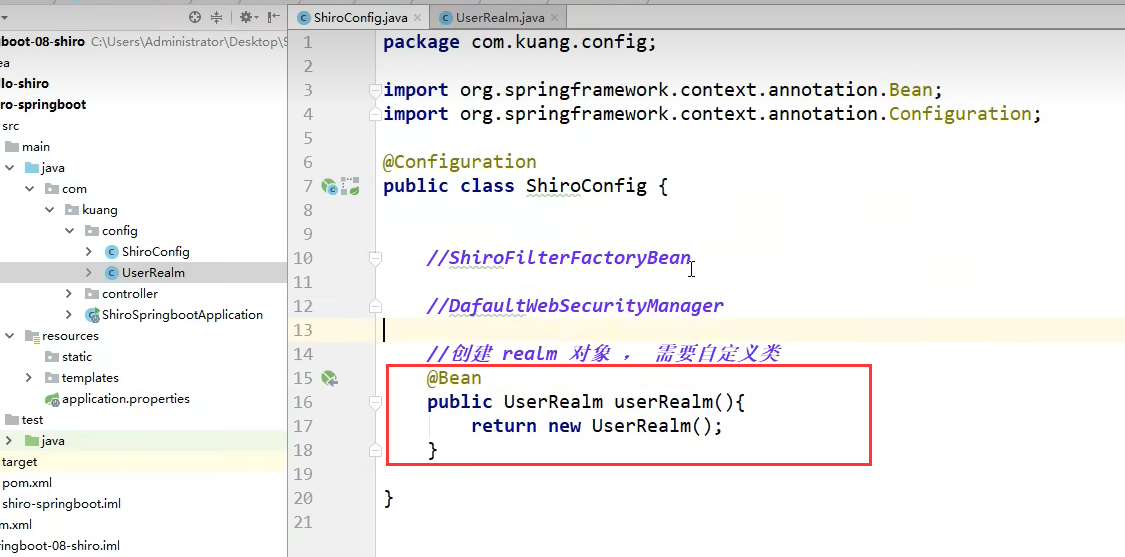
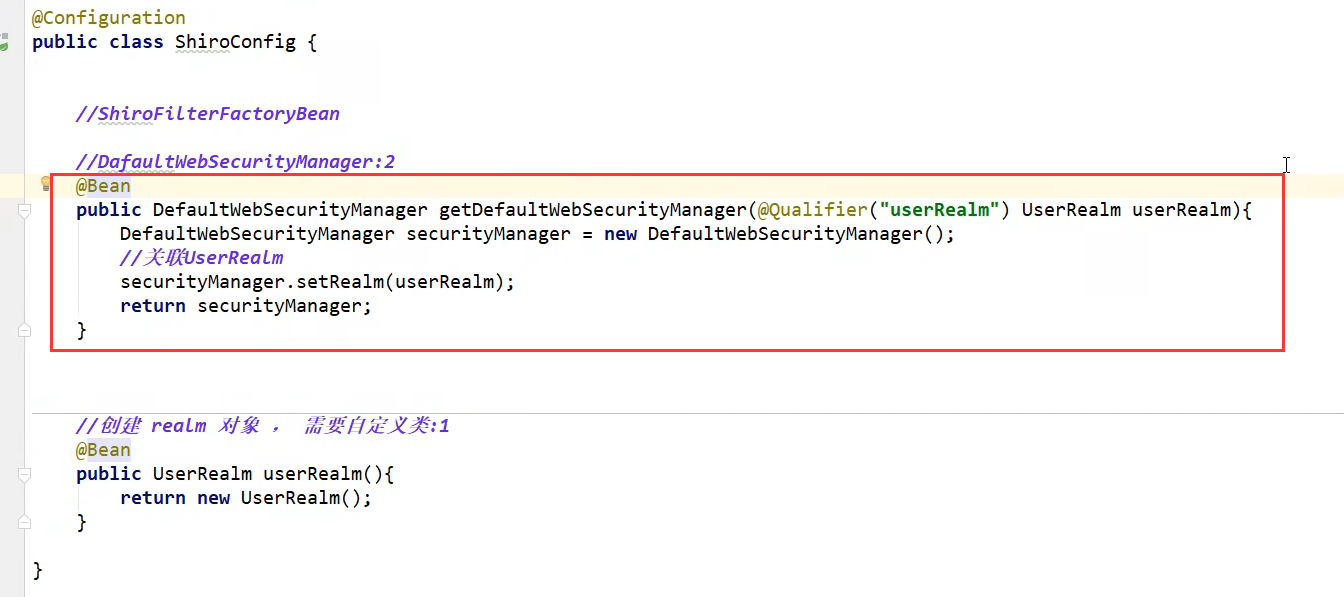
spring托管Bean
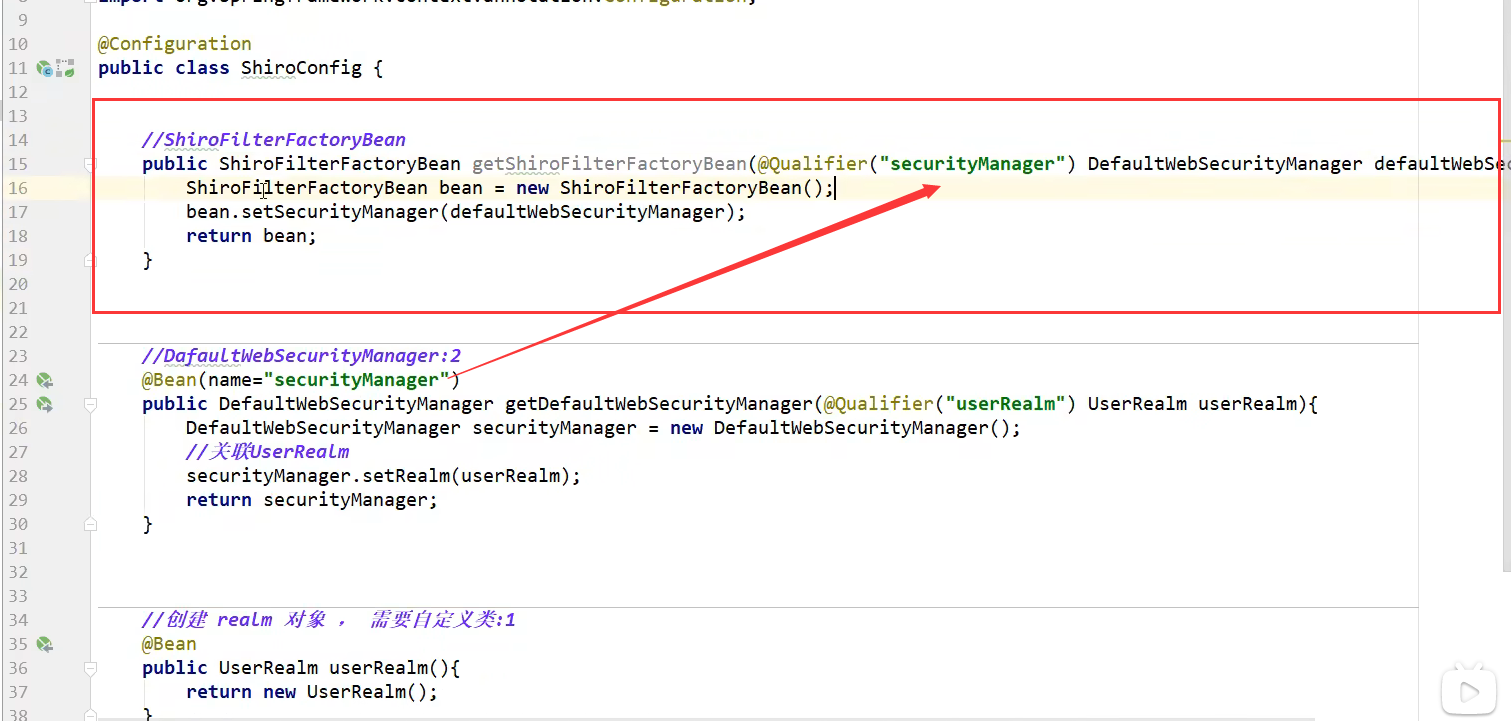
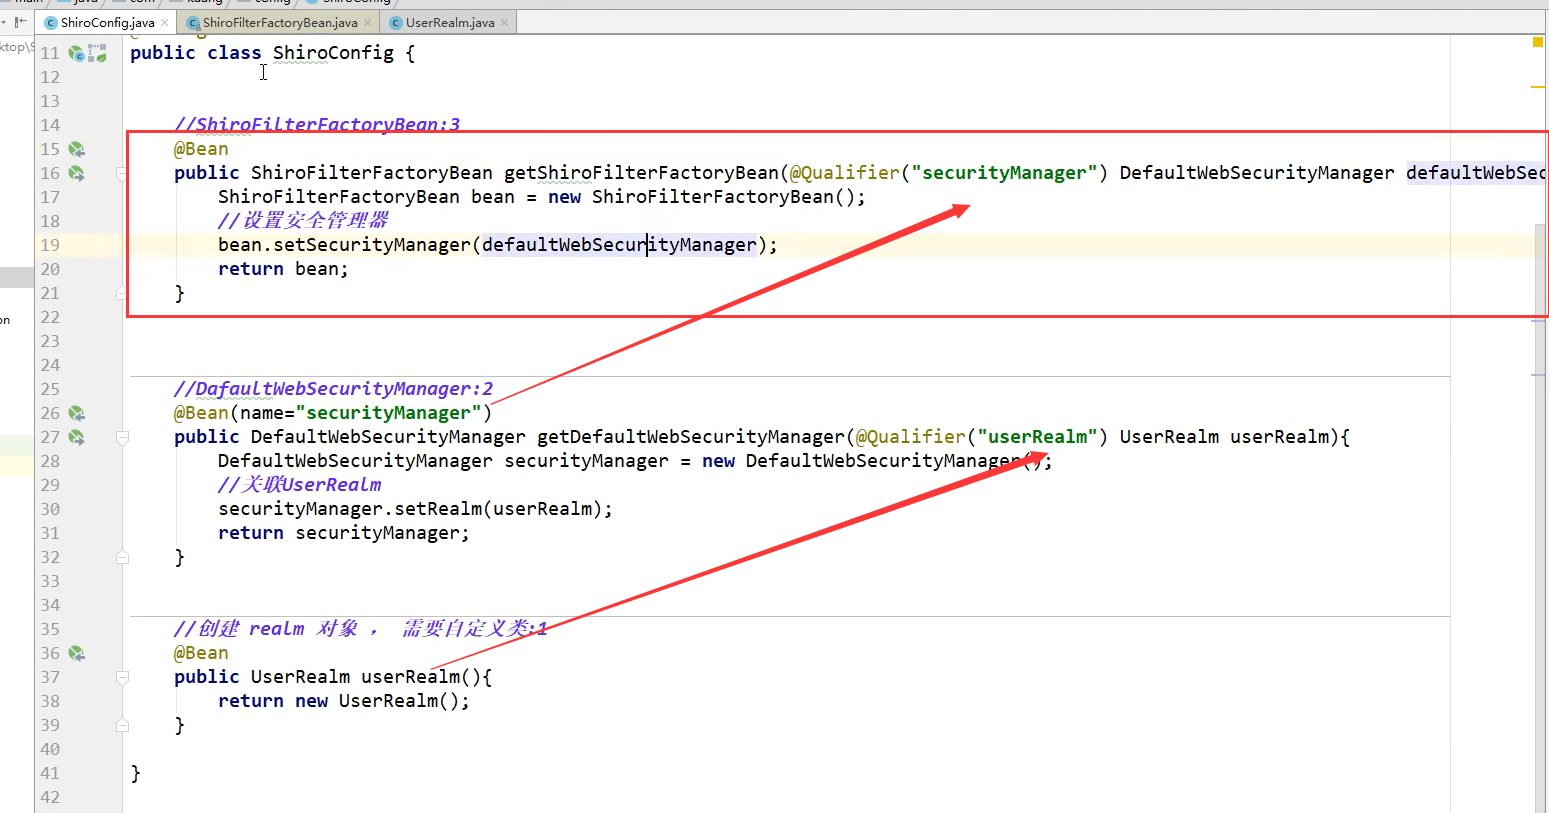
运行结果
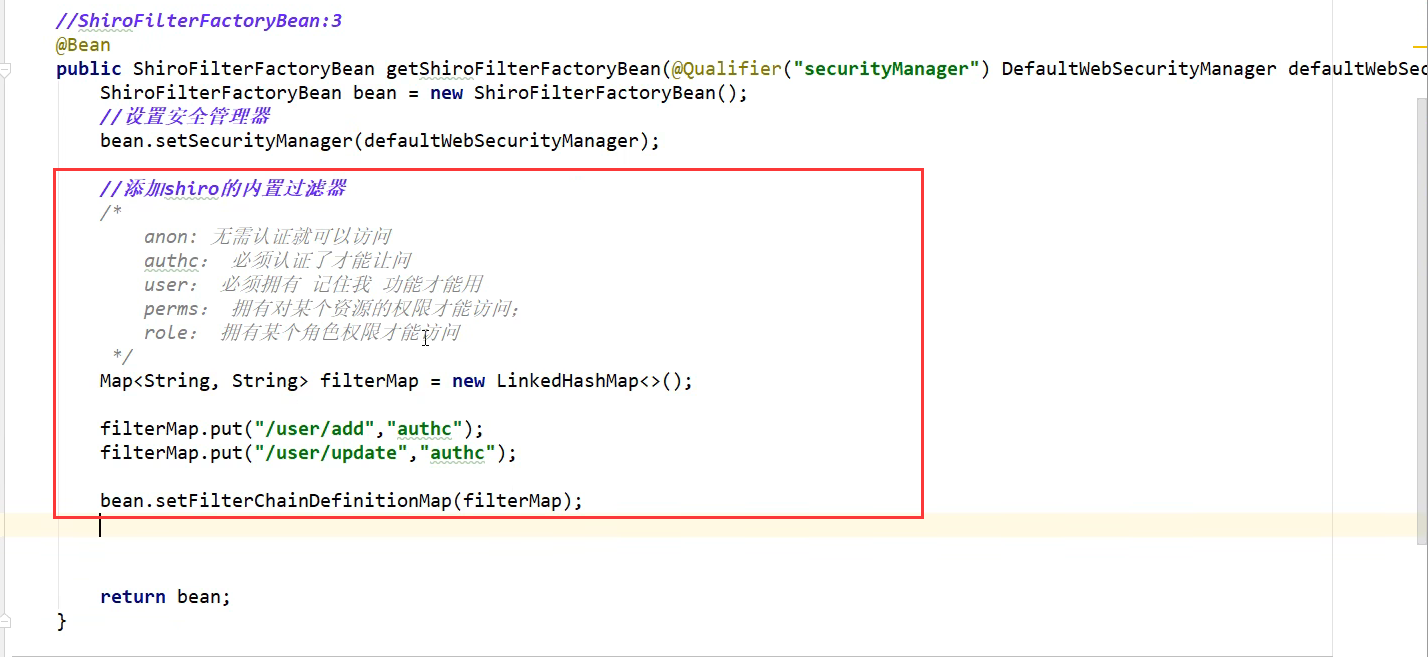
登录拦截

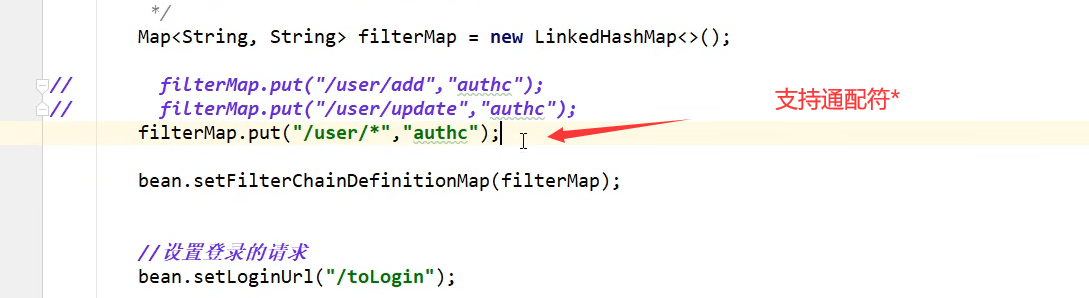
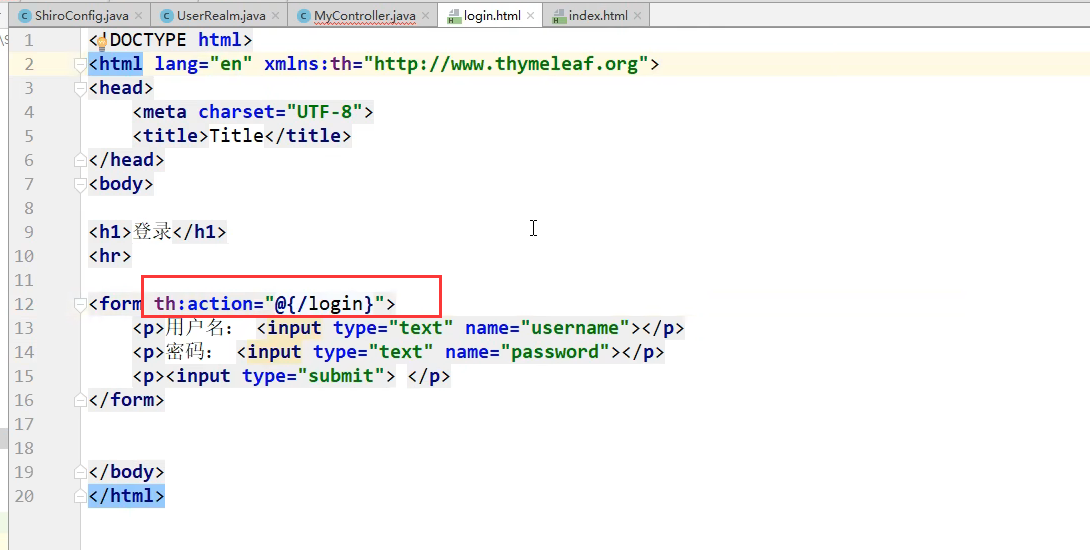
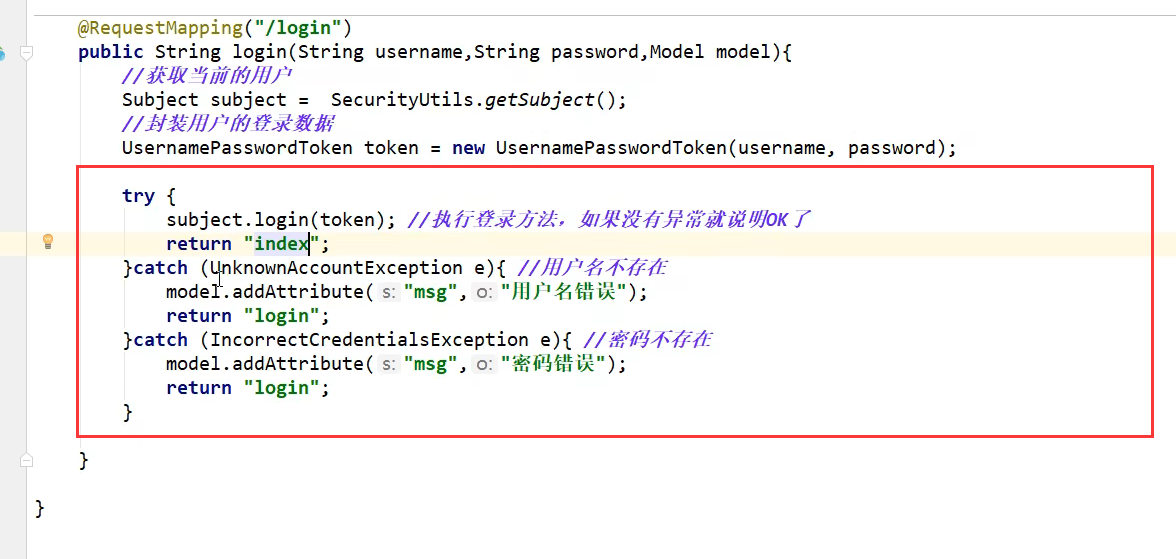
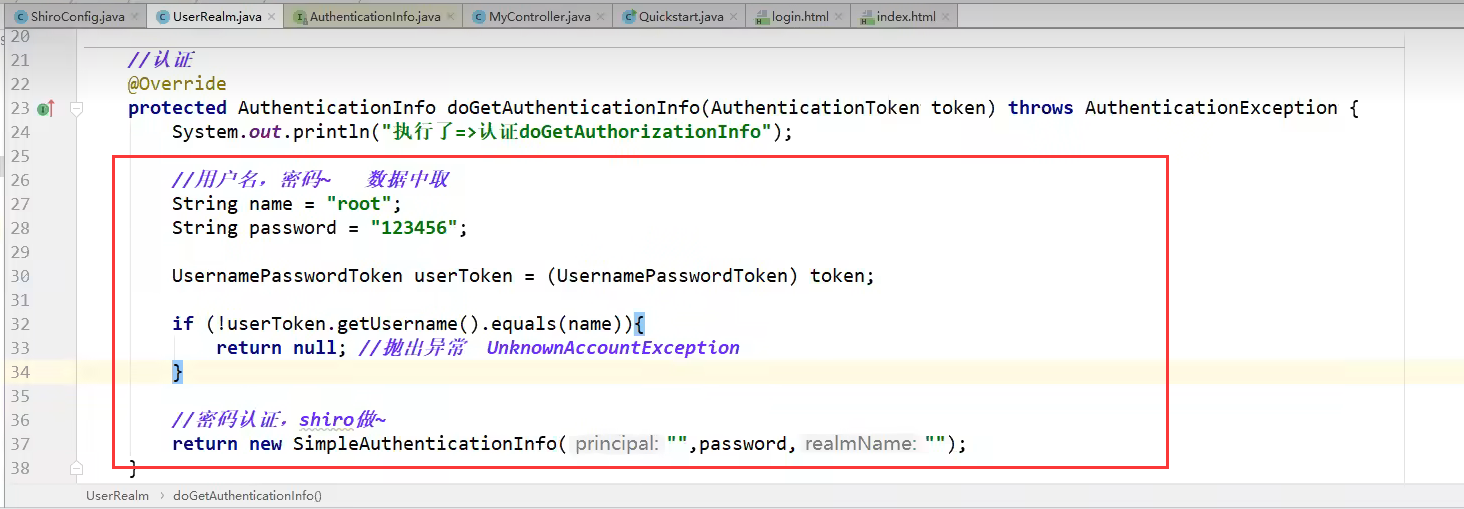
Shiro实现用户认证

Shiro整合Mybatis
编写配置文件
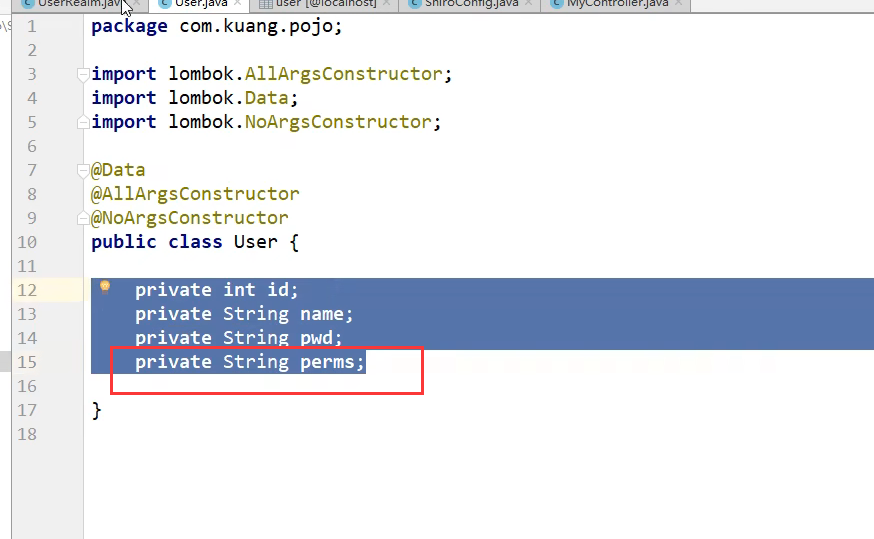
pojo类(用户实体类)
编写mapper
编写mapper.xml
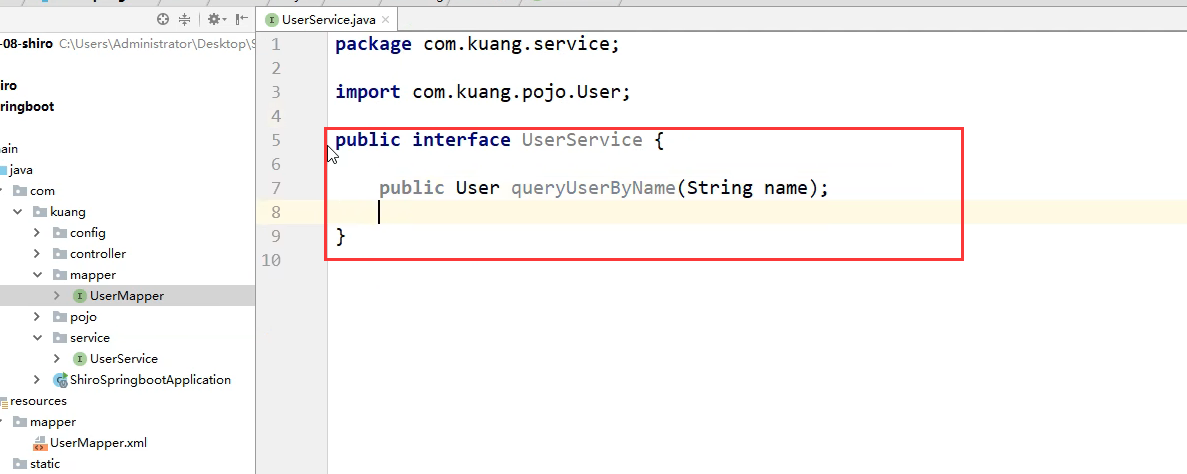
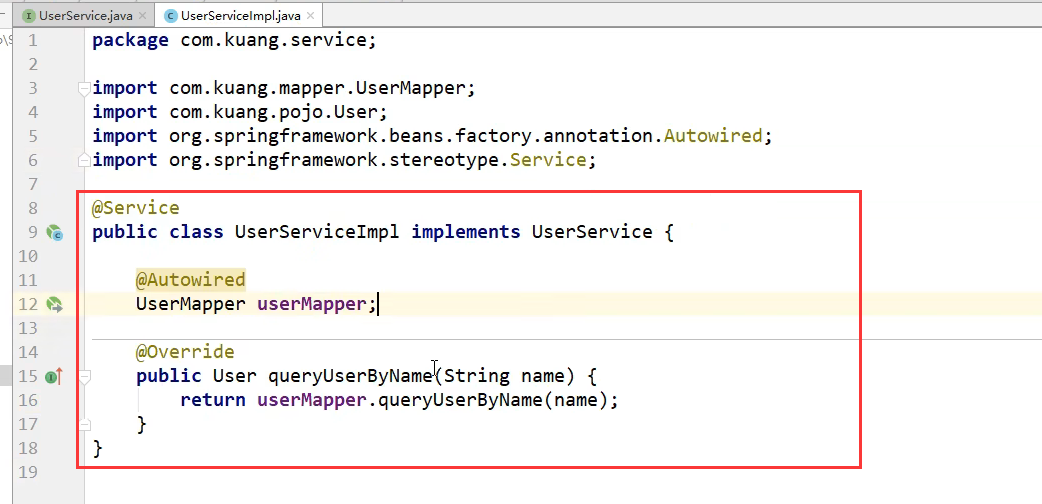
编写service层
编写service.impl
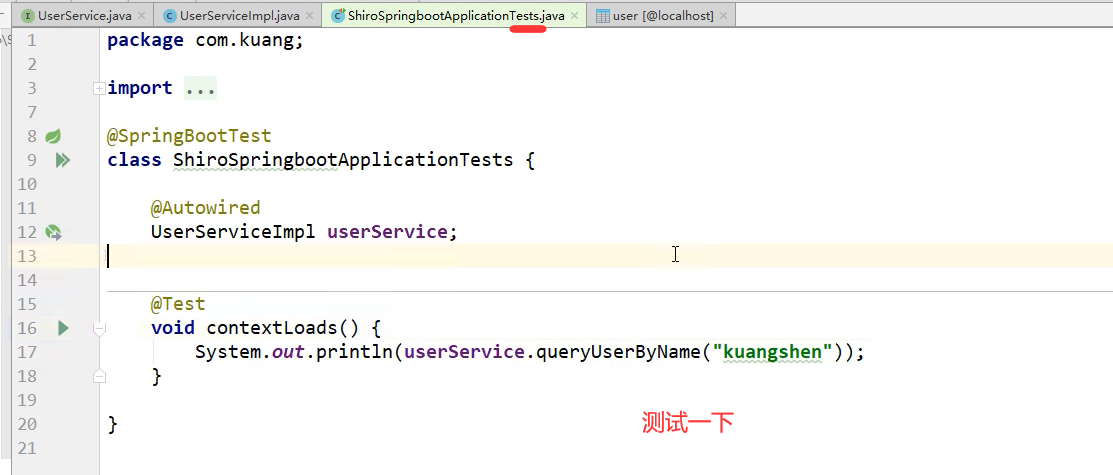
测试一下,没问题就说明底层可以连接到数据库
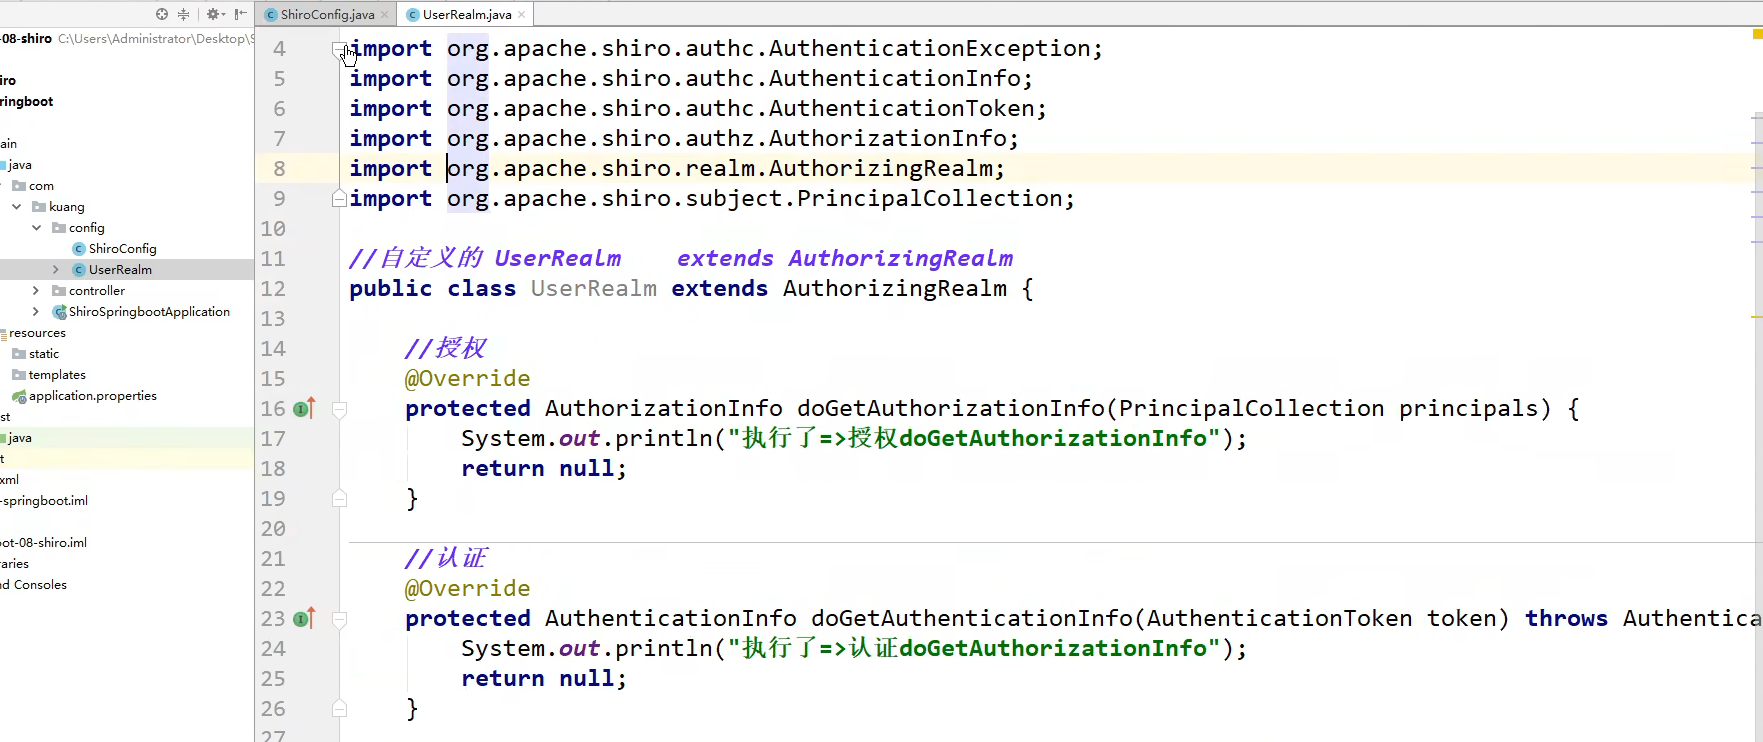
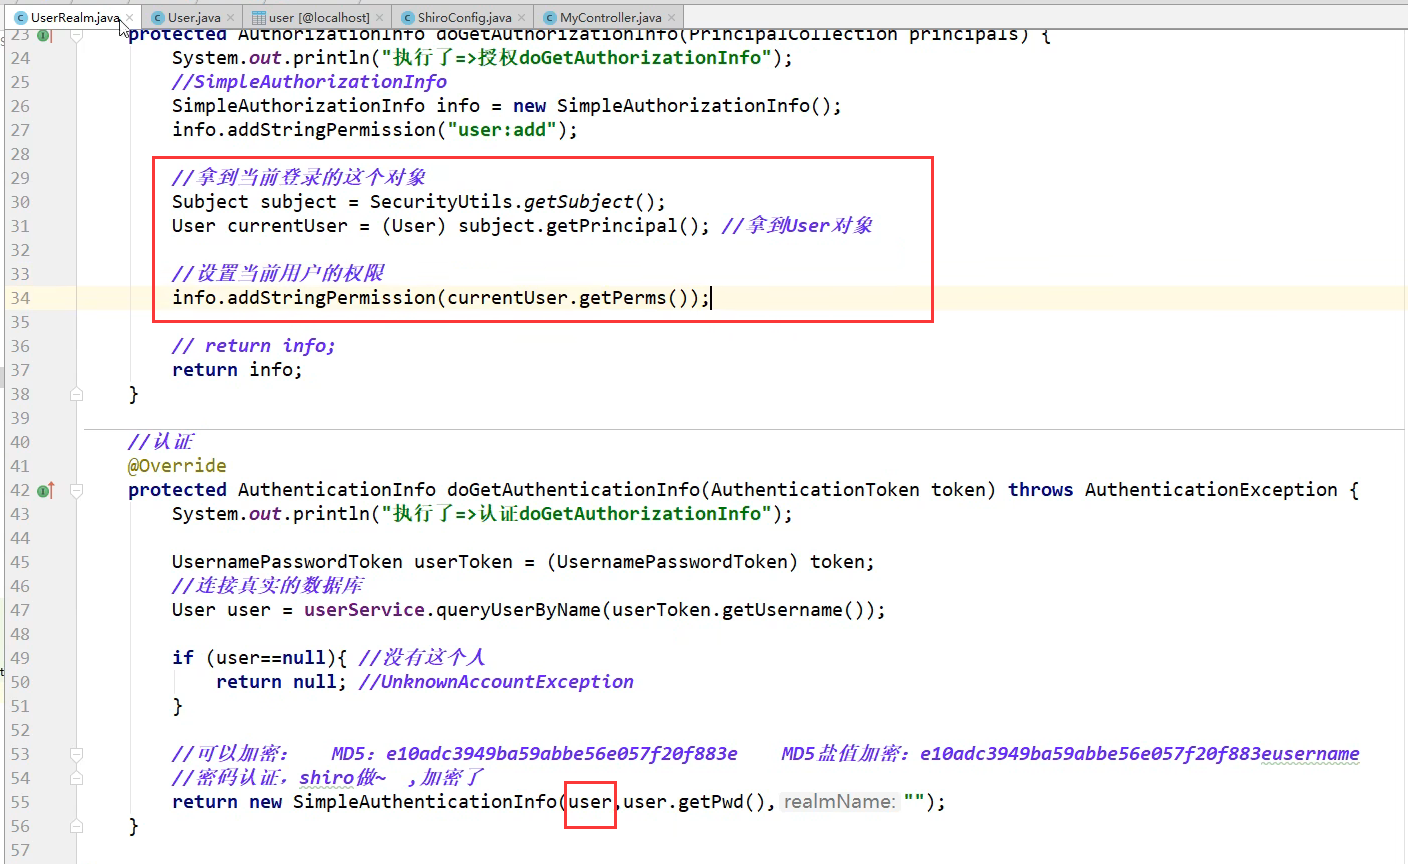
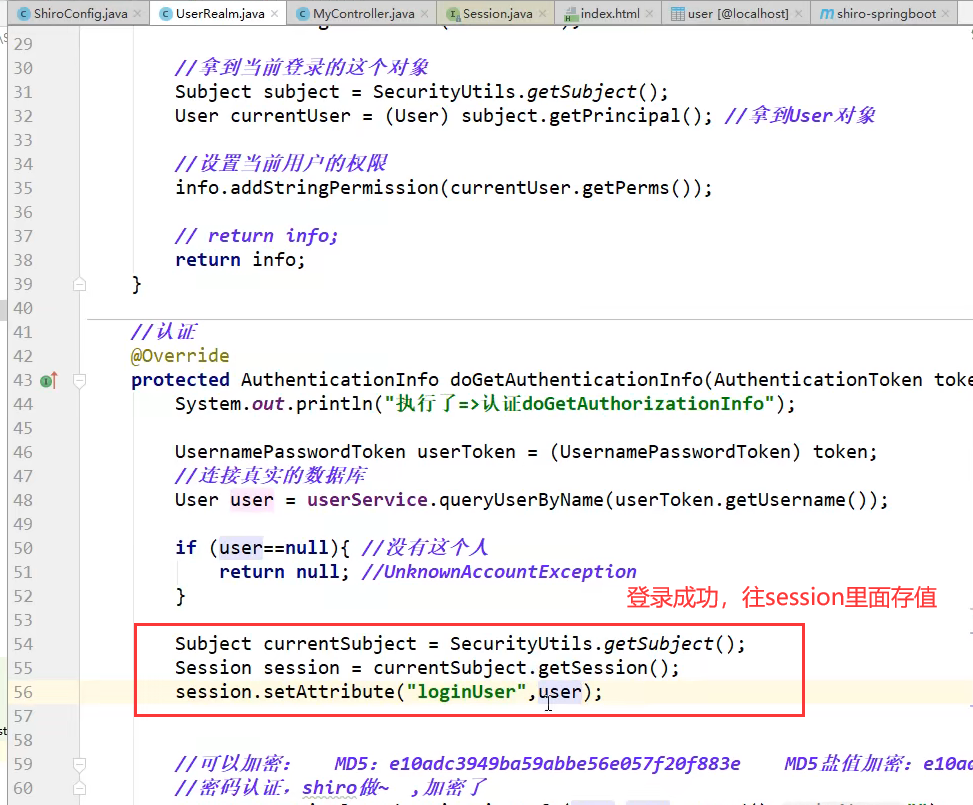
把UserRealm连接到真实的数据库
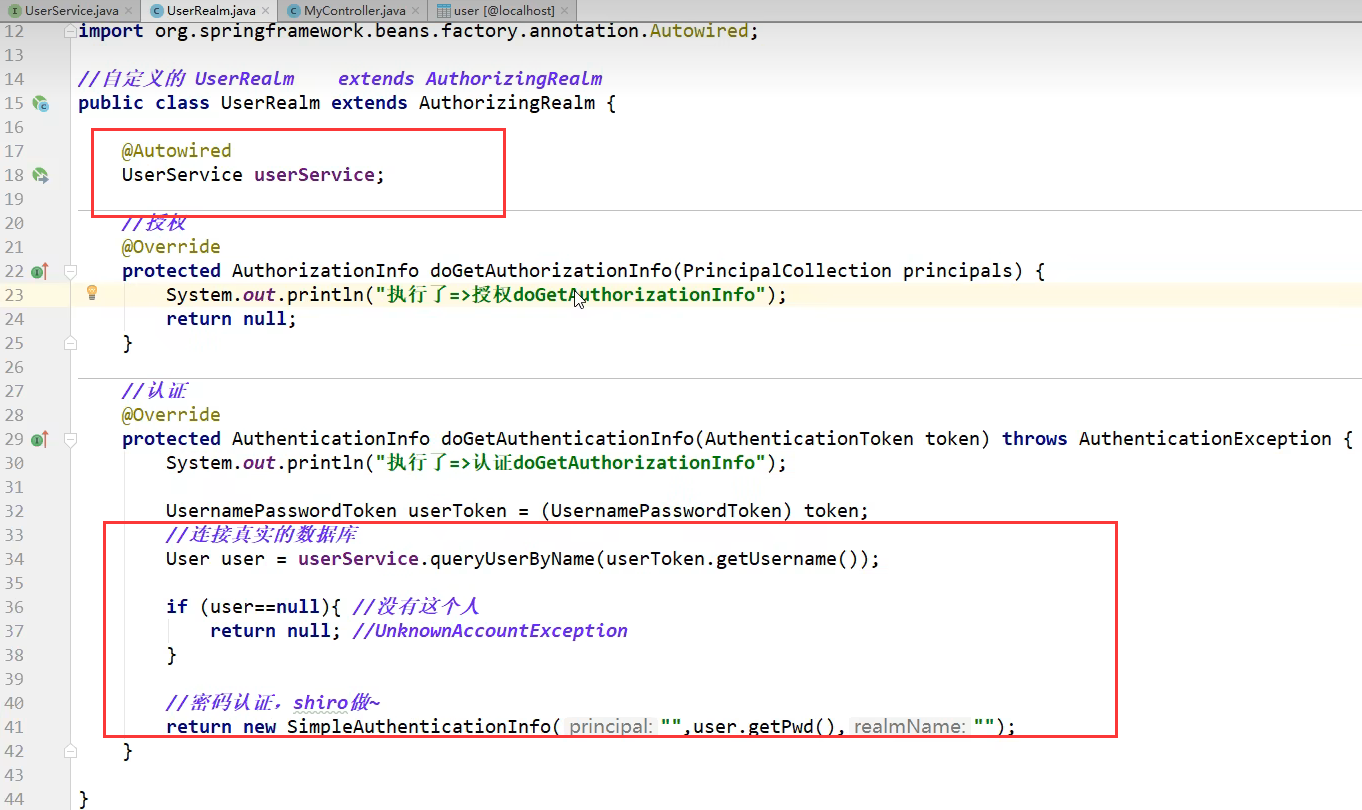
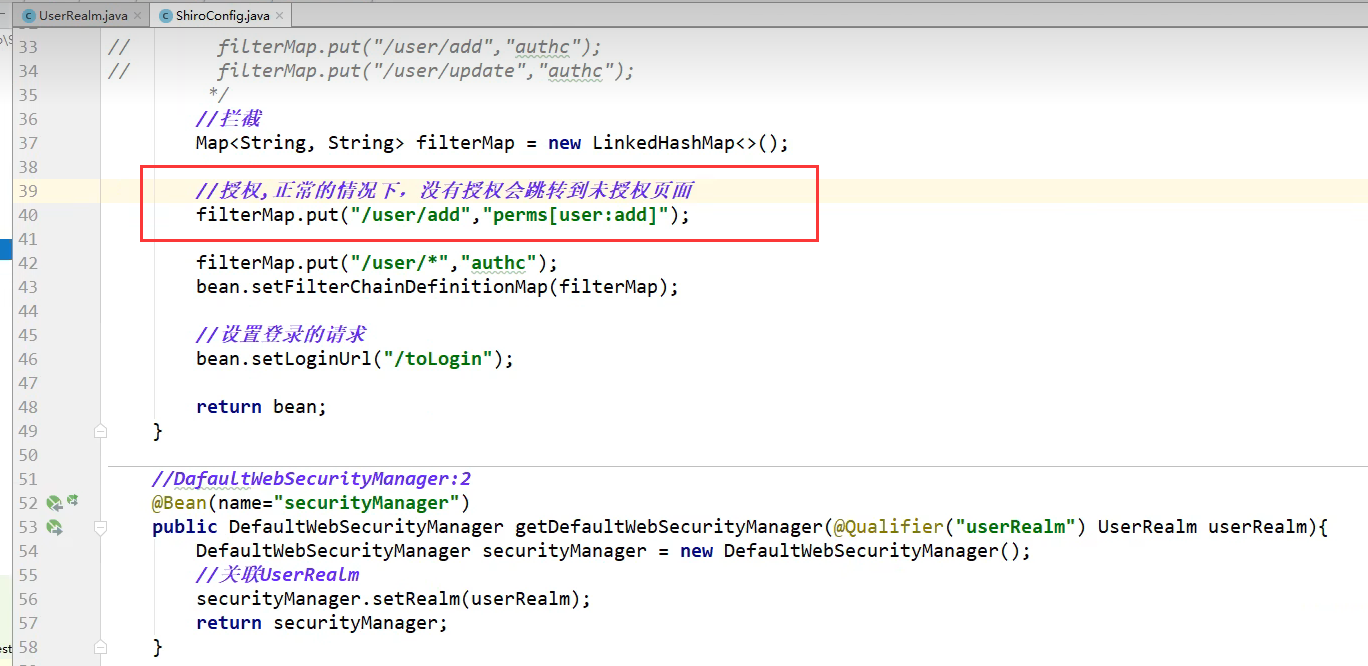
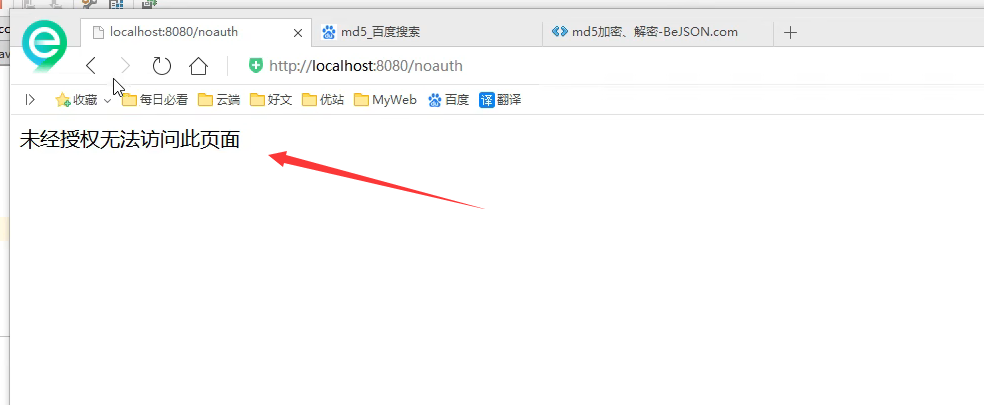
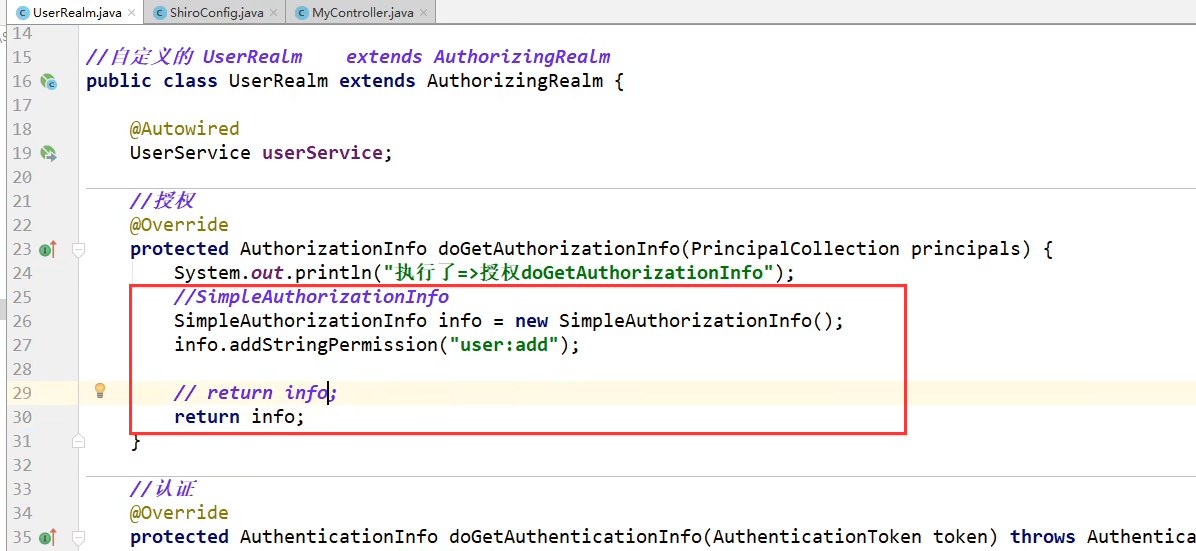
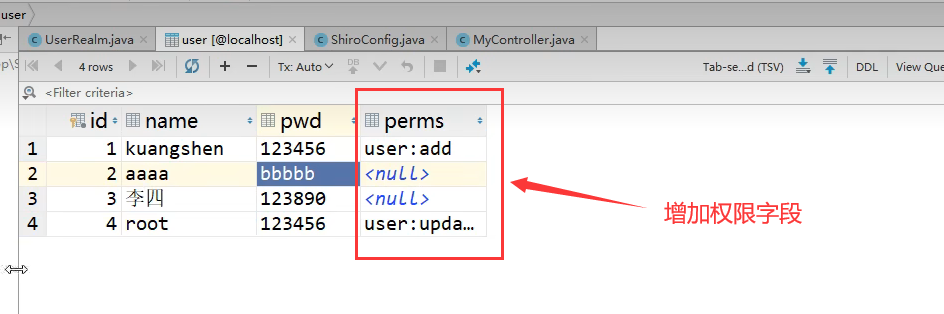
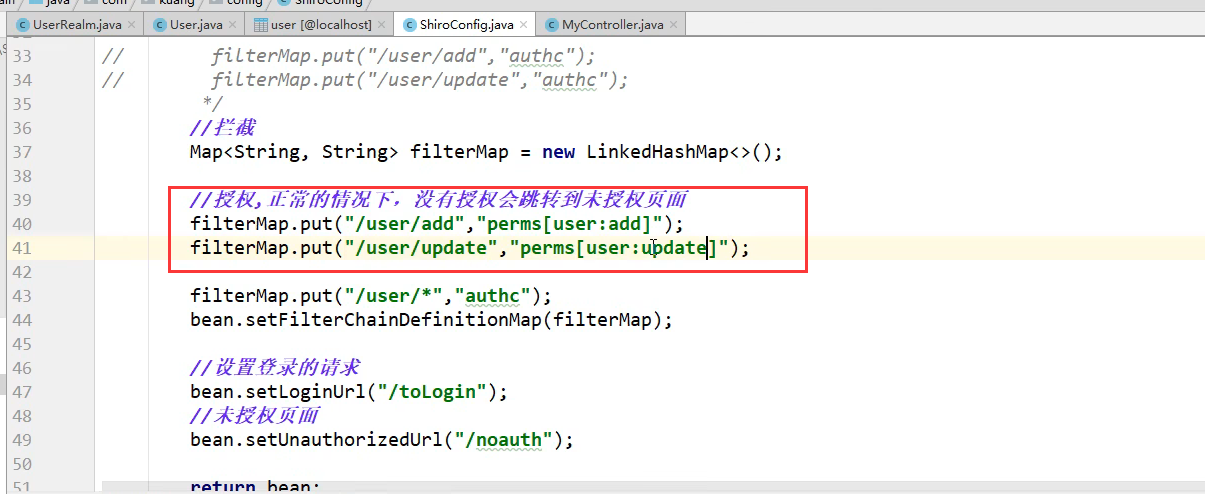
Shiro请求授权实现
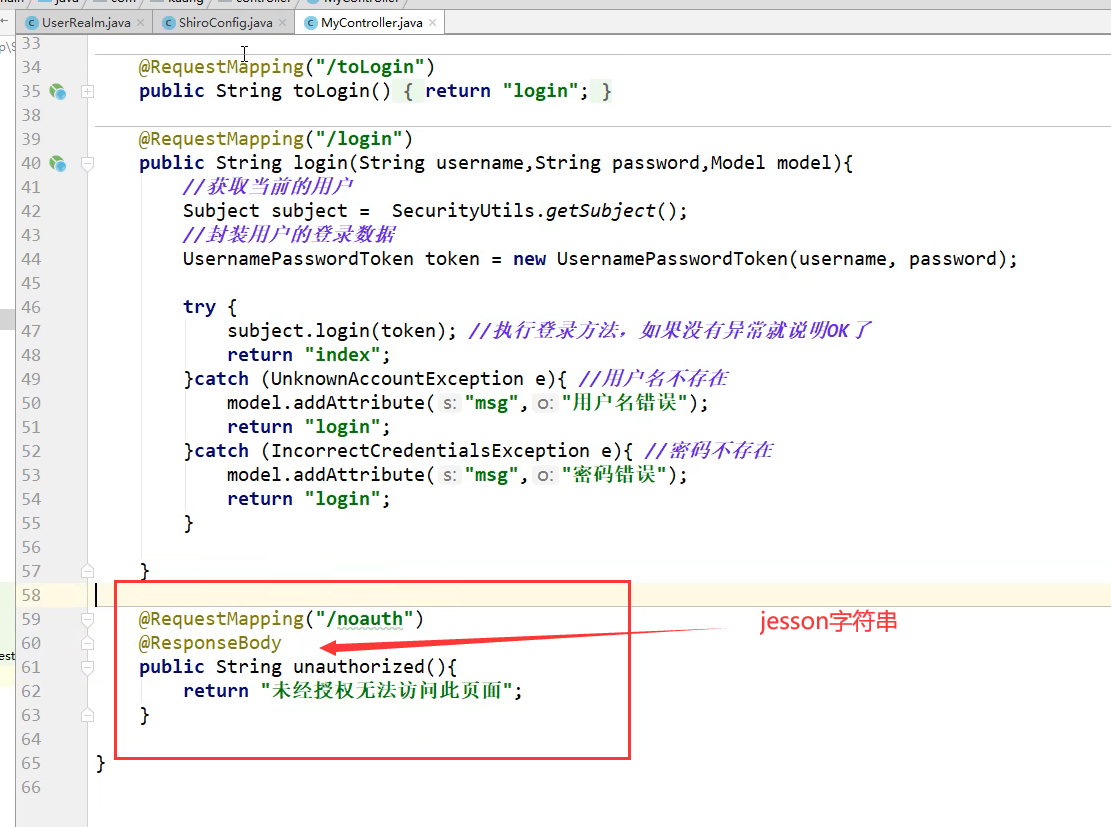
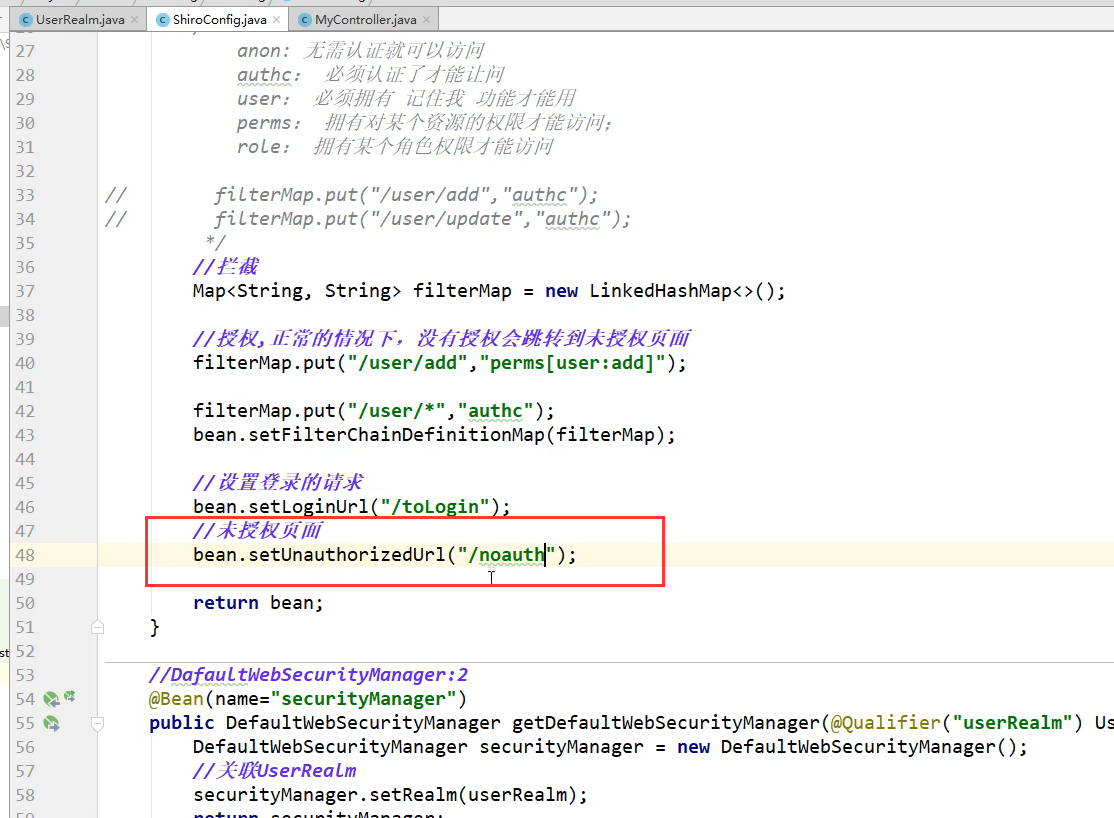
运行结果
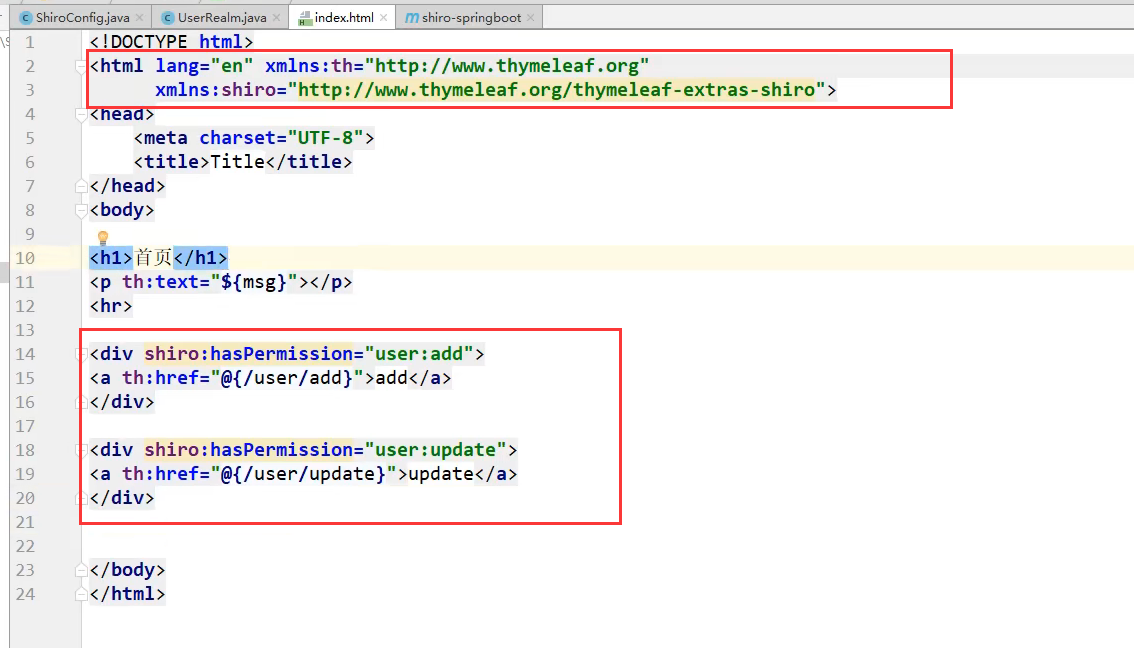
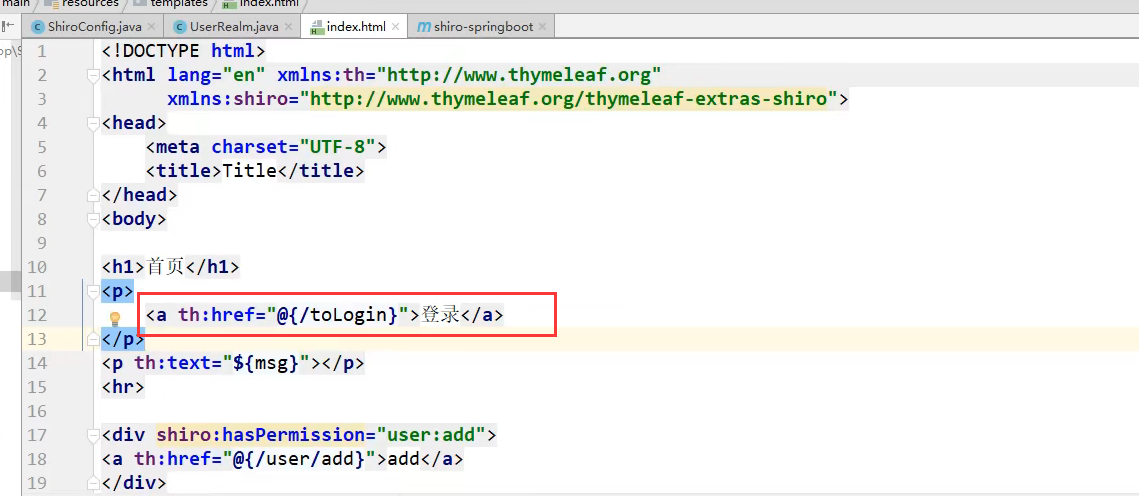
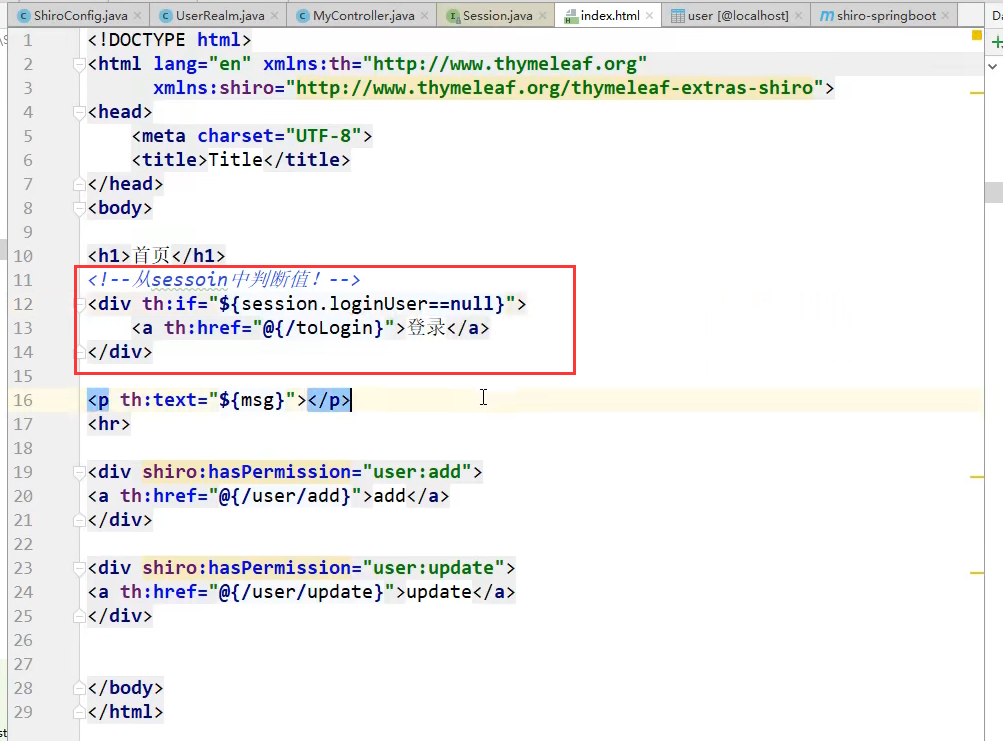
Shiro整合Thymeleaf
引入shiro-thymeleaf依赖

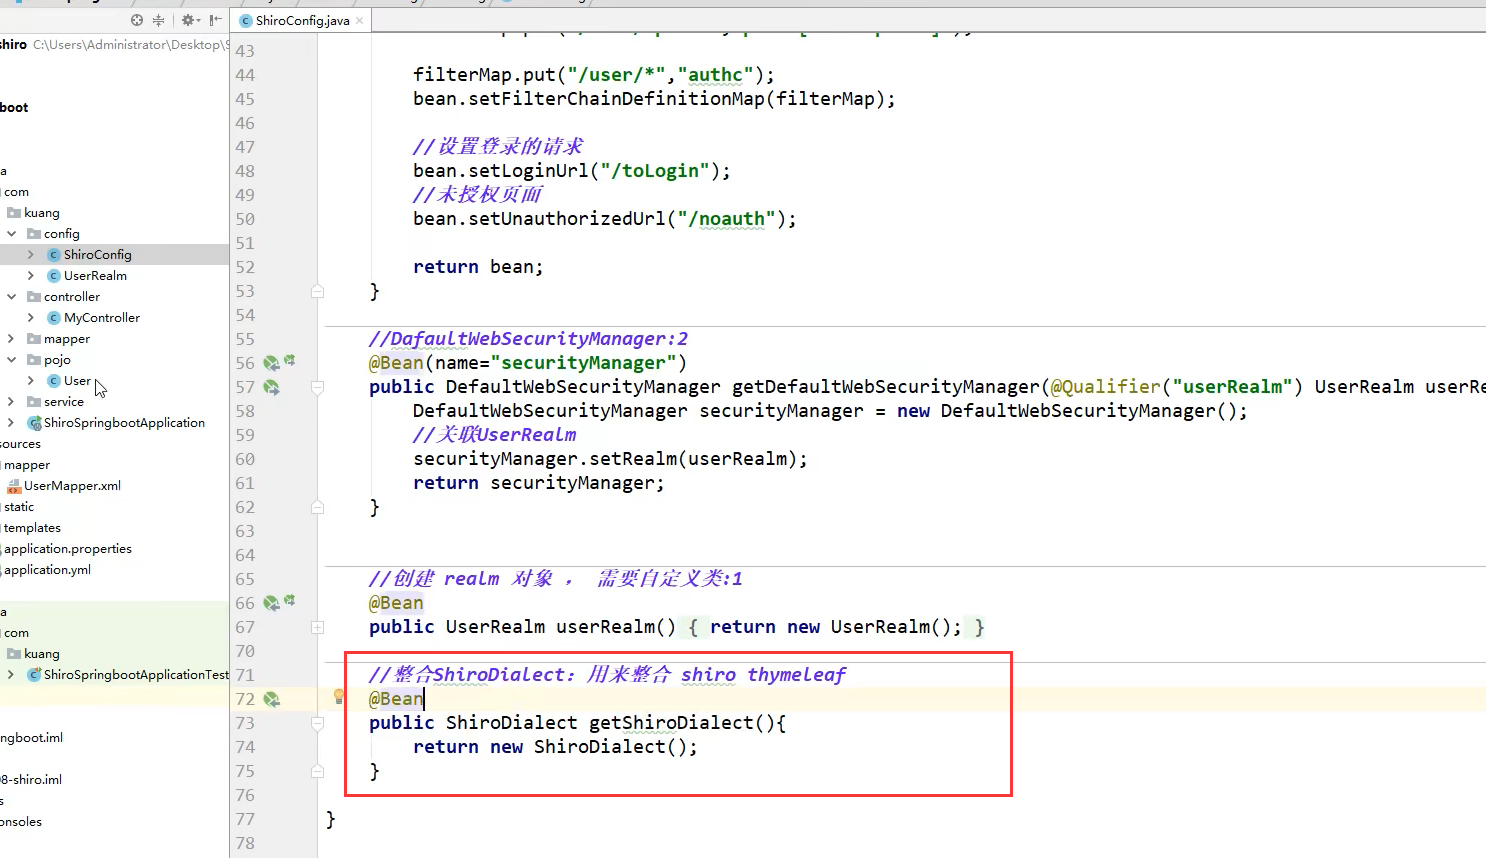
到此,Shiro就算结束了,当然学习Shiro还未结束,需要后面多加练习。。。


【推荐】国内首个AI IDE,深度理解中文开发场景,立即下载体验Trae
【推荐】编程新体验,更懂你的AI,立即体验豆包MarsCode编程助手
【推荐】抖音旗下AI助手豆包,你的智能百科全书,全免费不限次数
【推荐】轻量又高性能的 SSH 工具 IShell:AI 加持,快人一步
· TypeScript + Deepseek 打造卜卦网站:技术与玄学的结合
· Manus的开源复刻OpenManus初探
· AI 智能体引爆开源社区「GitHub 热点速览」
· 三行代码完成国际化适配,妙~啊~
· .NET Core 中如何实现缓存的预热?